
M
MysticYogi
Through this tutorial, you will learn how to create a little cute Linux Penguin in very easy steps. My thanks goes to CoolJeba's Tutorial.
Step 1
- Start a new document of size 200x200 pix.
- Draw a elipse using the eliptical marquee tool and fill it with black colour.
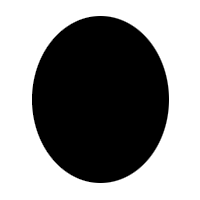
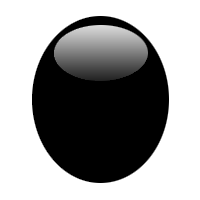
- Create another layer and draw a elipse and fill it with white gradient
Step 2
- Create another layer and draw a new elipse like the one shown below
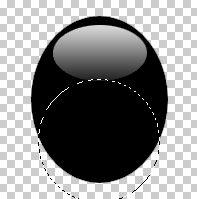
- Fill it with white colour
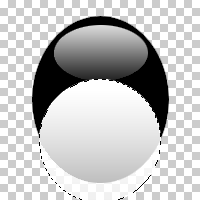
- Deselect the selected elipse and draw another elipse on it like show on the pic below
- Now select Image inverse i.e Select>Inverse and press the delete key on the keyboard.
Step 3
- Create a new layer and draw an elipse for eyes.

- Duplicate layer for the other eye.

Step 4
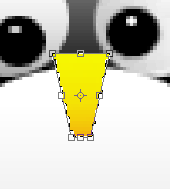
- Let's create it's beaks, Again create a new layer and draw rectangle with the rectangle marquee tool.
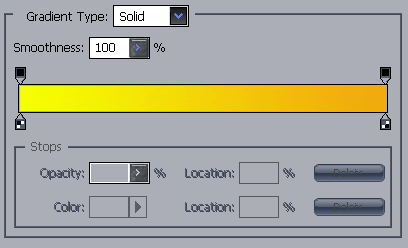
- Use the following gradient settings and fill the rectangle
- Now select the free transform ( Edit>transform>prespective ) to make it as a triangle.
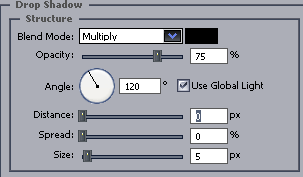
- Drop some shadow to give a little depth.

Step 5
- Let's create it's feet's now,Create another layer and draw a elipse like we did all these time.

- Duplicate the layer to make another leg.
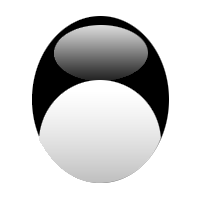
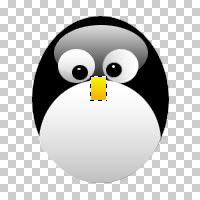
Your final picture should look like one shown below :

Step 1
- Start a new document of size 200x200 pix.
- Draw a elipse using the eliptical marquee tool and fill it with black colour.
- Create another layer and draw a elipse and fill it with white gradient
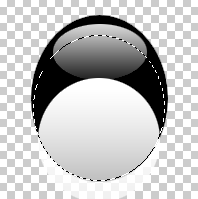
Step 2
- Create another layer and draw a new elipse like the one shown below
- Fill it with white colour
- Deselect the selected elipse and draw another elipse on it like show on the pic below
- Now select Image inverse i.e Select>Inverse and press the delete key on the keyboard.
Step 3
- Create a new layer and draw an elipse for eyes.
- Duplicate layer for the other eye.
Step 4
- Let's create it's beaks, Again create a new layer and draw rectangle with the rectangle marquee tool.
- Use the following gradient settings and fill the rectangle
- Now select the free transform ( Edit>transform>prespective ) to make it as a triangle.
- Drop some shadow to give a little depth.
Step 5
- Let's create it's feet's now,Create another layer and draw a elipse like we did all these time.
- Duplicate the layer to make another leg.
Your final picture should look like one shown below :
Now thats we wall cute ! Isn't ? And once again my thanks goes to CoolJeba. Hope you guys could have some fun :clap: with the penguin out there :angel:
