First up, I had to get the media identiciation code of the . Use an application called
DVD Identifier to do the job. It’s just a matter of popping in the blank disc, running the application and clicking the
Identify button on the BD-R/-RE tab.
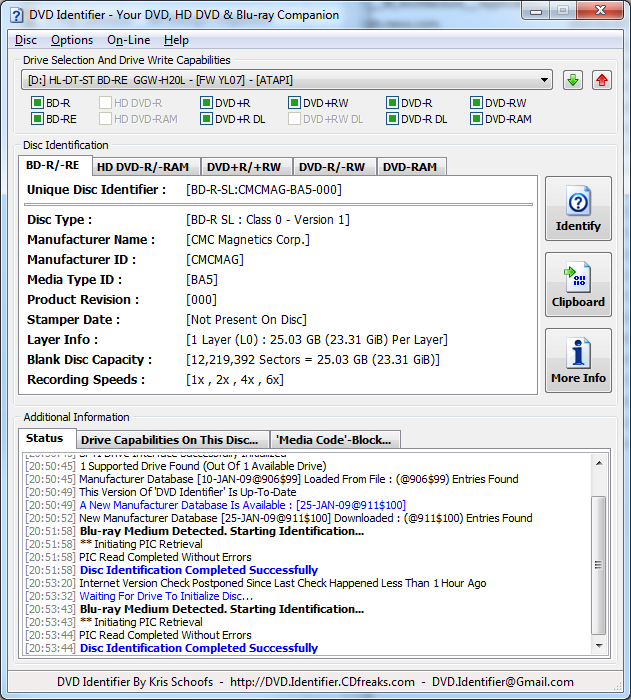
DVD Identifier - Shintaro BD-R Results
As we can see, there’s quite a bit of information there including burn speeds supported by the disc, number of layers, capacity and type. However, the details in which I was most interested were the
Manufacturer ID (“CMCMAG”) and
Media Type ID (“BA5”). We’ll see why later on.
The next step was to extract the firmware from my burner so I could examine its contents. Sounds scary and perhaps rightly so for people who don’t normally poke around in the nether regions of device memory! The utility I used for this is called
Flasher (otherwise knows as Devilsclaw’s Flasher). There are versions available for:
- Linux (32-bit),
- Mac OS X,
- Windows (32-bit and 64-bit).
I used the 64-bit Windows version and ran it from an
administrative command line to make sure I didn’t run into any problems with being unable to access my burner’s internal memory. I then executed the following commands after navigating to the folder containing the flasher (and note case sensitivity):
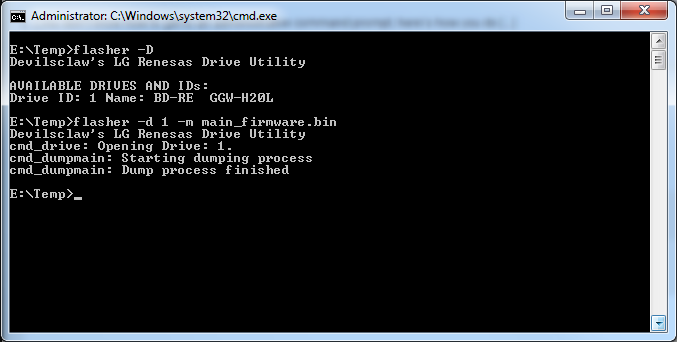
- flasher -D
- this gives you a list of all optical drives in the computer and their ID numbers.
- flasher -d x -m main_firmware.bin
- this contains the Manufacturer ID and Media Type ID data for the drive – replace x in the command with the ID number obtained in the last step corresponding with the drive from which you want to extract firmware.
After a while the utility should have done its job.

Flasher - Extract Burner Firmware
Don’t close the command prompt as you will need it later on.
The next step is to check out the extracted firmware with a hex editor and I used
Hex Workshop. Fire it up and open up the main_firmware.bin file that was extracted in the last step. We want to do a text search for the Manufacturer ID (CMCMAG) in the file which you can do as follows:
- Hit Ctrl + F on the keyboard,
- On the Criteria tab select Text String from the drop down menu,
- In the Value box type in “CMCMAG”,
- Click OK,
- The first matching value will be highlighted and in its vicinity you should also find something resembling the Media Type ID (something similar to “BA5” that we identified for the Shintaro disc that started this exercise),
- Hit F3 if you don’t find the exact Media Type ID or something close to it.
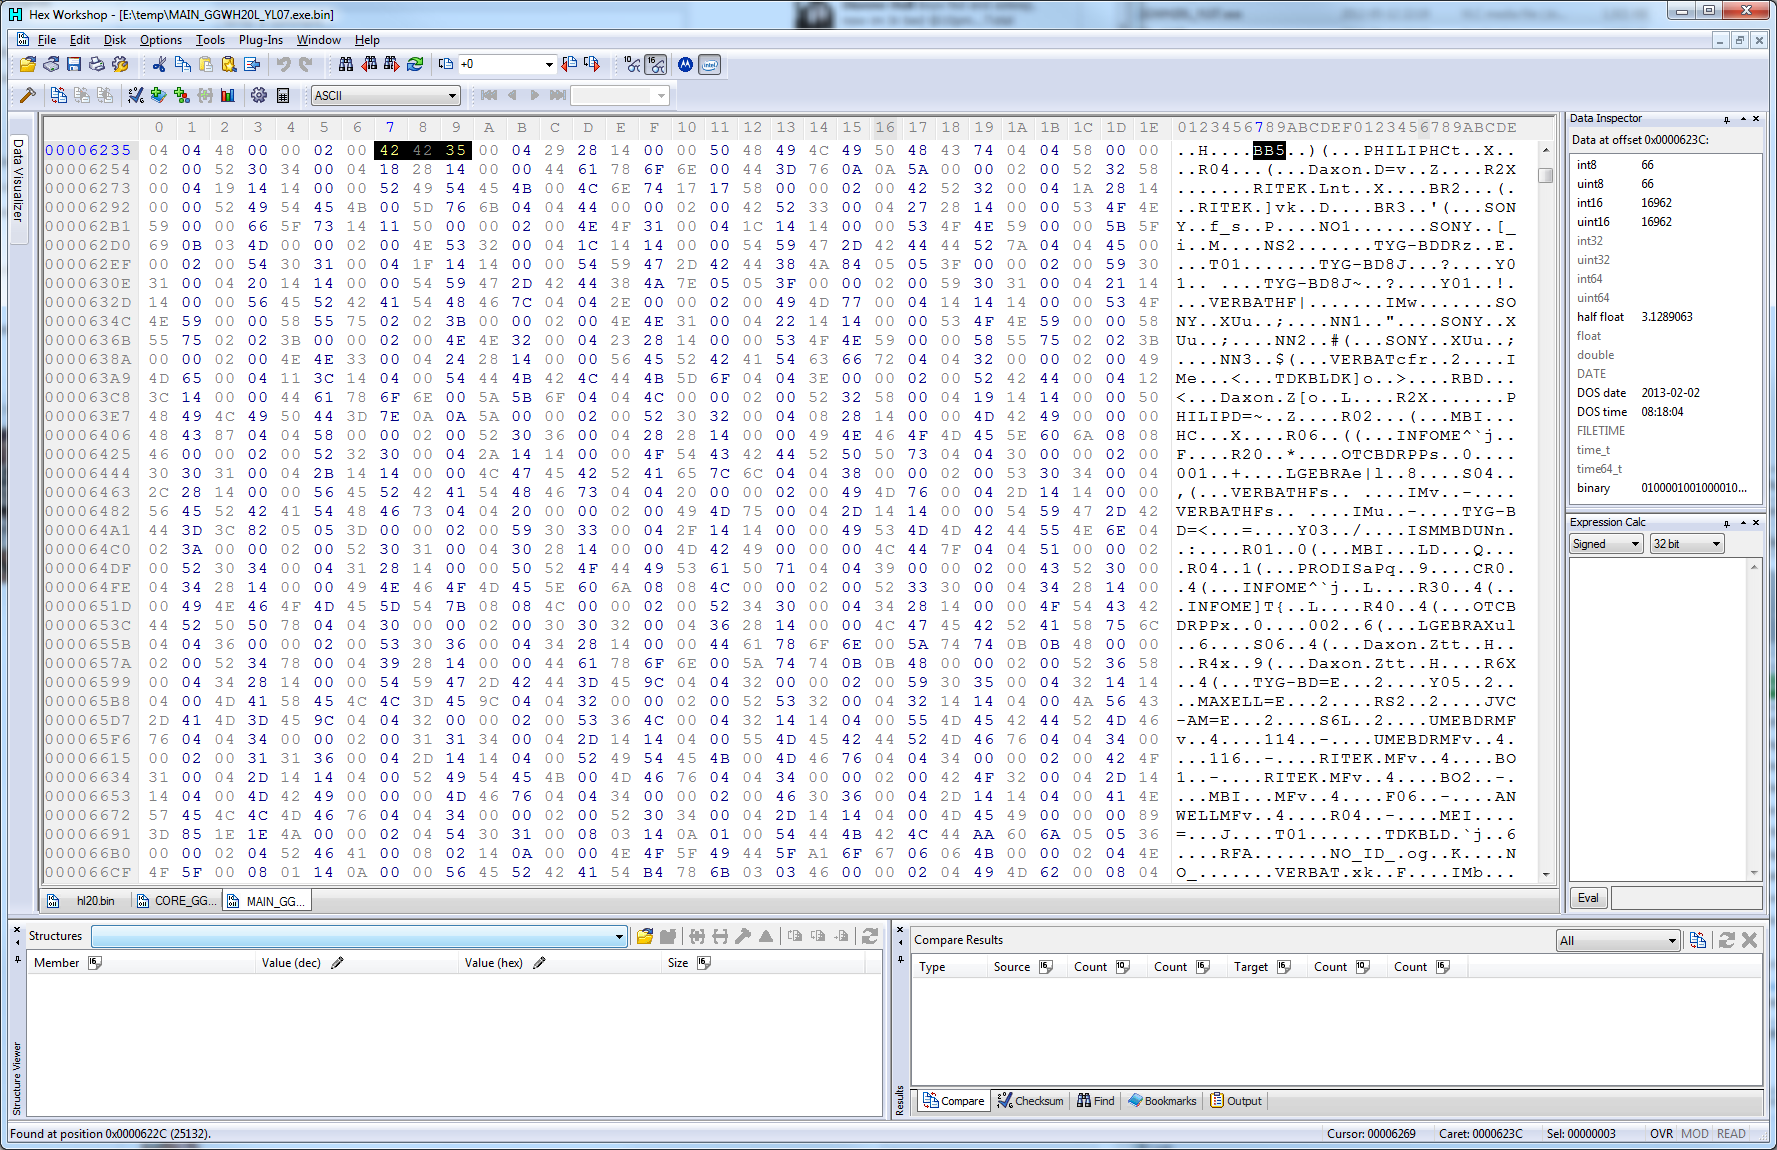
In this example, the sixth hit found something of interest:

Hex Workshop - GGW-H20L YL07 Firmware Typo
Eleven characters along from the sixth hit is the text “BB5” which looks like a
Media Type ID. This text is odd as the two prior references to the
Manufacturer ID of “CMCMAG” had
Media Type IDs of “BAx” where x was a number. Potentially, the “BB5” is a typo and was meant to be “BA5” so I am going to try changing it to “BA5” and save the firmware file under a new filename in the same folder like “main_firmware_new.bin”.
So now, we need to flash the firmware to our drive. Needless to say you should bear in mind the following:
- Updating your burner’s firmware has the potential to really mess up your burner from minor weird behaviour through to complete lack of operation,
- Uploading unofficial firmware can void your burner’s warranty,
- Don’t turn off the computer while the firmware is uploading,
- Updating your burner’s firmware has the potential to really mess up your burner from minor weird behaviour through to complete lack of operation (yes, I’m saying this again).
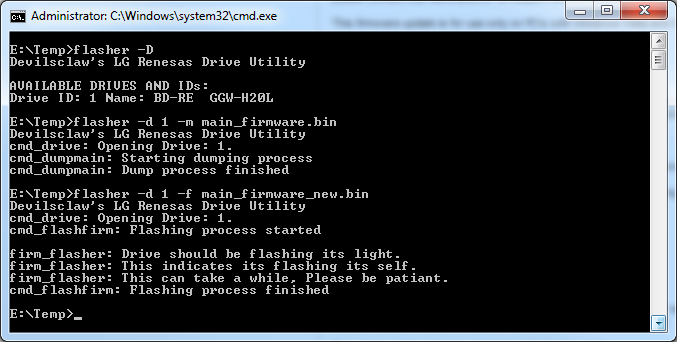
To upload the firmware, go back to the command prompt window and type in the following command:
- flasher -d x -f main_firmware_new.bin

Flasher - Upload Updated Burner Firmware
During flashing of the updated firmware, the light on your burner should flash.
After flashing, you may find that the drive may have also ejected the tray and is now unresponsive. Don’t be alarmed, just shut down your computer (i.e. power it off, not just a reboot) and it should come good during the subsequent boot up. The tray should also retract by itself by you can manually retract it yourself at this point by pushing the button on the front of the drive.
Once back up and running, the true test is in burning to our problematic disc. So how did I go?

CDBurnerXP - Successful Burn
Source :
http://mingersoft.com
Credit goes to original Author
Boyd Chan
Hope this helps you .
Regards