User Guides DIY Wi-Fi Water Level Sensor & Meter with ESP8266, Tasmota, Arduino, MQTT, Node-RED, Telegram

PART 1: THE SENSOR

We need this sensor to read the water level inside the tank. For this we'll be using the US-100 Ultrasonic Distance Sensor module. This sensor is 3.3V logic compatible and has a UART mode where it returns a distance reading that takes into account the current temperature for better accuracy. This sensor is wired to a ESP8266 module which is flashed with Tasmota and powered by POE. More info on the software bits after the photos.


Here is the hardware:
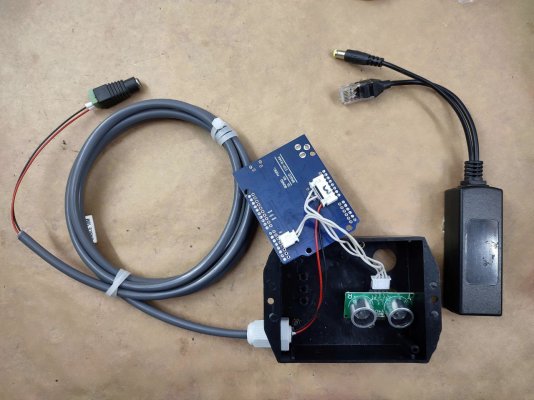
photo_2024-07-14 11.58.38.jpeg

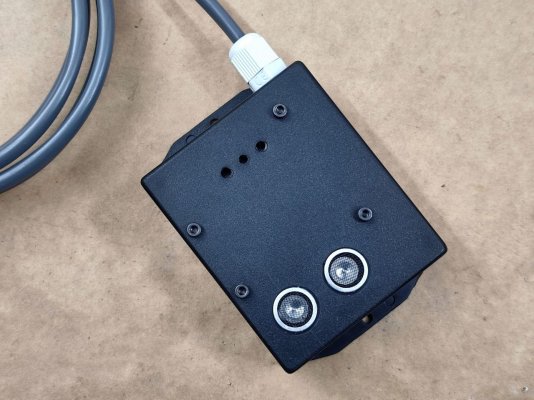
That's a WEMOS D1 R2 with the US-100 wired. Power is fed in through a 2M length of outdoor-rated CCTV cable that will be plugged into a 12V POE splitter. This WEMOS board can handle 12V input safely but you can use any ESP8266 board with a voltage converter module. I've removed all of the pins and DC input on this WEMOS board to make it easier to install.


All installed:
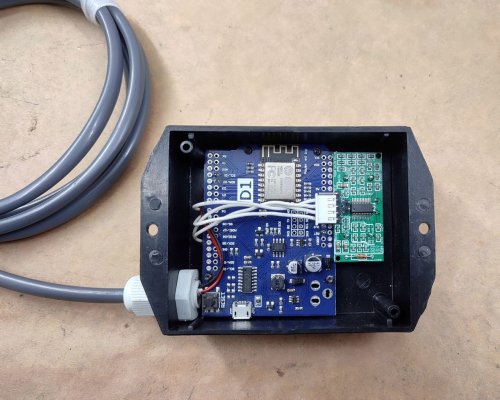
photo_2024-07-14 11.58.40.jpeg

photo_2024-07-14 11.58.41.jpeg

photo_2024-07-14 11.58.42.jpeg

The WEMOS module is hard-mounted with M3 screws and spacers but it's important that the ultrasonic sensor is not mounted through the metal cans, I used hot glue on the back of the PCB. Applying pressure or fixation to the metal cans will prevent the sensor from working properly, they must sit loose and free.


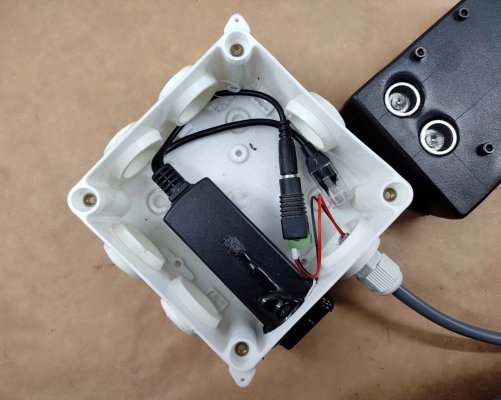
The POE adapter was also hot glued in a waterproof CCTV junction box:

photo_2024-07-14 11.58.51.jpeg

You can see the lines that I scored for drilling out the holes, they're 16mm on one axis and 16mm & 39mm on the other axis. Drill out 16mm holes on the two intersections.


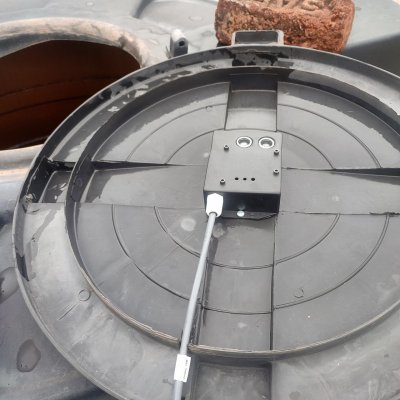
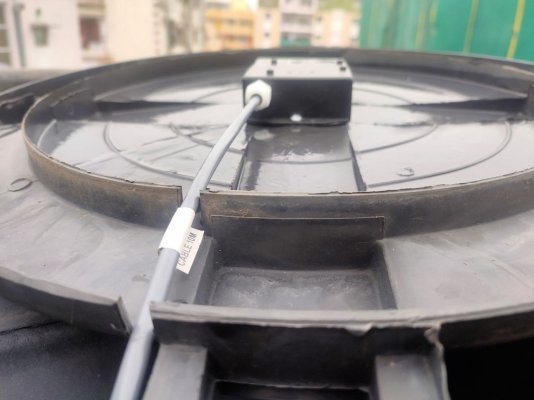
This is then mounted to the lid of the water tank, with a small bit cut out for the cable to pass through:

photo_2024-07-14 11.58.53.jpeg

photo_2024-07-14 11.58.55.jpeg


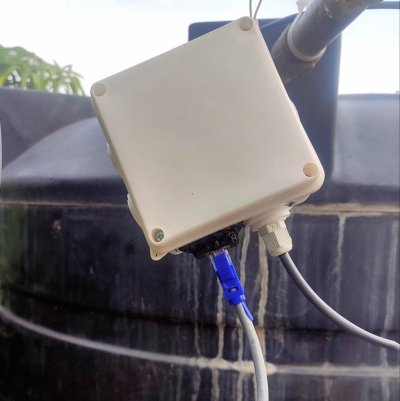
And finally the junction box is hung with a wire, with the cables pointing downwards to discourage water ingress during rains:

photo_2024-07-14 11.58.57.jpeg

For the software, we're using a custom build of Tasmota that incorporates a Serial to TCP bridge for Node-RED to access the sensor's readings. This is because Tasmota does not currently support the UART mode of the US-100 sensor. You can compile your own or use the tasmota-zbbridge pre-compiled binary.

Follow the instructions here: https://tasmota.github.io/docs/Serial-to-TCP-Bridge/ while setting baud rate to 9600 with the TCPBaudRate 9600 command in the console. Be sure to setup rule1 to activate the bridge on boot with the command Rule1 ON System#Boot DO TCPStart 8888,192.168.0.10 ENDON. The ip address should that of your self-hosted Node-RED instance (not covered in this guide).


PART2: THE CODE

This is the flow I'm currently using, you can replicate it or modify to your preference:

Screen Shot 2024-07-14 at 12.35.27 PM.png

I called the overhead tank 'elevated_pot'. You should have MQTT and optionally InfluxDB configured with Node-RED. You can delete the 'record' node if you don't want or need the database.

Here's the JSON for you to import into Node-RED:

JSON:
[
    {
        "id": "9c1d17307d70c8e7",
        "type": "tab",
        "label": "Water Supply",
        "disabled": false,
        "info": "",
        "env": []
    },
    {
        "id": "e742fddb55d91320",
        "type": "tcp request",
        "z": "9c1d17307d70c8e7",
        "name": "elevated_pot",
        "server": "192.168.0.10",
        "port": "8888",
        "out": "sit",
        "ret": "buffer",
        "splitc": " ",
        "newline": "",
        "trim": false,
        "tls": "",
        "x": 310,
        "y": 180,
        "wires": [
            [
                "9599dd34ec985ecc"
            ]
        ]
    },
    {
        "id": "1fd33c29198b6d97",
        "type": "inject",
        "z": "9c1d17307d70c8e7",
        "name": "5s",
        "props": [
            {
                "p": "payload"
            }
        ],
        "repeat": "5",
        "crontab": "",
        "once": false,
        "onceDelay": 0.1,
        "topic": "",
        "payload": "[\"0x55\"]",
        "payloadType": "bin",
        "x": 110,
        "y": 140,
        "wires": [
            [
                "c3edfc8a8fabd312"
            ]
        ]
    },
    {
        "id": "9599dd34ec985ecc",
        "type": "function",
        "z": "9c1d17307d70c8e7",
        "name": "process, filter & assemble",
        "func": "if (msg.payload.length != 2) \n// invalid reading; exit \n{\n    return null;\n}\n\nvar elevated_pot = flow.get('elevated_pot');\n//node.warn(elevated_pot);\n\nvar radius = elevated_pot[9];\nvar height = msg.payload[0] * 256 + msg.payload[1];\nvar cavity = 22/7 * radius * radius * height;\n// arbitrarily reduce anomalies\nvar minmax = Math.floor(cavity / 10) * 10;\nvar volume = elevated_pot[8] - minmax;\n\nif (volume < 0) \n// below reserve\n{\n    volume = 0;\n}\n\nif (volume === elevated_pot[3]) \n// no change; skip checks\n{\n    // send reading to db\n    var record = true; \n}\nelse if (volume === elevated_pot[2]) \n// passed secondary check\n{\n    // update new reading\n    flow.set('elevated_pot[3]', volume); \n\n    // send reading to db\n    var record = true; \n}\nelse if (volume === elevated_pot[1]) \n// passed primary check\n{\n    // update secondary check\n    flow.set('elevated_pot[2]', volume) \n}\nelse // failed both checks\n{\n    // update primary check\n    flow.set('elevated_pot[1]', volume); \n    \n    // clear secondary check\n    flow.set('elevated_pot[2]', 0); \n}\n\nif (record) \n{\n    // clear both checks\n    flow.set('elevated_pot[1]', 0);\n    flow.set('elevated_pot[2]', 0);\n\n    // record timestamp\n    flow.set('elevated_pot[4]', new Date());\n\n    // send reading to db\n    msg.payload = \n    [\n        {\n            measurement: \"elevated_pot\",\n            fields: \n            {\n                \"Liters\": volume\n            },\n            tags:\n            {\n                _sensor: \"US-100\"\n            }\n        }\n    ];\n    return msg;\n}\nelse\n{\n    return null;\n}\n",
        "outputs": 1,
        "timeout": 0,
        "noerr": 0,
        "initialize": "",
        "finalize": "",
        "libs": [],
        "x": 510,
        "y": 180,
        "wires": [
            [
                "62aa0f16d23499da"
            ]
        ]
    },
    {
        "id": "62aa0f16d23499da",
        "type": "influxdb batch",
        "z": "9c1d17307d70c8e7",
        "influxdb": "1234567890ABCDEF",
        "precision": "",
        "retentionPolicy": "",
        "name": "record",
        "database": "database",
        "precisionV18FluxV20": "ms",
        "retentionPolicyV18Flux": "",
        "org": "UmbrellaCorporation",
        "bucket": "sensors",
        "x": 690,
        "y": 180,
        "wires": []
    },
    {
        "id": "53db5c1222a9636d",
        "type": "function",
        "z": "9c1d17307d70c8e7",
        "name": "notify?",
        "func": "var elevated_pot = flow.get('elevated_pot');\n\nvar old_reading = elevated_pot[5];\nvar new_reading = Math.floor(elevated_pot[3] / 100) * 100;\nvar percentage = Math.floor(new_reading / elevated_pot[8] * 100);\n\nvar last_one = elevated_pot[6];\nvar this_run = new Date();\n\nvar notify = false;\n\nif (this_run.getTime() - last_one.getTime() > 900000)\n{\n    notify = true;\n}\n\nif (Math.abs(new_reading - old_reading >= elevated_pot[8]/10))\n{\n    notify = true;\n} \nelse if (new_reading === old_reading)\n{\n    notify = false;\n}\n\nif (notify)\n{\n    // set new reading\n    flow.set('elevated_pot[5]', new_reading);\n    flow.set('elevated_pot[7]', percentage);\n\n    // record timestamp\n    flow.set('elevated_pot[6]', new Date());\n\n    msg.payload =\n    {\n        chatId: '-1234567890ABC',\n        type: 'message',\n        content: '*Rooftop Tank at ' \n        + percentage \n        + '%* \\n_  ' \n        + new_reading \n        + ' liters_'\n    };\n    msg.payload.options =\n    {\n        'parse_mode': 'MarkdownV2'\n    };\n    return msg;\n}\nelse \n{\n    return null;\n}",
        "outputs": 1,
        "timeout": 0,
        "noerr": 0,
        "initialize": "",
        "finalize": "",
        "libs": [],
        "x": 550,
        "y": 140,
        "wires": [
            [
                "288263b022b2458e"
            ]
        ]
    },
    {
        "id": "288263b022b2458e",
        "type": "link out",
        "z": "9c1d17307d70c8e7",
        "name": "telegram",
        "mode": "link",
        "links": [
            "4a52930bbe78b3e5",
            "097d635a5e4929af",
            "bd3bc90dde1594ea",
            "73498046dd2c8752"
        ],
        "x": 725,
        "y": 140,
        "wires": []
    },
    {
        "id": "c3edfc8a8fabd312",
        "type": "function",
        "z": "9c1d17307d70c8e7",
        "name": "init & break",
        "func": "// break for 60s between successive valid readings\n\nvar last_one = flow.get('elevated_pot[4]');\nvar this_run = new Date();\n\nif (this_run.getTime() - last_one.getTime() >= 60000)\n{\n    return msg;\n}\nelse \n{\n    return null;\n}",
        "outputs": 1,
        "timeout": 0,
        "noerr": 0,
        "initialize": "// power-on reset\nif (flow.get('elevated_pot') === undefined) {\n    flow.set('elevated_pot', [\n        false,\n        0,\n        0,\n        0,\n        new Date(),\n        0,\n        new Date(),\n        0,\n        2000,\n        0.72\n    ])\n}\n",
        "finalize": "",
        "libs": [],
        "x": 130,
        "y": 180,
        "wires": [
            [
                "e742fddb55d91320",
                "9bfbebd5d8078c65"
            ]
        ]
    },
    {
        "id": "9bfbebd5d8078c65",
        "type": "delay",
        "z": "9c1d17307d70c8e7",
        "name": "1x per min",
        "pauseType": "rate",
        "timeout": "1",
        "timeoutUnits": "seconds",
        "rate": "1",
        "nbRateUnits": "1",
        "rateUnits": "minute",
        "randomFirst": "1",
        "randomLast": "5",
        "randomUnits": "seconds",
        "drop": true,
        "allowrate": false,
        "outputs": 1,
        "x": 310,
        "y": 140,
        "wires": [
            [
                "63edd20ca459180c",
                "53db5c1222a9636d"
            ]
        ]
    },
    {
        "id": "63edd20ca459180c",
        "type": "function",
        "z": "9c1d17307d70c8e7",
        "name": "send out percentage",
        "func": "msg.payload = flow.get('elevated_pot[7]');\nif (msg.payload === 0)\n{\n    msg.payload = 10;\n}\nreturn msg;",
        "outputs": 1,
        "timeout": 0,
        "noerr": 0,
        "initialize": "",
        "finalize": "",
        "libs": [],
        "x": 500,
        "y": 100,
        "wires": [
            [
                "de92b574bda3f709"
            ]
        ]
    },
    {
        "id": "de92b574bda3f709",
        "type": "mqtt out",
        "z": "9c1d17307d70c8e7",
        "name": "to display",
        "topic": "sensors/display/percent/elevated_pot",
        "qos": "",
        "retain": "",
        "respTopic": "",
        "contentType": "",
        "userProps": "",
        "correl": "",
        "expiry": "",
        "broker": "71efac7808763b18",
        "x": 680,
        "y": 100,
        "wires": []
    },
    {
        "id": "95a6d622911dd5bf",
        "type": "influxdb",
        "hostname": "192.168.0.11",
        "port": "8086",
        "protocol": "http",
        "database": "sensors",
        "name": "InfluxDB",
        "usetls": false,
        "tls": "",
        "influxdbVersion": "2.0",
        "url": "http://192.168.0.11:8086",
        "rejectUnauthorized": true
    },
    {
        "id": "71efac7808763b18",
        "type": "mqtt-broker",
        "name": "Mosquitto",
        "broker": "192.168.0.12",
        "port": "1883",
        "clientid": "",
        "autoConnect": true,
        "usetls": false,
        "protocolVersion": "4",
        "keepalive": "60",
        "cleansession": true,
        "autoUnsubscribe": true,
        "birthTopic": "",
        "birthQos": "0",
        "birthRetain": "false",
        "birthPayload": "",
        "birthMsg": {},
        "closeTopic": "",
        "closeQos": "0",
        "closeRetain": "false",
        "closePayload": "",
        "closeMsg": {},
        "willTopic": "",
        "willQos": "0",
        "willRetain": "false",
        "willPayload": "",
        "willMsg": {},
        "userProps": "",
        "sessionExpiry": ""
    }
]


So the flow runs every 5 seconds. On first-run there's a function in the On Start tab of the init & break function node:

JavaScript:
// power-on reset
if (flow.get('elevated_pot') === undefined) {
    flow.set('elevated_pot', [
        false,
        0,
        0,
        0,
        new Date(),
        0,
        new Date(),
        0,
        2000,
        0.72
    ])
}

We're defining an array here with ten values:
  1. whether the water pump is on (future guide)
  2. first check of the reading
  3. second check of the reading
  4. validated reading
  5. timestamp of the validation
  6. reading sent as notification
  7. timestamp of the notification
  8. percentage value of the reading
  9. capacity of the tank in liters
  10. radius of the tank in meters
The tank is a little over 2000 in my case, but I've defined it as 2000 to allow for a little reserve.


The 5s inject node sends a buffer value of 0x55 formatted as ["0x55"] to the sensor module, which then returns a two-byte hex value that's processed with the process, filter & assemble function node.

But before that happens, the init & break node forces a 60 second time-out since the last reading's timestamp, so as not to overwhelm the database with a reading every 5 seconds:

JavaScript:
// break for 60s between successive valid readings
var last_one = flow.get('elevated_pot[4]');
var this_run = new Date();
if (this_run.getTime() - last_one.getTime() >= 60000)
{
    return msg;
}
else
{
    return null;
}


The other reason for this time-out is that it could take more than a few readings to get an usable reading that's been thrice-validated. How that is done is explained in the process, filter & assemble node:

JavaScript:
if (msg.payload.length != 2)
// invalid reading; exit
{
    return null;
}
var elevated_pot = flow.get('elevated_pot');
//node.warn(elevated_pot);
var radius = elevated_pot[9];
var height = msg.payload[0] * 256 + msg.payload[1];
var cavity = 22/7 * radius * radius * height;
// arbitrarily reduce anomalies
var minmax = Math.floor(cavity / 10) * 10;
var volume = elevated_pot[8] - minmax;
if (volume < 0)
// below reserve
{
    volume = 0;
}
if (volume === elevated_pot[3])
// no change; skip checks
{
    // send reading to db
    var record = true;
}
else if (volume === elevated_pot[2])
// passed secondary check
{
    // update new reading
    flow.set('elevated_pot[3]', volume);
    // send reading to db
    var record = true;
}
else if (volume === elevated_pot[1])
// passed primary check
{
    // update secondary check
    flow.set('elevated_pot[2]', volume)
}
else
// failed both checks
{
    // update primary check
    flow.set('elevated_pot[1]', volume);
 
    // clear secondary check
    flow.set('elevated_pot[2]', 0);
}
if (record)
{
    // clear both checks
    flow.set('elevated_pot[1]', 0);
    flow.set('elevated_pot[2]', 0);
    // record timestamp
    flow.set('elevated_pot[4]', new Date());
    // send reading to db
    msg.payload =
    [
        {
            measurement: "elevated_pot",
            fields:
            {
                "Liters": volume
            },
            tags:
            {
                _sensor: "US-100"
            }
        }
    ];
    return msg;
}
else
{
    return null;
}

Basically, this code ensures that only three successive & identical readings are accepted as a valid reading. A little leniency is allowed in rounding down the number to the closest 10 liters.


The 1x per min node does what it sounds like it does and triggers the notify? node to decide if to send a notification to telegram:

JavaScript:
var elevated_pot = flow.get('elevated_pot');
var old_reading = elevated_pot[5];
var new_reading = Math.floor(elevated_pot[3] / 100) * 100;
var percentage = Math.floor(new_reading / elevated_pot[8] * 100);
var last_one = elevated_pot[6];
var this_run = new Date();
var notify = false;
if (this_run.getTime() - last_one.getTime() > 900000)
{
    notify = true;
}
if (Math.abs(new_reading - old_reading >= elevated_pot[8]/10))
{
    notify = true;
}
else if (new_reading === old_reading)
{
    notify = false;
}
if (notify)
{
    // set new reading
    flow.set('elevated_pot[5]', new_reading);
    flow.set('elevated_pot[7]', percentage);
    // record timestamp
    flow.set('elevated_pot[6]', new Date());
    msg.payload =
    {
        chatId: '-1234567890ABC',
        type: 'message',
        content: '*Rooftop Tank at '
        + percentage
        + '%* \n_  '
        + new_reading
        + ' liters_'
    };
    msg.payload.options =
    {
        'parse_mode': 'MarkdownV2'
    };
    return msg;
}
else
{
    return null;
}

This code triggers a telegram notification through a link out node. This notification is triggered under two conditions, if there's been 15 minute period since the last notification and the reading has changed, or if the reading has changed more than 10%.


Lastly, the send out percentage node sends out the percentage value to the MQTT server to pass on to any device waiting for an update (part 3 below):

JavaScript:
msg.payload = flow.get('elevated_pot[7]');
if (msg.payload === 0)
{
    msg.payload = 10;
}
return msg;

A zero-value is changed to 10% for better visuals on the meter (part 3).


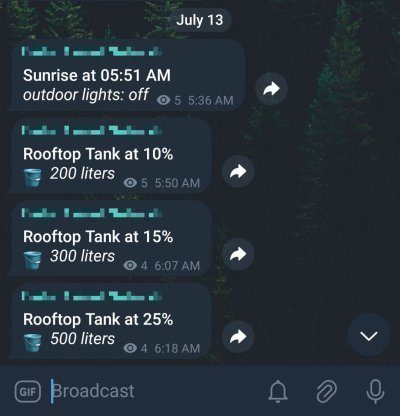
Here are what the notifications look like:

photo_2024-07-14 13.15.16.jpeg


PART 3: THE METER

This device is conveniently powered by USB and connects to MQTT to pull the percentage and display it as a bar graph. It's running Arduino code since Tasmota doesn't have support for the SeeedStudio Grove LED Bar.

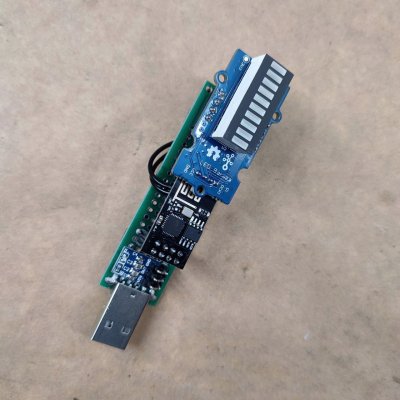
It's built using a ESP-01 module , the LED Bar module, and a AMS1117-3.3 voltage regulator on a small proto-pcb plugged into a usb charger:

photo_2024-07-14 13.22.55.jpeg


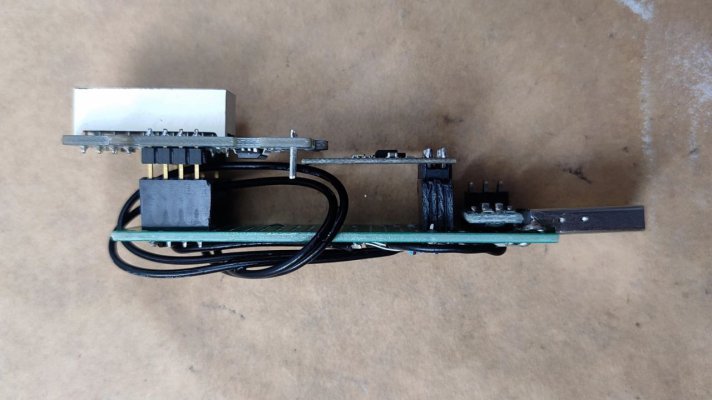
Everything is stacked for easier debugging and assembly:

photo_2024-07-14 13.22.56.jpeg


The ESP-01 module lacks the pull-up resistors that the ESP-01S has, so I've added two 10K ones:

photo_2024-07-14 13.22.57.jpeg


The Grove LED bar is wider than the proto-pcb so I've had to bend the pins a little:

photo_2024-07-14 13.22.58.jpeg


Here is the Arduino code:

C:
#include "EspMQTTClient.h"
#include <Grove_LED_Bar.h>
EspMQTTClient client(
  "Wi-Fi SSID",
  "Wi-Fi Password",
  "MQTT-IP",
  "MQTT-username",
  "MQTT-password",
  "MQTT-client-id",
  1883
);
Grove_LED_Bar bar(0, 2, 0, LED_BAR_10);
int reading = 10;
void setup()
{
  Serial.begin(9600);
  bar.begin();
  Serial.println(reading);
}
void onConnectionEstablished()
{
  client.subscribe("/sensors/display/percent/elevated_pot", [](const String & payload) {
    reading = payload.toInt() / 10;
    if (reading <= 10)
    {
      bar.setLevel(reading);
    }
    Serial.println(payload);
  });
}
void loop()
{
  client.loop();
}

The serial connection is left on since the ESP-01 module has a blue LED connected to the TX pin, so it's used a visual indicator that the module is working and getting updates.

We're using the EspMQTTClient library that handles both Wi-Fi and MQTT: https://github.com/plapointe6/EspMQTTClient

The Grove LED Bar library in the Arduino IDE is out of date, so you'll need to install it and then overwrite it with the updated unreleased files from github: https://github.com/Seeed-Studio/Grove_LED_Bar

Be sure to experiment with the examples to learn more about those libraries.


All configured and working, showing that the tank is 40% full:

photo_2024-07-14 13.22.59.jpeg

Installed in the hallway for everyone to see:

photo_2024-07-14 13.23.00.jpeg


This project has been bouncing around in my head for five or so years now. I'm happy it's finally done, even if it's just a prototype.

If I've skipped something or something isn't clear, ask away, I probably did forget a few key details somewhere.
 
Last edited:
A well described article. I think the forum needs a diy thread as there are many tinkerers here and plenty of knowledge regarding such projects. Thanks @rsaeon for this very nicely executed project.
There is actually a thread for such articles called the build log on the forum . This article can be moved to that place I guess .
 
Last edited:
Thanks, it was fun building, documenting and figuring out the coding.

I have most of my incomplete projects in the build log section of the forum.

I’m from a time where the build log section is for in-progress or completed projects.

This is more of a guide, start to finish, with explanations and resources, all in a single post.

Basically, the difference is between “How I did this” vs “How you can do this”

Other guides in this section: https://techenclave.com/forums/reviews-and-guides.28/?prefix_id=49
 
how if you disclose total cost here, so any one want it to for commercial production can contact you ...
I would also like to know the total cost in materials

Everything I post here (photos, code, ideas) are public domain, no copyright is claimed and no attribution is requested (I should make this part of my signature or profile). So anyone and everyone is welcome to rebuild this, or even turn it into a commercial product — I'd love to see that actually. Some day, I would probably make this into a product or a kit, but that's not anytime soon.

This is barely a prototype, there are so many refinements and modifications that can be done to make this a commercially viable product, I already have 5 different revisions in mind.

I put together some parts lists together for both devices with prices for only what is used. There are important notes to consider at the bottom of each one.


For the sensor:

PartFull NameURLPrice with GSTQuantityTotal Cost
EnclosureCIRCUITX PLASTIC ENCLOSURE - MEDIUM PEM03 70.00
1​
70
Wi-Fi ModuleWeMos ESP8266 D1 R2 V2.1.0 WiFi Development Board 269.00
1​
269
Ultrasonic SensorUS-100 Ultrasonic Sensor Distance Measuring Module with Temperature Compensation 199.00
1​
199
Connector, PCB6 pin JST XH 2.5mm Side Entry Header 8.35
1​
8.35
Connector, PCB2 pin JST XH 2.5mm Side Entry Header 2.78
1​
2.78
Connector, Wire6 pin JST XH 2.5mm Housing 4.18
1​
4.18
Connector, Wire2 pin JST XH 2.5mm Housing 1.48
1​
1.48
Connector, Wire4 pin JST XH 2.5mm Housing 2.79
1​
2.79
Pins, WireCrimping Pins for JST XH 2.5mm 0.84
2​
1.68
Wire, Pre-crimped10cm JST XH 2.5mm Both side Pre-crimped white wire 5.01
4​
20.04
Cable GlandPolyamide Cable Gland PG 7 5
2​
10
Power ConnectorFemale DC Power adapter - 5.5x2.1mm plug to screw terminal 34.81
1​
34.81
FerruleBlack 0.5 sq. mm Wire Ferrule 1.77
2​
3.54
POE SplitterParuht PoE Splitter Active 48V to 12V 329
1​
329
CCTV CableFEDUS 23AWG 3+1 Outdoor CCTV Cable 10M 471
0.2​
94.2
Junction BoxSquare IP65 Junction Box for CCTV 405
0.25​
101.25
Total Cost1152.1

Notes:
  1. Most of the smaller items on that list have a minimum order quantity of 10.
  2. The POE splitter drops down to under 250 each if you buy a pack of 5.
  3. The junction boxes are much cheaper locally (about half price).
  4. M3 screws, 5mm spacers and self tapping screws are not listed.
  5. Consumables like solder, flux and assets like tools are not listed.
  6. POE cable, POE switch, Wi-Fi access point are not listed.


For the meter:

PartFull NameURLPrice with GSTQuantityTotal Cost
PCB, Prototyping2 x 8 cm Universal PCB Prototype Board Double-Sided 30
0.5​
15
Connector, USBUSB A-type Plug Male PCB R/A Connector 35
0.2​
7
Header, Female2.54mm 1×40 Pin Female Single Row Header Strip 199
0.05​
9.95
Header, Male2.54mm 1×40 Pin Male Single Row Straight Long Header Strip 157
0.03​
4.71
Voltage RegulatorAMS1117-3.3 LDO 800MA DC 5V to 3.3V Step-Down Power Supply Module 23
1​
23
Wi-Fi ModuleESP-01 ESP8266 Serial WIFI Wireless Transceiver Module 105
1​
105
LED Bar ModuleSeeedStudio Grove LED Bar v2.0 449
1​
449
Total Cost613.66

Notes:
  1. If you decide on a four-digit numeric display module instead of the led bar module, you'd save Rs 400: https://robu.in/product/tm1637-4-bits-digital-tube-led-display-module-clock-display-arduino/
  2. Consumables like wires are not listed.
  3. USB charger is not listed


This is a crazy tool, I need to learn this immediately. I have only seen one video of it yet.
Yeah I wanted to learn this too from a long time to use it to control zigbee devices. Thankfully we now have a member @rsaeon who knows it well ;) who can help us

It's the most impressive piece of software I've ever had the pleasure of working with.

However, most Node-RED forums where you can discuss and ask questions have purists that look down upon my usage of the function node.

The philosophy they hold is that a flow should not contain any lines of code, just nodes.
 
Last edited:
Notes:
  1. If you decide on a four-digit numeric display module instead of the led bar module, you'd save Rs 400

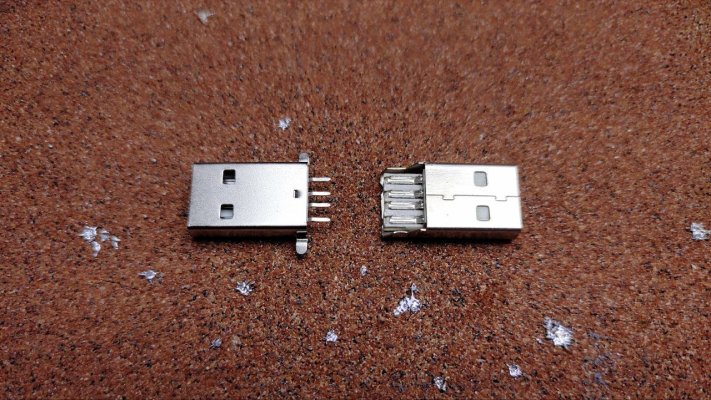
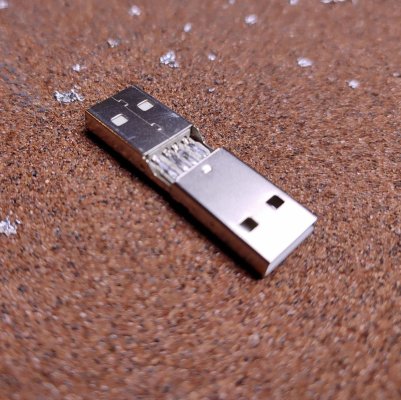
Joining a PCB-mount male connection with a wire-type male connector makes for an inexpensive USB type-A male-to-male adapter:

photo_2024-07-26 16.41.58.jpeg

To avoid melting the plastic, lower the soldering temperature to 250C:

photo_2024-07-26 16.42.01.jpeg

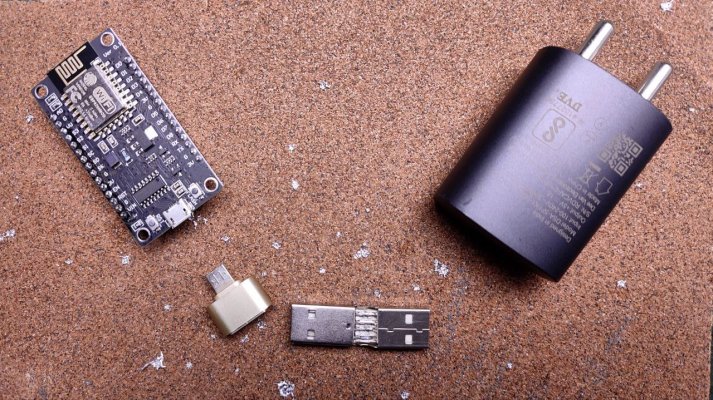
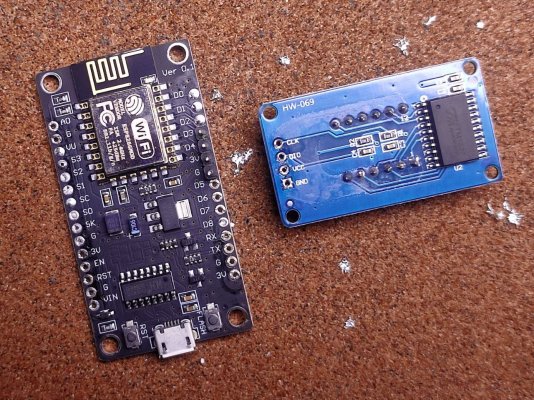
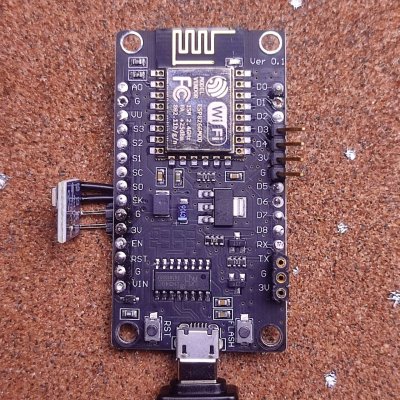
And this makes for an easy way to power a LOLIN/AMICA ESP8266 NodeMCU module:

photo_2024-07-26 16.42.02.jpeg

The Ground, VCC, D4/GPIO2 and D3/GPIO0 pins line up perfectly to power/control the TM1637 module:

photo_2024-07-26 16.42.08.jpeg

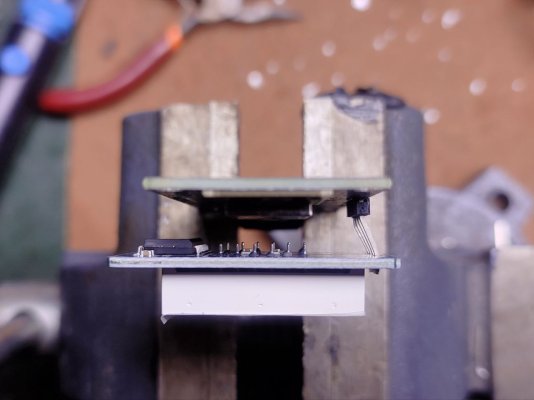
The headers I used were taller than usual, at 16mm or 17mm, this lets me bend them slightly for centering the display:

photo_2024-07-26 16.42.15.jpeg

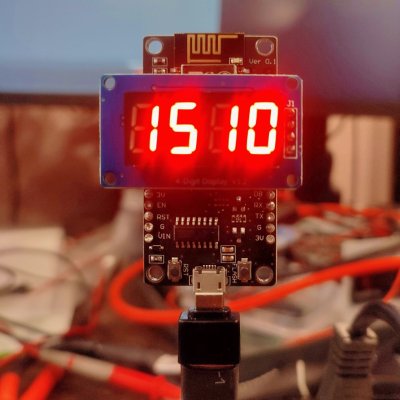
Looks pretty spiffy:

photo_2024-07-26 16.42.17.jpeg

More updates later.
 
Last edited:
... you'd save Rs 400

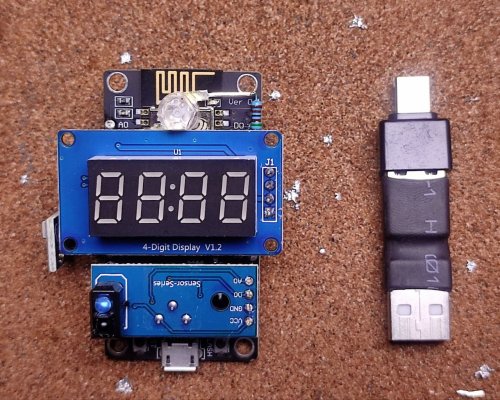
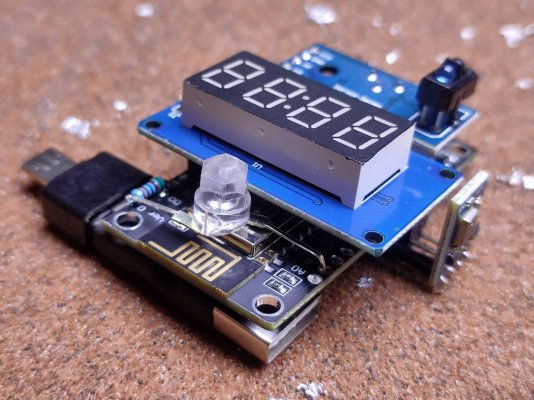
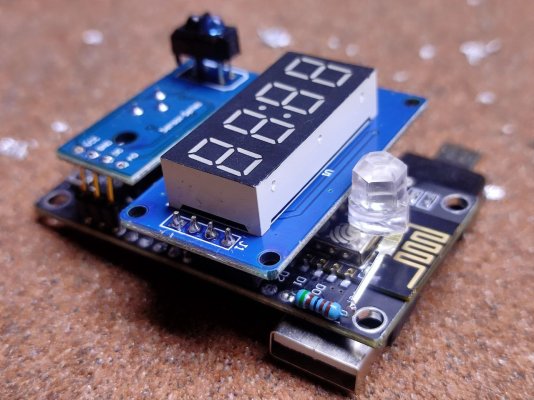
Or you could just add a bunch of other stuff and come up with this:

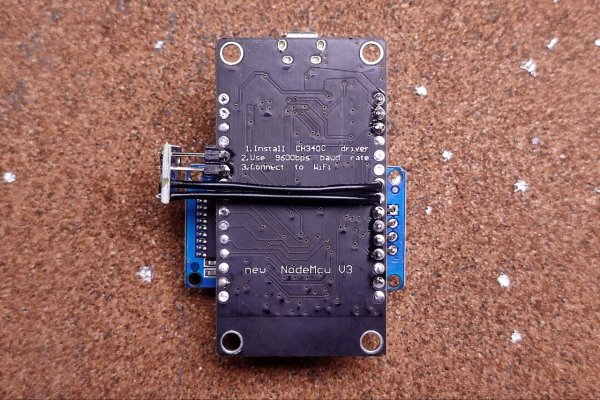
photo_2024-07-28 14.09.33.jpeg

The rear:

photo_2024-07-28 14.10.11.jpeg

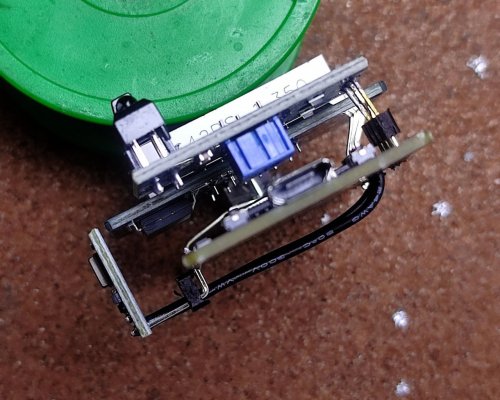
The sandwich:

photo_2024-07-28 14.10.20.jpeg

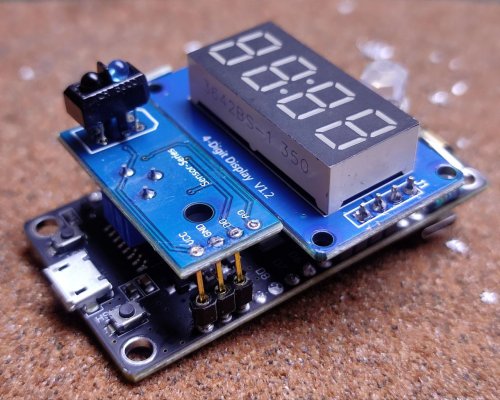
A better look at the pins used, the temperature sensor is a AHT10:

photo_2024-07-28 14.10.15.jpeg

This IR sensor is used as a non-contact button to turn on the water pump:

photo_2024-07-28 14.10.30.jpeg

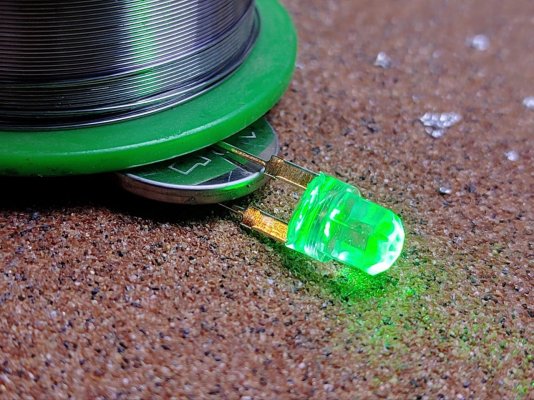
And this led is used as a indicator to show if the water pump is on:

photo_2024-07-28 14.10.33.jpeg

A 5.1K resistor for the led:

photo_2024-07-28 14.10.36.jpeg

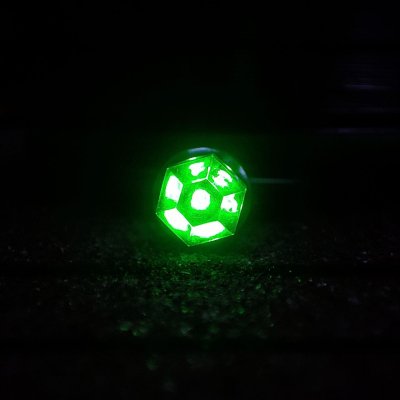
It's a really nice led:

photo_2024-07-28 14.10.49.jpeg

photo_2024-07-28 14.10.53.jpeg

quartzcomponents describes this led as a 8mm diamond.

And the video of it in action (the animations were fun to code):

 
Great job, I can sense you are having extreme fun, doing these things and watching all your hardware and software working like clockwork is very rewarding in the end.
 
And finally the junction box is hung with a wire, with the cables pointing downwards to discourage water ingress during rains

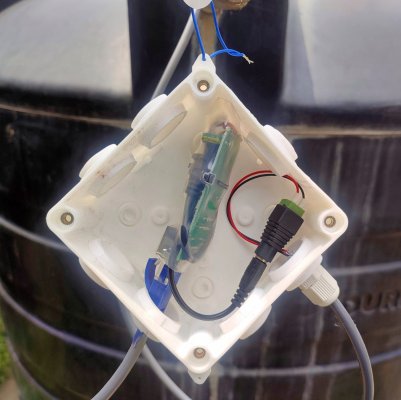
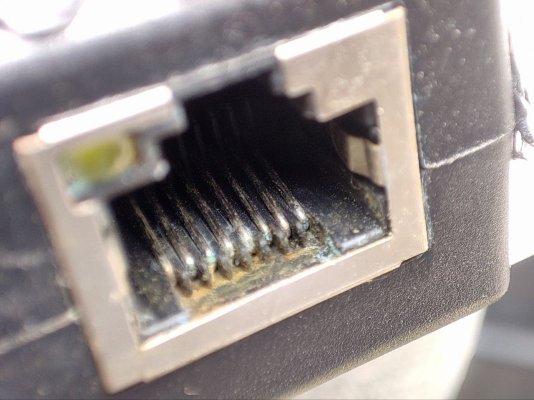
It wasn't effective. Water found a way in so the POE splitter shorted and died, it's a pretty gross photo so I haven't attached it in this post, it's below.

I got another splitter, gently tapped at the seams with a hammer until the housing separated and then heatshrinked it just because I could.

This time the connector will be inside the box and hopefully fare better:

photo_2024-08-15 11.51.18.jpeg
 

Attachments

  • photo_2024-08-15 11.51.16.jpeg
    photo_2024-08-15 11.51.16.jpeg
    204.9 KB · Views: 45
It wasn't effective. Water found a way in so the POE splitter shorted and died, it's a pretty gross photo so I haven't attached it in this post, it's below.

I got another splitter, gently tapped at the seams with a hammer until the housing separated and then heatshrinked it just because I could.

This time the connector will be inside the box and hopefully fare better:

View attachment 204681
Fog, condensation, moisture can still get inside, a full proof solution could be a potting compound which you pour in the box and let it dry.

 
PART 1: THE SENSOR

We need this sensor to read the water level inside the tank. For this we'll be using the US-100 Ultrasonic Distance Sensor module. This sensor is 3.3V logic compatible and has a UART mode where it returns a distance reading that takes into account the current temperature for better accuracy. This sensor is wired to a ESP8266 module which is flashed with Tasmota and powered by POE. More info on the software bits after the photos.


Here is the hardware:

View attachment 201369

That's a WEMOS D1 R2 with the US-100 wired. Power is fed in through a 2M length of outdoor-rated CCTV cable that will be plugged into a 12V POE splitter. This WEMOS board can handle 12V input safely but you can use any ESP8266 board with a voltage converter module. I've removed all of the pins and DC input on this WEMOS board to make it easier to install.


All installed:
View attachment 201371

View attachment 201372

View attachment 201373

The WEMOS module is hard-mounted with M3 screws and spacers but it's important that the ultrasonic sensor is not mounted through the metal cans, I used hot glue on the back of the PCB. Applying pressure or fixation to the metal cans will prevent the sensor from working properly, they must sit loose and free.


The POE adapter was also hot glued in a waterproof CCTV junction box:
View attachment 201375

You can see the lines that I scored for drilling out the holes, they're 16mm on one axis and 16mm & 39mm on the other axis. Drill out 16mm holes on the two intersections.


This is then mounted to the lid of the water tank, with a small bit cut out for the cable to pass through:
View attachment 201376

View attachment 201377


And finally the junction box is hung with a wire, with the cables pointing downwards to discourage water ingress during rains:
View attachment 201378

For the software, we're using a custom build of Tasmota that incorporates a Serial to TCP bridge for Node-RED to access the sensor's readings. This is because Tasmota does not currently support the UART mode of the US-100 sensor. You can compile your own or use the tasmota-zbbridge pre-compiled binary.

Follow the instructions here: https://tasmota.github.io/docs/Serial-to-TCP-Bridge/ while setting baud rate to 9600 with the TCPBaudRate 9600 command in the console. Be sure to setup rule1 to activate the bridge on boot with the command Rule1 ON System#Boot DO TCPStart 8888,192.168.0.10 ENDON. The ip address should that of your self-hosted Node-RED instance (not covered in this guide).


PART2: THE CODE

This is the flow I'm currently using, you can replicate it or modify to your preference:

View attachment 201380

I called the overhead tank 'elevated_pot'. You should have MQTT and optionally InfluxDB configured with Node-RED. You can delete the 'record' node if you don't want or need the database.

Here's the JSON for you to import into Node-RED:

JSON:
[
    {
        "id": "9c1d17307d70c8e7",
        "type": "tab",
        "label": "Water Supply",
        "disabled": false,
        "info": "",
        "env": []
    },
    {
        "id": "e742fddb55d91320",
        "type": "tcp request",
        "z": "9c1d17307d70c8e7",
        "name": "elevated_pot",
        "server": "192.168.0.10",
        "port": "8888",
        "out": "sit",
        "ret": "buffer",
        "splitc": " ",
        "newline": "",
        "trim": false,
        "tls": "",
        "x": 310,
        "y": 180,
        "wires": [
            [
                "9599dd34ec985ecc"
            ]
        ]
    },
    {
        "id": "1fd33c29198b6d97",
        "type": "inject",
        "z": "9c1d17307d70c8e7",
        "name": "5s",
        "props": [
            {
                "p": "payload"
            }
        ],
        "repeat": "5",
        "crontab": "",
        "once": false,
        "onceDelay": 0.1,
        "topic": "",
        "payload": "[\"0x55\"]",
        "payloadType": "bin",
        "x": 110,
        "y": 140,
        "wires": [
            [
                "c3edfc8a8fabd312"
            ]
        ]
    },
    {
        "id": "9599dd34ec985ecc",
        "type": "function",
        "z": "9c1d17307d70c8e7",
        "name": "process, filter & assemble",
        "func": "if (msg.payload.length != 2) \n// invalid reading; exit \n{\n    return null;\n}\n\nvar elevated_pot = flow.get('elevated_pot');\n//node.warn(elevated_pot);\n\nvar radius = elevated_pot[9];\nvar height = msg.payload[0] * 256 + msg.payload[1];\nvar cavity = 22/7 * radius * radius * height;\n// arbitrarily reduce anomalies\nvar minmax = Math.floor(cavity / 10) * 10;\nvar volume = elevated_pot[8] - minmax;\n\nif (volume < 0) \n// below reserve\n{\n    volume = 0;\n}\n\nif (volume === elevated_pot[3]) \n// no change; skip checks\n{\n    // send reading to db\n    var record = true; \n}\nelse if (volume === elevated_pot[2]) \n// passed secondary check\n{\n    // update new reading\n    flow.set('elevated_pot[3]', volume); \n\n    // send reading to db\n    var record = true; \n}\nelse if (volume === elevated_pot[1]) \n// passed primary check\n{\n    // update secondary check\n    flow.set('elevated_pot[2]', volume) \n}\nelse // failed both checks\n{\n    // update primary check\n    flow.set('elevated_pot[1]', volume); \n    \n    // clear secondary check\n    flow.set('elevated_pot[2]', 0); \n}\n\nif (record) \n{\n    // clear both checks\n    flow.set('elevated_pot[1]', 0);\n    flow.set('elevated_pot[2]', 0);\n\n    // record timestamp\n    flow.set('elevated_pot[4]', new Date());\n\n    // send reading to db\n    msg.payload = \n    [\n        {\n            measurement: \"elevated_pot\",\n            fields: \n            {\n                \"Liters\": volume\n            },\n            tags:\n            {\n                _sensor: \"US-100\"\n            }\n        }\n    ];\n    return msg;\n}\nelse\n{\n    return null;\n}\n",
        "outputs": 1,
        "timeout": 0,
        "noerr": 0,
        "initialize": "",
        "finalize": "",
        "libs": [],
        "x": 510,
        "y": 180,
        "wires": [
            [
                "62aa0f16d23499da"
            ]
        ]
    },
    {
        "id": "62aa0f16d23499da",
        "type": "influxdb batch",
        "z": "9c1d17307d70c8e7",
        "influxdb": "1234567890ABCDEF",
        "precision": "",
        "retentionPolicy": "",
        "name": "record",
        "database": "database",
        "precisionV18FluxV20": "ms",
        "retentionPolicyV18Flux": "",
        "org": "UmbrellaCorporation",
        "bucket": "sensors",
        "x": 690,
        "y": 180,
        "wires": []
    },
    {
        "id": "53db5c1222a9636d",
        "type": "function",
        "z": "9c1d17307d70c8e7",
        "name": "notify?",
        "func": "var elevated_pot = flow.get('elevated_pot');\n\nvar old_reading = elevated_pot[5];\nvar new_reading = Math.floor(elevated_pot[3] / 100) * 100;\nvar percentage = Math.floor(new_reading / elevated_pot[8] * 100);\n\nvar last_one = elevated_pot[6];\nvar this_run = new Date();\n\nvar notify = false;\n\nif (this_run.getTime() - last_one.getTime() > 900000)\n{\n    notify = true;\n}\n\nif (Math.abs(new_reading - old_reading >= elevated_pot[8]/10))\n{\n    notify = true;\n} \nelse if (new_reading === old_reading)\n{\n    notify = false;\n}\n\nif (notify)\n{\n    // set new reading\n    flow.set('elevated_pot[5]', new_reading);\n    flow.set('elevated_pot[7]', percentage);\n\n    // record timestamp\n    flow.set('elevated_pot[6]', new Date());\n\n    msg.payload =\n    {\n        chatId: '-1234567890ABC',\n        type: 'message',\n        content: '*Rooftop Tank at ' \n        + percentage \n        + '%* \\n_  ' \n        + new_reading \n        + ' liters_'\n    };\n    msg.payload.options =\n    {\n        'parse_mode': 'MarkdownV2'\n    };\n    return msg;\n}\nelse \n{\n    return null;\n}",
        "outputs": 1,
        "timeout": 0,
        "noerr": 0,
        "initialize": "",
        "finalize": "",
        "libs": [],
        "x": 550,
        "y": 140,
        "wires": [
            [
                "288263b022b2458e"
            ]
        ]
    },
    {
        "id": "288263b022b2458e",
        "type": "link out",
        "z": "9c1d17307d70c8e7",
        "name": "telegram",
        "mode": "link",
        "links": [
            "4a52930bbe78b3e5",
            "097d635a5e4929af",
            "bd3bc90dde1594ea",
            "73498046dd2c8752"
        ],
        "x": 725,
        "y": 140,
        "wires": []
    },
    {
        "id": "c3edfc8a8fabd312",
        "type": "function",
        "z": "9c1d17307d70c8e7",
        "name": "init & break",
        "func": "// break for 60s between successive valid readings\n\nvar last_one = flow.get('elevated_pot[4]');\nvar this_run = new Date();\n\nif (this_run.getTime() - last_one.getTime() >= 60000)\n{\n    return msg;\n}\nelse \n{\n    return null;\n}",
        "outputs": 1,
        "timeout": 0,
        "noerr": 0,
        "initialize": "// power-on reset\nif (flow.get('elevated_pot') === undefined) {\n    flow.set('elevated_pot', [\n        false,\n        0,\n        0,\n        0,\n        new Date(),\n        0,\n        new Date(),\n        0,\n        2000,\n        0.72\n    ])\n}\n",
        "finalize": "",
        "libs": [],
        "x": 130,
        "y": 180,
        "wires": [
            [
                "e742fddb55d91320",
                "9bfbebd5d8078c65"
            ]
        ]
    },
    {
        "id": "9bfbebd5d8078c65",
        "type": "delay",
        "z": "9c1d17307d70c8e7",
        "name": "1x per min",
        "pauseType": "rate",
        "timeout": "1",
        "timeoutUnits": "seconds",
        "rate": "1",
        "nbRateUnits": "1",
        "rateUnits": "minute",
        "randomFirst": "1",
        "randomLast": "5",
        "randomUnits": "seconds",
        "drop": true,
        "allowrate": false,
        "outputs": 1,
        "x": 310,
        "y": 140,
        "wires": [
            [
                "63edd20ca459180c",
                "53db5c1222a9636d"
            ]
        ]
    },
    {
        "id": "63edd20ca459180c",
        "type": "function",
        "z": "9c1d17307d70c8e7",
        "name": "send out percentage",
        "func": "msg.payload = flow.get('elevated_pot[7]');\nif (msg.payload === 0)\n{\n    msg.payload = 10;\n}\nreturn msg;",
        "outputs": 1,
        "timeout": 0,
        "noerr": 0,
        "initialize": "",
        "finalize": "",
        "libs": [],
        "x": 500,
        "y": 100,
        "wires": [
            [
                "de92b574bda3f709"
            ]
        ]
    },
    {
        "id": "de92b574bda3f709",
        "type": "mqtt out",
        "z": "9c1d17307d70c8e7",
        "name": "to display",
        "topic": "sensors/display/percent/elevated_pot",
        "qos": "",
        "retain": "",
        "respTopic": "",
        "contentType": "",
        "userProps": "",
        "correl": "",
        "expiry": "",
        "broker": "71efac7808763b18",
        "x": 680,
        "y": 100,
        "wires": []
    },
    {
        "id": "95a6d622911dd5bf",
        "type": "influxdb",
        "hostname": "192.168.0.11",
        "port": "8086",
        "protocol": "http",
        "database": "sensors",
        "name": "InfluxDB",
        "usetls": false,
        "tls": "",
        "influxdbVersion": "2.0",
        "url": "http://192.168.0.11:8086",
        "rejectUnauthorized": true
    },
    {
        "id": "71efac7808763b18",
        "type": "mqtt-broker",
        "name": "Mosquitto",
        "broker": "192.168.0.12",
        "port": "1883",
        "clientid": "",
        "autoConnect": true,
        "usetls": false,
        "protocolVersion": "4",
        "keepalive": "60",
        "cleansession": true,
        "autoUnsubscribe": true,
        "birthTopic": "",
        "birthQos": "0",
        "birthRetain": "false",
        "birthPayload": "",
        "birthMsg": {},
        "closeTopic": "",
        "closeQos": "0",
        "closeRetain": "false",
        "closePayload": "",
        "closeMsg": {},
        "willTopic": "",
        "willQos": "0",
        "willRetain": "false",
        "willPayload": "",
        "willMsg": {},
        "userProps": "",
        "sessionExpiry": ""
    }
]


So the flow runs every 5 seconds. On first-run there's a function in the On Start tab of the init & break function node:

JavaScript:
// power-on reset
if (flow.get('elevated_pot') === undefined) {
    flow.set('elevated_pot', [
        false,
        0,
        0,
        0,
        new Date(),
        0,
        new Date(),
        0,
        2000,
        0.72
    ])
}

We're defining an array here with ten values:
  1. whether the water pump is on (future guide)
  2. first check of the reading
  3. second check of the reading
  4. validated reading
  5. timestamp of the validation
  6. reading sent as notification
  7. timestamp of the notification
  8. percentage value of the reading
  9. capacity of the tank in liters
  10. radius of the tank in meters
The tank is a little over 2000 in my case, but I've defined it as 2000 to allow for a little reserve.


The 5s inject node sends a buffer value of 0x55 formatted as ["0x55"] to the sensor module, which then returns a two-byte hex value that's processed with the process, filter & assemble function node.

But before that happens, the init & break node forces a 60 second time-out since the last reading's timestamp, so as not to overwhelm the database with a reading every 5 seconds:

JavaScript:
// break for 60s between successive valid readings
var last_one = flow.get('elevated_pot[4]');
var this_run = new Date();
if (this_run.getTime() - last_one.getTime() >= 60000)
{
    return msg;
}
else
{
    return null;
}


The other reason for this time-out is that it could take more than a few readings to get an usable reading that's been thrice-validated. How that is done is explained in the process, filter & assemble node:

JavaScript:
if (msg.payload.length != 2)
// invalid reading; exit
{
    return null;
}
var elevated_pot = flow.get('elevated_pot');
//node.warn(elevated_pot);
var radius = elevated_pot[9];
var height = msg.payload[0] * 256 + msg.payload[1];
var cavity = 22/7 * radius * radius * height;
// arbitrarily reduce anomalies
var minmax = Math.floor(cavity / 10) * 10;
var volume = elevated_pot[8] - minmax;
if (volume < 0)
// below reserve
{
    volume = 0;
}
if (volume === elevated_pot[3])
// no change; skip checks
{
    // send reading to db
    var record = true;
}
else if (volume === elevated_pot[2])
// passed secondary check
{
    // update new reading
    flow.set('elevated_pot[3]', volume);
    // send reading to db
    var record = true;
}
else if (volume === elevated_pot[1])
// passed primary check
{
    // update secondary check
    flow.set('elevated_pot[2]', volume)
}
else
// failed both checks
{
    // update primary check
    flow.set('elevated_pot[1]', volume);
 
    // clear secondary check
    flow.set('elevated_pot[2]', 0);
}
if (record)
{
    // clear both checks
    flow.set('elevated_pot[1]', 0);
    flow.set('elevated_pot[2]', 0);
    // record timestamp
    flow.set('elevated_pot[4]', new Date());
    // send reading to db
    msg.payload =
    [
        {
            measurement: "elevated_pot",
            fields:
            {
                "Liters": volume
            },
            tags:
            {
                _sensor: "US-100"
            }
        }
    ];
    return msg;
}
else
{
    return null;
}

Basically, this code ensures that only three successive & identical readings are accepted as a valid reading. A little leniency is allowed in rounding down the number to the closest 10 liters.


The 1x per min node does what it sounds like it does and triggers the notify? node to decide if to send a notification to telegram:

JavaScript:
var elevated_pot = flow.get('elevated_pot');
var old_reading = elevated_pot[5];
var new_reading = Math.floor(elevated_pot[3] / 100) * 100;
var percentage = Math.floor(new_reading / elevated_pot[8] * 100);
var last_one = elevated_pot[6];
var this_run = new Date();
var notify = false;
if (this_run.getTime() - last_one.getTime() > 900000)
{
    notify = true;
}
if (Math.abs(new_reading - old_reading >= elevated_pot[8]/10))
{
    notify = true;
}
else if (new_reading === old_reading)
{
    notify = false;
}
if (notify)
{
    // set new reading
    flow.set('elevated_pot[5]', new_reading);
    flow.set('elevated_pot[7]', percentage);
    // record timestamp
    flow.set('elevated_pot[6]', new Date());
    msg.payload =
    {
        chatId: '-1234567890ABC',
        type: 'message',
        content: '*Rooftop Tank at '
        + percentage
        + '%* \n_  '
        + new_reading
        + ' liters_'
    };
    msg.payload.options =
    {
        'parse_mode': 'MarkdownV2'
    };
    return msg;
}
else
{
    return null;
}

This code triggers a telegram notification through a link out node. This notification is triggered under two conditions, if there's been 15 minute period since the last notification and the reading has changed, or if the reading has changed more than 10%.


Lastly, the send out percentage node sends out the percentage value to the MQTT server to pass on to any device waiting for an update (part 3 below):

JavaScript:
msg.payload = flow.get('elevated_pot[7]');
if (msg.payload === 0)
{
    msg.payload = 10;
}
return msg;

A zero-value is changed to 10% for better visuals on the meter (part 3).


Here are what the notifications look like:
View attachment 201385


PART 3: THE METER

This device is conveniently powered by USB and connects to MQTT to pull the percentage and display it as a bar graph. It's running Arduino code since Tasmota doesn't have support for the SeeedStudio Grove LED Bar.

It's built using a ESP-01 module , the LED Bar module, and a AMS1117-3.3 voltage regulator on a small proto-pcb plugged into a usb charger:
View attachment 201386


Everything is stacked for easier debugging and assembly:
View attachment 201387


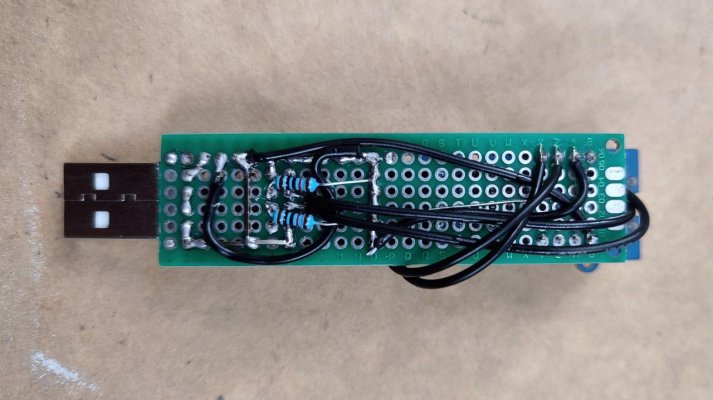
The ESP-01 module lacks the pull-up resistors that the ESP-01S has, so I've added two 10K ones:
View attachment 201388


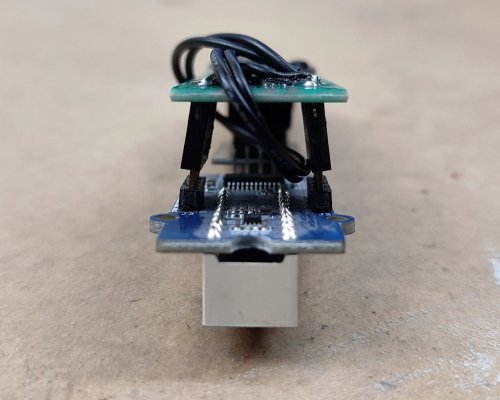
The Grove LED bar is wider than the proto-pcb so I've had to bend the pins a little:
View attachment 201389


Here is the Arduino code:

C:
#include "EspMQTTClient.h"
#include <Grove_LED_Bar.h>
EspMQTTClient client(
  "Wi-Fi SSID",
  "Wi-Fi Password",
  "MQTT-IP",
  "MQTT-username",
  "MQTT-password",
  "MQTT-client-id",
  1883
);
Grove_LED_Bar bar(0, 2, 0, LED_BAR_10);
int reading = 10;
void setup()
{
  Serial.begin(9600);
  bar.begin();
  Serial.println(reading);
}
void onConnectionEstablished()
{
  client.subscribe("/sensors/display/percent/elevated_pot", [](const String & payload) {
    reading = payload.toInt() / 10;
    if (reading <= 10)
    {
      bar.setLevel(reading);
    }
    Serial.println(payload);
  });
}
void loop()
{
  client.loop();
}

The serial connection is left on since the ESP-01 module has a blue LED connected to the TX pin, so it's used a visual indicator that the module is working and getting updates.

We're using the EspMQTTClient library that handles both Wi-Fi and MQTT: https://github.com/plapointe6/EspMQTTClient

The Grove LED Bar library in the Arduino IDE is out of date, so you'll need to install it and then overwrite it with the updated unreleased files from github: https://github.com/Seeed-Studio/Grove_LED_Bar

Be sure to experiment with the examples to learn more about those libraries.


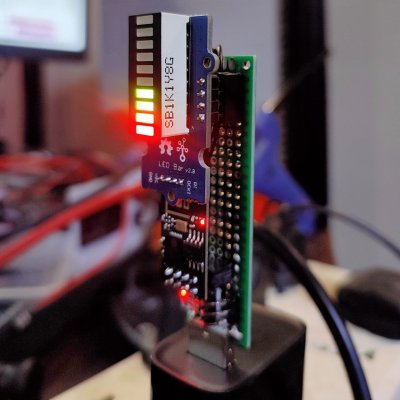
All configured and working, showing that the tank is 40% full:
View attachment 201390

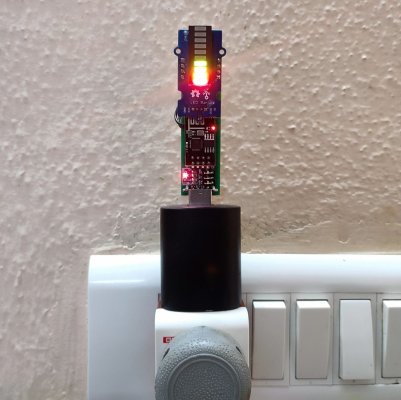
Installed in the hallway for everyone to see:
View attachment 201391


This project has been bouncing around in my head for five or so years now. I'm happy it's finally done, even if it's just a prototype.

If I've skipped something or something isn't clear, ask away, I probably did forget a few key details somewhere.
damn, great work. I really feel like doing this now. How can someone who has no experience on coding build this? are there any video guides to just follow?
Also, a little addon, I don't know if this will be too much work, but can we make it so after tank drops to certain level or at a specific time the pump turns on and off by taking into account these readings? I want to make it completely automated so that I wouldn't even need to keep an eye on the pump! There should also be some fail safe if the sensor were to stop working all of the sudden, like automatically shutting down of pump if water level isn't going up for the given specific time frame.
I don't know if this will be too much work but please brainstorm on it!
Again I loved this idea, great work!
 
How can someone who has no experience on coding build this?
One can start with arduino uno, it's the most popular and easy to learn. Lot of tutorials are available with code, tons of videos on youtube for free. I recommend the official starter kit it has everything to get you going. Here is the PDF of the book that comes with it if want to get a feel for this thing.

Also, a little addon, I don't know if this will be too much work, but can we make it so after tank drops to certain level or at a specific time the pump turns on and off by taking into account these readings?
It can be done for sure, you can control anything with given parameters. But this can get complex specially for beginner due to reasons
  • Involves AC voltage which is dangerous to be tinkering with.
  • Pump motors are high current they might need a special relay to turn them on and off, and that special relay might need special circuit of it's own.
  • Turning ON the pump when water level is low is easy but we also have to check if it water is available to pump. A water detection sensor before the pump might be needed.
  • In case water level sensor fails there must be a another manual water level detection method that turns OFF the pump if it is ON when water level reaches max or when water goes out in middle of pumping.

When you use the words "all done automatically" it usually pulls in a lot of edge cases which the product has to take care of and this shoots up the over all price.


I am sure there must be a off the shelf product that you can buy that does all this, so you don't have to re-invent the wheel.
 
Last edited:
Back
Top