Hey everyone
I’ve been working on a project surrounding the 10-inch rack ecosystem and wanted to start a discussion about why this format is making a massive comeback, specifically for home server enthusiasts worldwide, and why I believe 3D printing is the superior path forward compared to commercial metal options.
TLDR; If you don’t want to go through the entire thread and just want to see few builds, head over to https://www.reddit.com/r/minilab/
The 10-inch Standard: A Brief History
While the 19-inch rack (EIA-310) is the global standard for data centers, the 10-inch variation has a quieter history. It was originally introduced for telecommunications and SOHO (Small Office/Home Office) environments where equipment was smaller and space was at a premium.
For years, the format was largely dormant, used only for niche patch panels. However, with the explosion of Single Board Computers (Raspberry Pi) , NUCs , and Compact Switches (like the Unifi USG or 8-port switches), the 19-inch rack became overkill. Most modern home lab gear is tiny; putting a Raspberry Pi in a 19-inch rack is like parking a bicycle in a bus garage. The 10-inch format has evolved in recent years to become the “Apartment Homelab” standard which is compact, power-efficient, and wife-approval-factor friendly.
Off the shelves market offerings in India
If you want a 10-inch rack in India today, your options are severely limited. The “Gold Standard” currently is often considered the DeskPi RackMate T1 .
DeskPi RackMate:
-
Pros: It’s made of metal, looks premium, and offers great rigidity.
-
Cons: The biggest issue is Cost & Availability . In India, importing one attracts massive customs duties and shipping fees, often doubling the price. Furthermore, it is a static product. If you buy a 4U RackMate and suddenly need 6U of space, you have to buy a whole new rack or hack it together. It is heavy, and shipping it is inefficient.
The DIY Alternative: Aluminum Extrusions (2020 Profiles)
Naturally, many of us consider building a rack out of standard 2020 T-slot aluminum profiles. While this is the “gold standard” for rigidity, it comes with specific logistical headaches in the Indian context:
-
The “Cutting” Problem: Sourcing 1-meter lengths of 2020 profile from vendors (like Robu, Nayani, or local hardware markets) is easy. However, cutting them to the exact 10-inch standard requires a precision miter saw. If you cut them by hand with a hacksaw and the angle is off by even 1 degree, the entire rack will wobble or fail to sit flat.
-
The Hidden Cost of Fittings: While the aluminum rods seem cheap (~₹200-300 per meter), the cost explodes when you add the “vitamins.” Corner brackets, sliding T-nuts, and specialized bolts add up very quickly. A “cheap” DIY aluminum frame often ends up costing nearly as much as a commercial unit once you tally up the 50+ pieces of hardware required to assemble it.
-
Wasted Volume: For a small 10-inch setup holding lightweight Pis and switches, 2020 extrusions are often overkill. They add significant bulk and weight (and shipping cost) for load-bearing capacity that simply isn’t needed for gear weighing under 5kg.
Why I think 3D Printed Racks are the Solution
3D printing changes the equation from “Buying a Product” to “Manufacturing a Solution.” Here is why a printable modular rack often beats the metal alternative:
-
Infinite Extensibility: Need to go from 4U to 6U? You don’t need a new rack. You just print additional nU rails with extensions and you’re good to go. The hardware (nuts/screws) remains the same.
-
Custom Mounts: Metal racks require standard shelves. With a 3D printed ecosystem, we can print mounts specifically designed for an Orange Pi, a Jetson Nano, or a specific SSD array, snapping them directly into the frame without wasting vertical space on generic trays.
-
Repairability: If you drop a metal rack and bend the rail, it’s game over. If you crack a printed leg, you print a replacement in couple of hours.
The “Barebones” Concept
I was initially designing a configuration that aims to solve the cost, rigidity and wastage issue but then came across a very good design which ticked all of the points.
It is a modular, barebones frame .
-
Design Philosophy: No wasted plastic on aesthetic “walls” or “roofs” that trap heat. It is a skeleton frame designed purely for structural rigidity.
-
Variable Depth: The design uses a parameter-based approach where the depth (150mm, 200mm, 250mm) can be swapped easily based on whether you are mounting a small switch or a deeper mini-PC.
-
Minimal Hardware: Only needs 20mm M5 bolts and hex nuts as additional hw. Also requires M5 heat inserts for mounts handles and legs.
The Economics: What actually costs money?
Many people think 3D printing is “free” once you buy the printer, or they look strictly at the cost of plastic. However, the cost of a high-quality printed rack is influenced by several technical factors:
-
Rigidity vs. Filament (Walls & Infill): A rack needs to hold weight. We can’t print these with 10% infill. We need high wall counts (perimeters) for structural integrity. This drastically increases material usage and print time.
-
Print Time & Electricity: A robust rack isn’t a 2-hour print. It can take 20+ hours of machine time. The wear and tear on the machine (nozzles, belts, fans) and the risk of failure (power cuts!) are real costs.
-
Material Choice: Standard PLA or even PETG creeps (warps) under continuous load or heat. Using a good filament like ABS/ASA with much better mechanical properties adds to the material cost but is necessary for a rack that can contain devices generating enough heat.
How you can print your own?
First you need to decide the number of units you require on the rack and the depth. I feel 250mm gives you sufficient room to do cable management as well as deep enough to mount slightly larger appliances.
For each rack, you are required to print the following:
- Rails: 4 rails are required for any rack. The design shared above offers two variants so please check which one suits your requirements.
- Mounts: You can add these on ad-hoc basis. 2U mounts for actual devices and rest blank faceplates.
- Handles: Each rack requires 2 handles to interconnect with left front and back and right front and back rails.
- Legs: Similar to handles, each rack requires 2 legs to interconnect left front and back and right front and back rails.
- Hardware:
- 8x M5 heat inserts which goes at the top and bottom of each rail for mounting legs and handles.
- For a single U mount 4xM5 20mm bolts and 4xM5 hex nuts (6 can also be used instead of 4 but I found using is enough for a single U mounts.
- Topper: Although optional, I feel this can enhance overall aesthetics and act as a useful shelf.
I concluded that 3 walls, 15% infill, 3 top and bottom layers settings works very well for the above specified rack and “most” of it’s mounts for ABS/ASA filament. Now this is considering you are well acquainted with your 3D printer and the filament of choice as choosing the wrong settings can impact the final results.
If you are going to be printing it in ABS/ASA (which is preferred over PETG/PLA), ensure that you have an enclosed printer which can maintain good chamber temps as due to the nature of the 3d models (long lengths), both filaments have a tendency to warp under non-ideal printing environments.
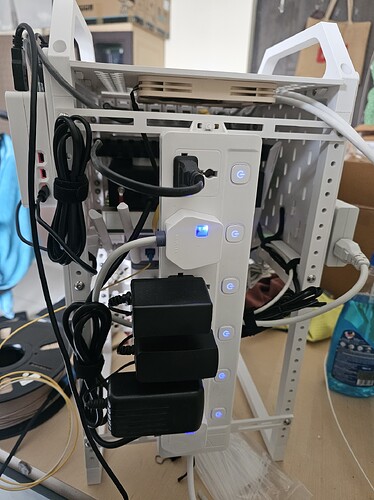
My own 10 incher 
Here is mine which I am still finalizing. This was earlier printed as a 4U unit but I later extended by another 3U
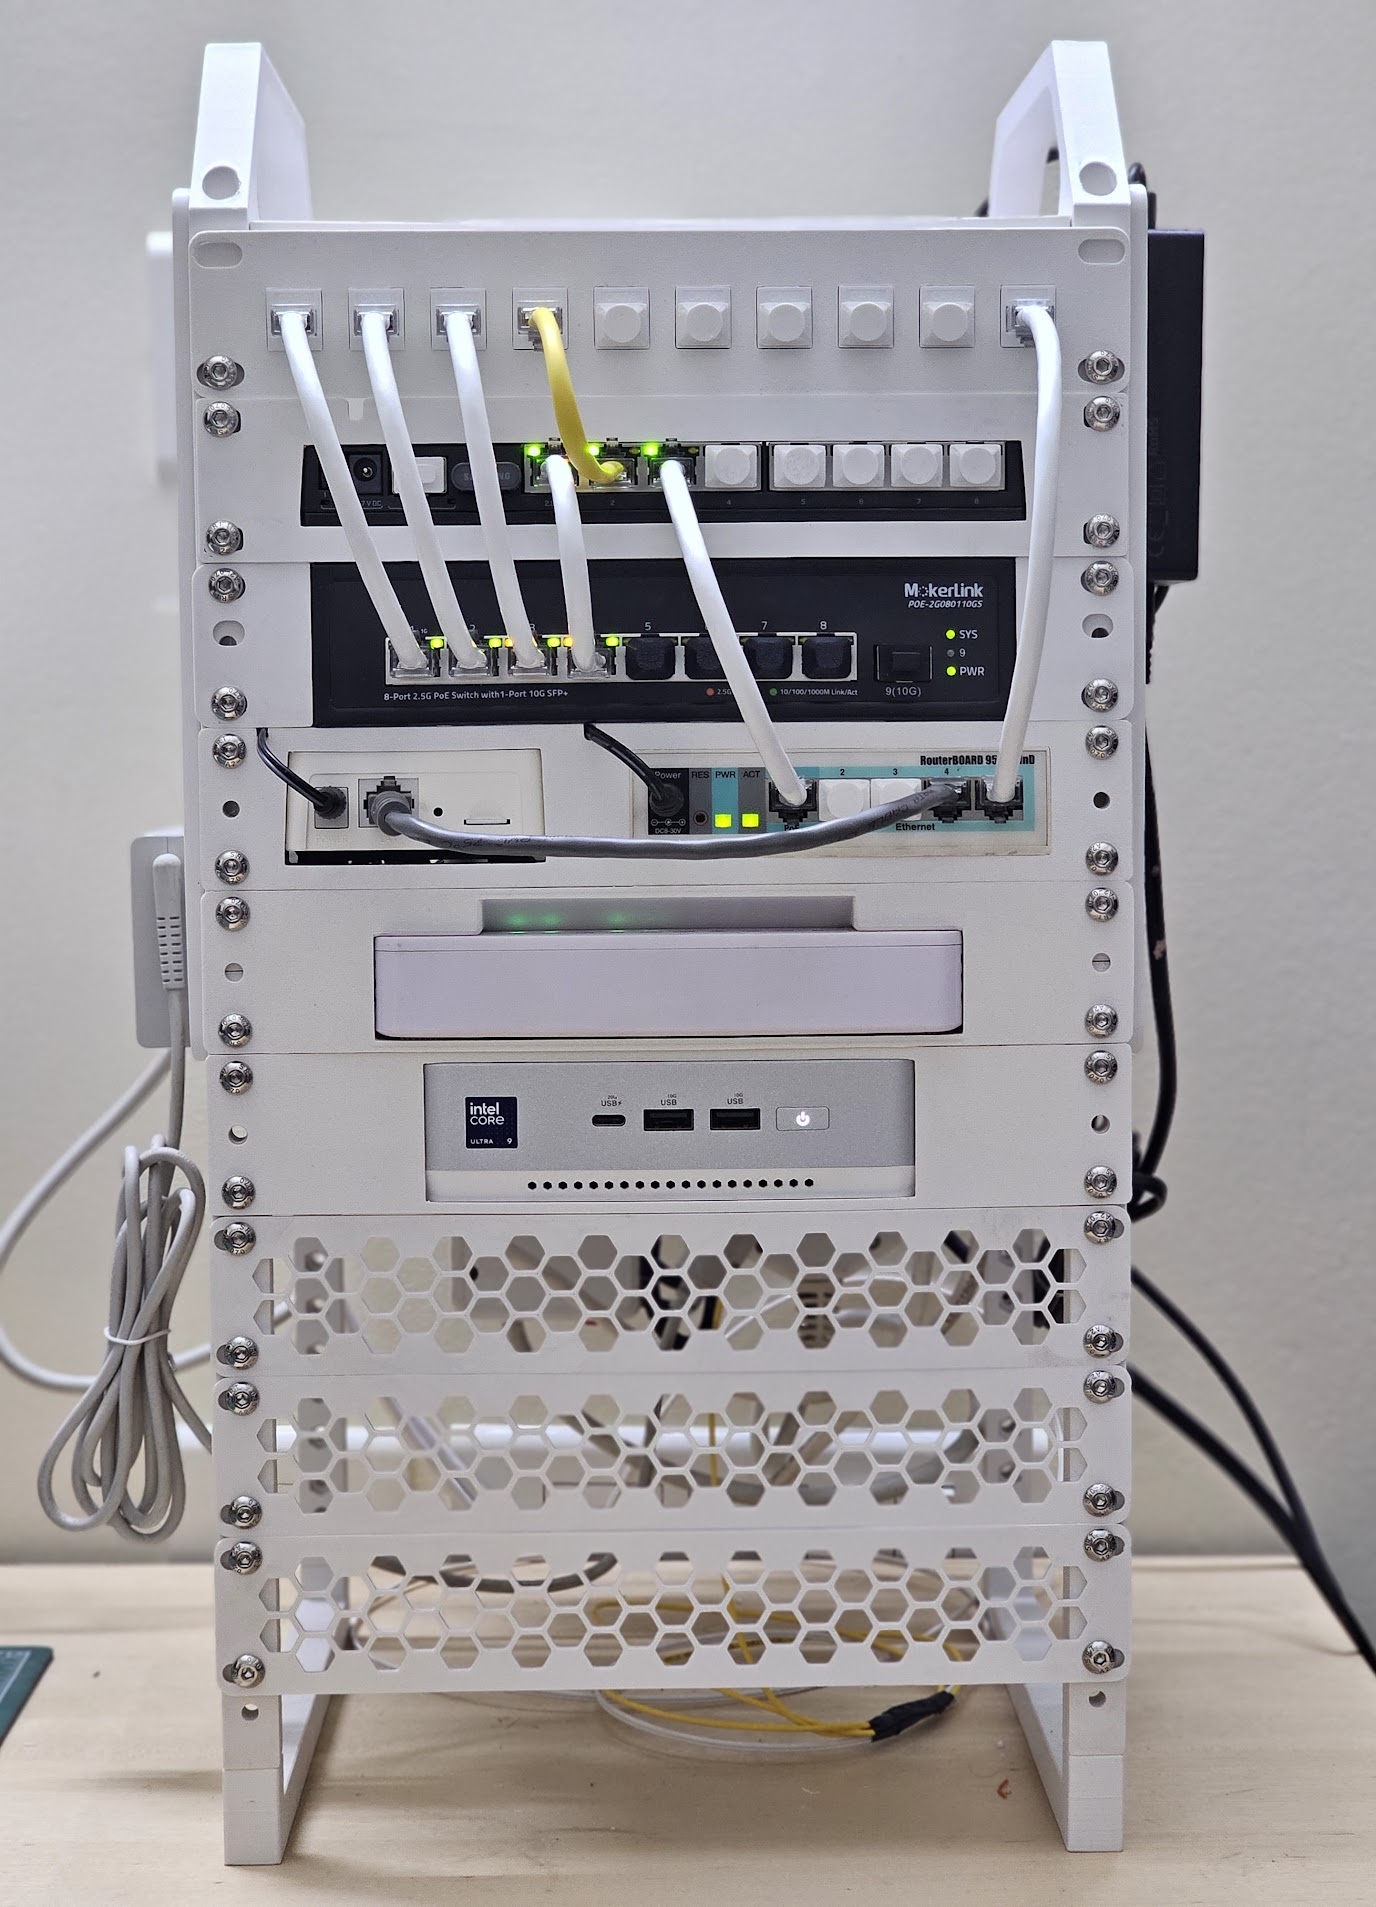
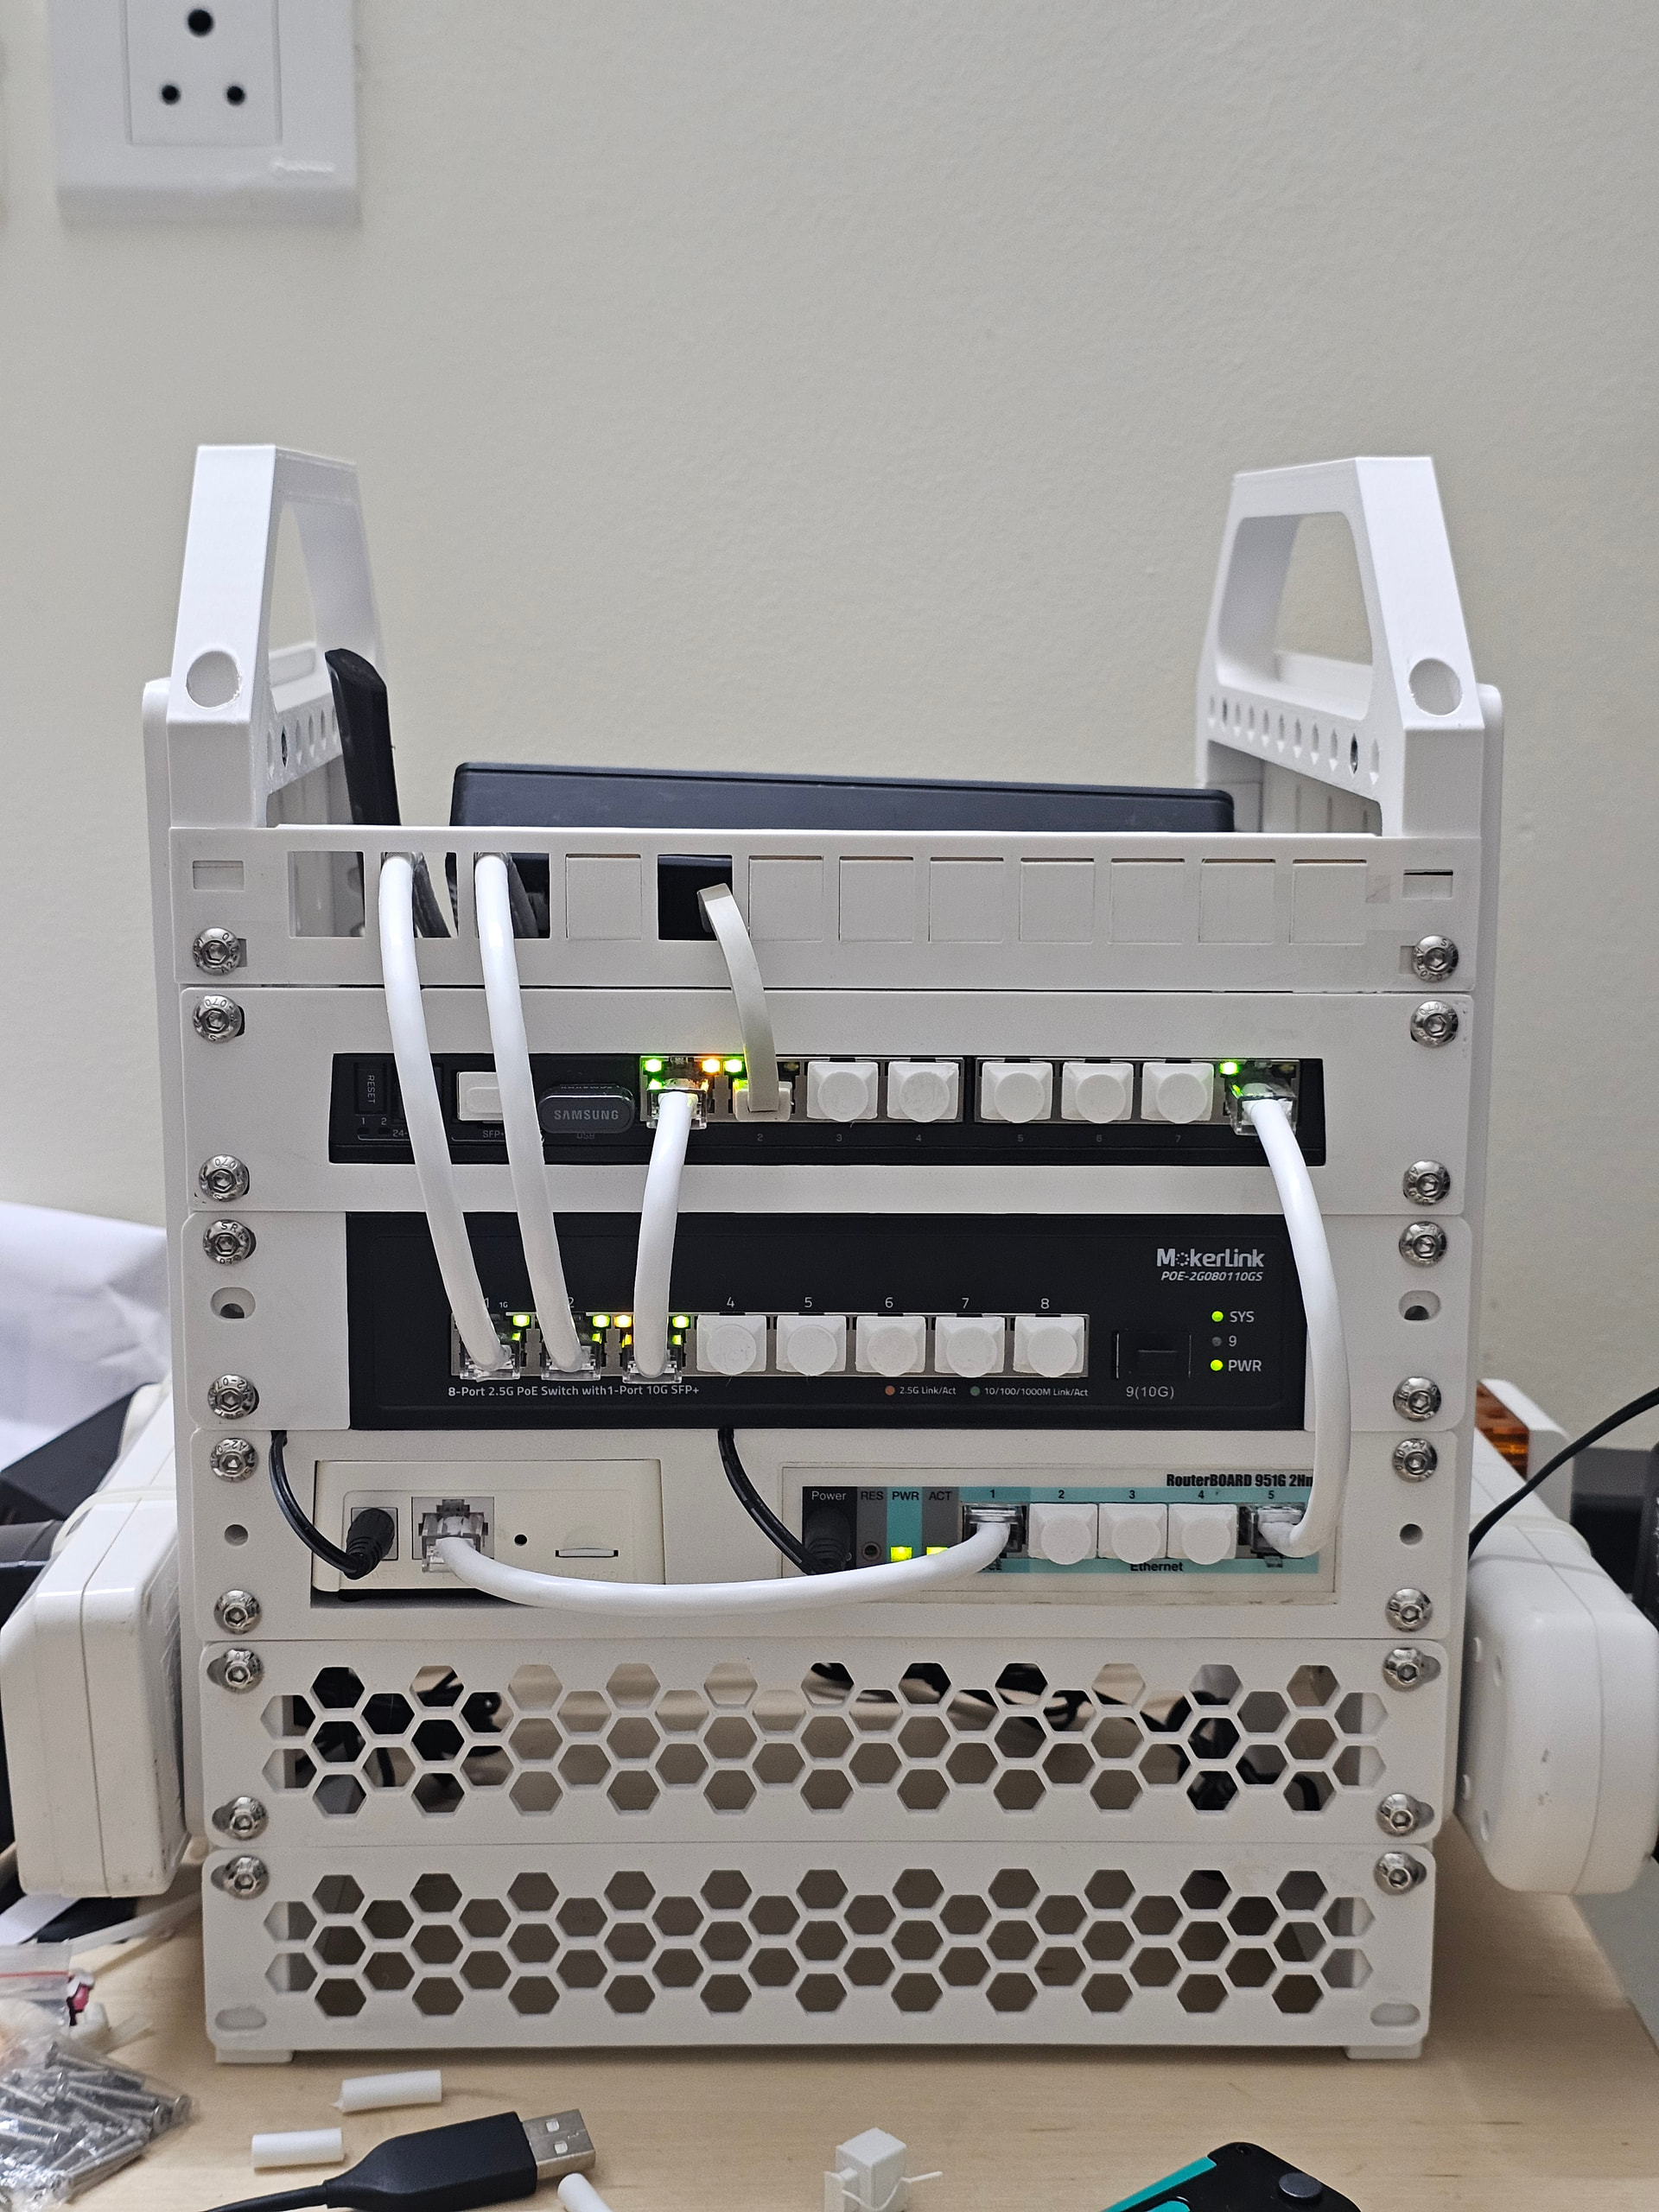
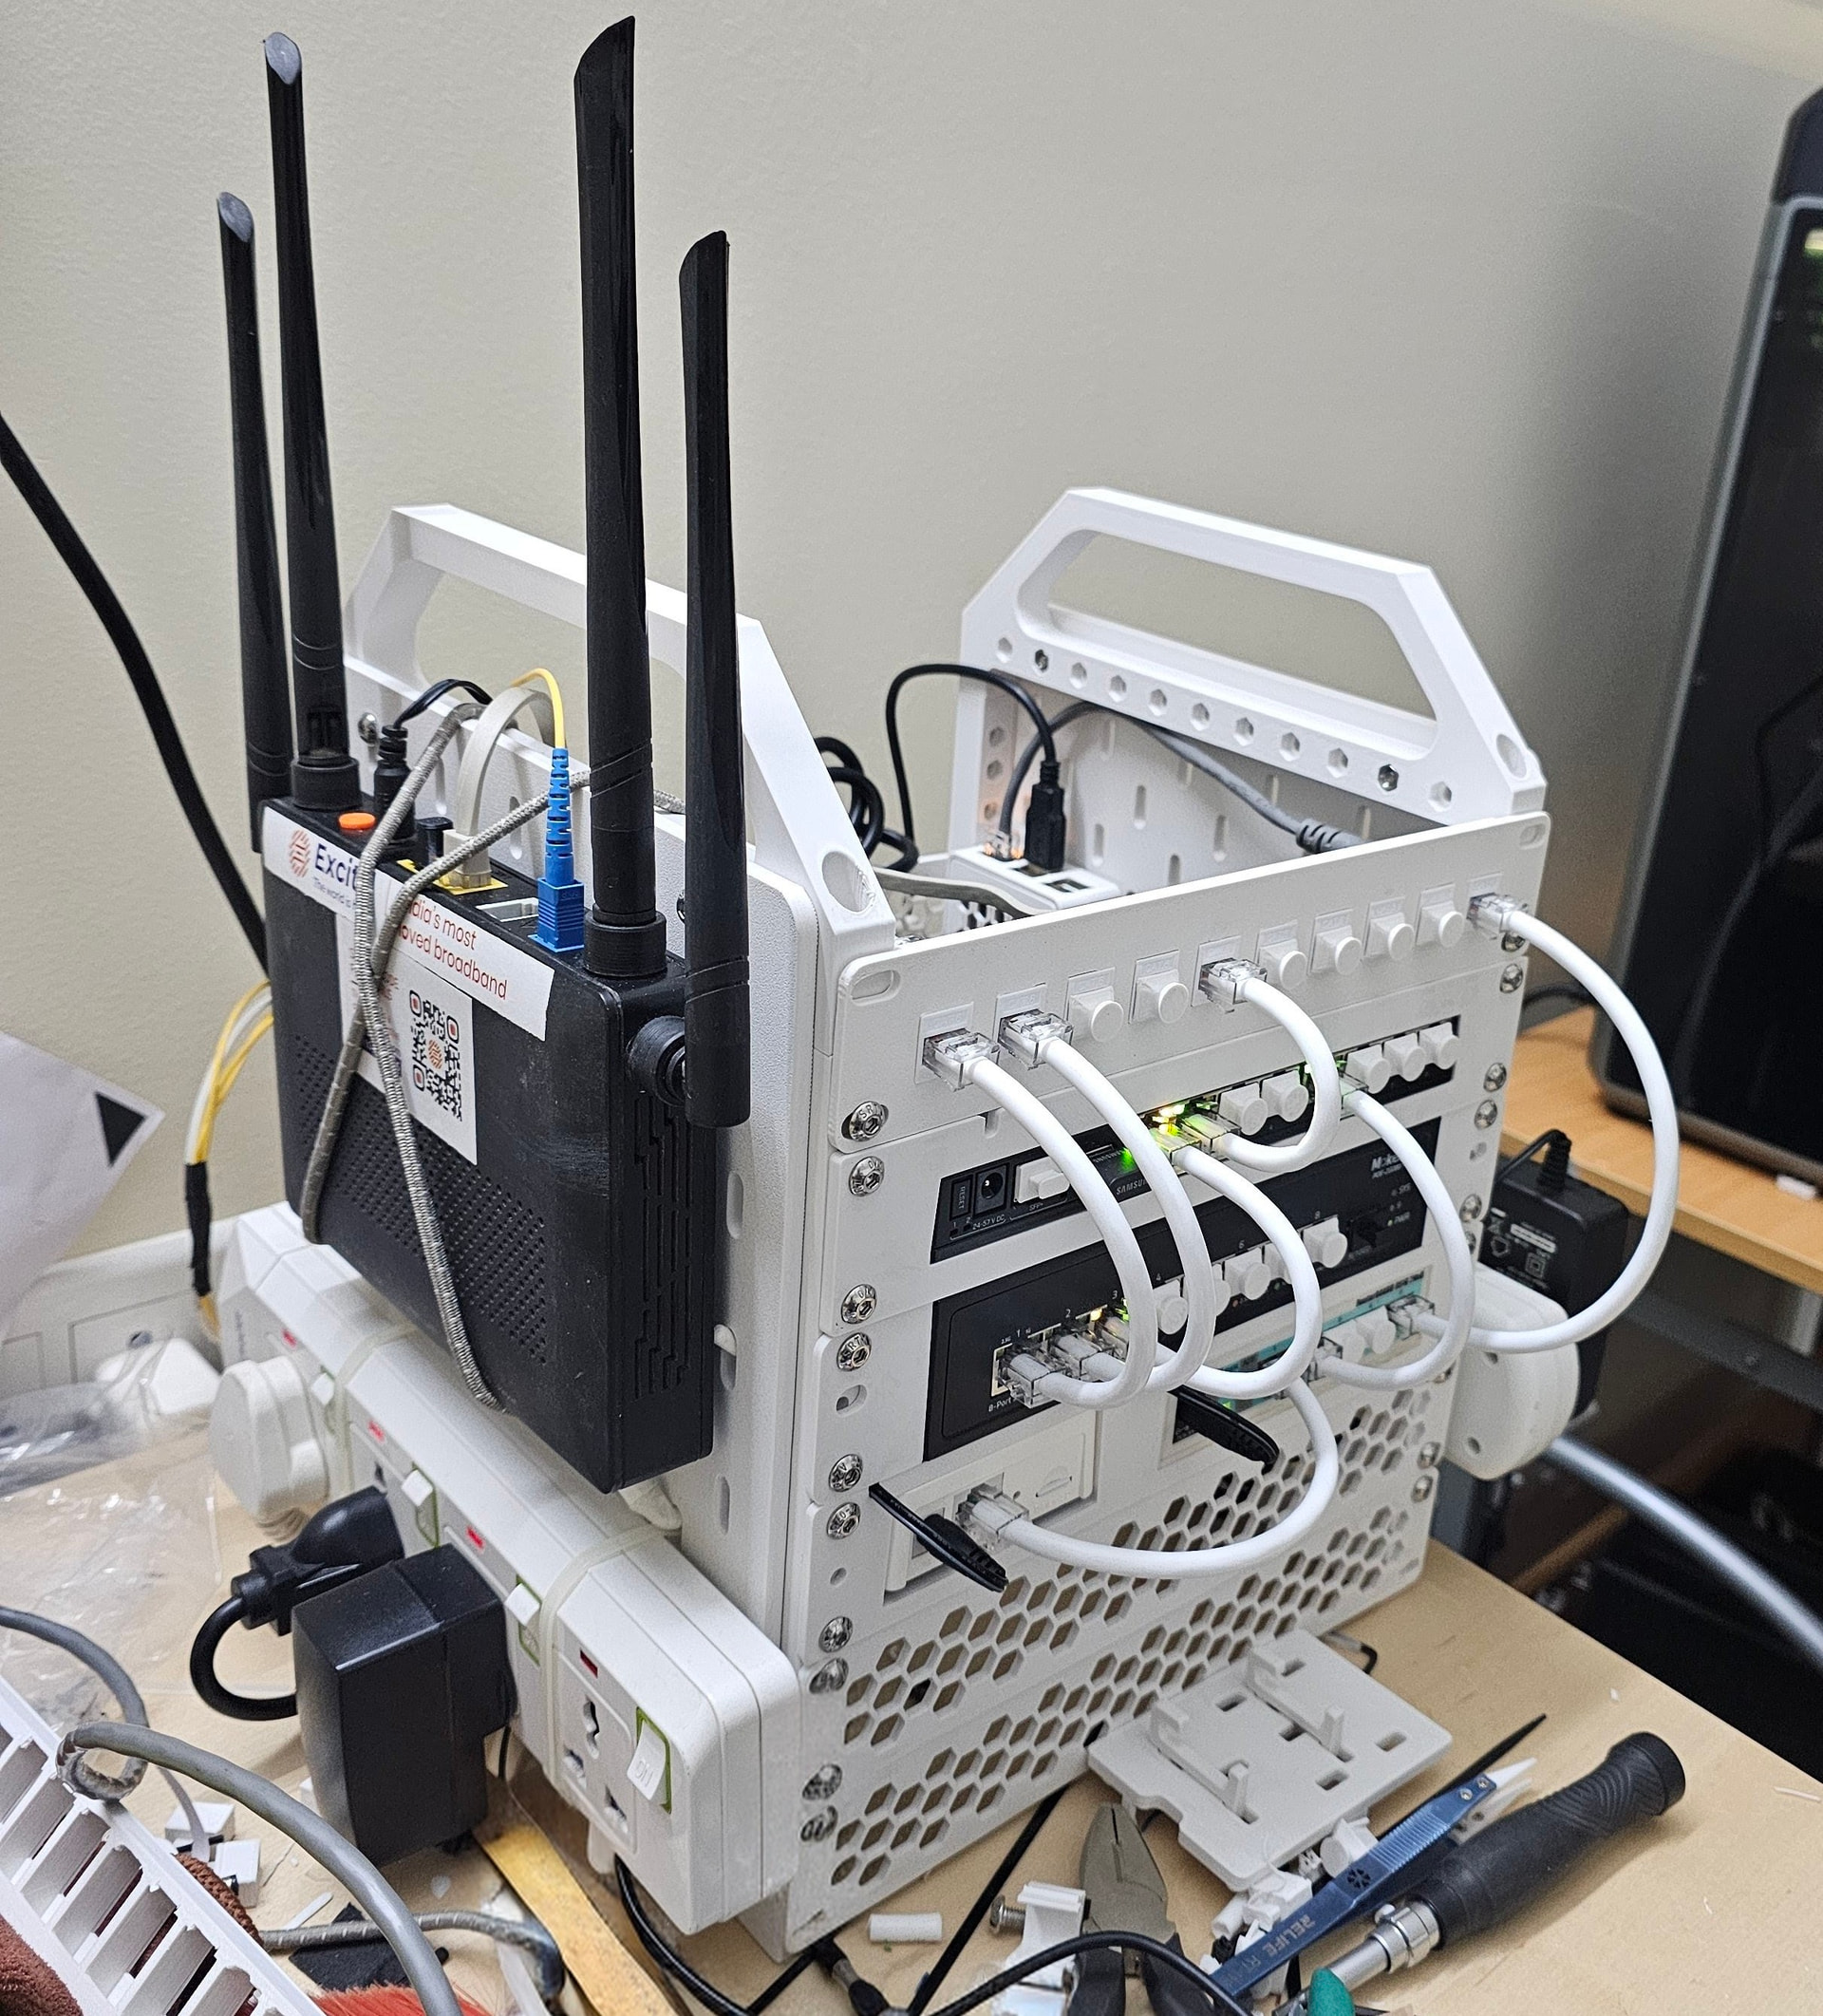
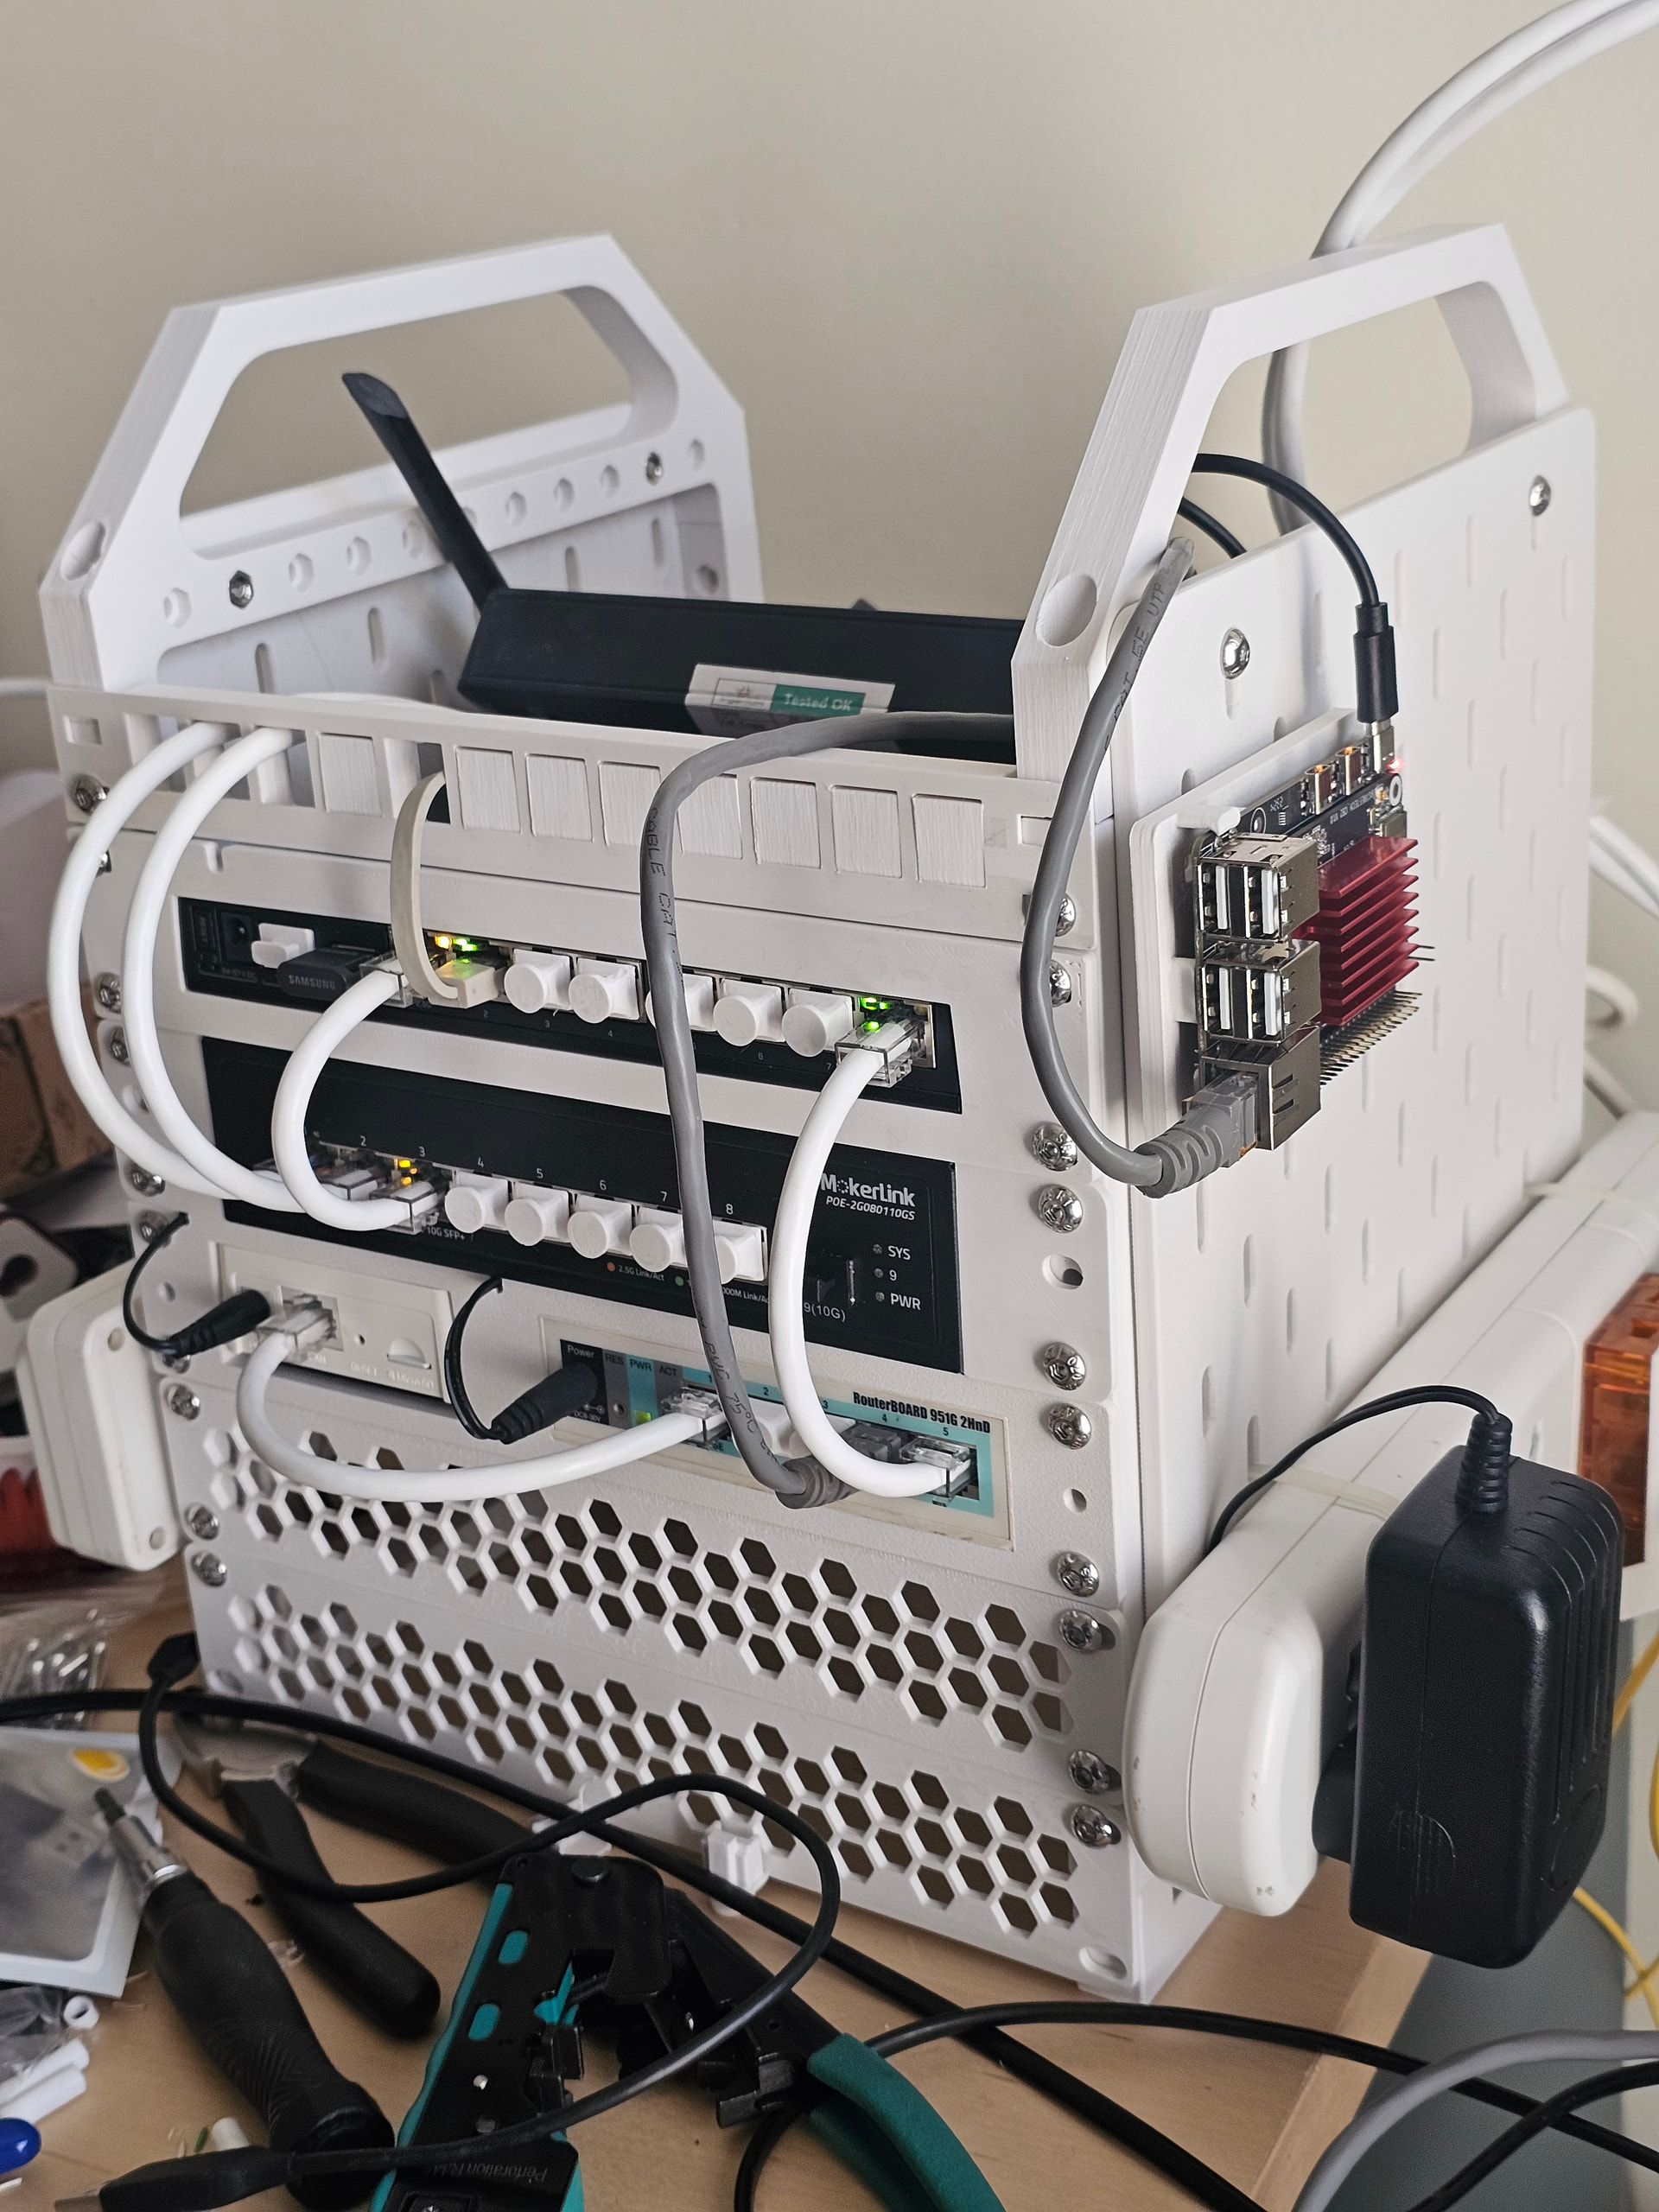
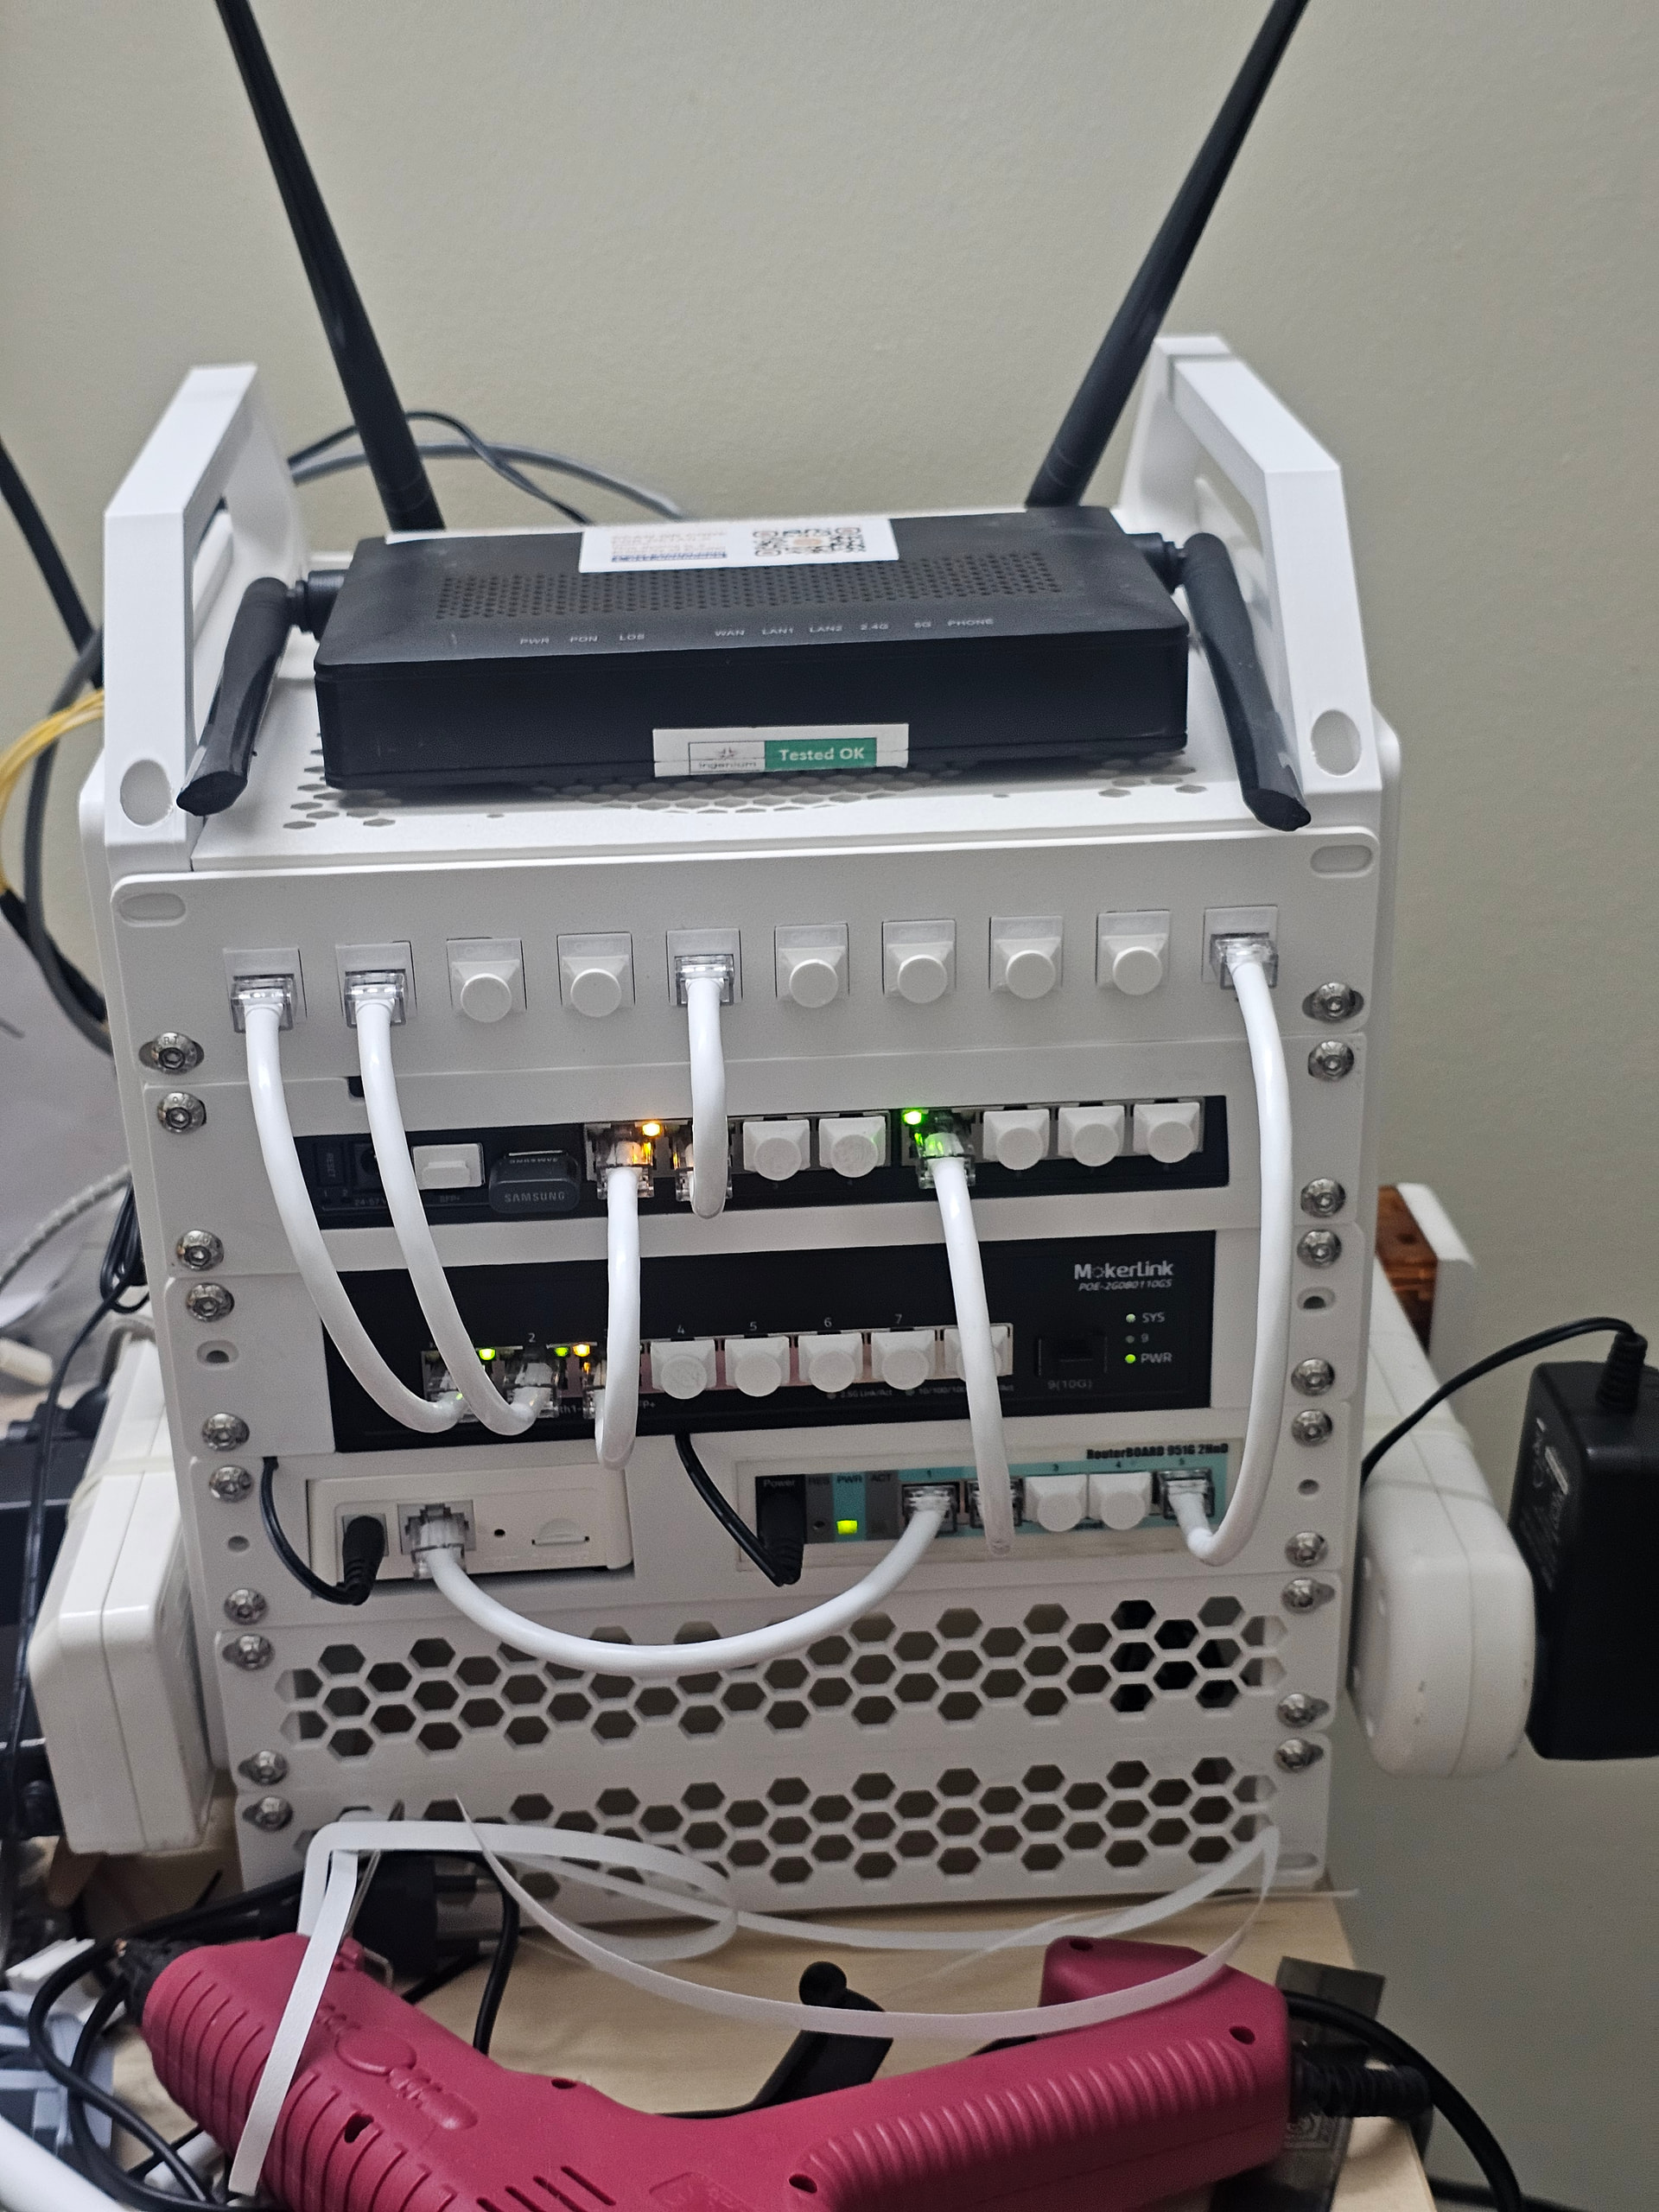
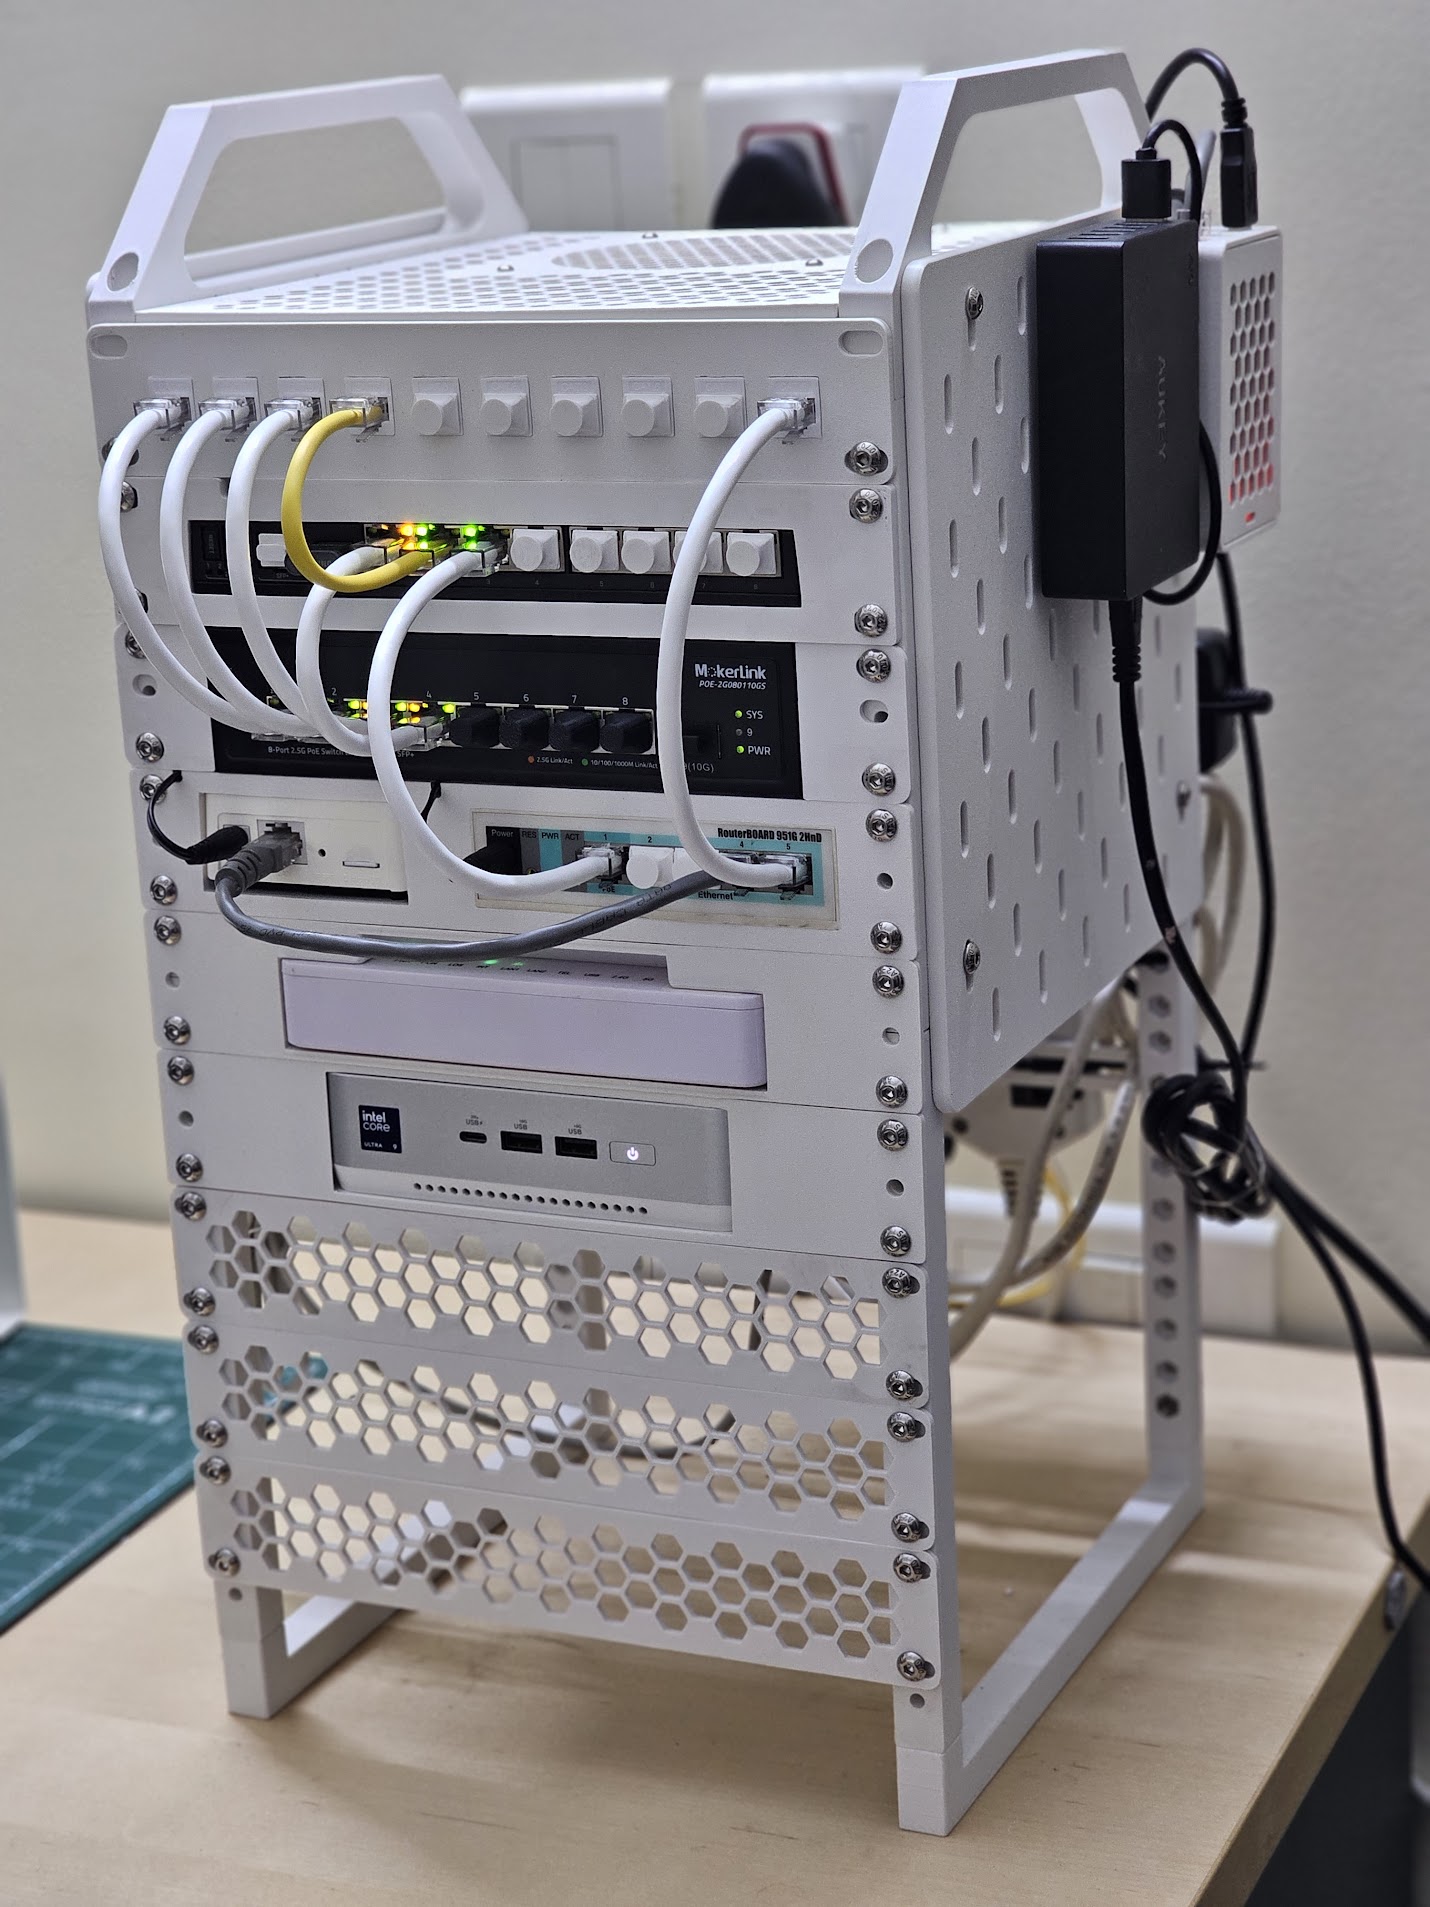
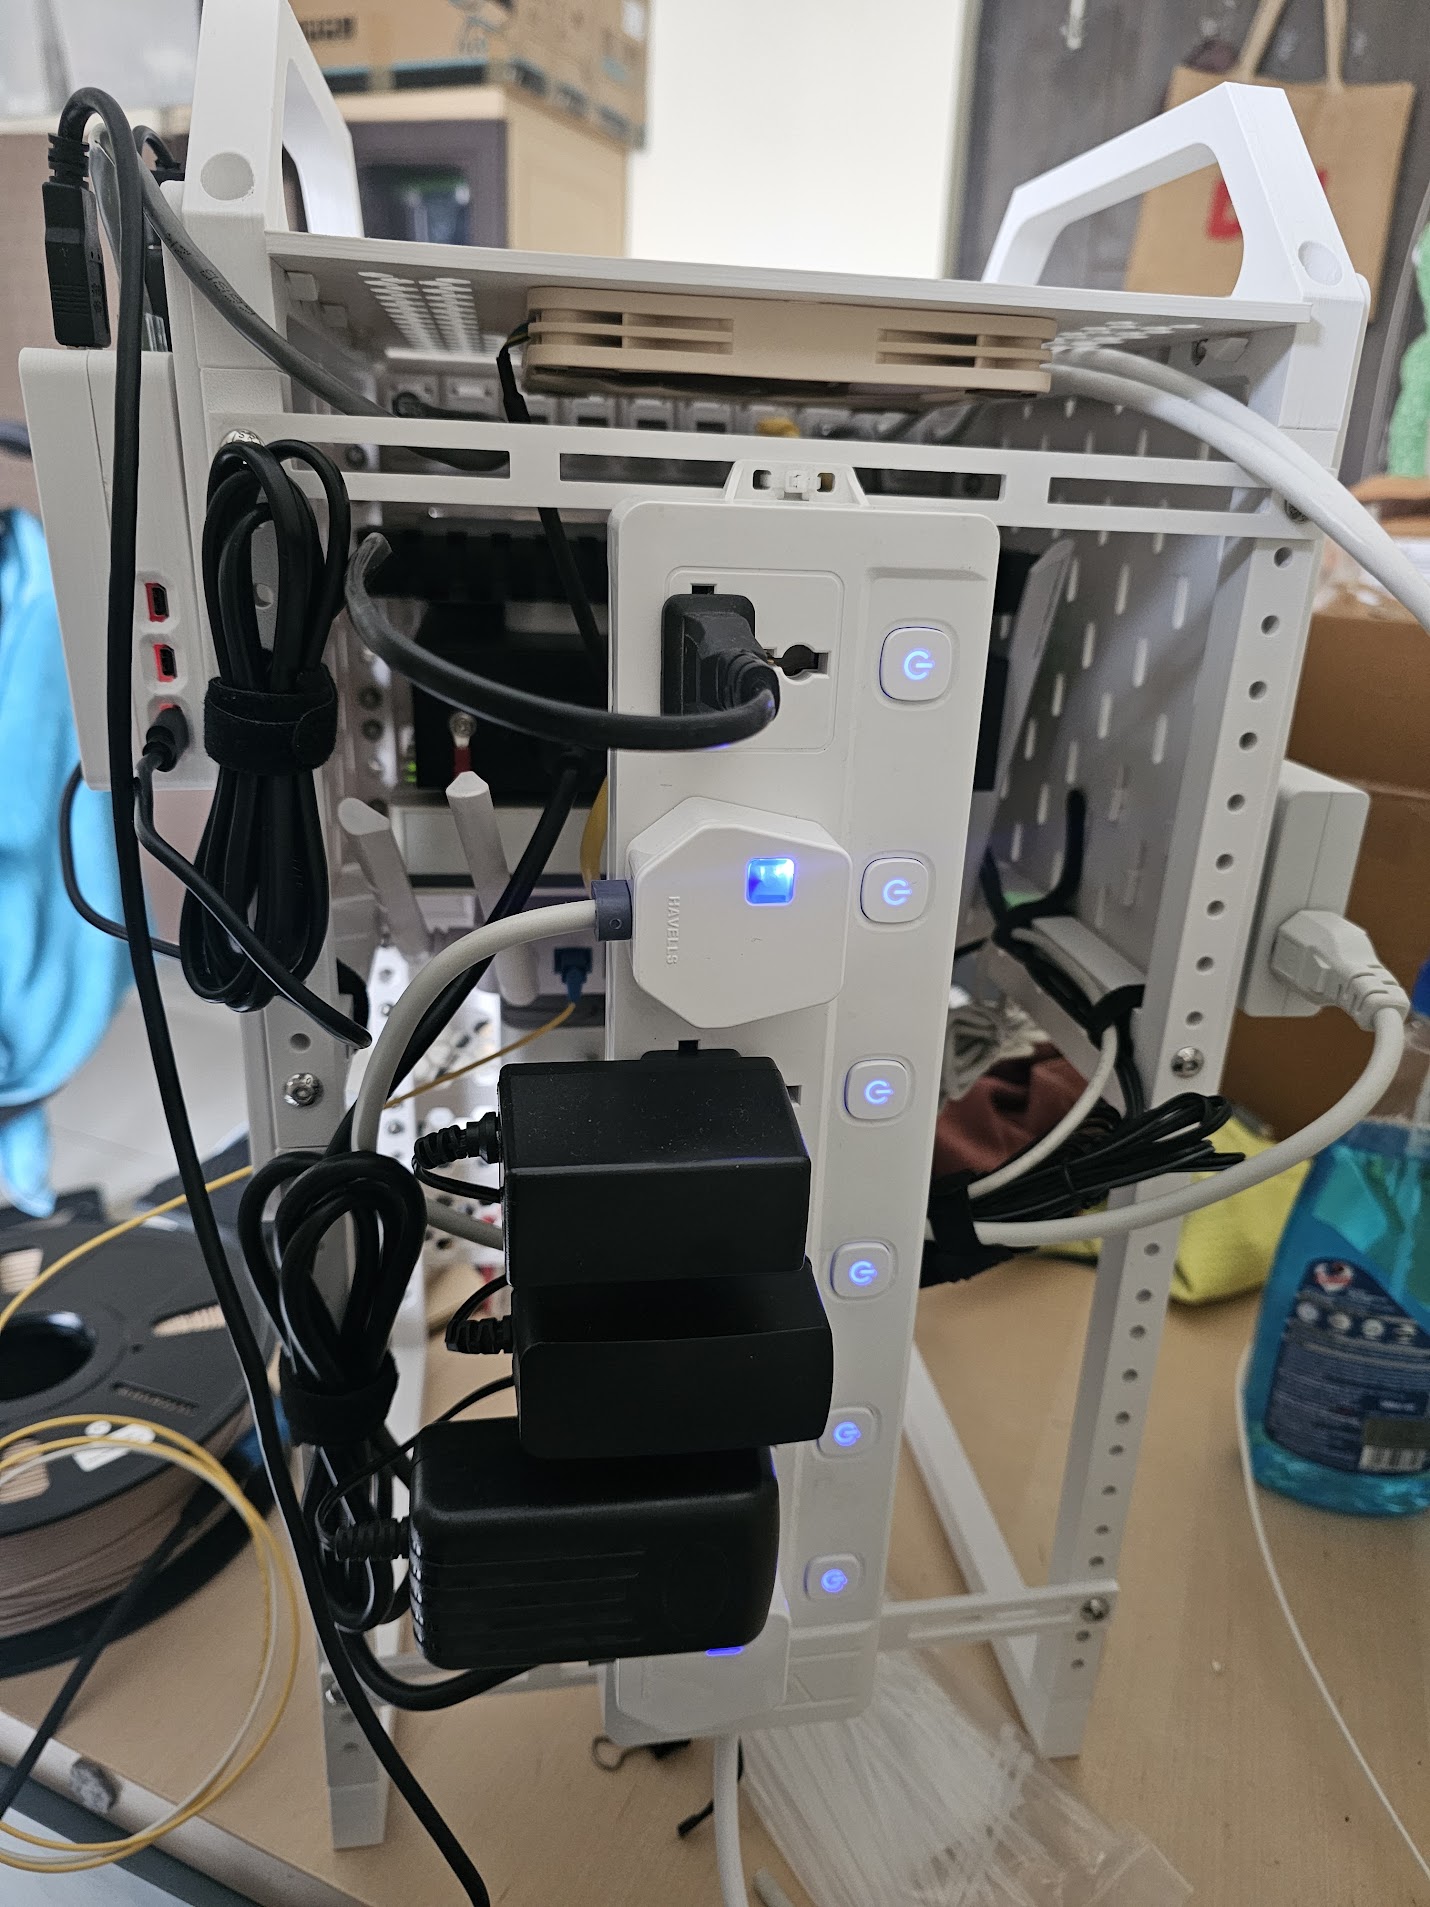
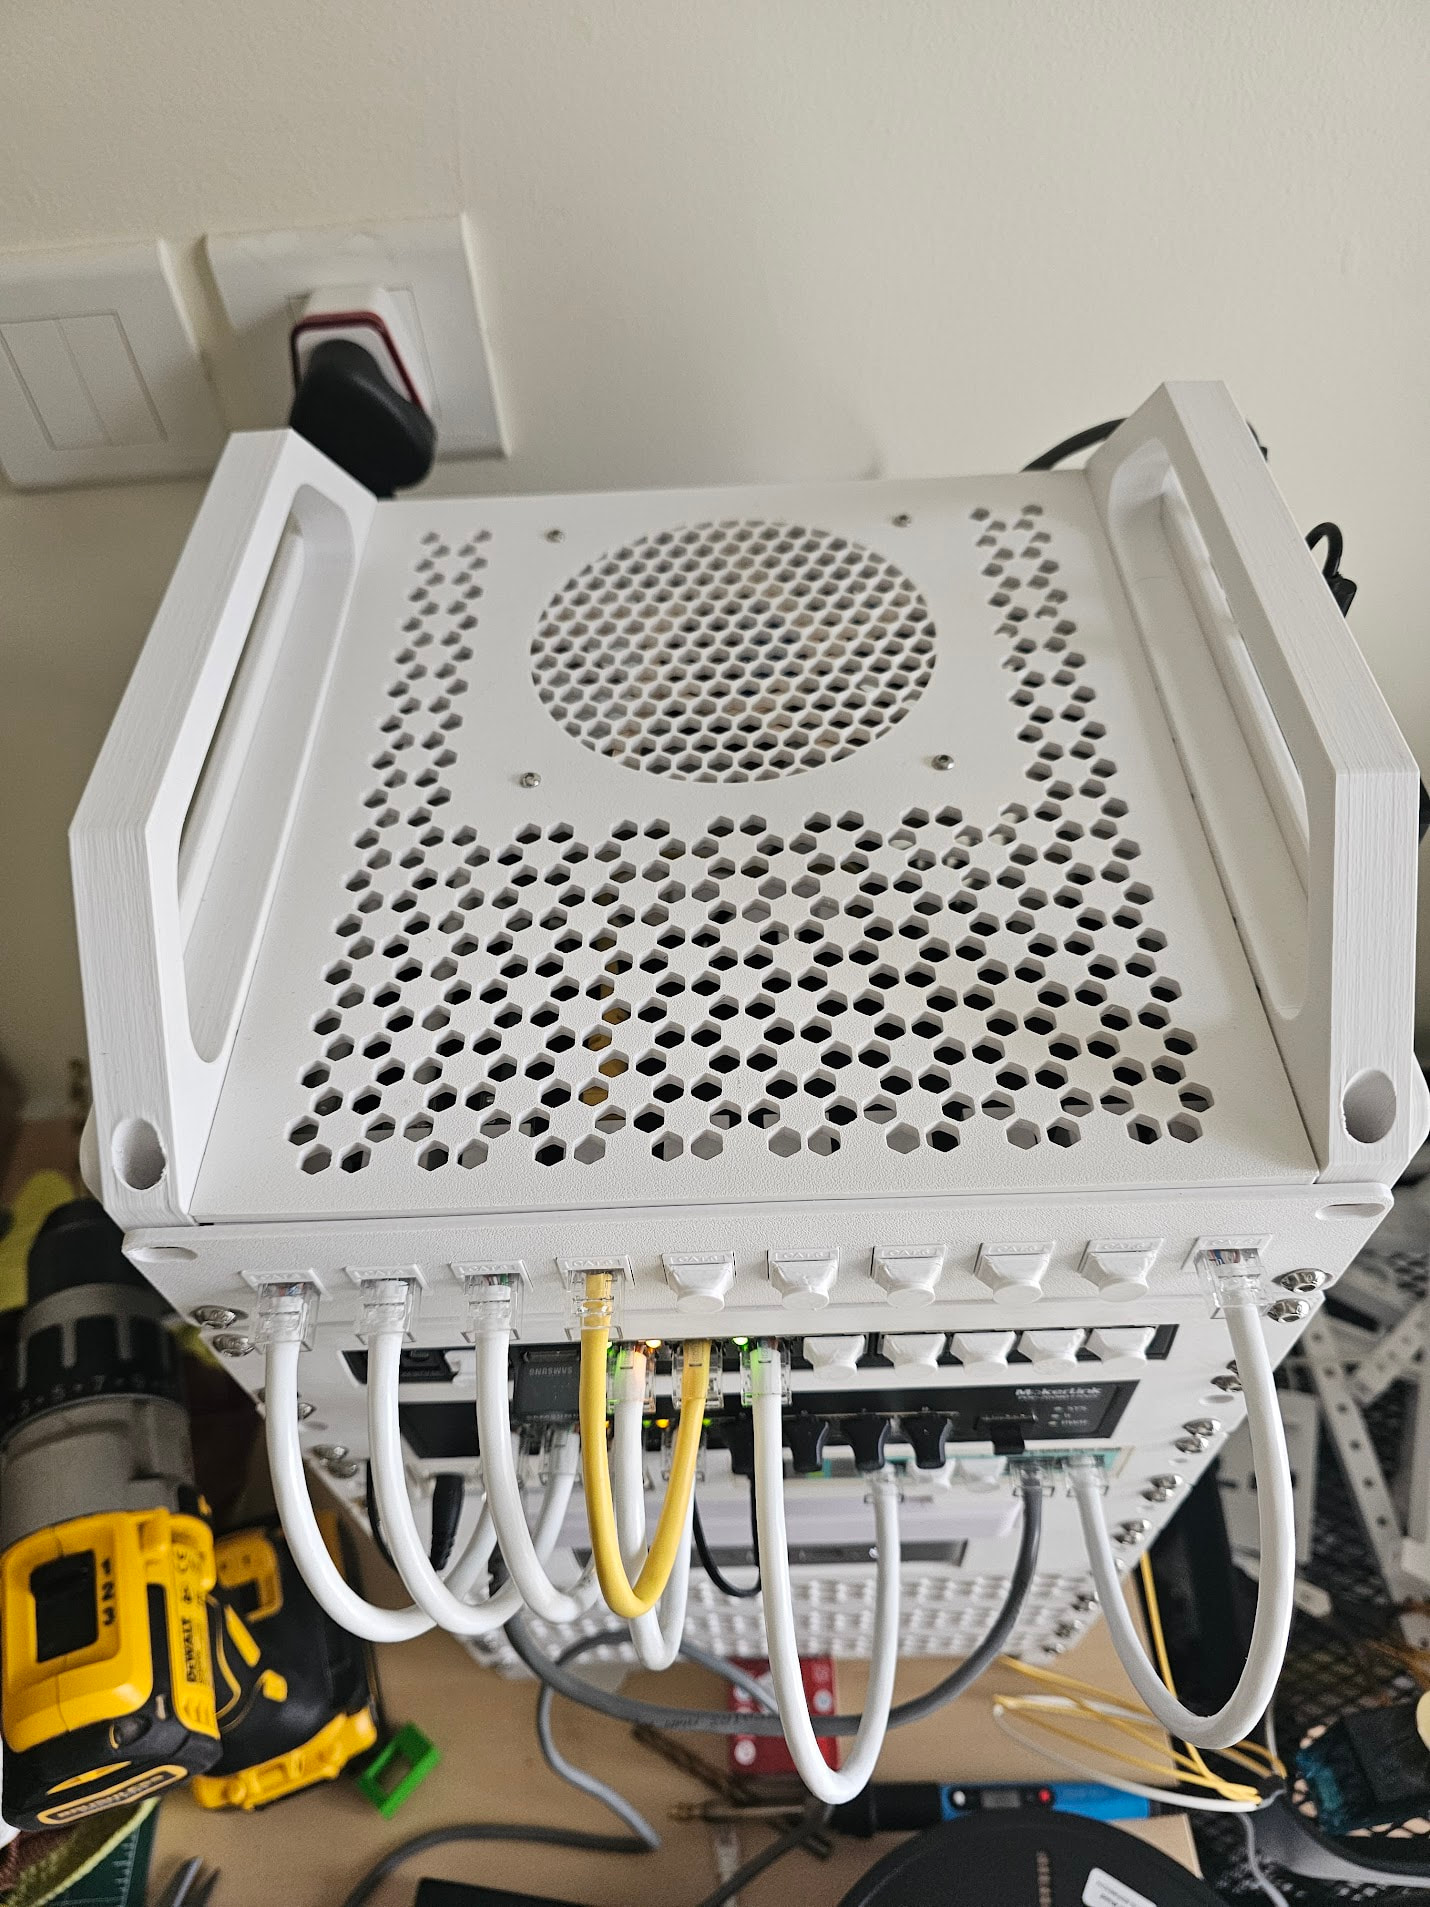
So the rack currently has the following units.
- 10 port keystone patch panel
- Mikrotik RB5009 (powered by the below mokerlink switch over POE)
- Mokerlink POE 2.5G switch (designed)
- Tapo hub and Mikrotik RB951 (designed)
- Excitel provided ONU (PPC 2K15X) (designed)
- Asus NUC14 Pro Plus rocking 96GB of ddr5 ram, yes I have to mention it. (designed)
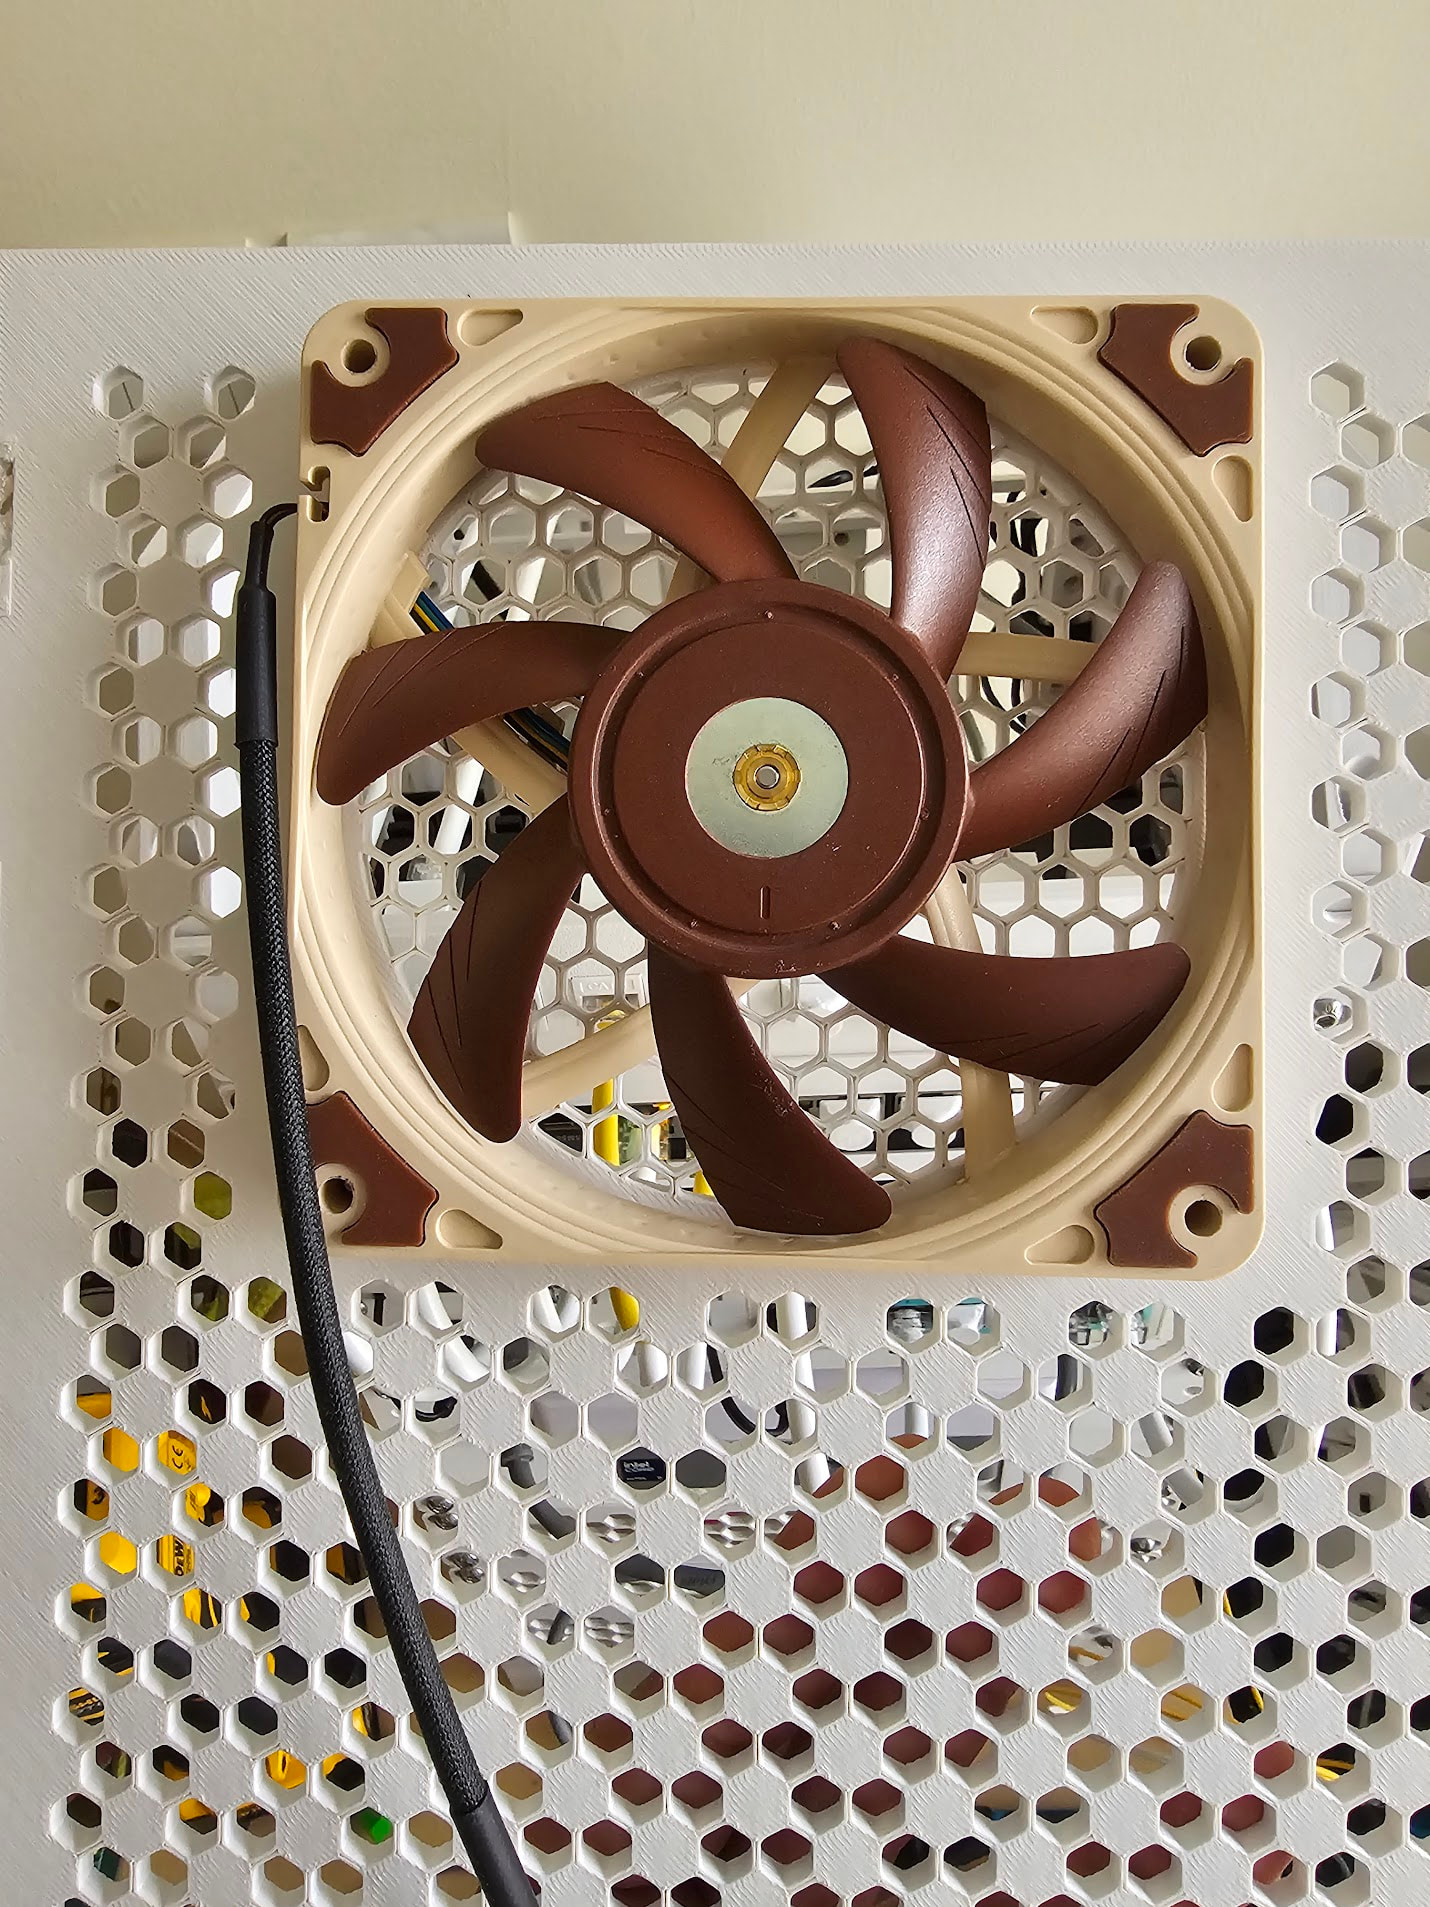
- The topper does have Noctua slim 120mm fan attached which I am planning to control using a ESP32 later on.
- A Rockchip RK3566 based CB2 SBC on the side skadis panel running home assistant.
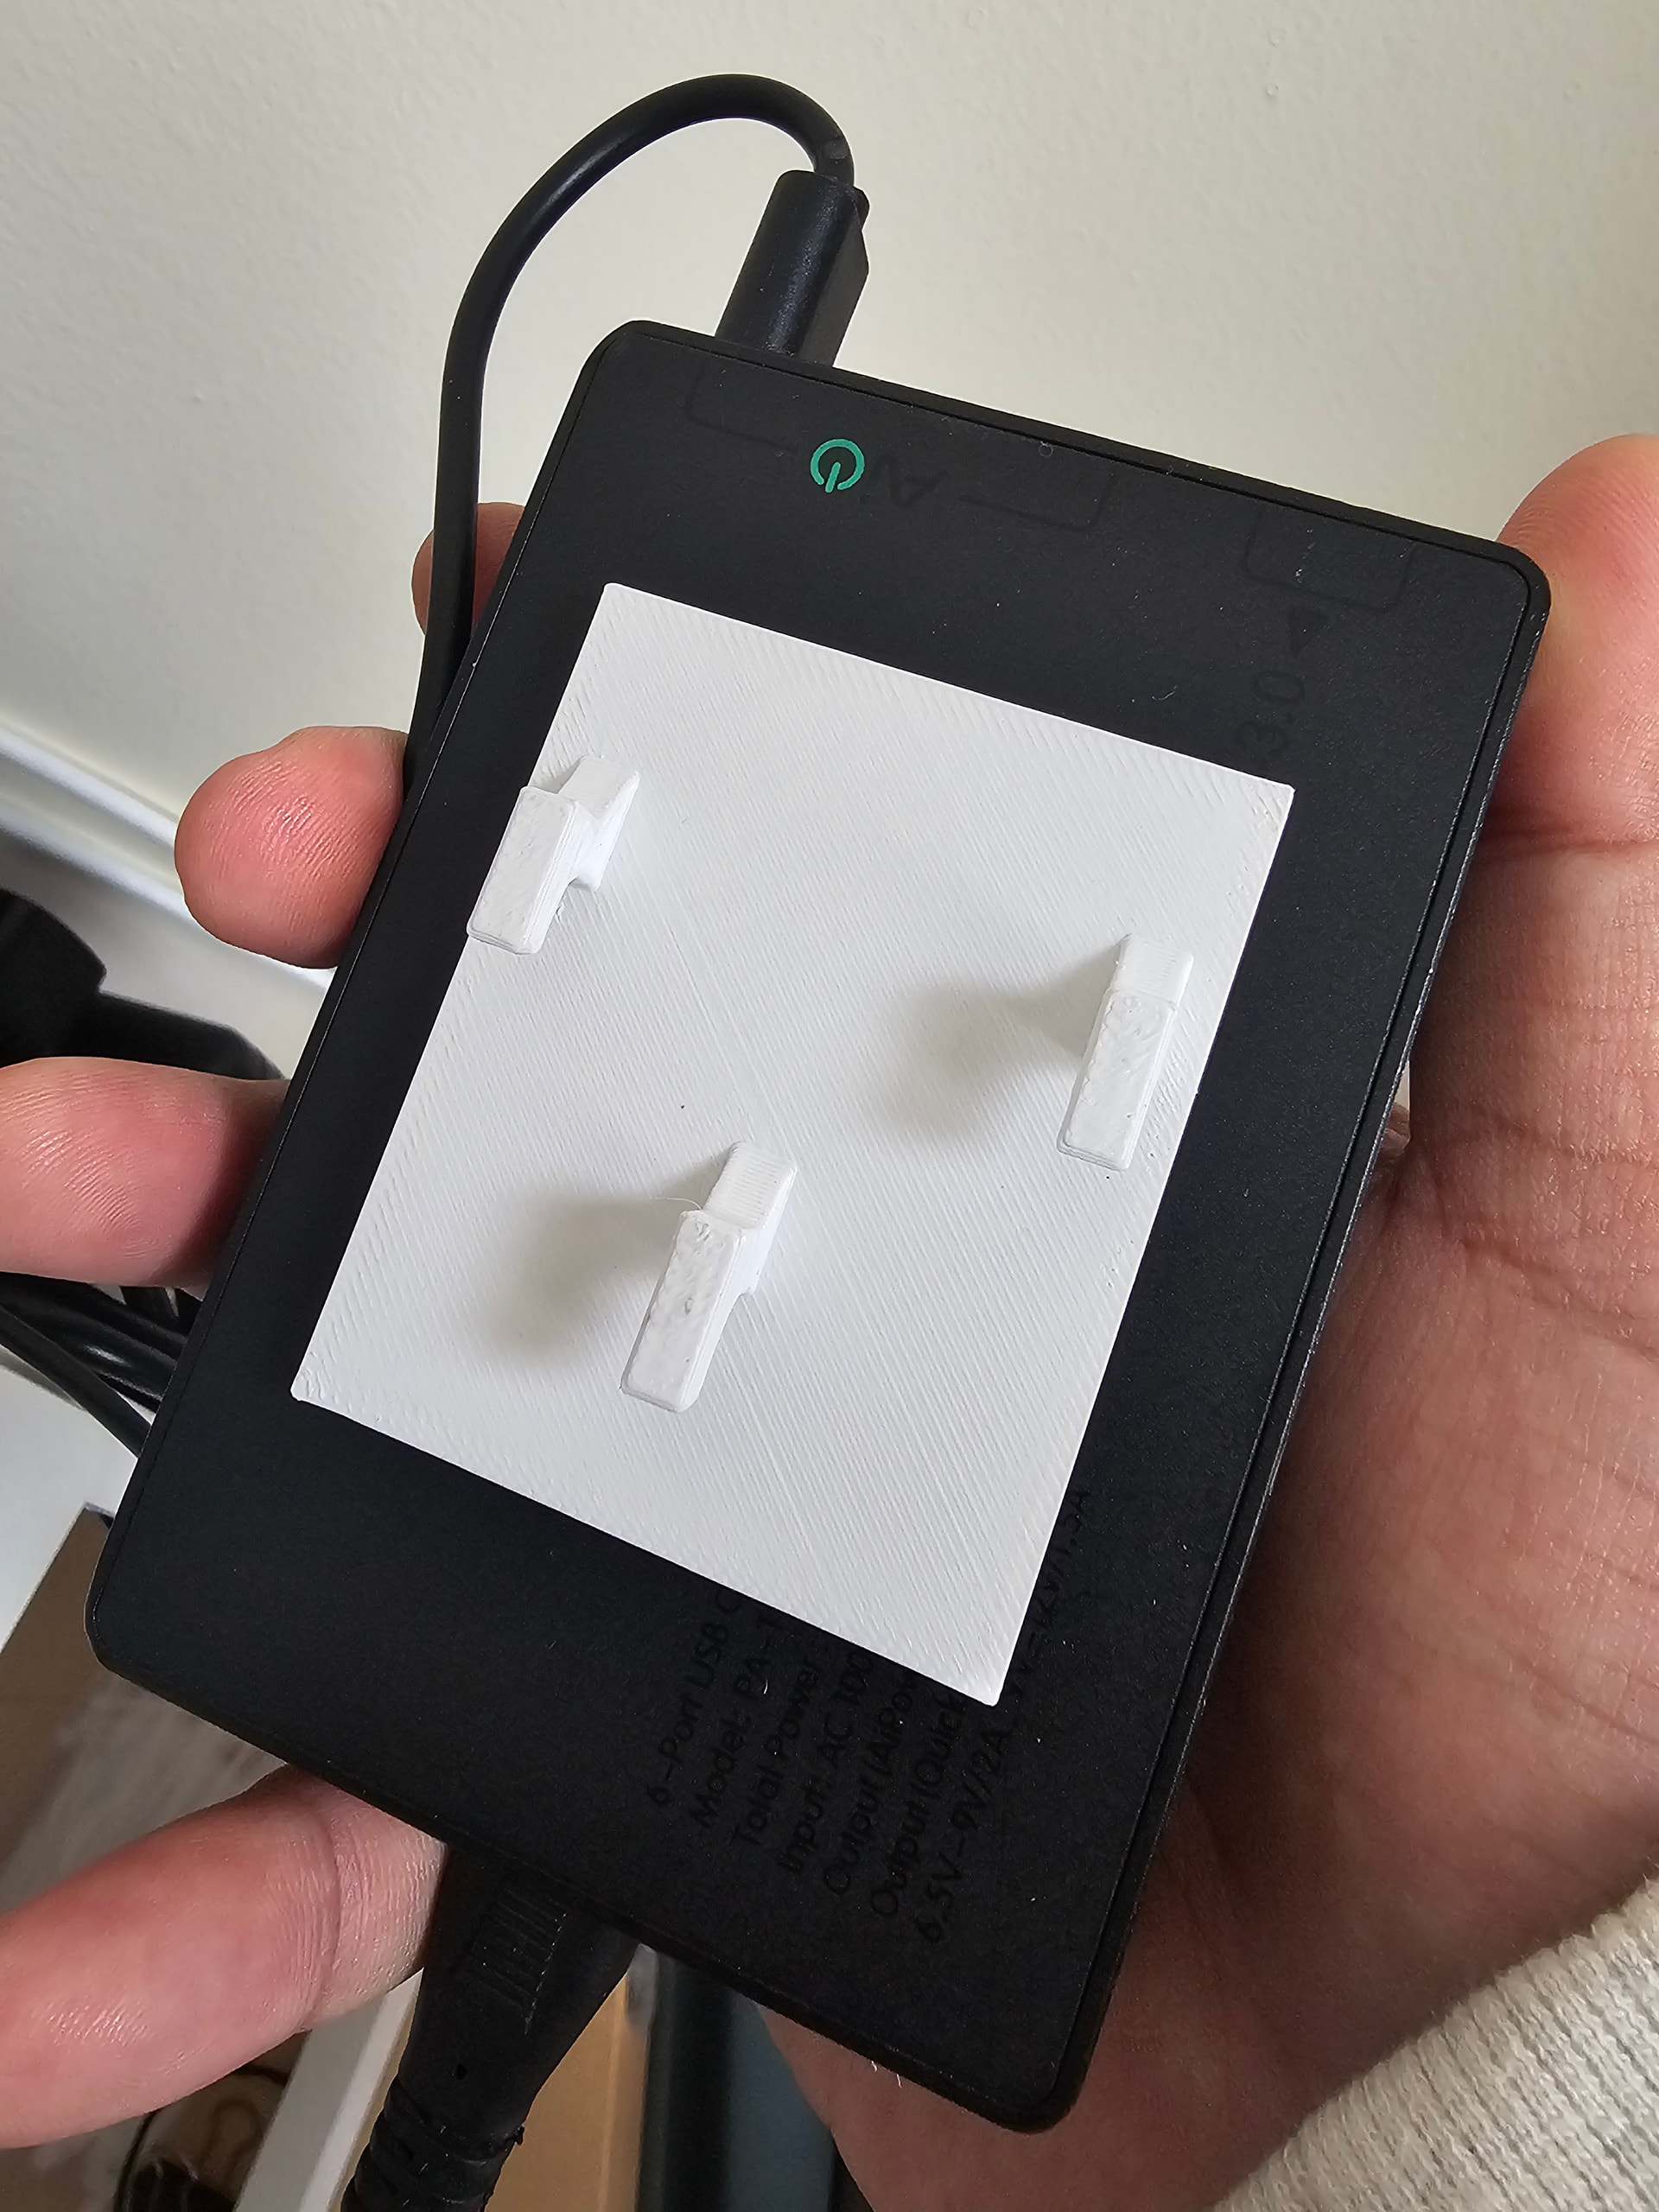
- An aukey 6port 60W USB charger.
The “Skadis” Extension: The coolest part of this design is the optional side panels. You can use custom skadis board generators to create side panels for the rack. This means the side of your server rack can hold cable management clips, WiFi antennas, or even external hard drives using existing Skadis hooks. The standard skadis doesn’t allow good cable management so I am trying to finalize a design where cable (atleast usb and DC) can be easily passed through.
You can also design your own mounts (although limited in nature) using the below openscad designer
https://makerworld.com/en/models/1765102-10-inch-mini-rack-generator
If anyone is interested in getting one printed, please feel free to message me. Do not expect me to charge just the cost of filament though. You will get everything in the package including the hardware etc.
| Mount Units | Depth | Price |
|---|---|---|
| 4U | 150mm | 1029 |
| 4U | 200mm | 1134 |
| 4U | 250mm | 1247 |
| 5U | 150mm | 1141 |
| 5U | 200mm | 1247 |
| 5U | 250mm | 1360 |
The above prices are just rough estimates without any mounts. Each configuration will include 4xRails, 2xLegs and 2xHandles for the selected depth. Mount prices will vary largely based on the design (6U and 7U can be printed as well). For example price for 1U keystone panel (as in my rack) of 10 ports is 250 (excluding the couplers). The above doesn’t include shipping as well