Hey Folks,
I am happy to share a successful DIY project for a 24GHz mmWave Human Presence sensor and integration with Home Assistant.
Short back story - I have setup all my Smart home devices via Home Assistant (also integrated all those devices
under Apple Homekit), among those Smart home devices I have setup few PIR sensors in few Bedrooms & Bathrooms and running Automations with those motion sensors & lights & exhaust fans.
PIR motion sensors are excellent at detecting motion with quick response time, however they have major shortcoming which is they don’t detect room occupancy if someone is sitting still/idle in a room and when there is a sensor reset/timeout, the lights would go off ![]()
Back to DIY story - I had been reading article & watching videos on YT about mmWave Human Presence sensors like the Aqara FP1 & FP2 sensor which were very effective in detecting human presence even if they are sitting/standing still, they are so effective that they even detect heart beats.
Buying/Importing Aqara Sensors turned out to be very expensive & even if I wanted to buy these sensors, they were out of stock most of the times, that I when I came across few new mmWave sensors which were released and could to be combined with a ESP nodemcu board for a DIY.
I followed the below video from @[digiblurDIY](’
https://www.youtube.com/@digiblurDIY’
) which was excellent and has very clear instructions in setting up & integrating the LD1125H Human presence sensor with Home Assistant
[This DIY mmWave Presence Sensor Changed Everything - LD1125H - YouTube](’
https://www.youtube.com/watch?v=VE62MAQDuCw&t=999s’
)
**[This DIY mmWave Presence Sensor Changed Everything - LD1125H How To Guide | digiblurDIY](’
This DIY mmWave Presence Sensor Changed Everything - LD1125H How To Guide | digiblurDIY’
)**
Now the challenge was to get hold of the LD1125H mmWave sensor, only option was to import it from the US or try Aliexpress (which was ruled out), fortunately for me a Indian supplier from Mumbai had imported these sensors and I was able order one sensor for DIY purpose ![]()
What do you need for the DIY?
1). HLK-LD1125H-24Ghz Sensor
2). ESP32 or ESP8266 NodeMCU Dev Board
3). Female to Female Jumpers
4). 5VDC Power Source (can be ur USB adapters also)
Hot Glue Gun (optional)
Soldering Gun (optional)
Note - the guy in the video had chosen to include BME280 (Temp & Humidity) sensor to the setup, which is optional and I skipped the same.
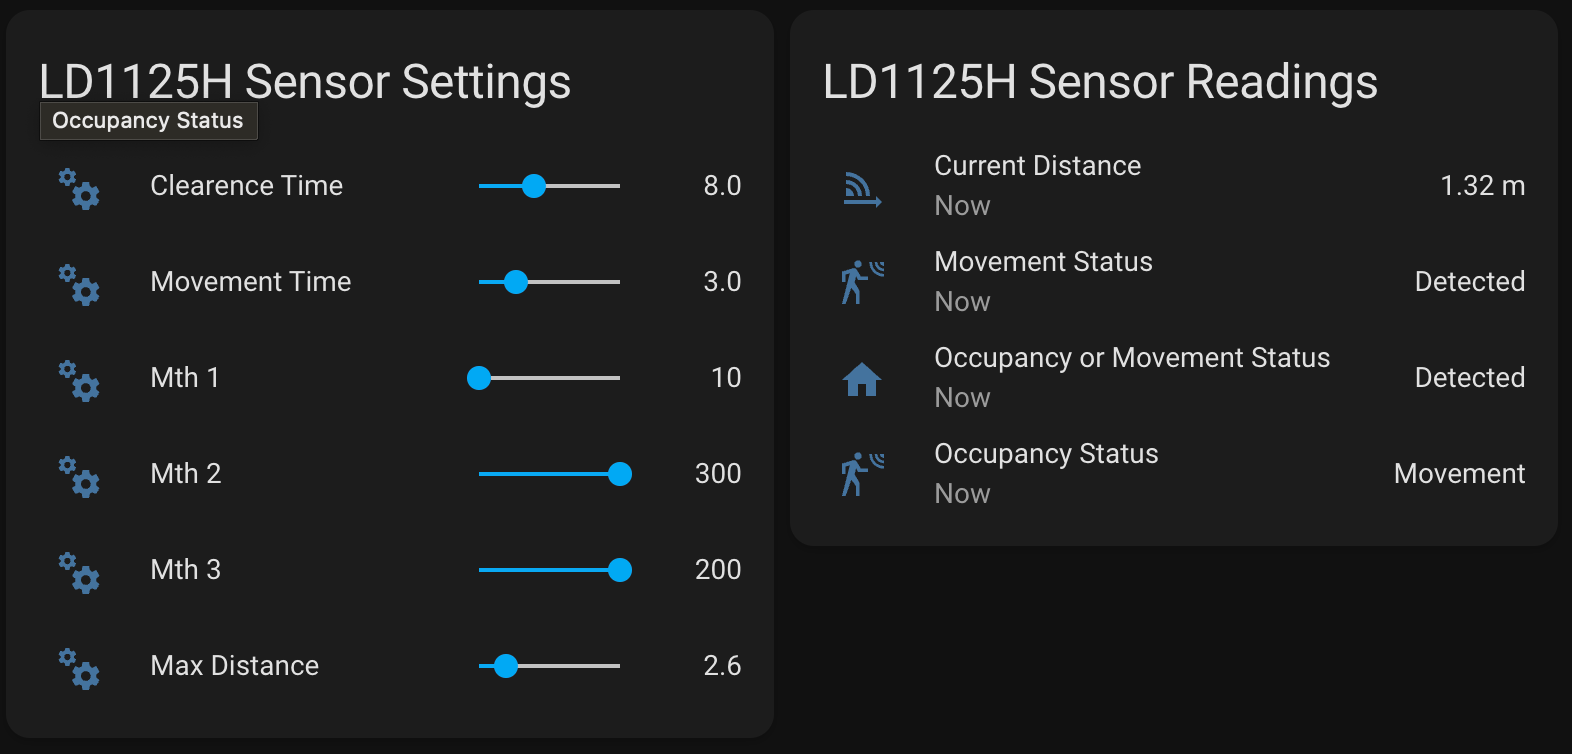
The entire DIY process went smooth thanks to the video and I was able to flash ESPHome firmware & integrate the device with my Home Assistant setup, I placed this Sensor in one of my bathrooms and I fiddled around with the settings (distance, sensitivity, clearence time - refer the above video for more details) for the best results, I am happy to work the entire setup works perfectly as per my requirement, the bathroom is around 35 sqfeet with 10 feet high and I placed the sensor on one of the side walls (you can even place it in the ceiling).
I am currently looking for a 3D printed case which can hold the ESP board and also the sensor.
Expenses for the DIY
- LD1125H Sensor - ₹1400 (including GST)
- ESP32 node mcuboard - ₹500
- Jumper wires - ₹100
Didnt have to buy a 5v USB adapter since I had spare ones.
my Sensor reading & settings
my current makeshift setup
[ ](’
](’
IMG-3752 hosted at ImgBB — ImgBB’
)
[ ](’
](’
IMG-3559 hosted at ImgBB — ImgBB’
)
If any TE member is interested in above DIY or have any questions, feel free to reachout to me, happy to help.