Hello folks,
I have noticed that file sharing between Windows PCs and iOS devices isn’t as well understood as it should be. Most guides out there over complicate things, but it’s actually pretty simple.
Below, I will walk you through the process of setting up easy file sharing between Windows and iOS without needing any app or to mess with IPs or configure static IPs.
Only requirement is your iPhone and PC has to be on the same network and you have to do this small setup only once. ![]()
Step 1: Ensure Your Local Account Has a Password
For this to work, make sure your Windows user account has a password set. File sharing won’t work without it, so take a second to set that up if you have not already.
Step 2: Set Your Network to Private
Now, we need to ensure that your Windows PC is on a private network:
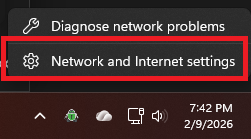
- Right click on the Internet access icon in your taskbar.
- Select Network & Internet settings.
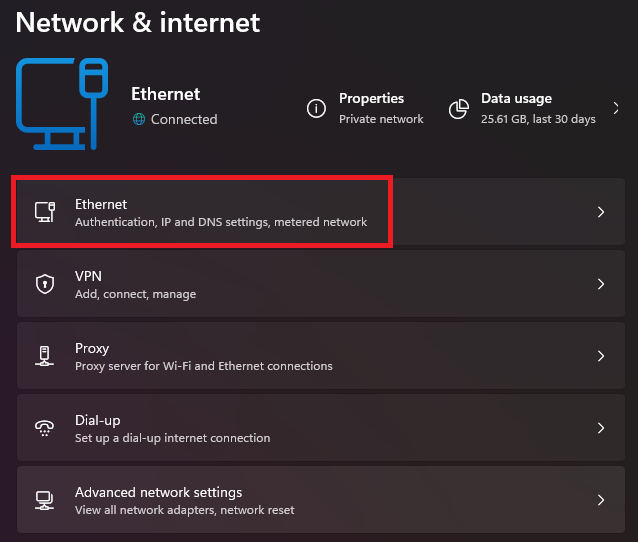
- Click on Ethernet (or Wi-Fi if you’re using a wireless connection).
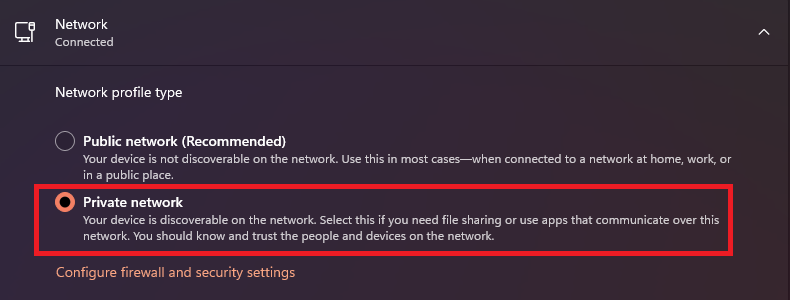
- Set your network to Private.
Step 3: Modify Advanced Sharing Settings
Next, let’s tweak a few sharing settings in Windows to ensure everything is properly configured:
- Go back to Network & Internet settings, but this time, click on Advanced network settings.
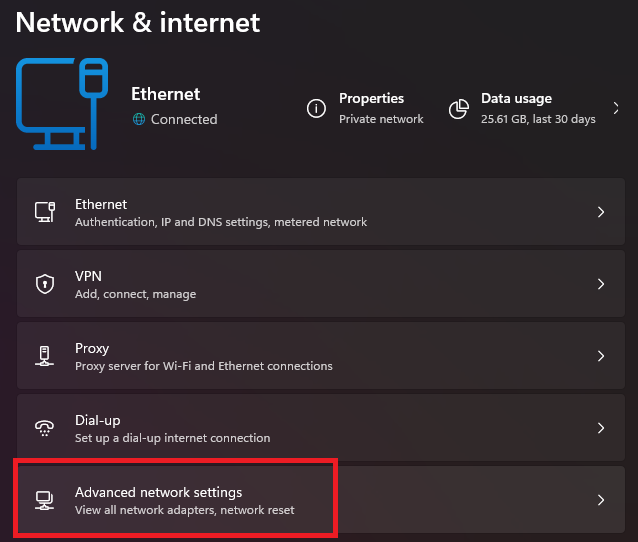
- Under Advanced network settings, select Advanced sharing settings.
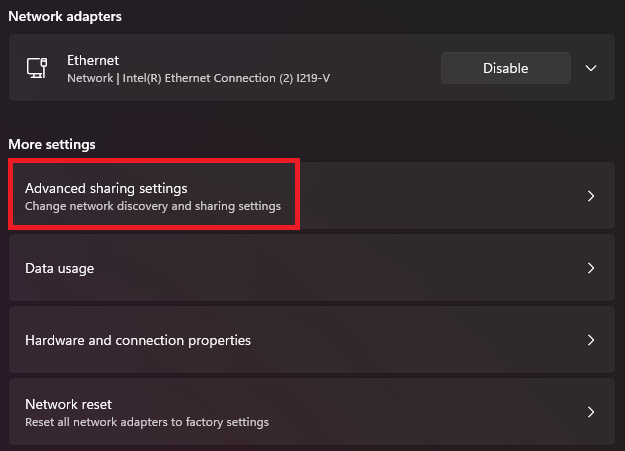
- Ensure that File and printer sharing is turned on (this is the only change you’ll need to make). Leave the other options as they are (these are typically the default settings).
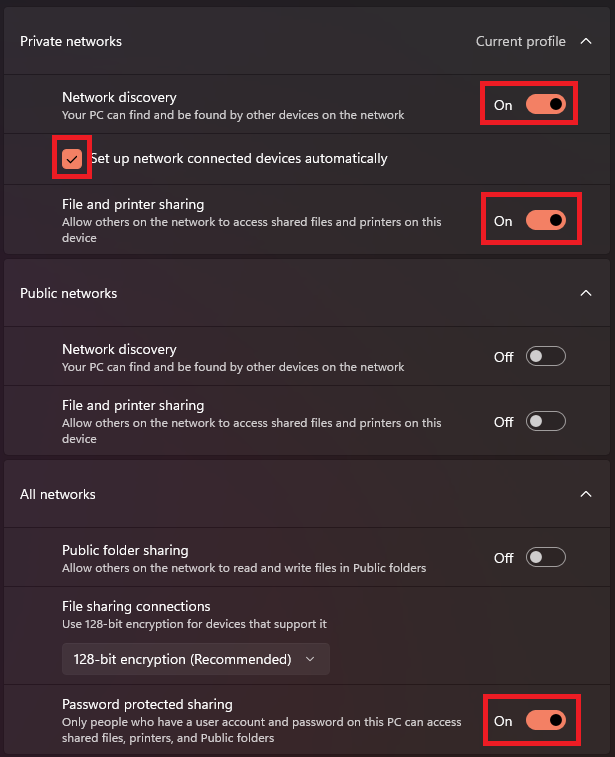
This makes your PC discoverable on the network.
Step 4: Share a Folder
You are almost there, Now, let’s set up a shared folder:
- Create a new folder anywhere on your PC. For example, create one on your Desktop.
- Right click on the folder and select Properties.
- Share it this way.

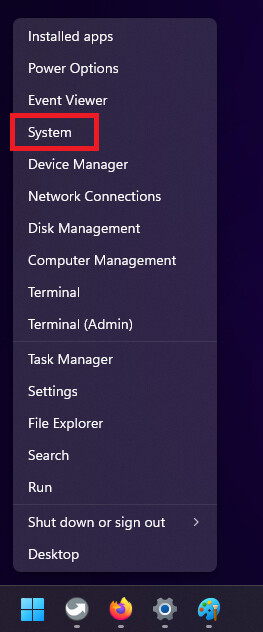
Step 5: Find Your PC’s Device Name
Now, we need your Windows PC’s device name to connect it to your iOS device:
- Right click on the Start button and select System.
- In the Device specifications section, you’ll see your PC’s Device name. By default, it will be a cryptic name (e.g.,
DESKTOP-1234XYZ), but you can change it to something more recognizable.
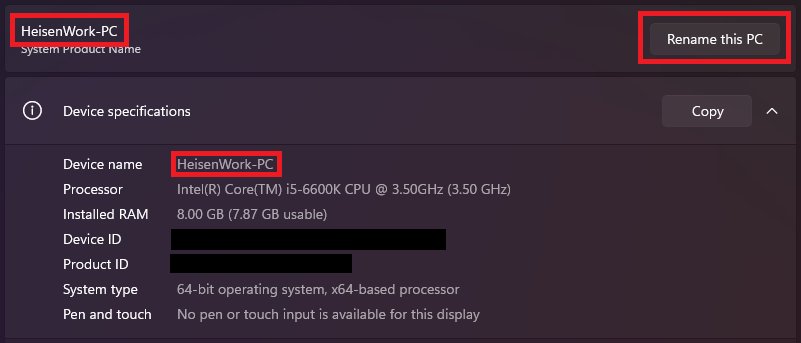
If you decide to rename it, a reboot will be required to apply the change.
Step 6: Connect from iOS
Now we’ll move to the iOS side of things. Here’s how to connect to your Windows PC from an iPhone or iPad:
- Open the Files app on your iOS device.
- Tap on the Browse tab, then tap Connect to Server (you’ll find this option in the three dots menu).
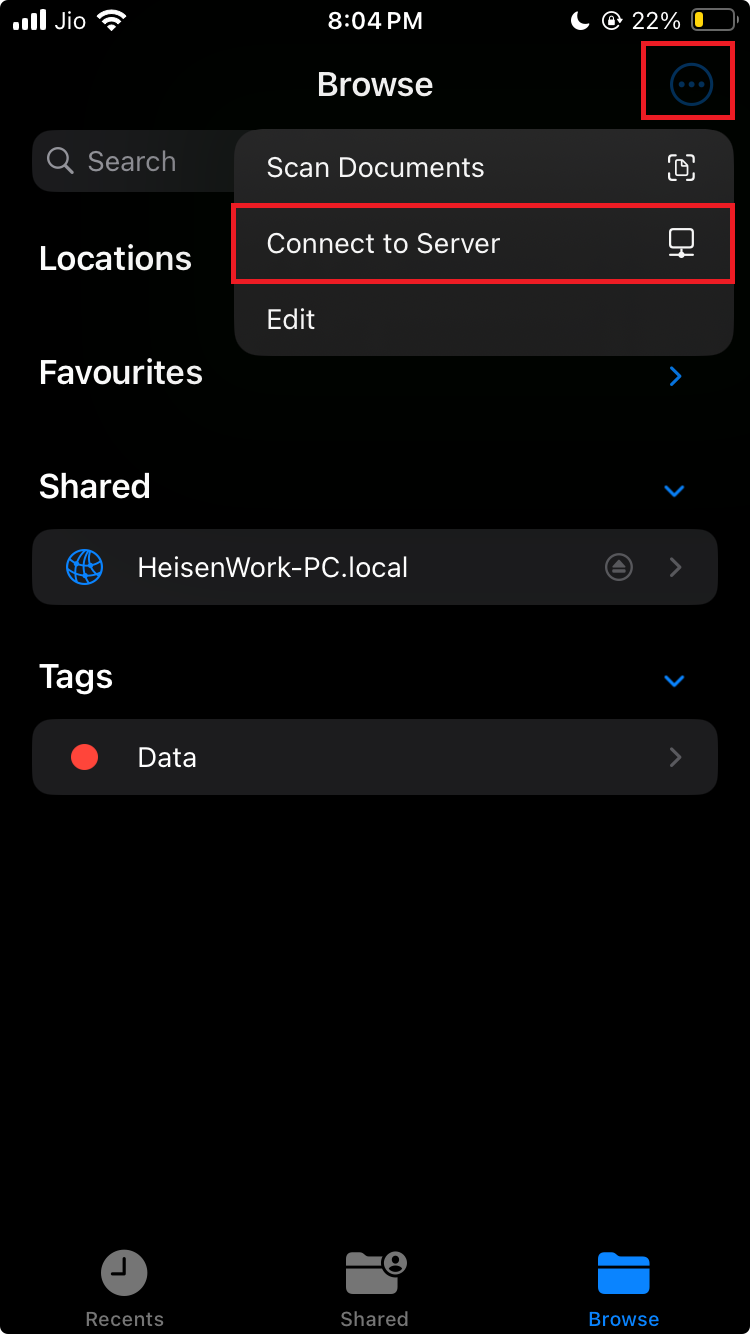
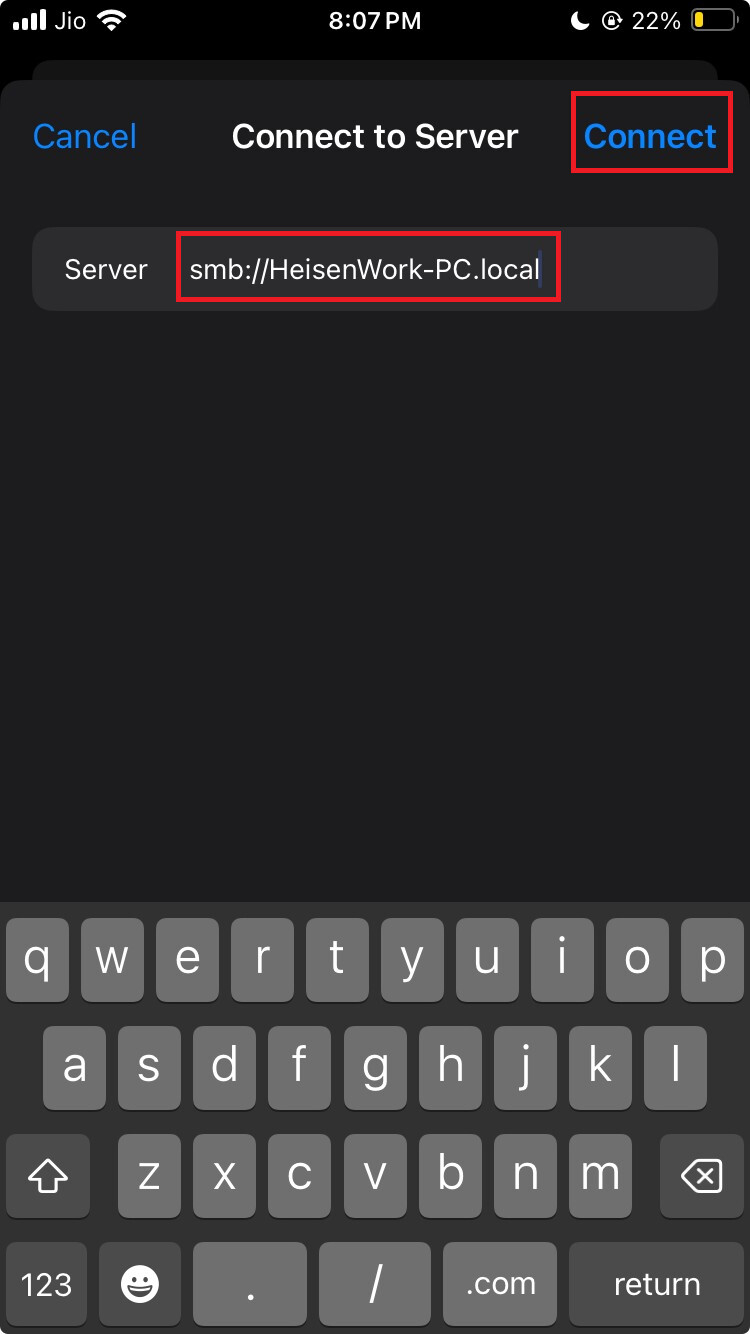
- Enter your Windows PC’s device name in the following format:
smb://[PC_Device_Name].local(e.g.,smb://HeisenWork-PC.local).- Tap Connect.
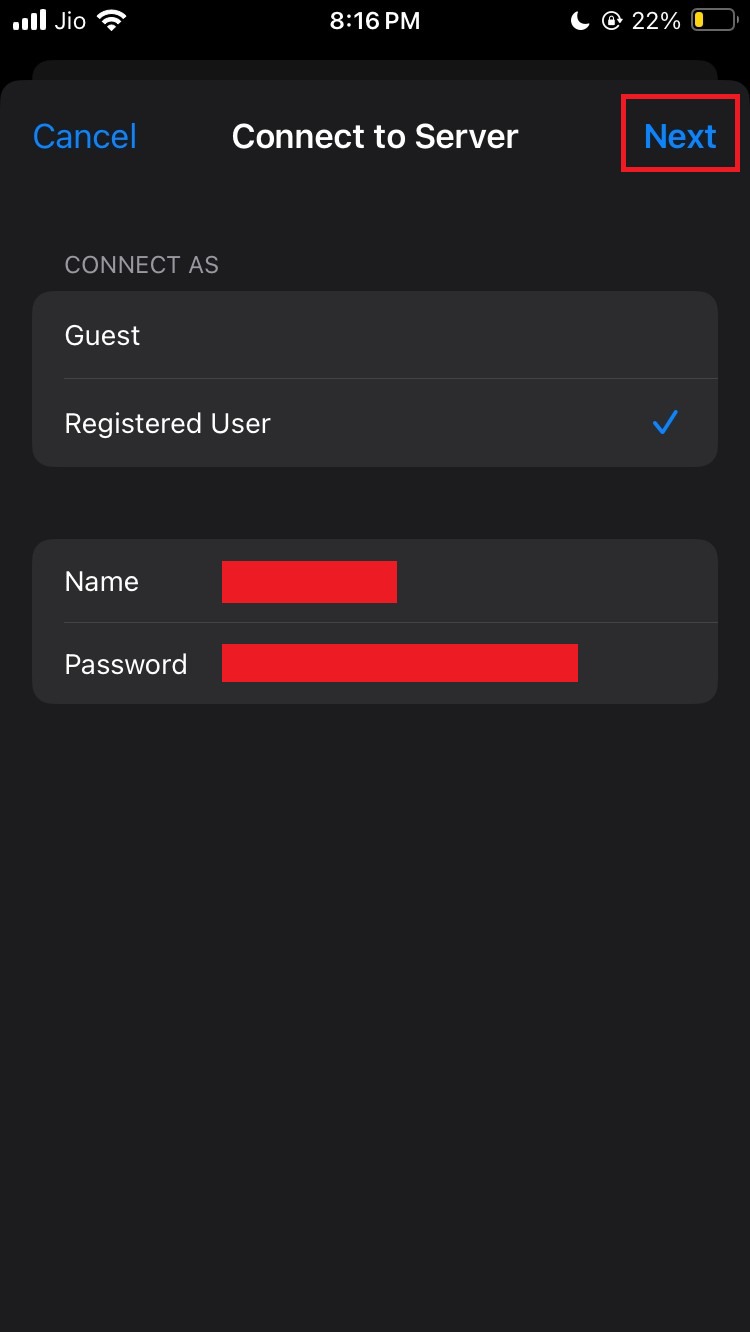
- It will then prompt you for the login credentials. These are the same credentials you use to log into your Windows PC.
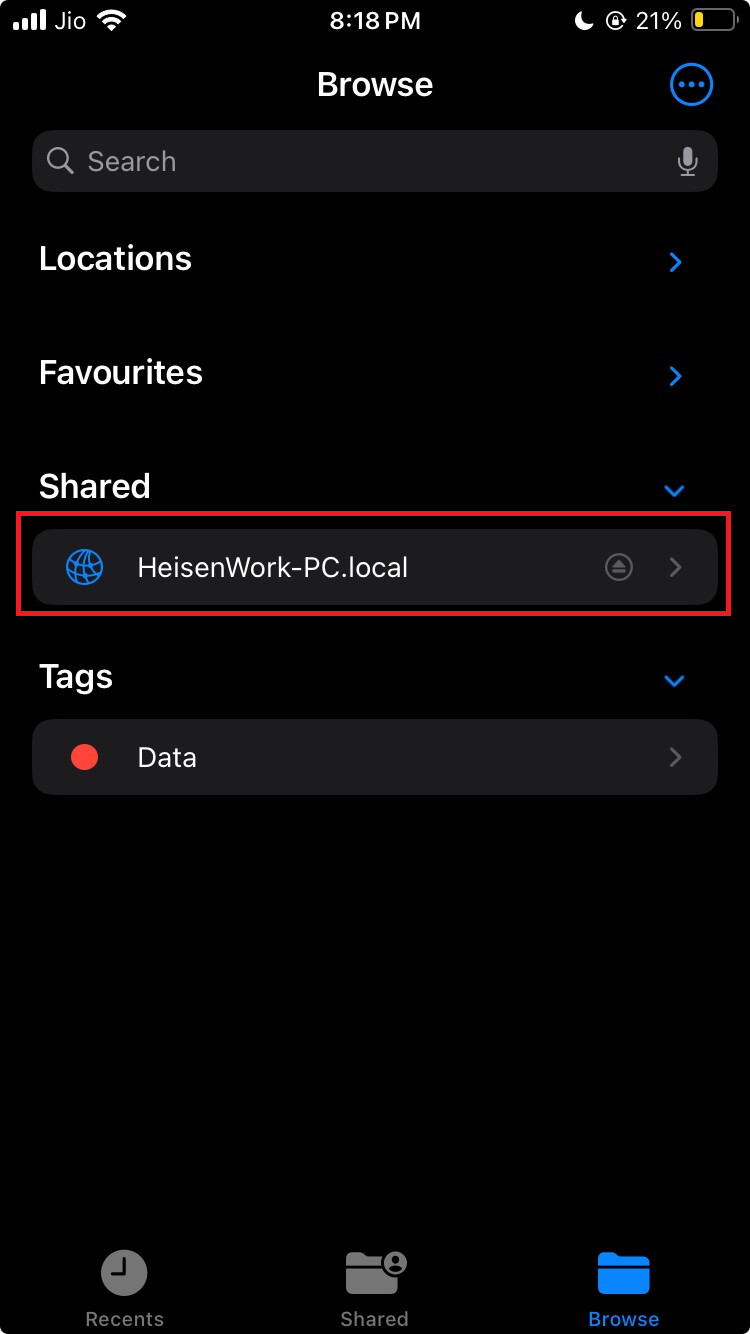
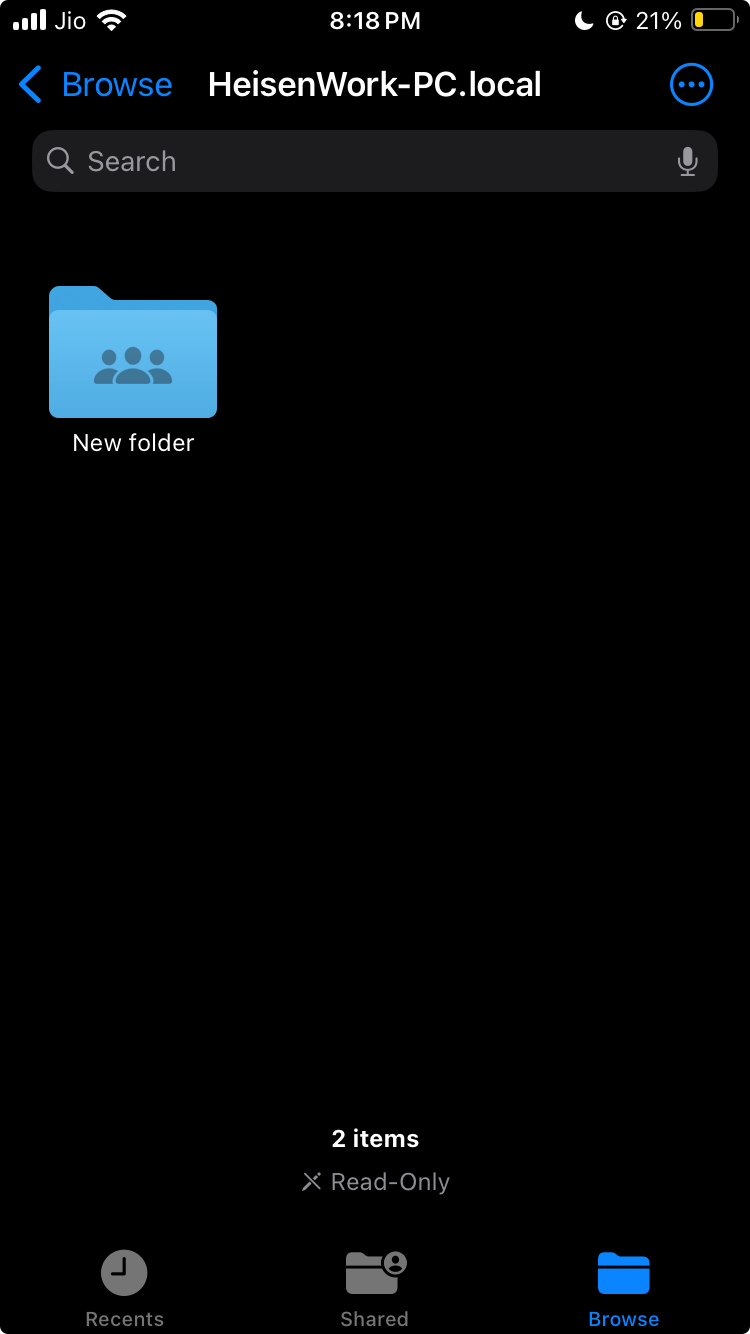
- Now your PC will be added and will show up like this in the files app.
and when you open it you will see the shared folder with full read and write permission both ways.
To transfer files from PC → iPhone photos app
- Copy the files to this folder on your PC.
- On phone navigate to this folder, select the files, if they are compatible with photos app, save option will show up in the share sheet. In case they are not compatible, just copy to a local folder in your files app.
To transfer files from iPhone photos app → PC
- Select all the files in photos app, then do save to files in the share sheet and paste it in this shared folder.
- A direct write happens to PC.
That’s it!, you have now set up an easy file sharing system between your Windows PC and your iOS device. No complicated configurations, no third party app, no static IPs, and it works great for fast and reliable file transfers. Enjoy!