How much do you 'DIY' around the house vs calling a professional?

Yes, that stuff is non negotiable, I always get high quality discs and blades. Leave the cheaper stuff for the professionals who know what to expect.

I’m just so disappointed with the poor wiring, these wires don’t even have proper labeling. I’ll just crimp new connections and switch out the mcb for a 10A until I’m able to pay someone to replace the wiring.

I can fix most electrical issues at home, but none for plumbing or carpentry, except replacing kitchen taps :slight_smile:

cost only around 1k for uninstallation and 1.5 to 2k for installation or something when I had to relocate. You might need to get new copper pipe too if AC positioning is different.

I think, ya’ll giving a false hope to @Ssreek

As he has mentioned, nobody can access his outdoor unit without the painter’s zula. That kind of service is expensive. And, not to mention, many AC guys just don’t do it.

Haven’t seen them in a long time. Are you sure you can still get them?

You can always twist them to make them single.

For the wiring in btwn the sockets , I can get single strand wire used for earthing . You can get earthing wire in many sizes .

No , twisting does not work . The improper contact is what makes the wire heat up even with a thick wire . Only way to get proper contact is to use copper lugs . Another issue is with rocker switches the screws loosen over a period of time due to hammering . With a copper lug those screws do not loosen .

IF you look up fuse wires at the main switchboard , it will be thinner than the wiring in the household . The wires are thin because the distance is short .

No, outdoor unit is on terrace and easily accessible. The hole made on wall isn’t accessible from outside.

2 Likes

good that i chose to buy extra copper pipe while installing.

No problem . Remove the copper pipe at the outdoor unit . Then remove the indoor unit and cut the copper pipe . Then pull it out from the top near the out door unit . Simple job .

Didn’t he say he was on the top floor? In that case the outdoor unit is either on the roof or hanging off the railing/roof wall.

I’m on the top floor as well, the ac installation people were like mountain goats, one tied a rope to their waist and the other lowered him off the roof to help route copper pipes. Outdoor unit itself was placed on the roof.

If they really did put the outdoor unit on the wall of the building then year you need a painters swing thing and that’s an extra 1000 or so expense to rent.

You can weld copper pipes if length is not enough . Most of the time , I weld the pipes and get the appropriate flare nuts .

Just to be clear, because this sounds dangerous, the thinner wire should still be minimum spec, which is 2.5 sq mm for 16A and 4 sq mm for 32A.

Don’t allow for anything less than 2.5 sq mm inside walls or distribution boxes because you’ll end up with a fire hazard like mine.

Crimped connections inside switchboxes is the ideal method but I’m sure I read somewhere that our sockets and switches are rated for both stranded and solid core wire.

Ok..i think some people may have misunderstood.

The outdoor unit is on roof, easily accessible. The issue is hole made on wall is not closed from outside but from inside. Sometimes when there were heavy rains in hyd, i could see a few drops falling from ac idu (from backside of the unit), even when not switched on.

Since hole cannot be accessed from outside, I was only wondering if that foam thing can be sprayed from inside, but as @Kloud suggested, it could be very hard to remove during installation as it will also stick to pipes.

You can .. the foam is softer than the POP to remove . The foam costs around 450 rupees and is usable only once . Once sprayed the gas is lost and cannot be used for subsequent applications . The foam usage would hardly be 5% for 1 hole .

The POP does not get wet with water . Sometimes chalk powder is sold as POP . Cheaper option is to spend on POP and try sealing it again .

You are assuming 230v as standard voltage . If the voltage is 180v the current draw would be higher .

Most switches and sockets can take up to 4 sq.mm wire core thickness . If the socket is rated at 16Amp one does not use an appliance which draws 16 amps . At 230v the current rating is 16A . At 200V the current draw of the appliance will exceed 16Amps .

The 16amp sockets that you see typically have appliances which will not draw more than 10 amps .

I recently called a carpenter who was working another flat in my apartment to fix 5 photo frames in a particular pattern on a wall. I was left with a full-on headache and an odd-looking wall.

It was such a straight forward ask as a customer and a simple task for a carpenter. But instead of relying on scales and tapes to calculate the placement of the frames, the genius carpenter did mental mathematics and fixed the nails at the wrong location. Although I didnt pay him anything I thought to myself when I could complete engineering in 4 years and learn all the subjects in the world why can’t i put up some frames on the wall.

I bought a cordless drill and a tape, checked a few youtube videos and completed it. It looked so much better than before and I also learnt a lot from the experience.

My next accomplishment should be plumbing, just in the last one year I had atleast 4 plumbing related issues.

2 Likes

Plumbing is fairly easy these days thanks to PVC . If you were to use GI pipes for plumbing then it is a different story all together .

Once you get into DIY , you will accumulate tools . So be ready . Hehe

Ah right, I hadn’t considered that, thanks. I regularly have low voltage that I correct with a stabilizer and online UPS, that’s probably didn’t help the poor wiring.

I’m trying to fix this socket box, I’ve got ferrules on all of the connections, but I’m struggling with finding a way to connect them together.

This is what I’ve got done so far:

This is where the problem is:

These wire connectors, lever nuts, they’re rated for 0.5 to 4 sq mm but I’ve having a hard time pushing in the conductors with ferrules.

How do you do it? The thicker wire here is 4 sq mm and the rest is what’s in the walls, probably 2.5mm sq mm.

Do you use these lever nuts or make connections another way?

One of my nearby relatives, who just got possession of their new flat, had the TV installed crookedly.

It infuriates me that the general labor that does this kind of work can’t use a spirit level or is capable of primary mathematics.

Yeah. As yogaa said, plumbing has become extremely easy thanks to uPVC and cPVC. I redid all the plumbing in my house in 2016. All by myself. It was satisfying.

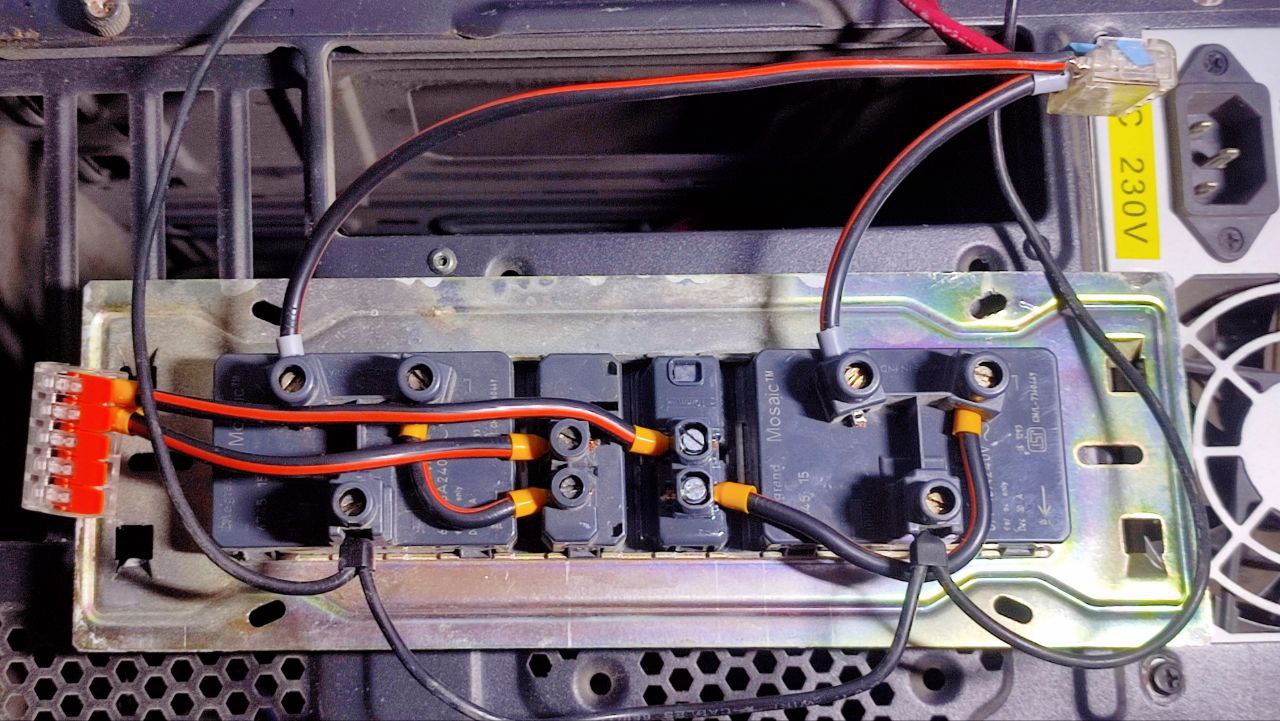
Technically possible, but practically no. Sometimes we need to double the wires to forward the connections and 8sqmm won’t get in there.

Go with the foam, dude. When I said hard, I meant it’ll probably add 10 minutes to uninstallation. And the guy may complain a little. But nothing you can’t fix by offering him a tea.

I did do the same foam sealing with my first AC. But I did it on both sides, as I had the access. The dude who came to uninstall this AC last year didn’t complain.

Foam is extremely sticky; don’t get it on your clothes. Clean the spillage while it is wet.

You can keep using the same bottle as long as it is not empty. The bottle I got last year is still good even though I’ve used it a few times so far. All you need to do is clean the nozzle, and the bottle is ready to go.

I have my own method of cleaning the nozzle, which is extremely confidential and super easy and nowhere to be found on youtube.

You do it yourself? Is it easy without a blowtorch?

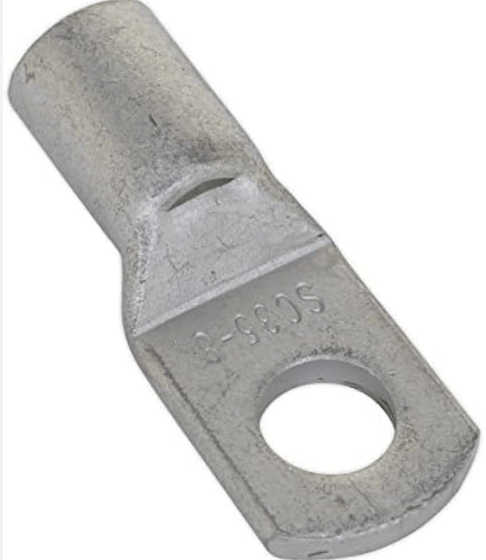
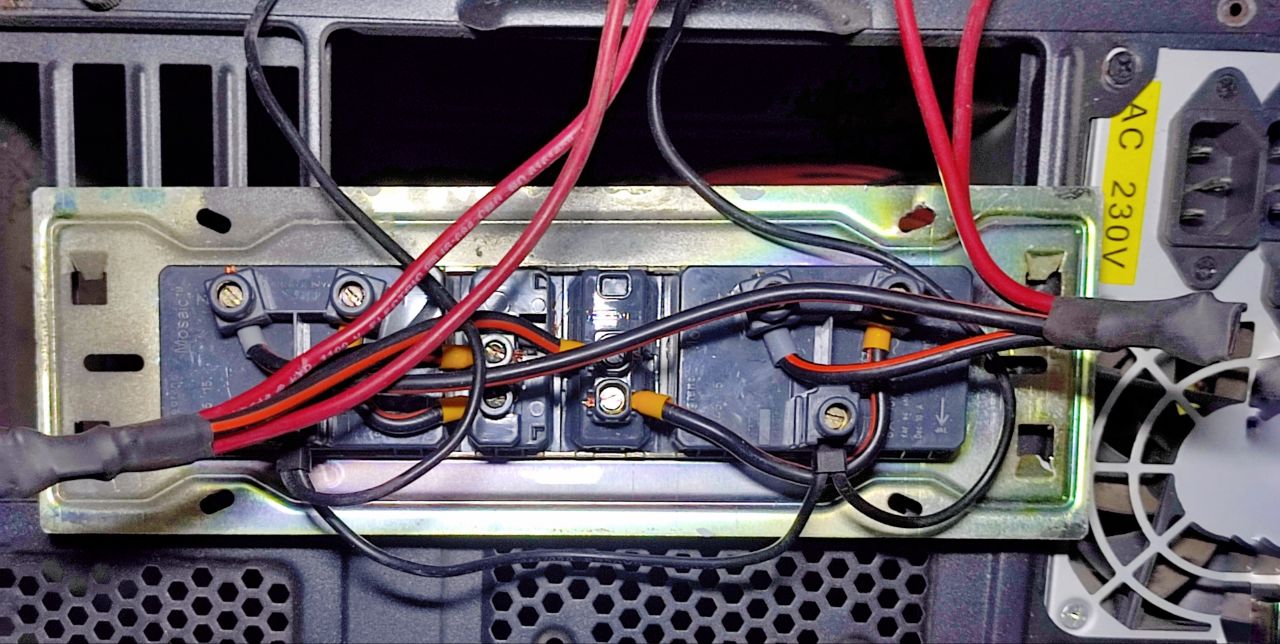
You are trying to be fancy. In that case you need lugs like these.:

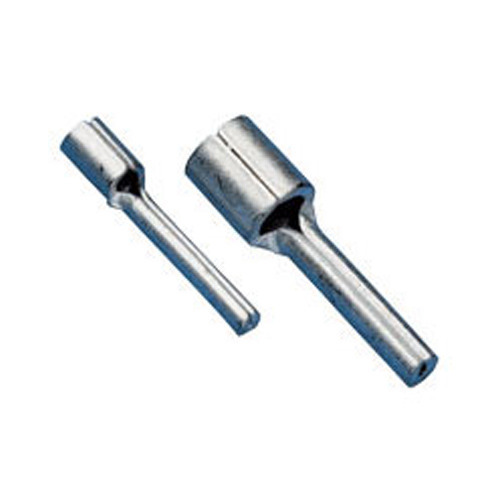
Or even better, you can get something like this

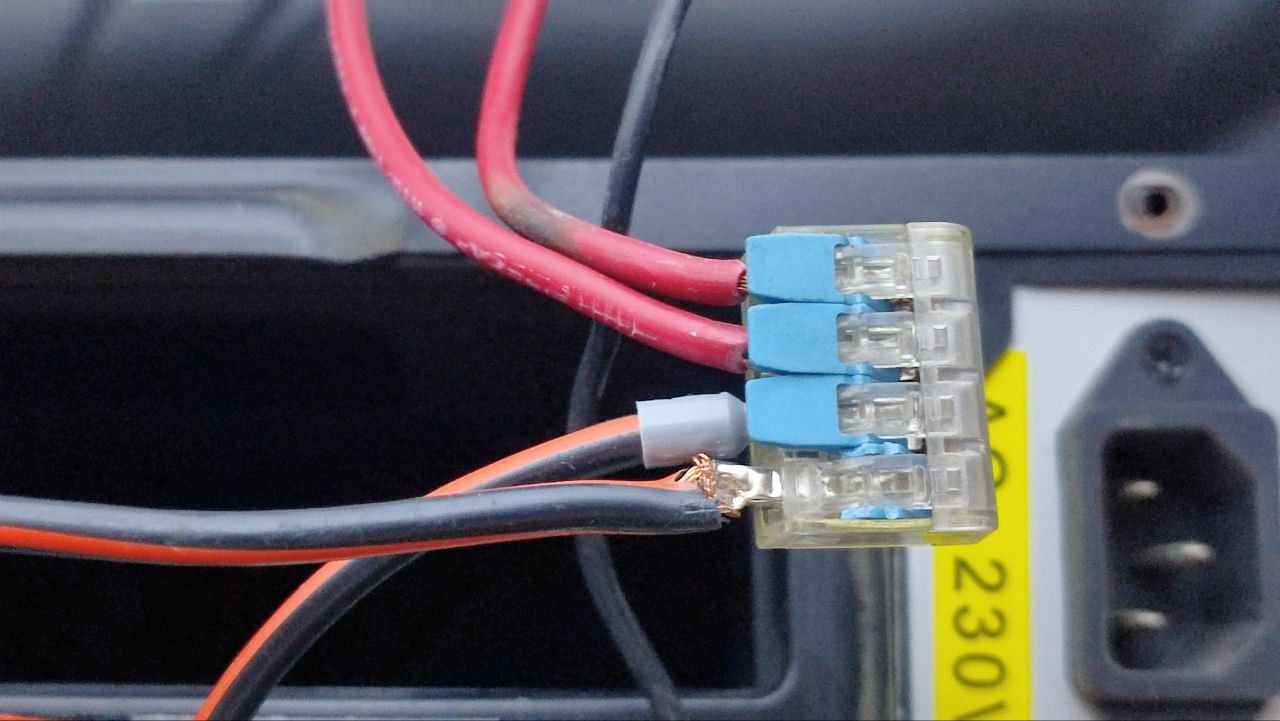
But what, in the name of Bipasha basu, are you trying to do here?

I would just patch them together as that has never failed me. Unless, of course, I was running wires for 32A current.

These are the lugs that you use for household wiring . I have used the lugs and soldered them as well . I use exact rating wire and I have no problems what so ever using up to the capacity . In case if 2 or 3 wires need to be joined together , then twist them together and use a 6 or 8MM lug .

Yes , I do Ac installation , uninstallation , board , compressor trouble shooting ,gas leak at coil repair . I use a butane torch for small jobs . For higher heat requirement I use oxy acetlyne flame for welds . From my experience most Ac what ever brand they are , they are manufactured by carrier or Gree . People will tell you inverter AC cannot be paired with different brands . I have bluestar indoor running with Godrej outdoor , Voltas outdoor running with Marq indoor , panasonic outdoor running with whirlpool indoor . All inverter Acs . For the 1.5 tons Ac my wiring is 1.5 sq.mm and for 1 ton my wiring is 1 sq.mm but all with copper lugs and soldering .

I have a foam bottle which is used only for 1 hole and the gas has escaped . Now the bottle is paper weight . I am assuming while the foam is sprayed 2 chemicals mix together and something they got mixed inside the car or without gas they solidify . I do not know the cause , but I lost a bottle of foam .

1 Like

I’m rewiring a socket box that has two 16A sockets which branches off to another socket box that has two more 16A sockets.

Not fancy, just safe.

I posted burned wiring photos above, I have three such socket boxes, all burned, and all connected together. I suspect I’ve been paying about 5000 extra each month because the math and load didn’t add up to what I was being billed. I was literally burning money by having underspec wiring in the walls.

So I’m rewiring them all but I won’t be using them, I’ll have a new connection made to the distribution box that’s properly rated to handle the load of my homelab and 3d printing garden (~5000w).

I couldn’t even get a 10mm lug to work, I needed a 16mm one. I was tying two 2.5mm and two 4mm wires together — four in total.

I did end up using those, but it was a hassle getting the hydraulic crimper in the cramped socket area and then later cutting off the ring terminal and then filing off the sharp edges and then putting on two layers of heatshrink, there has to be a better way:

This was far too much work, I don’t think this is how it’s normally done. Nor do I think that simply twisting them together is the ideal solution.

Those are pin type lugs that are usually used for mcbs, I haven’t seen them in use for switch/socket box wiring. Do you have photos of your work? I’d like to see how bends and tight spaces are negotiated, it was a hassle for me with 4mm wire.

@Heisen what would you recommend to tie wires together? The wago 221 clones just can’t handle 4mm stranded wire evne though they’re rated for them. I ordered a bunch of wago 222 clones, maybe that’ll work better.