You are using a ferrule. Not a lug. Will send some pics when I get home. Lugs can be opened up to fit bigger size wires.
1 Like
No, it was a lug like what @Kloud linked. I cut off the ring part before heatshrinking.
Yes.. Not many use lugs except for industrial wiring. I use them to save on wire guage and proper tightening of the switch and socket terminals.
1 Like
If I can cut live power, I do all the AC switch replacement and stuffs normally. For connections that are live and can’t be turned off, I call electrician.
Plumbing doing myself. And recently started connecting pipes myself(The plumber was very busy).
On my roof started cementing the wall little by little everyday mostly as part of exercise, nothing else.
Have bought saw and planning to buy more machines to make more wood stuff.
Got a soldering station and fixed a lot of stuff at home inlcuding small solders for fixing a game console and replacing all the keys on a non-swappable mecahncial ekyboard.
2 Likes
Can you share a pic? From the pics you posted it looks like a ferrule. I am also wondering why you would need a hydraulic crimp..
These two are aluminum ring lugs, the rest are ferrules.

They’re exactly like what @Kloud linked, I got them for my lifepo4 battery projects.
Bro, I think you are overcomplicating stuff.
What kind of board is that? Why is it embedded in a cabinet?
2x 16A sockets with 2 16A buttons is very elementary. I’m not sure why you need a hydraulic press.
What kind of sockets are those? All all 4 of them are a single piece. Why is the faceplate metallic?
Hold up. That doesn’t add up. If your loads are asking for 5KW, you don’t work with 16A sockets, nor do you use 2.5sqmm wires. And, most importantly, you don’t work with plastic sockets. At that load, you go ceramic.
I have done serious electrical work, in the last 2 decades, and I have no idea what I’m looking at. Kindly explain a bit more. I’m missing something.
For 4mm stranded wire use butt to butt/wire to wire connector like this one.
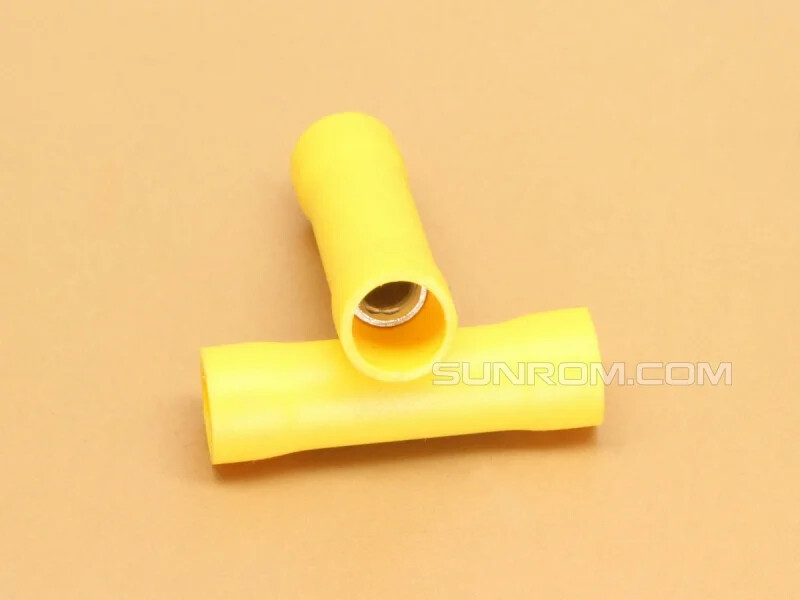
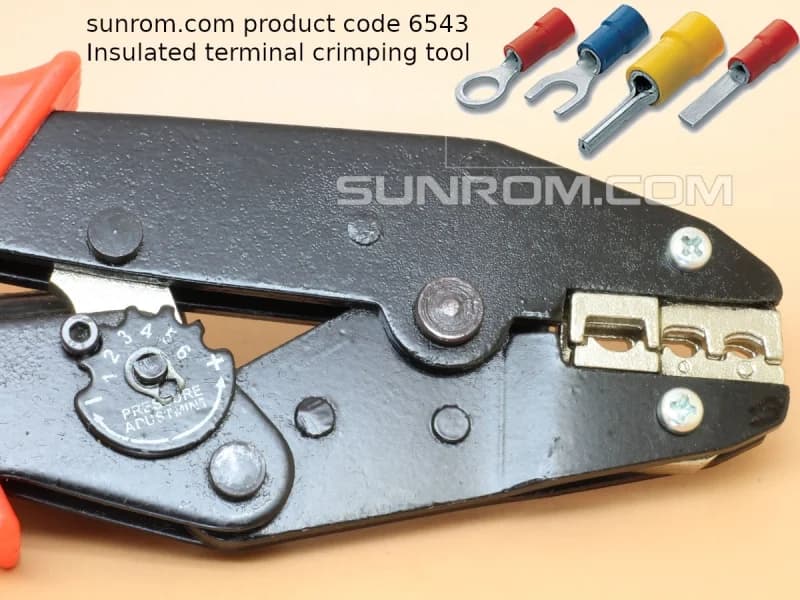
You would have to use a crimp tool like this one.
Here is a video how this crimp works.
For wire to wire soldering can also work with heat shrink wrap.
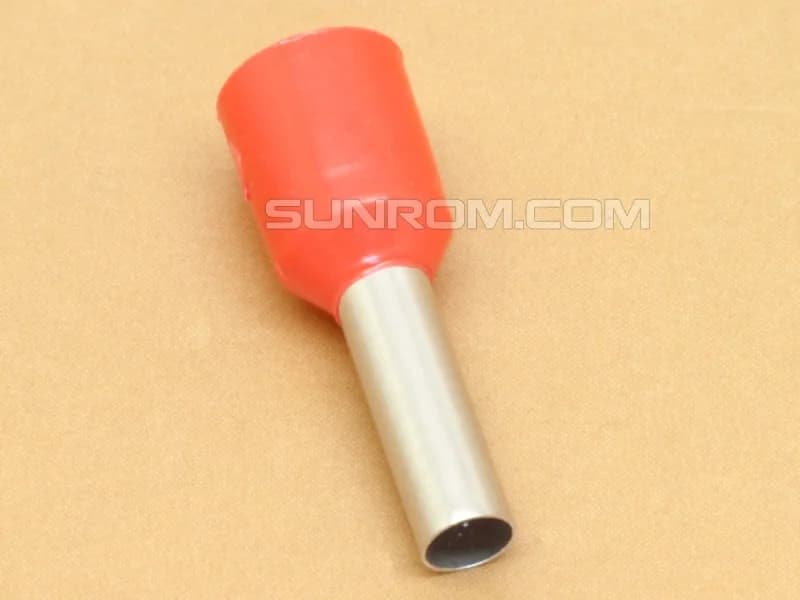
For all your other needs like connecting wires to switch boards and stuff, use these ferrules.
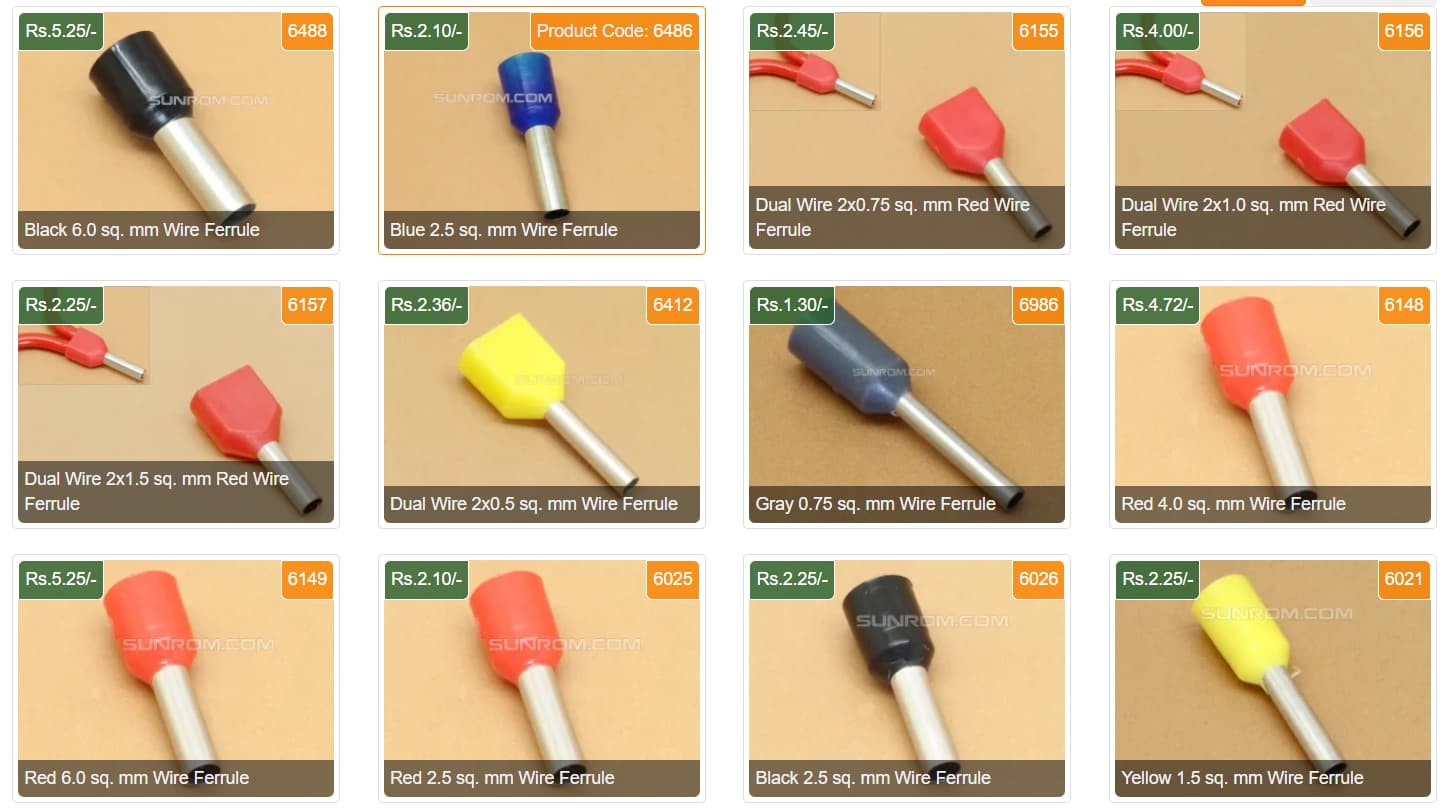
Compatible wire sizes are also mentioned.
The tool for crimping these is this one.

All the stuff you need should be in here.
Wire Crimp Terminals
Wire to Wire
Ferrule (Bootlace)
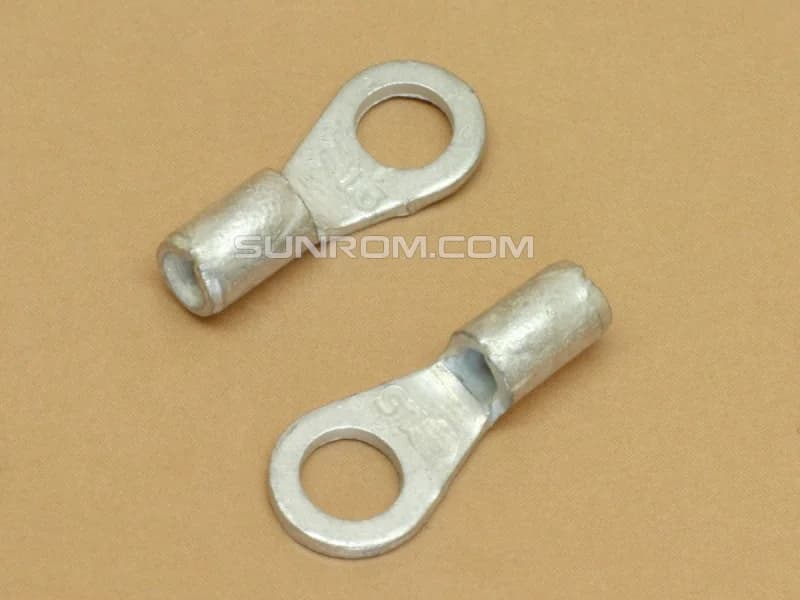
Ring connector is also available here if you need, but this is only for 0.5 to 1.5 sq.mm wire. For 4.0 sq.mm wire you will have to source from somewhere else.
And the most important part.
50% Failure Rate! How To Install Crimp Connectors Like The Pros!
1 Like
Ha no, maybe I’m not being clear.
It’s a 8M switch plate for modular switches and sockets.
It’s sitting on top of an old cabinet that I’m using as a makeshift table. It normally sits inside a metal box that’s embedded in the wall.
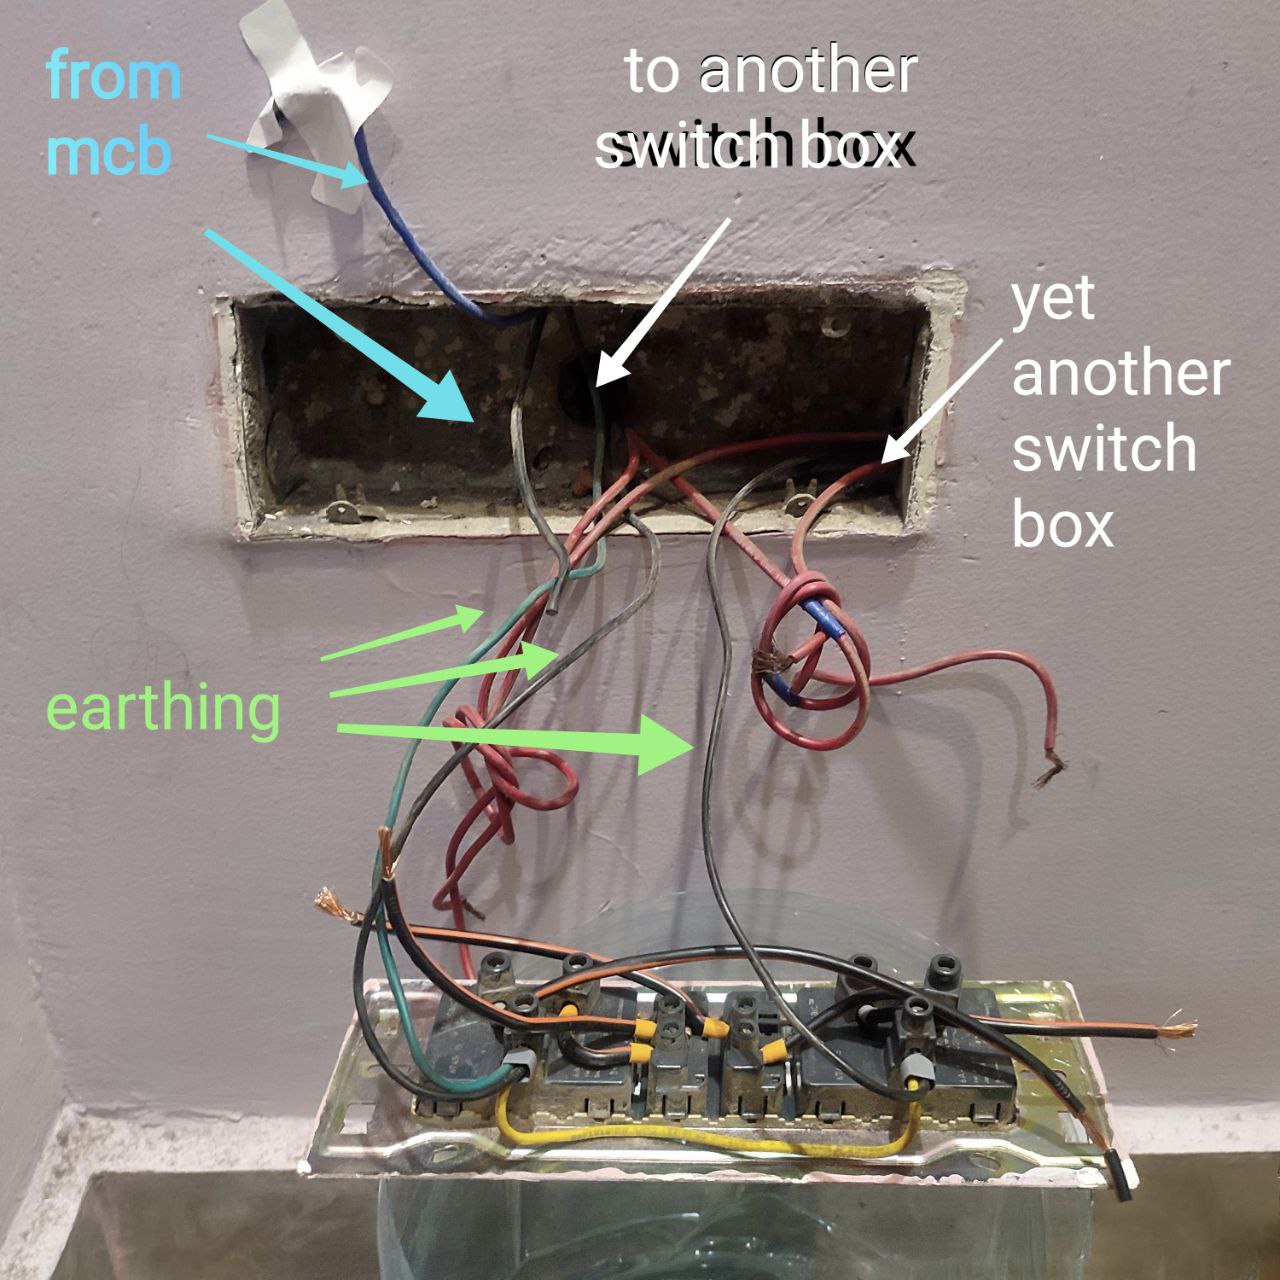
There are four wires to be joined. Two 4sq mm from the two sockets and two 2.5 sq mm, one from the mcb box, one going off to another switch box somewhere.
The 2.5 sq mm wire is in the walls. The 4 sq mm wires are what I upgraded for this switch/socket panel.
It’s a hydraulic crimper, hand tools can’t sufficiently exert enough pressure for wires thick as these four combined, maybe a hammer can.
It’s not a single load, it’s spread across six 16a sockets.
Two you see here, two somewhere else, two daisy chained off from this.
See the four red wires? Two are from the mcb box and two are going off to another switch box.
The black wires are earth, again, one from the mcb box and one going off to another switch box.
I’m sorry for the confusion, I thought the wiring was self explanatory.
It’s a switch plate, the plastic face plate snaps on top of it. These metal plates were considered premium before iot took over the market and people realized that the metal cut down wifi signal strength. These days they’re mostly plastic.
These are Legrand Mosaic sockets, two 3M 16A sockets with two 1M 16A switches in the middle. Except Mosaic is discontinued and one of the switches went bad so I replaced with it a Legrand Myrius 1M 16A switch.
1 Like
Aluminium and copper do not work well. Kindly redo with copper lugs.
For 5000w use industrial socket rated atleast 40 amps. Or better use a 40 amp breaker directly wired or a 2 pole main switch.
1 Like
That shouldnt matter, the aluminum is only holding the four wires together, it’s not transferring any power.
What wire size would you recommend to the main mcb box?
Currently, the 5000W load is spread across six 16A sockets on two different phases.
What about for four wires? A larger butt connector? I have two 4mm stranded wires and two 2.5mm stranded wires that need to be joined together.
Here’s a different switch box that I’m fixing/upgrading:
We have our sockets closer to the ground.
You can see how the builder/electrician used one connection from the mcb to connect three switch boxes together (in this instance). It’s frustrating.
Each switchbox has two 16A sockets.
I am confused . Are the 4 wires twisted together and then crimped ?
If the distance is long get 6sq.mm or 4 sq.mm with proper crimps .
1 Like
Big differene between wago original and wago style ones.
I only use fake ones for led bulbs, fans. Wago 221-6xx is the one to use for 2.5sq mm if its solid stranded or crimped with a lug.
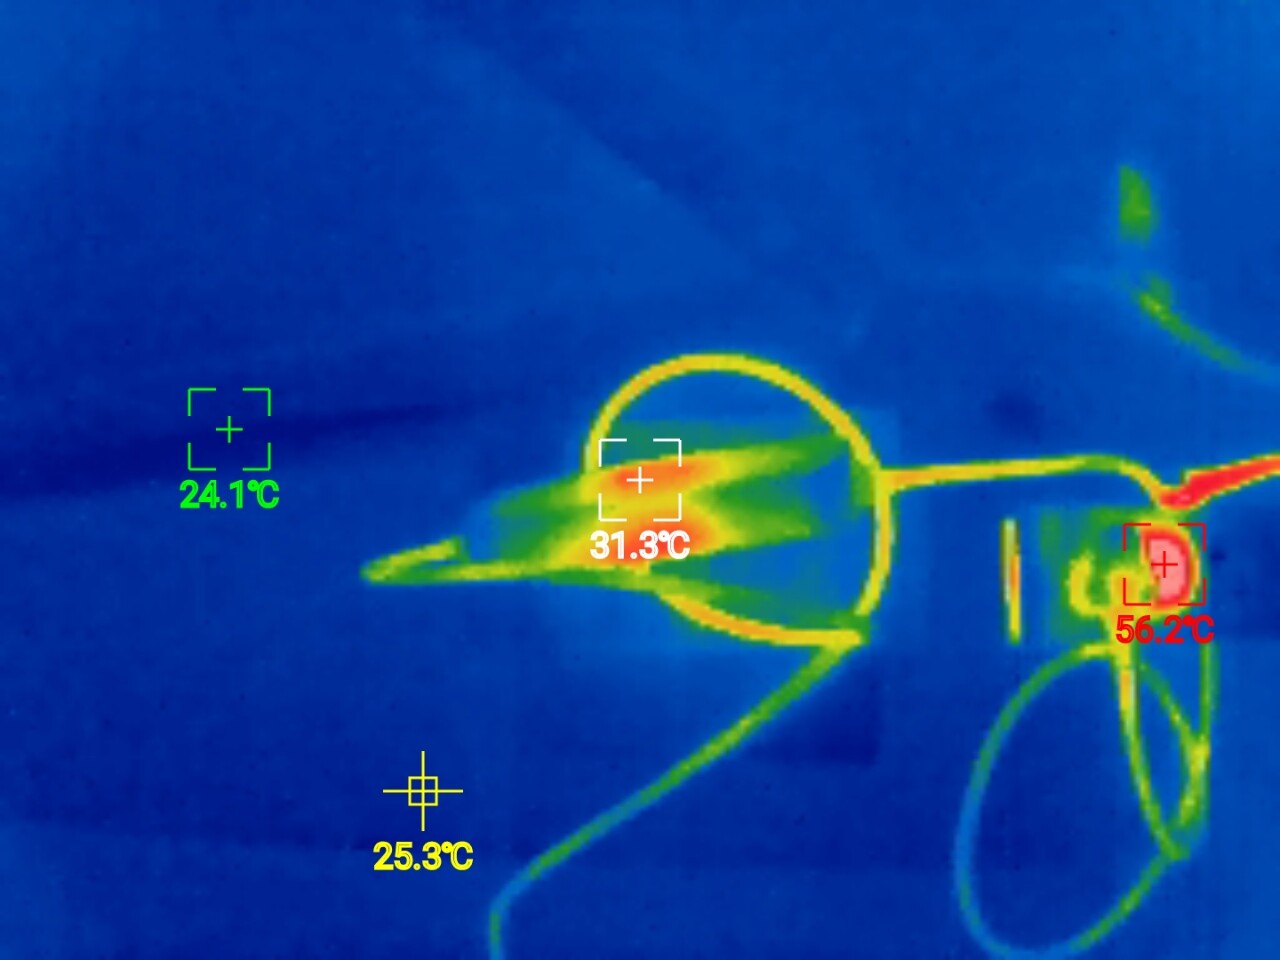
Even if the load is less, for a 2.5sq mm the theoritical 18A in conduit or 22A for open space. In my use, when I used a 2.5sq mm finolex wire with a length of only 3 inches from the 16A switch to socket. The temperature of the wire went to 100C at 12A to 13A load. While the temperature was less than the wire rating, it is still more than what the switch could handle. The terminals of the switch got hot and started to melt into the plastic.
This didn’t happen before in my geyser or AC when the power cord itself from factory is 2.5 sqmm. But for my EV charging pulling 12A for more than hour 2.5sq mm wire got hot enough. To the identical switch next to it in the same DIY extension box with a 6Sq mm wire and with the same load the terminals where just 48C even after 8 hours.
1 Like
Yes twisted and crimped, sorry I wasn’t clear.
It’s 12 meters, I was planning on 4 sq mm but I’ll get 6 if it’s required for 5000w. Later I’ll be getting a seperate electrical connection for tax purposes so I hope to reuse the same wire.
Issue is with the contacts inside the switches . MK switches offer silver contacts and they used to offer lifetime warranty for those switches . The switches get hot because the contacts inside the switch are improper contact .
Geyser will cut off after 20-30 mins depending on the capacity , so a 2.5mm wire is acceptable for a short distance and the wires are crimped and bolted inside the geyser minimising contact loss .
More than sufficient . Just try to find some copper lugs and use them .
1 Like
Twist one 4mm wire with 2.5mm wire and crimp with this 6mm Ferrule, it will be a tight fit we are 0.5 sq mm short but should work fine if you crimp right. Ideally we should be using a bigger ferrule for this but then our basic tool won’t support that.
similarly create other pair. Now join these two with this.

It is brass inside, so should be good.
There are some different type connectors here.
1 Like
I completely forgot about evelta! Thanks for the suggestion/reminder.
old age, bleh
1 Like
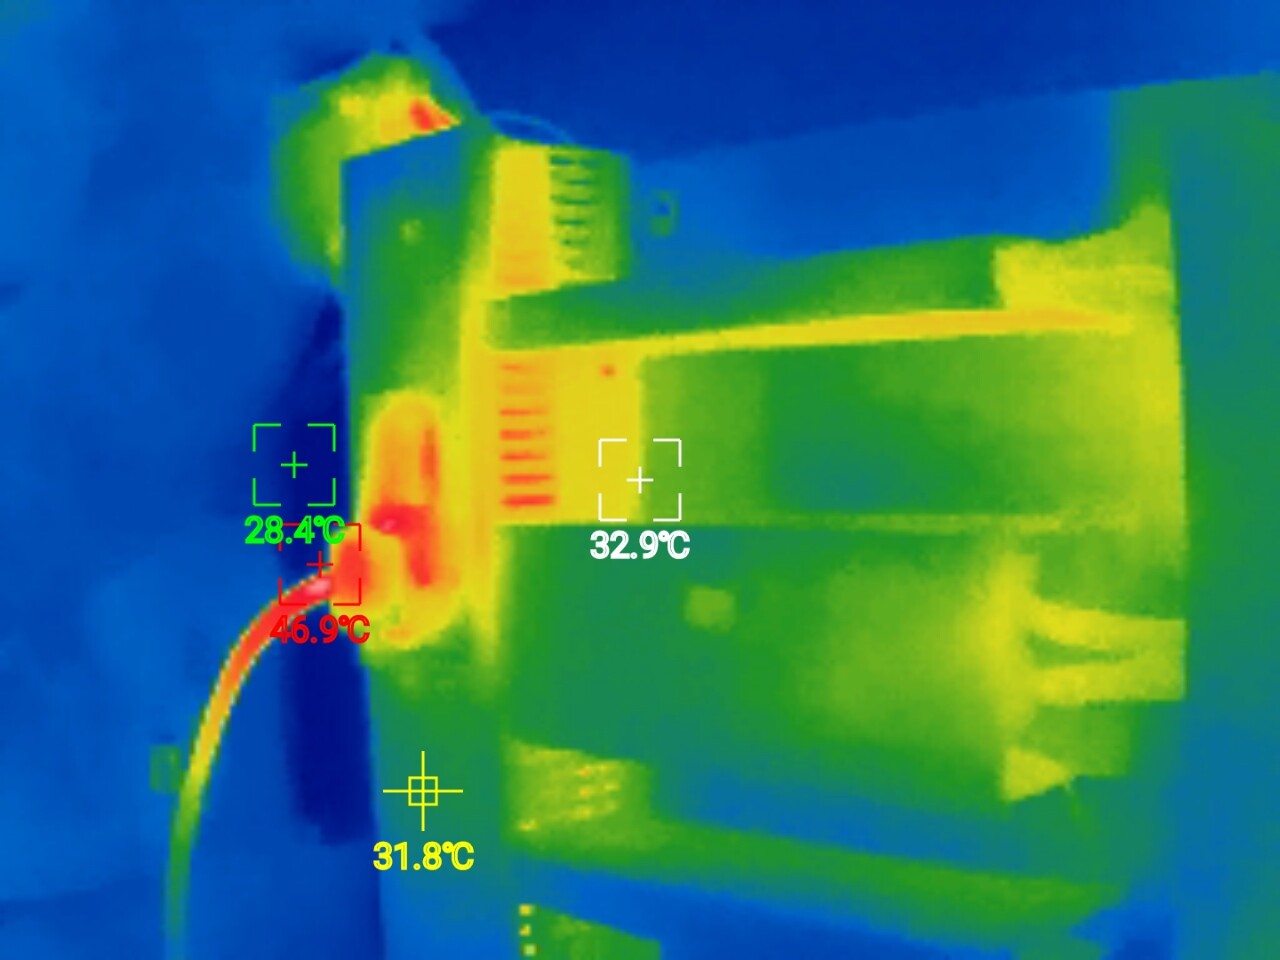
Well I don’t believe it was poor contact, since it was the first day I was charging my EV, I was observing this with a thermal camera. To make sure everything is capable to handle all terminals where checked for loose contact. What I missed was the terminals inside was hotter its only when I flipped the extension box did I find it to be 100C.
Those who have seen my posts at Solar/UPS thread would be be familiar with the pictures. First one with a 16A DIY plug and socket with 6 sqmm wire second one the extension box socket and the portable EV charger plug which is molded and the switch next to it is very hot after about 20 mins.
2 Likes
Thanks for explanation/reminder.
I don’t know what it is, maybe my brain is shrinking or I’m just getting old but I completely forgot about temperature ratings and temperature rising due to current flow and such.