1. Introduction
Hi everyone, hope you are all doing fine. This time I am reviewing the ASUS Maximus VII Formula motherboard featuring Watch Dogs PC Game. This motherboard is based on the Intel Z97 chipset and is targeted towards high end gaming segment.
Here is the link to the motherboard(Asus official site) : ASUS Maximus VII Formula motherboard
Here is the link to the specs as on official site: Motherboards - MAXIMUS VII FORMULA - ASUS
2. Unboxing and packaging:
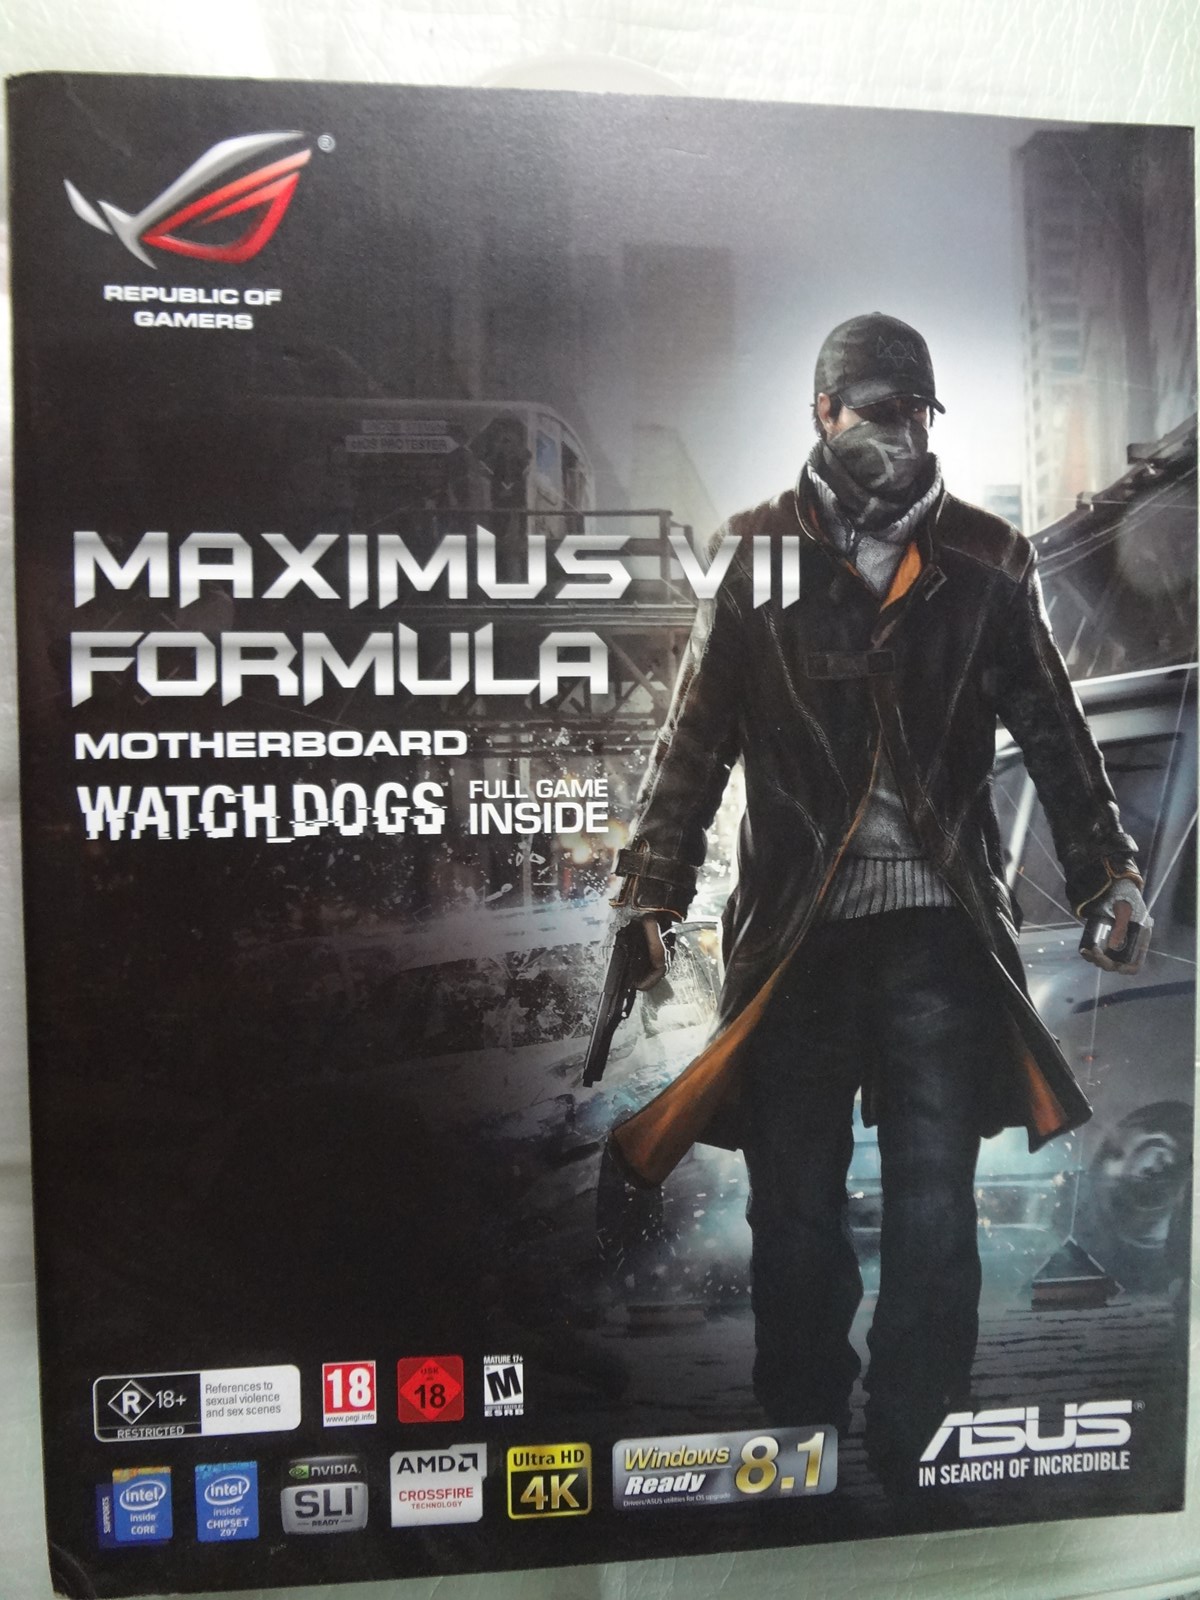
The box has got a good aesthetic appeal with the Watch Dogs protagonist, Aiden Pearce pictured on the front side which is secured via velcro. You can see the board through a transparent plastic layer under the top cover.
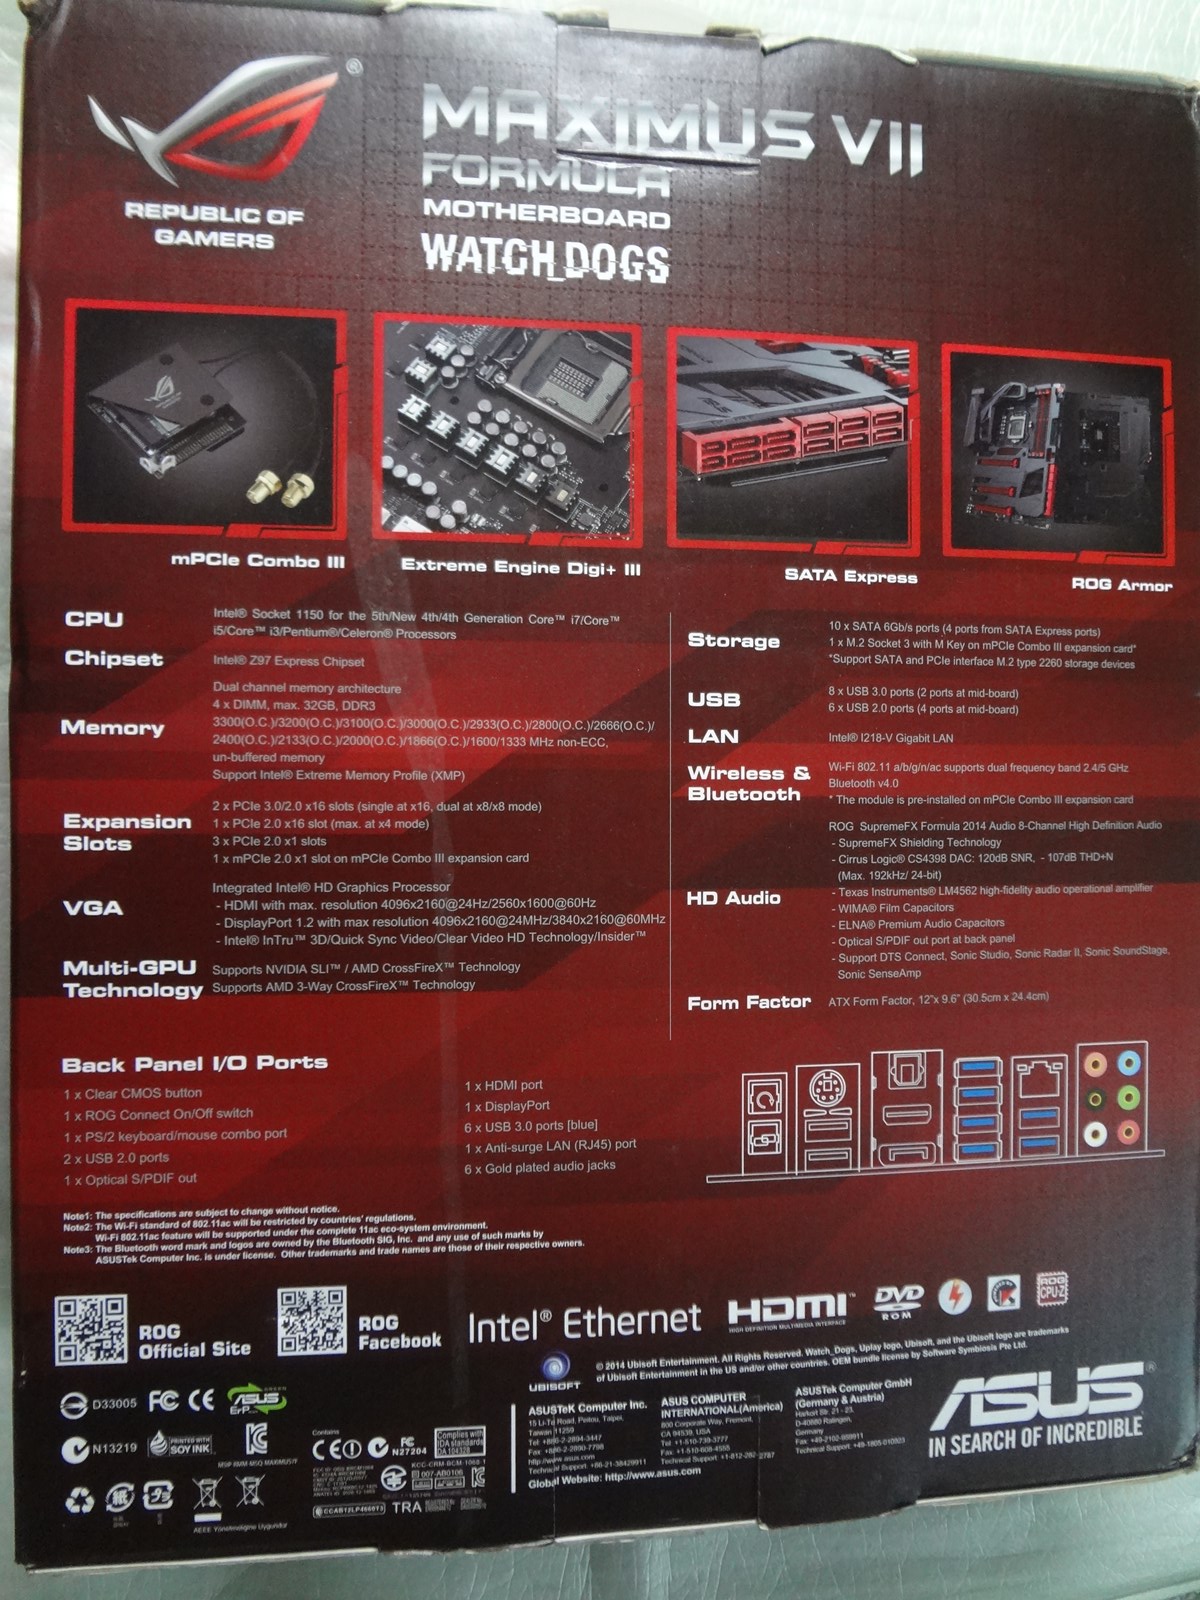
The back side of the box has detailed write up of the overview of the board and special features are explained.
Packaging was very good. The accessories were well packed inside another box below the motherboard.
In box accessories:
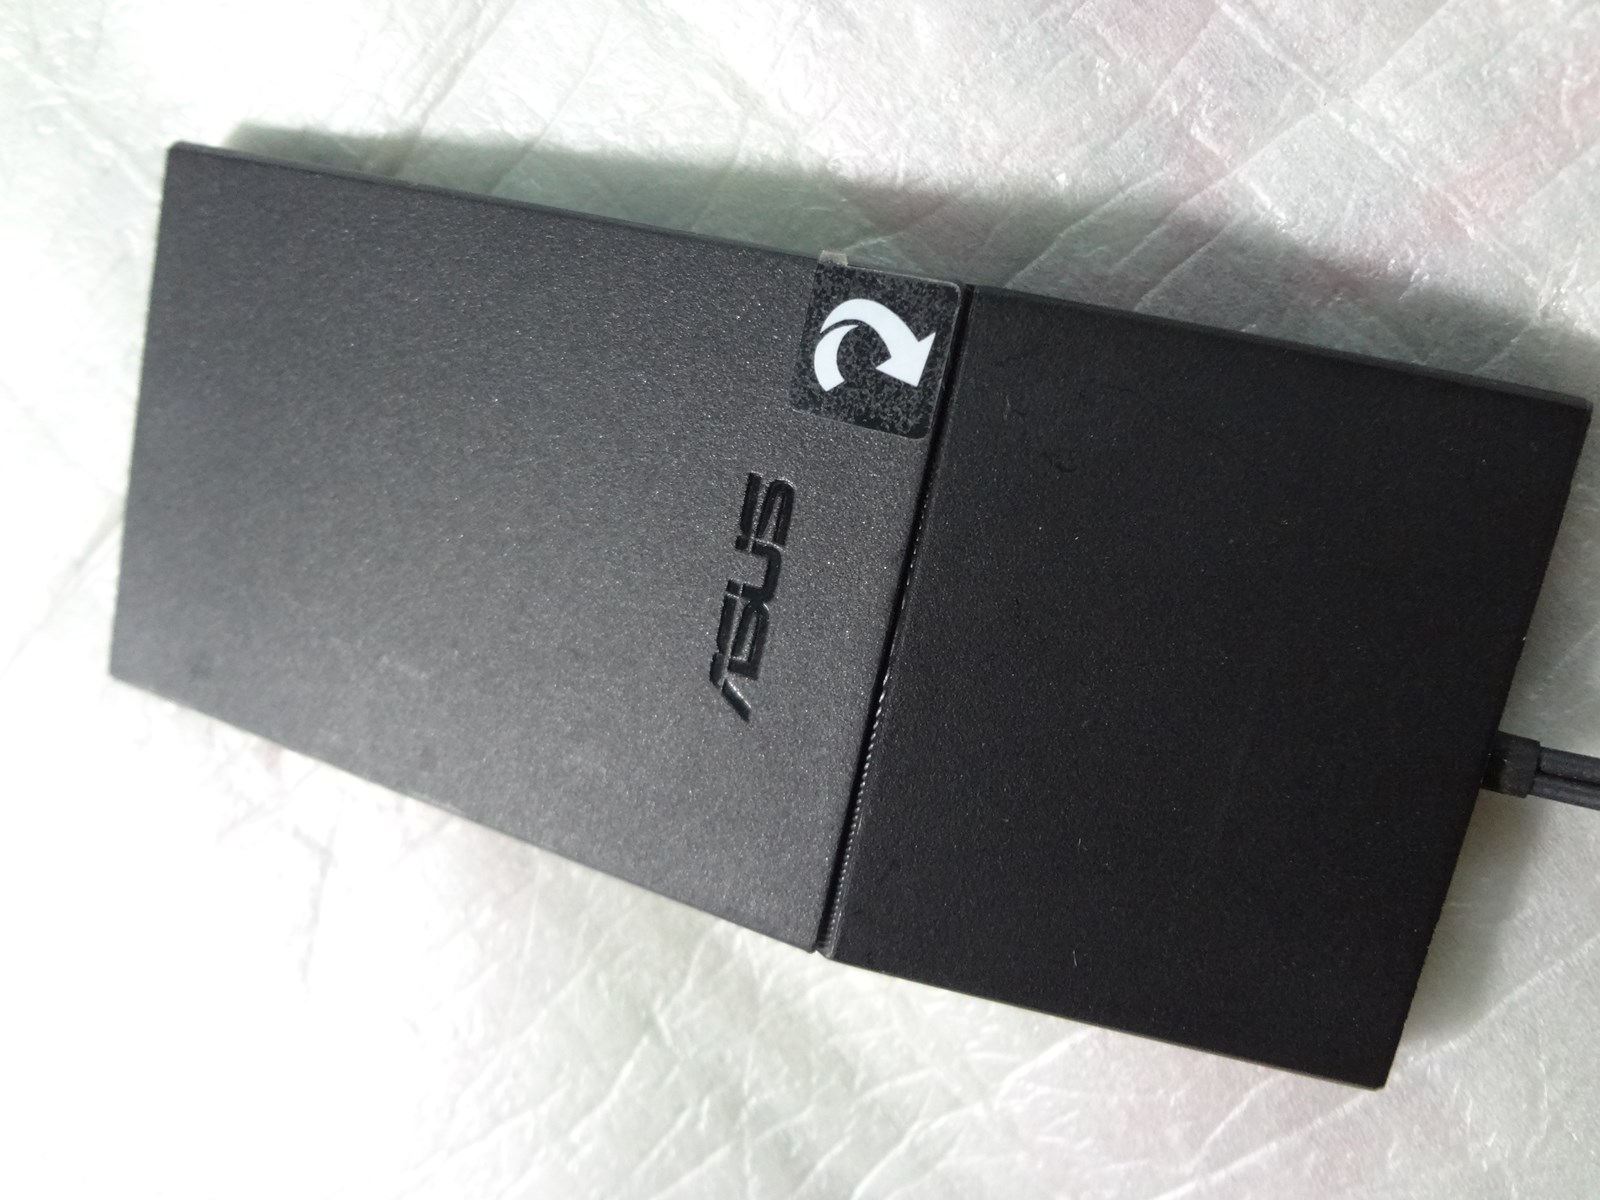
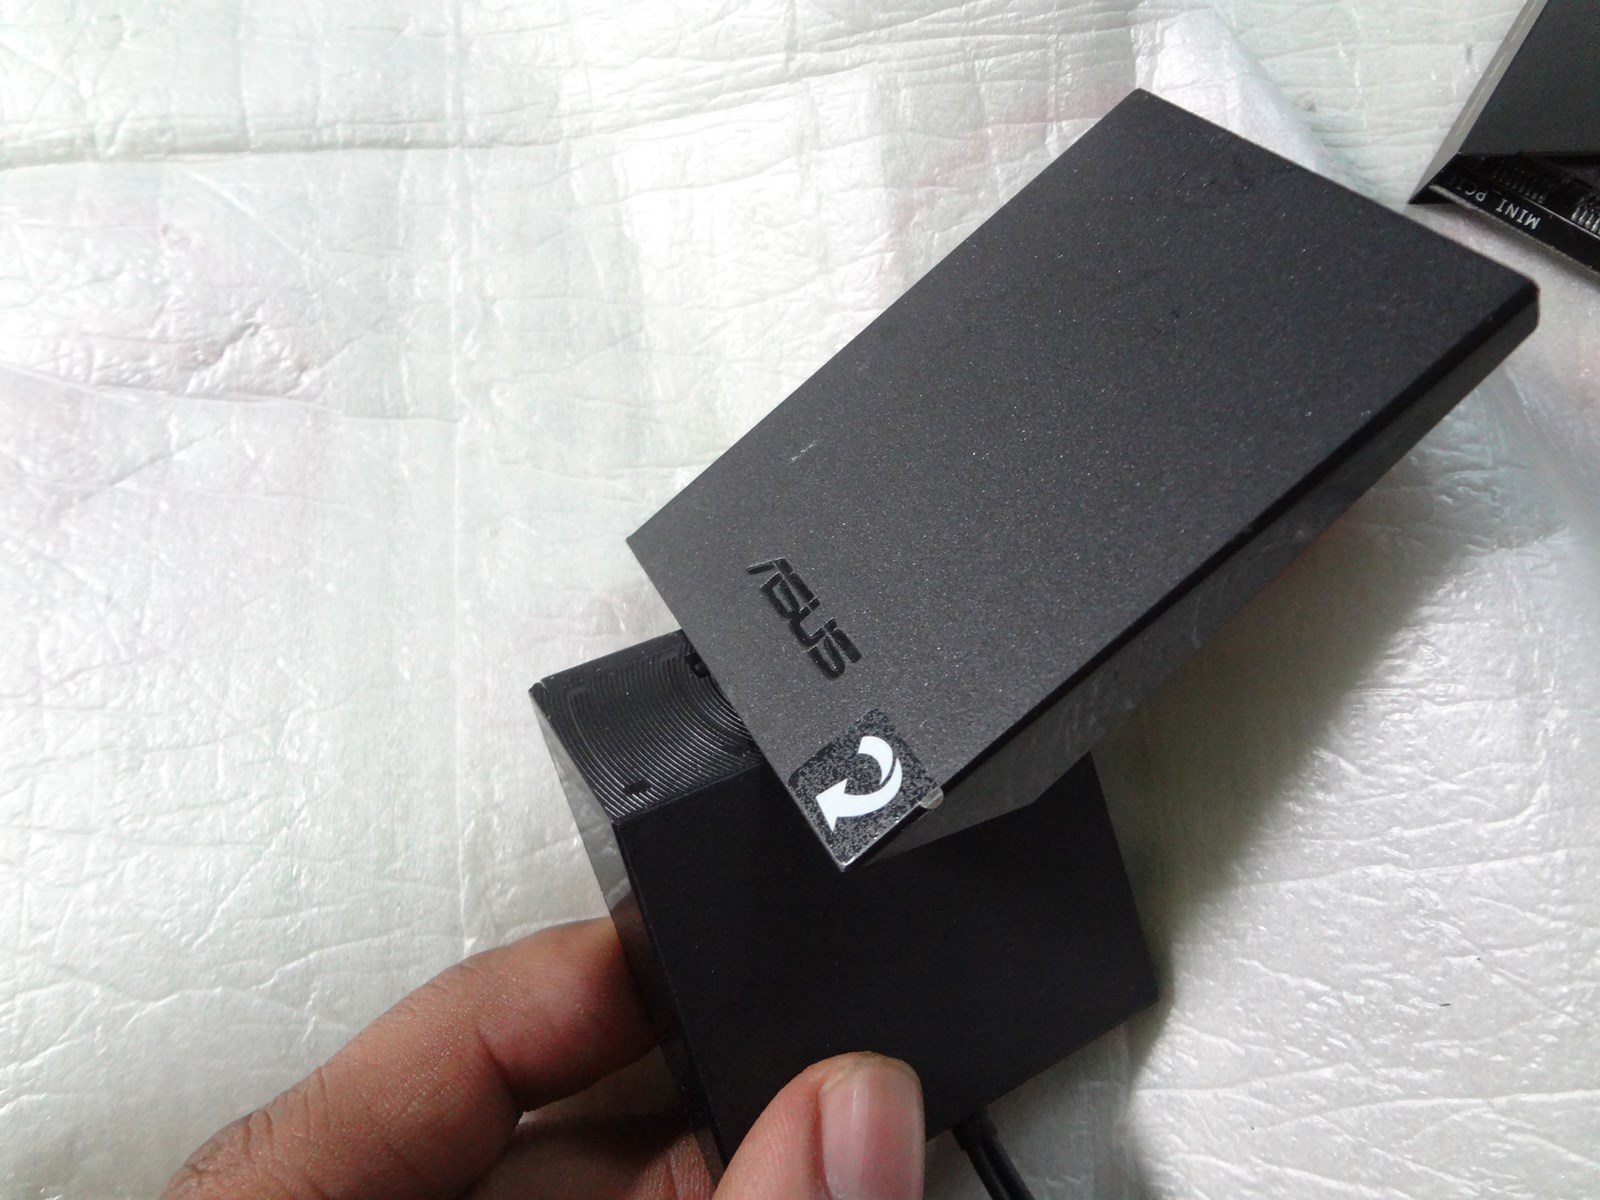
mPCIE Combo III:
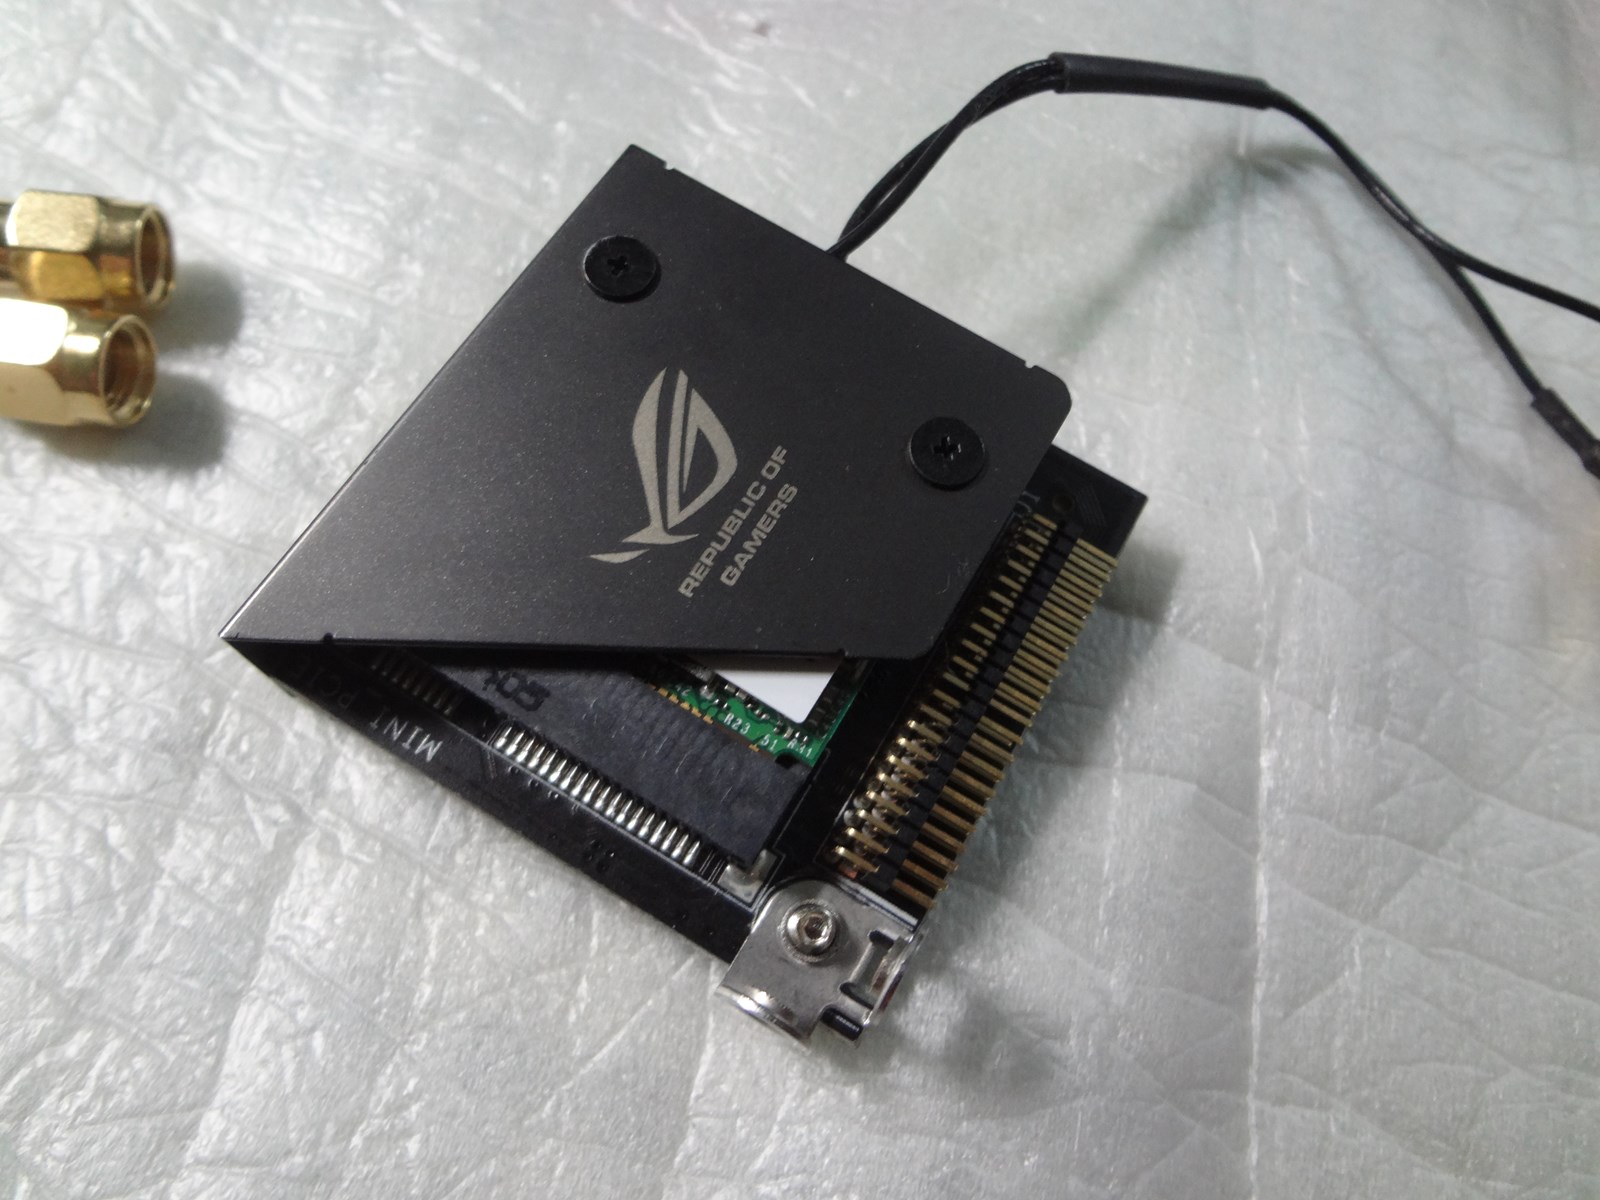

Glad to say M.2 support is there on this module which we did not find in the GIGABYTE Z97 Gaming G1 WiFi BK.
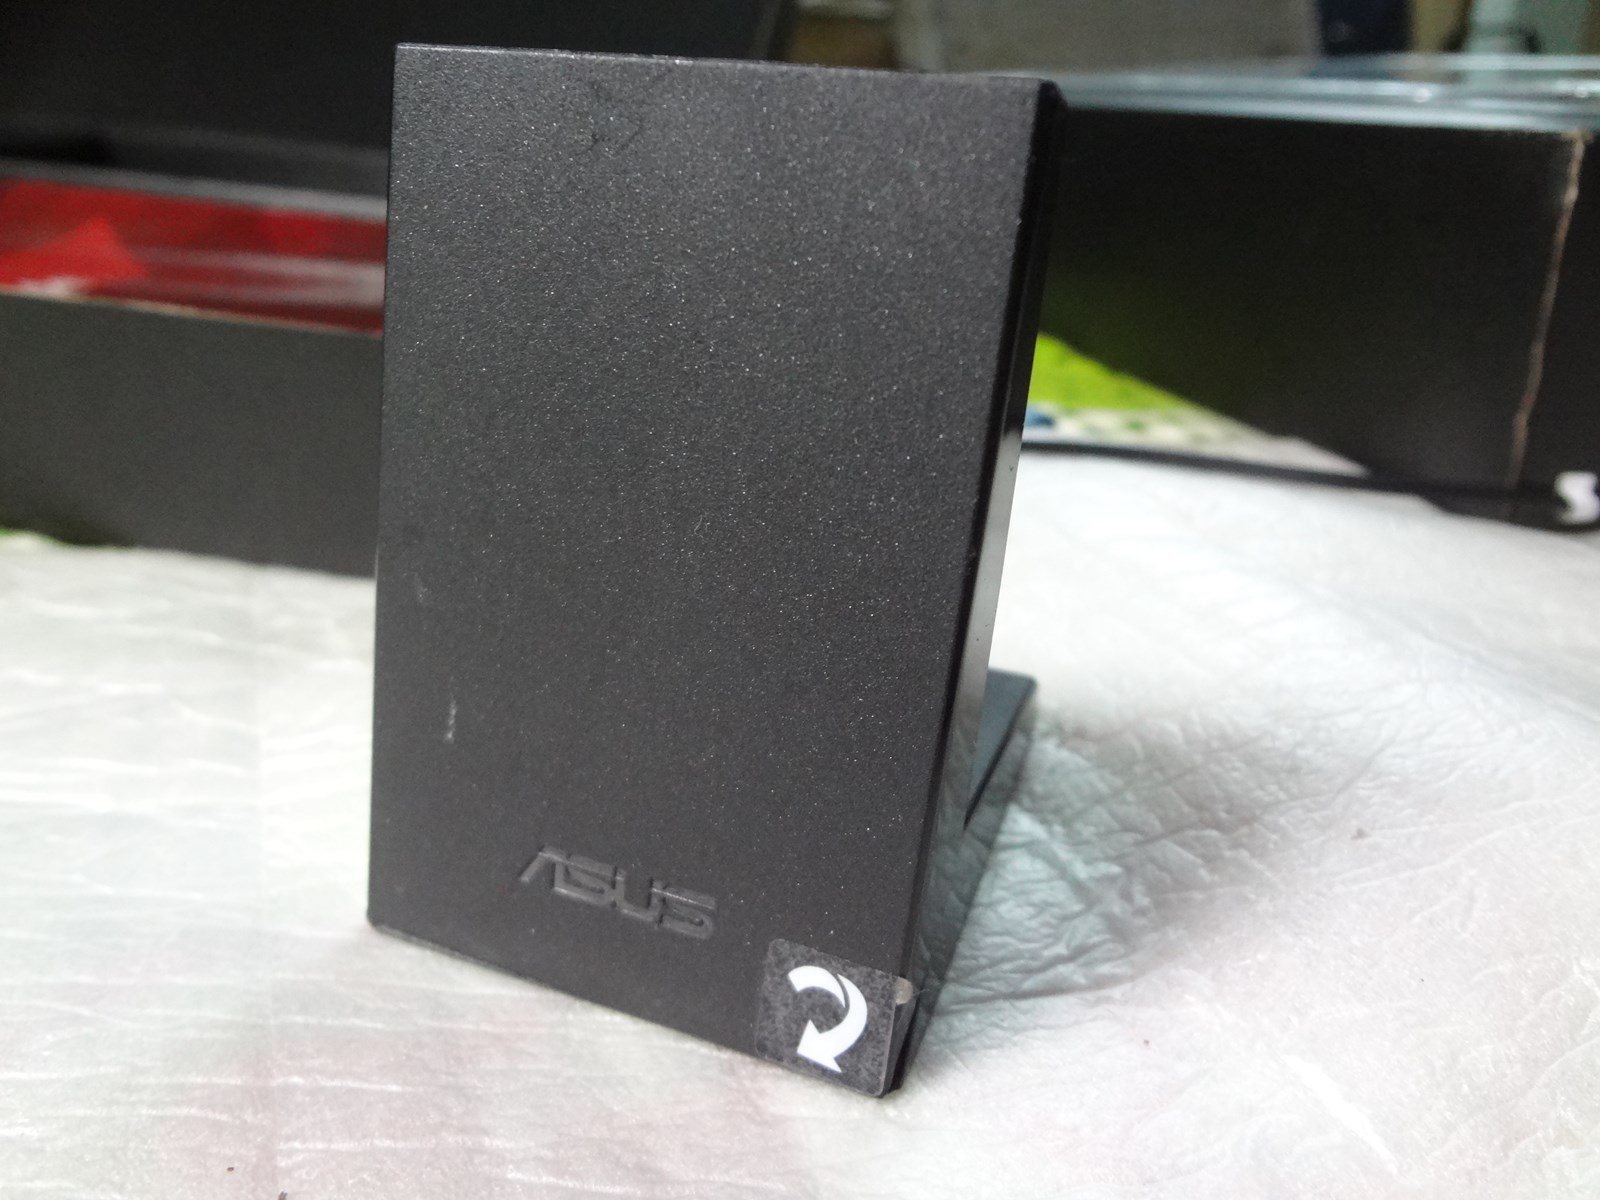
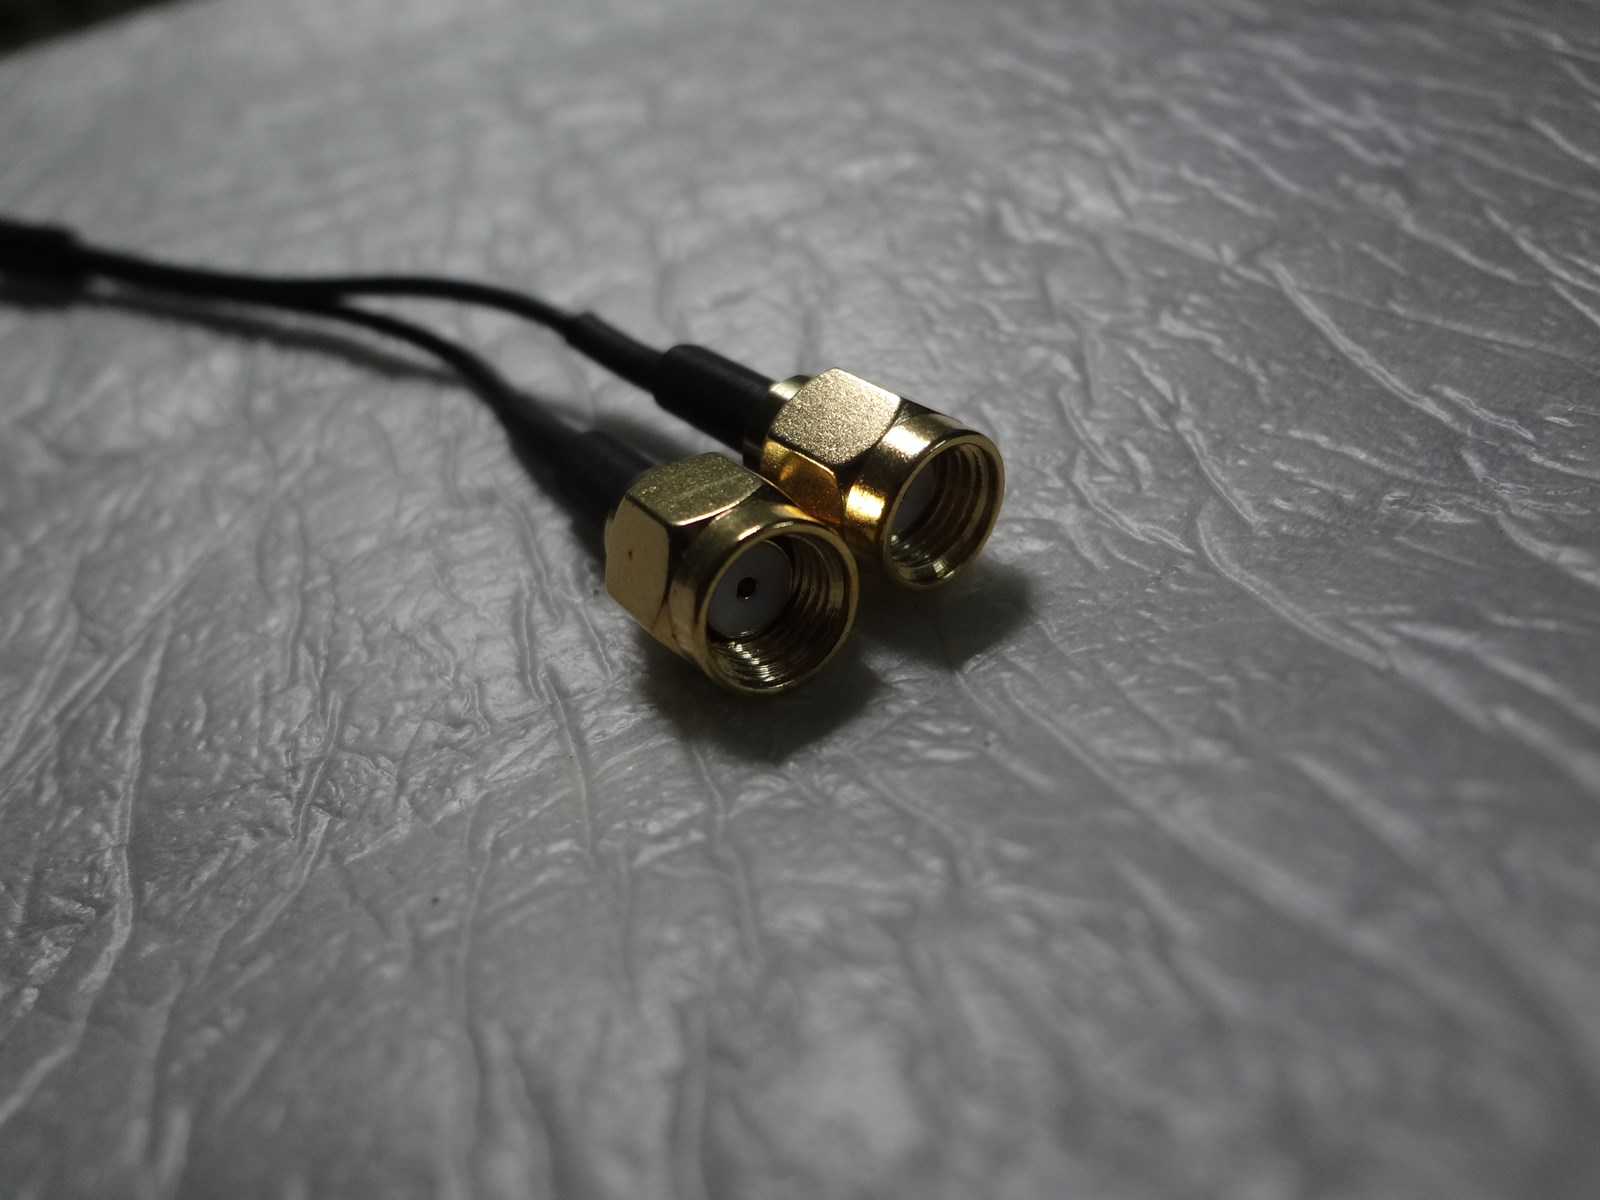
The WiFi antennae is state of the art and looks excellent. Here are some photos:
The cable connectors on both sides are gold plated and are of good quality.
The I/O shield is metallic black in color with foam on the back coated with an aluminium layer for electric screening. I forgot to take photo of the I/O shield, so apologize for that.
3. Layout:
The board:
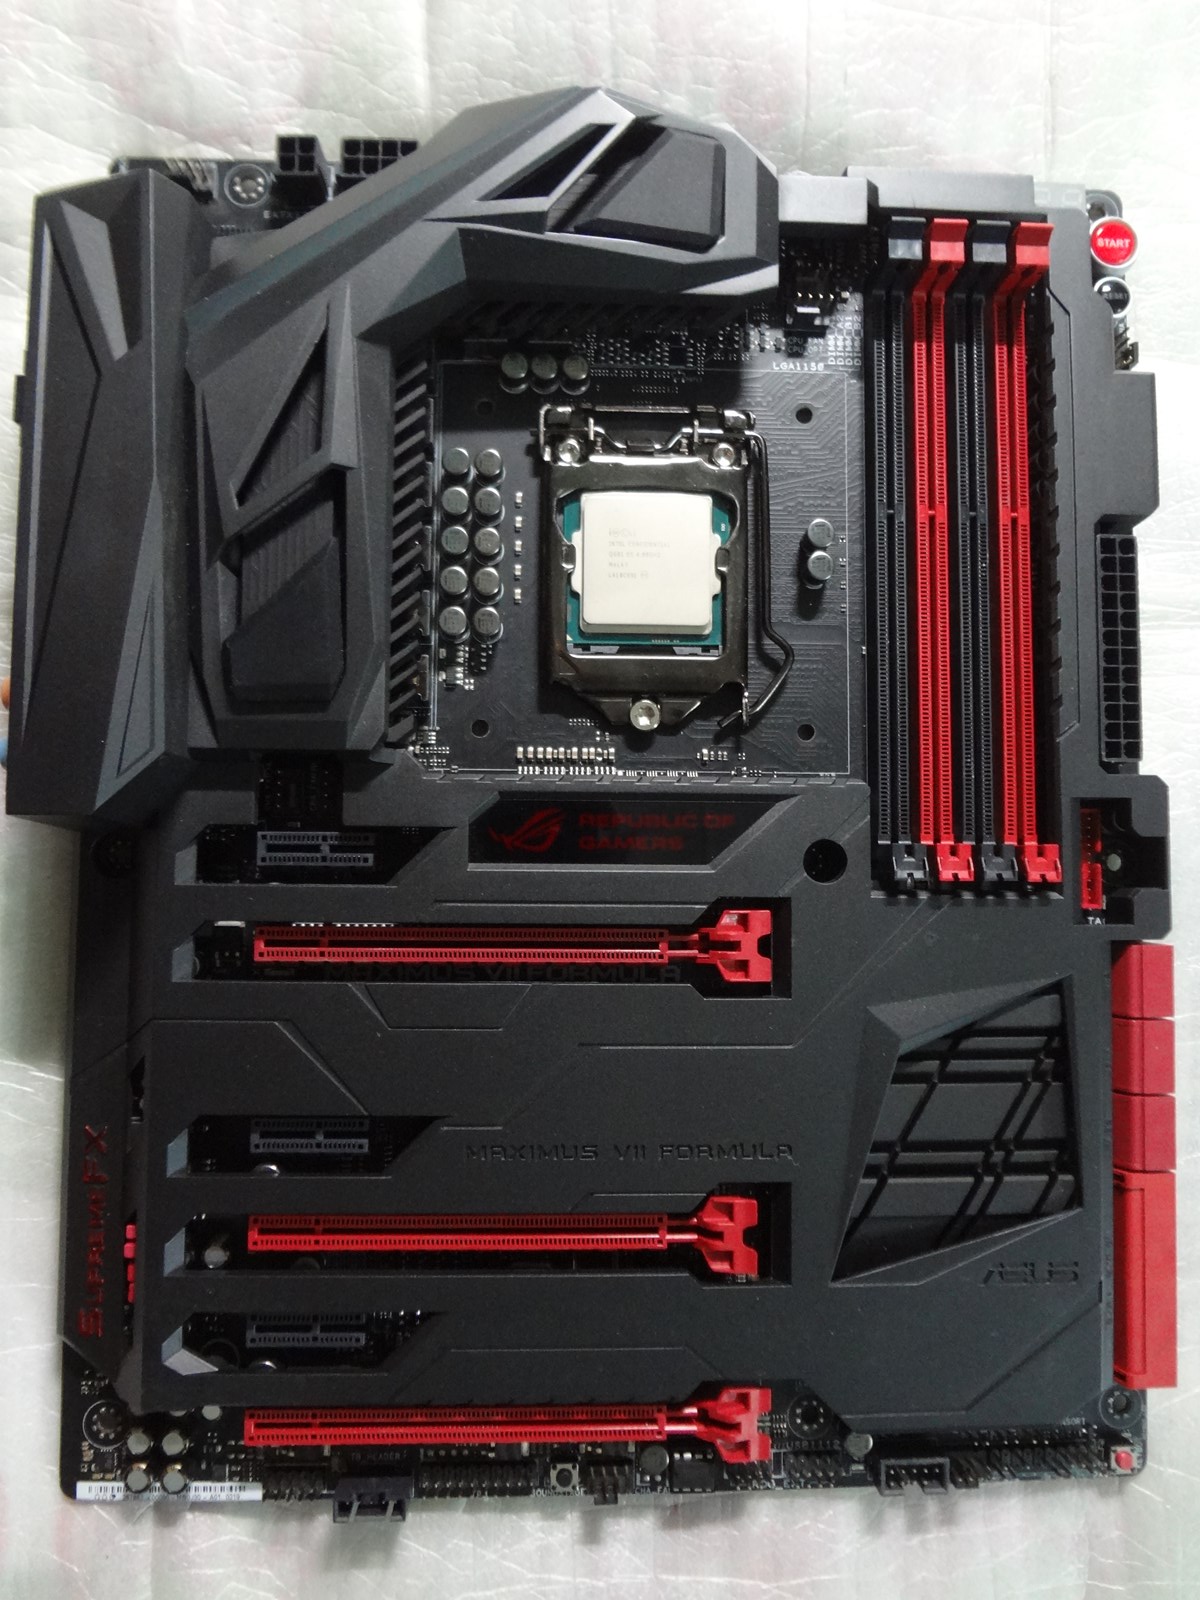
The motherboard is based on a black and red theme as seen on Republic-of-Gamers segment.
Cleaning was good mostly. There was little excess soldering flux on some areas.
Back I/O ports:
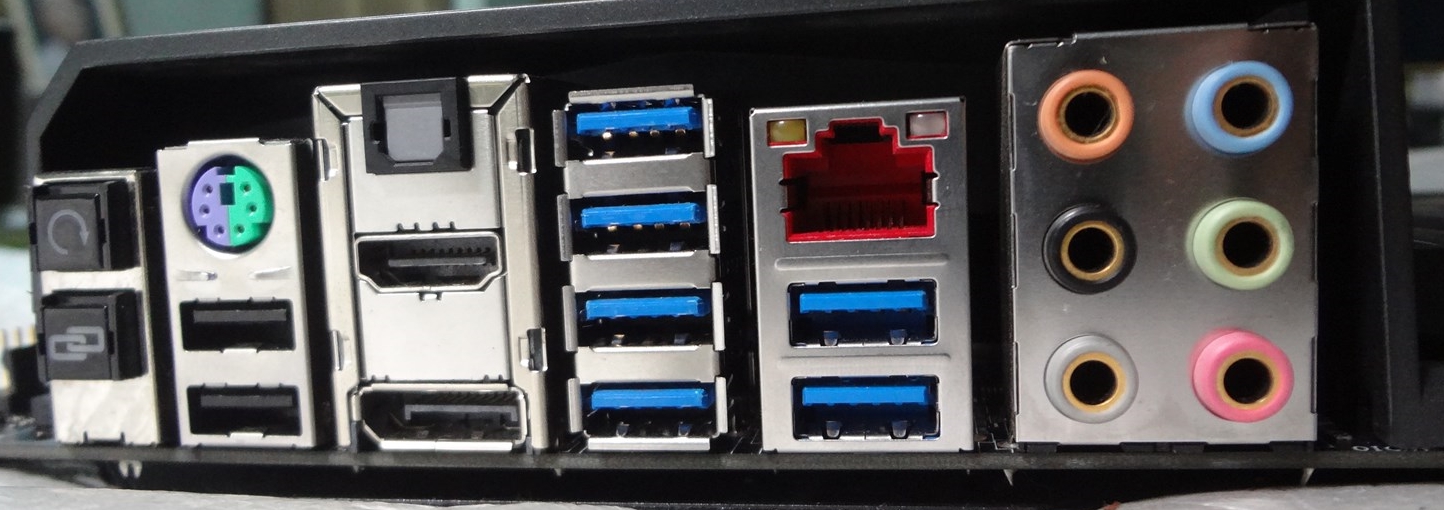
The back panel features:
Power connectors:
The board is powered using the standard 24 pin EATX and 8 pin EPS plugs.
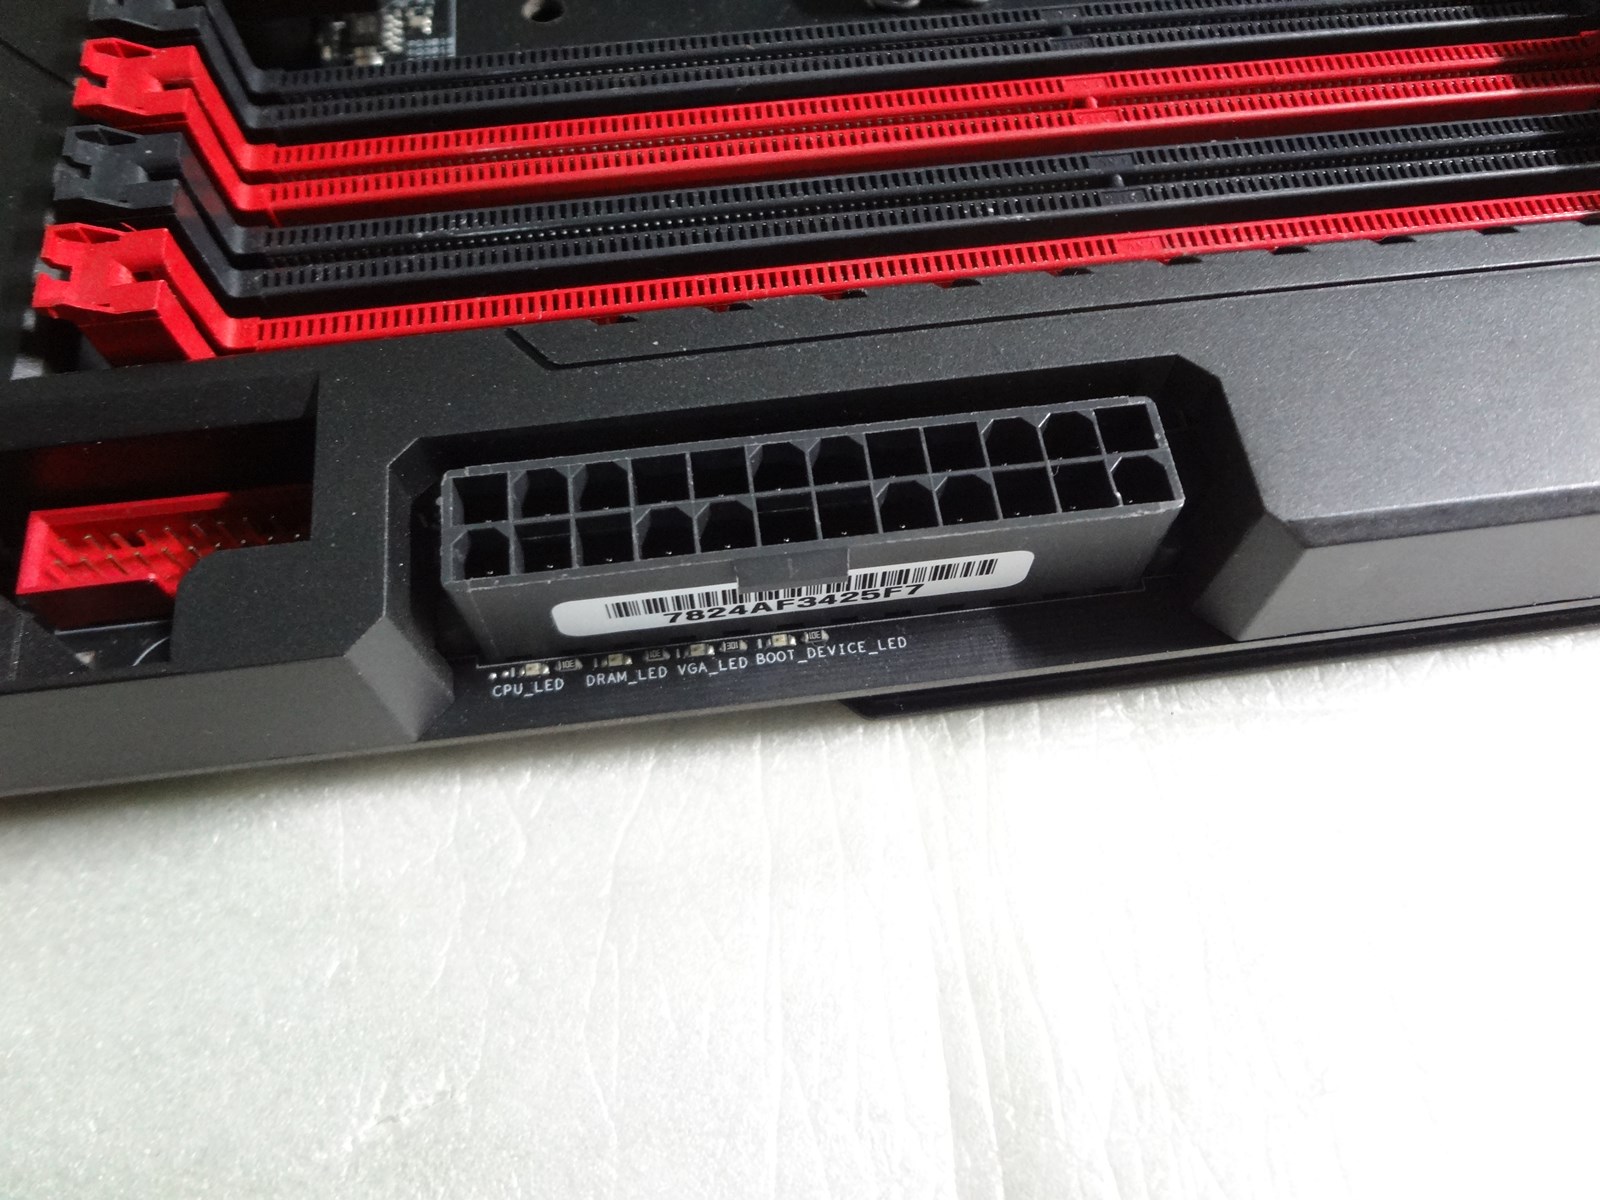
Please note that there are device detection LEDs here as well for diagnosing problems.
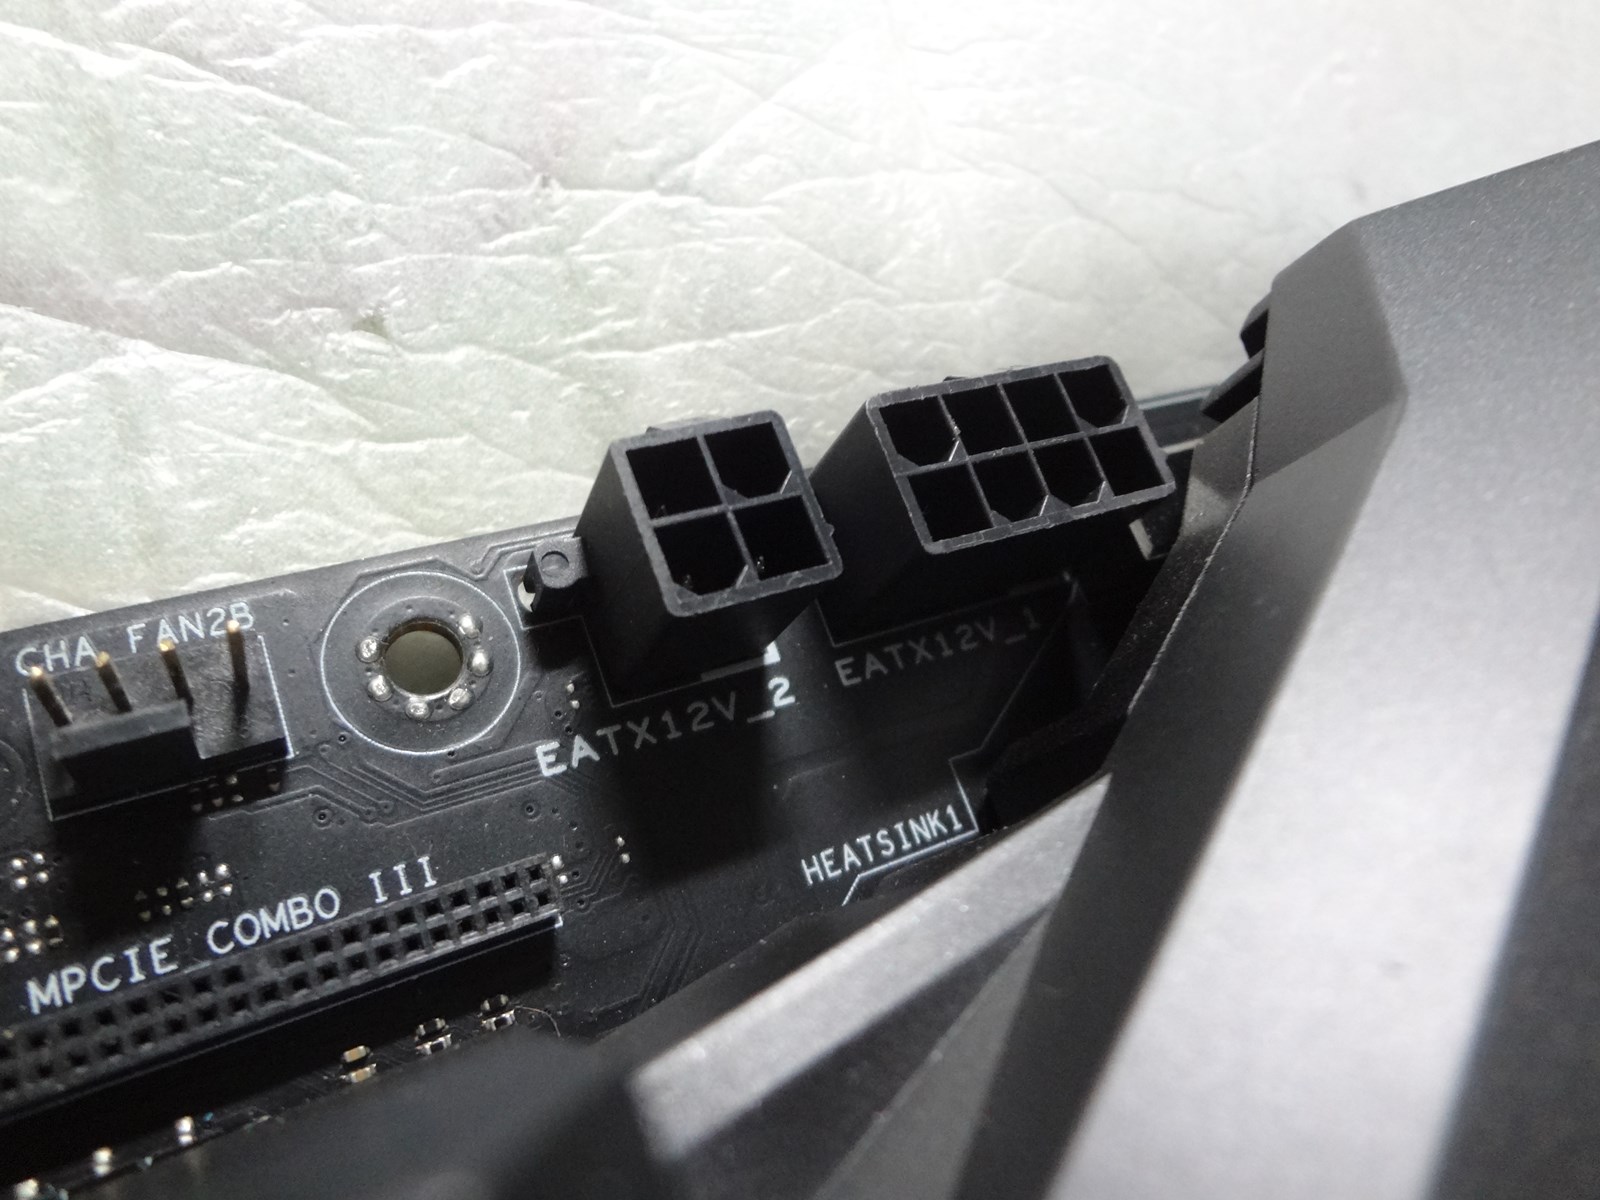
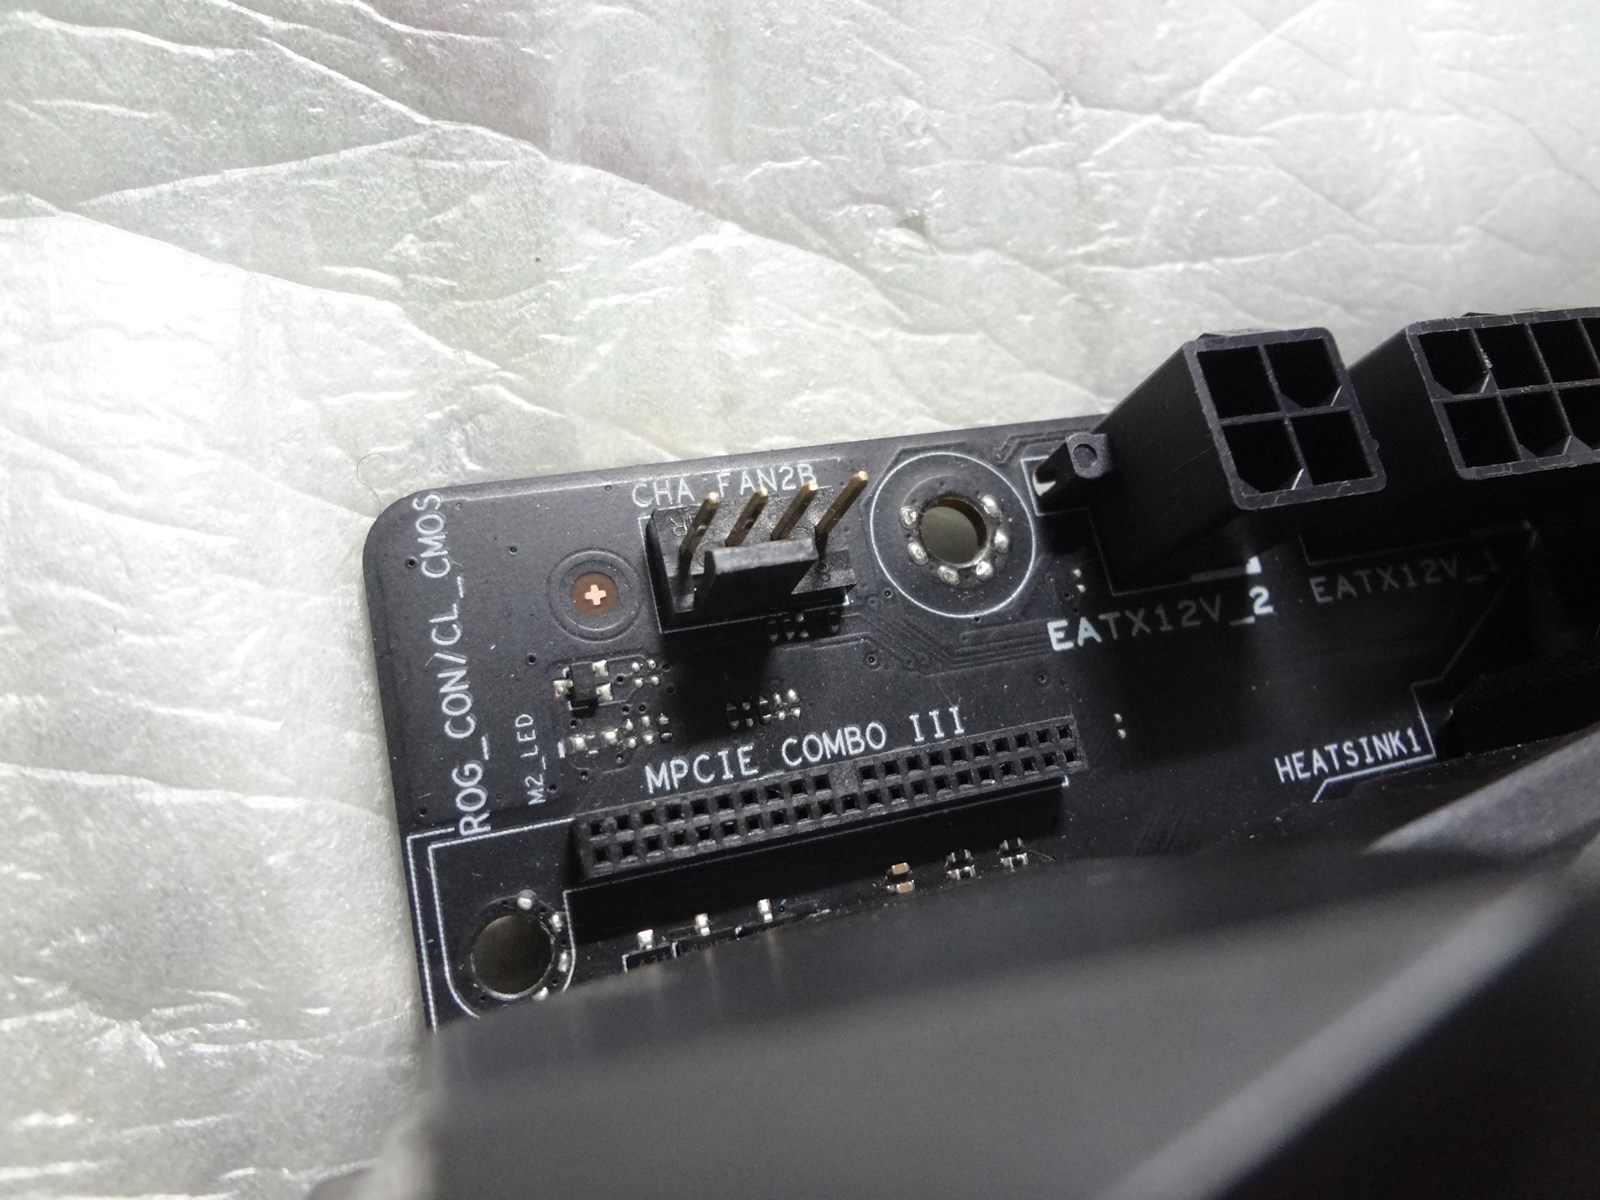
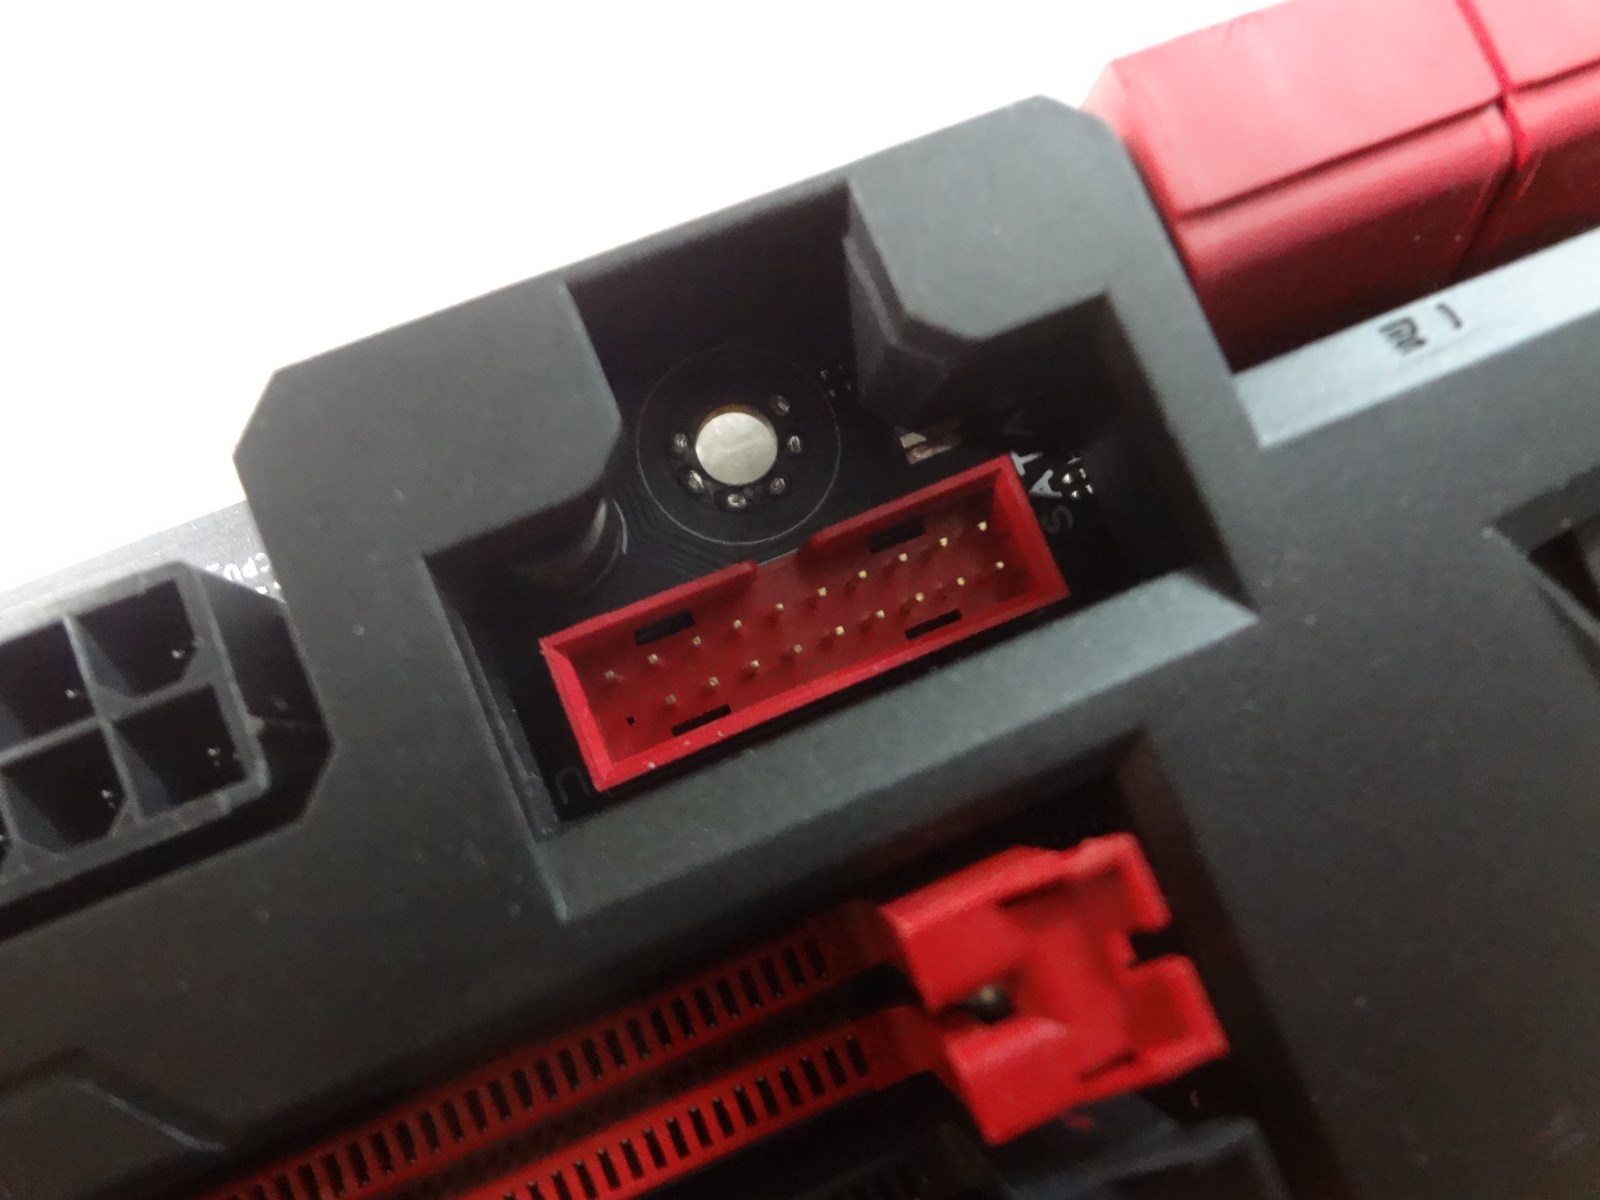
An additional 4 pin power connector is given for even more power required during extreme overclocking.
Expansion capabilities
SATA ports:[/B]
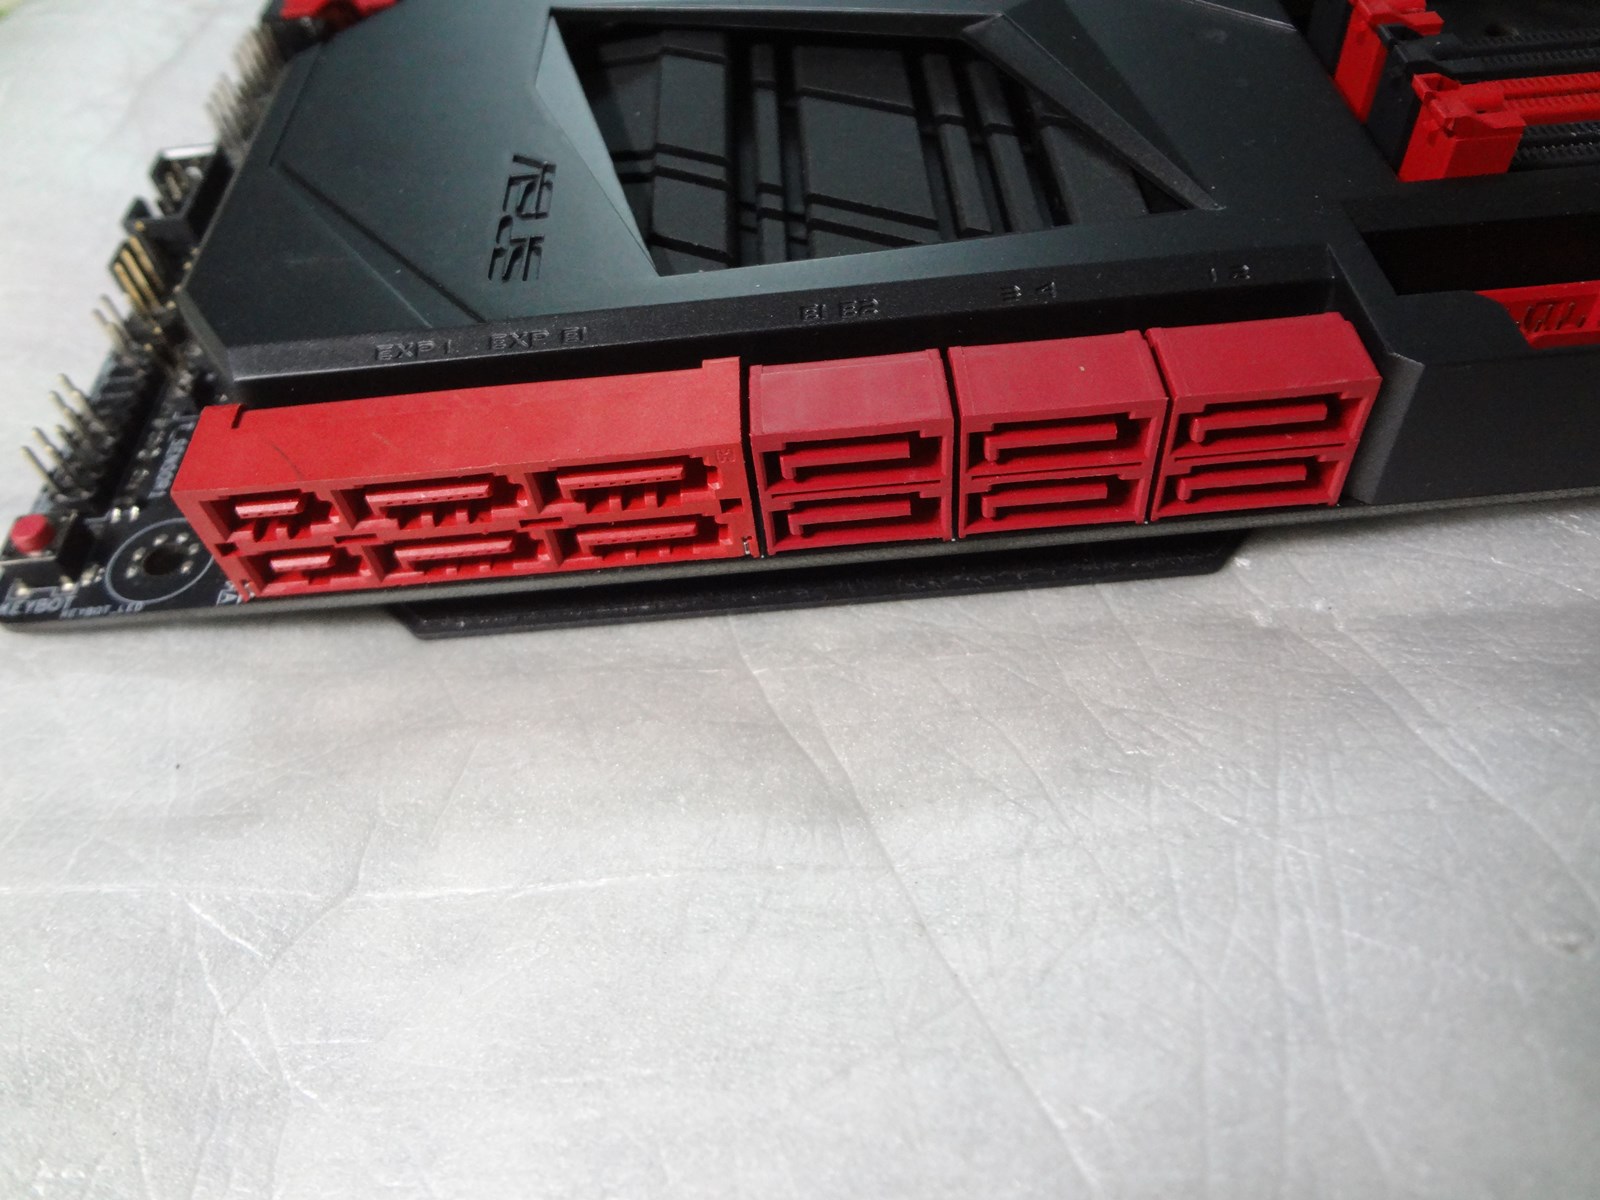
The motherboard has 10 SATA ports at 6 Gbps conforming to the SATA-III specification, two SATA Express ports with support for two SATA 6 Gbps ports each. 6 SATA ports are controlled by the Z97 chipset while the rest are controlled by ASMedia controller.
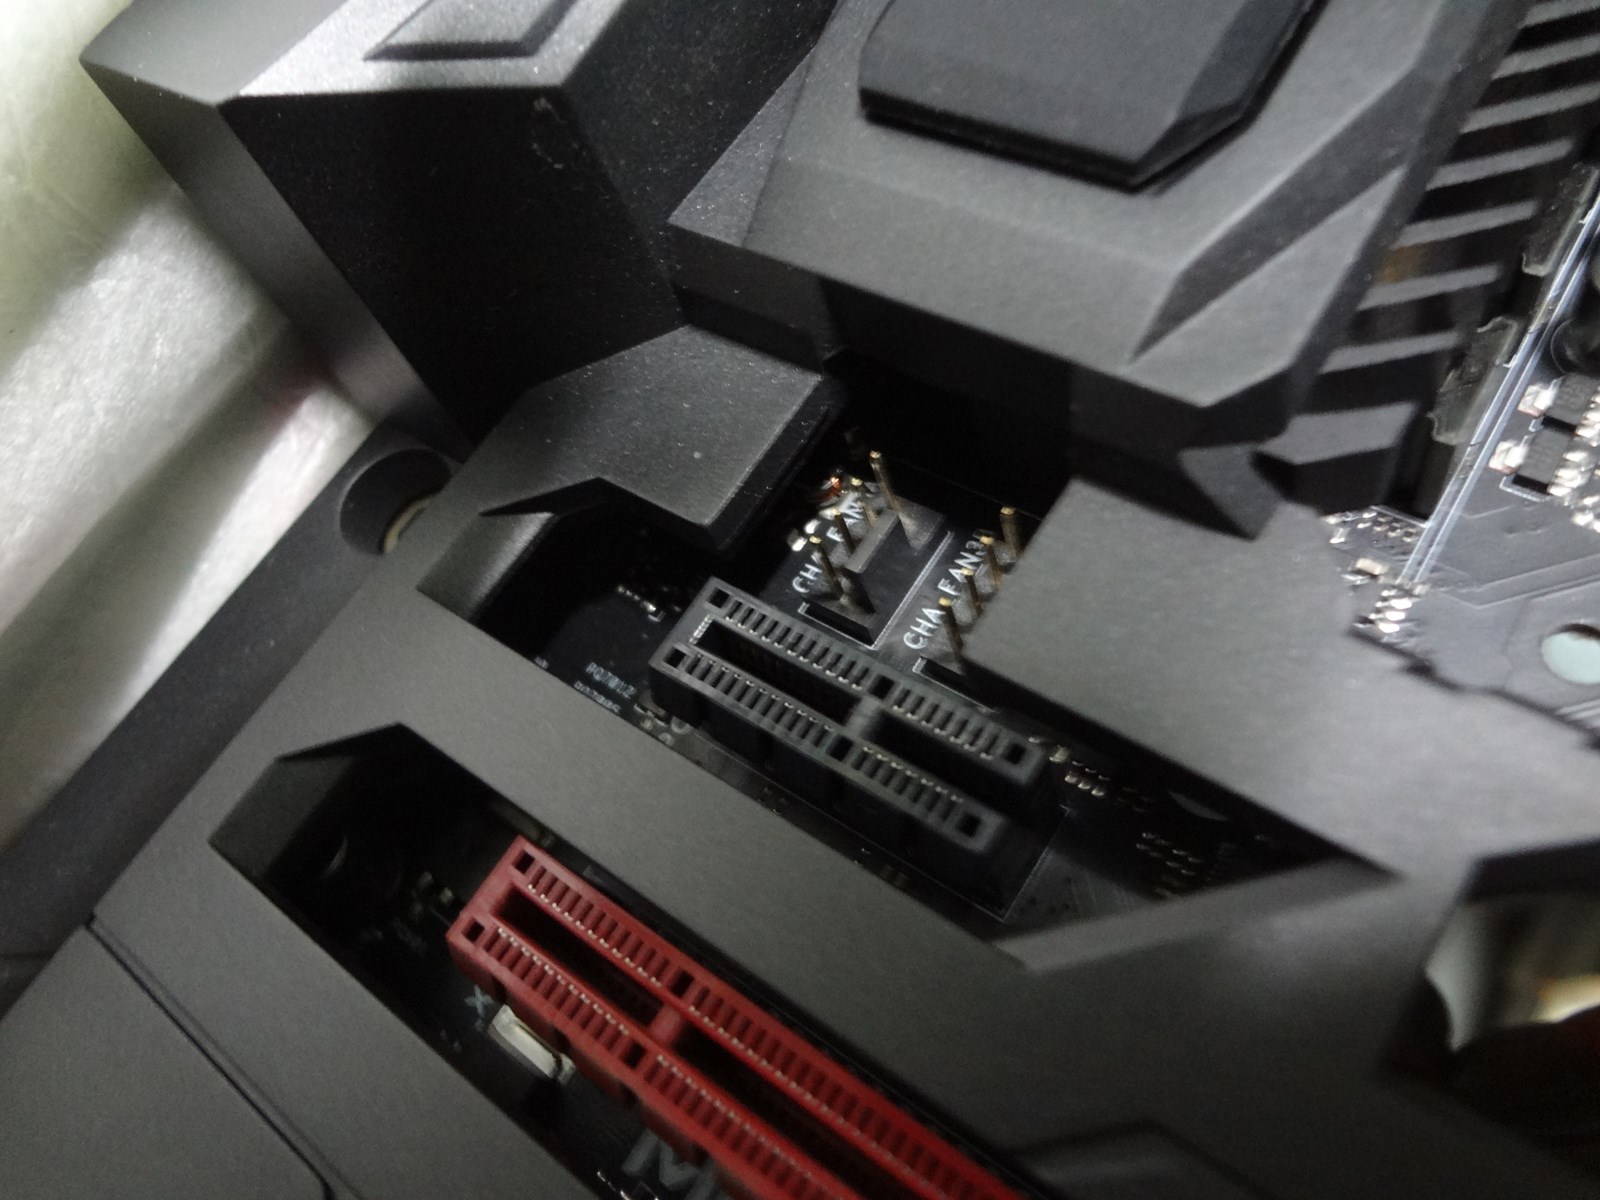
Expansion slots:
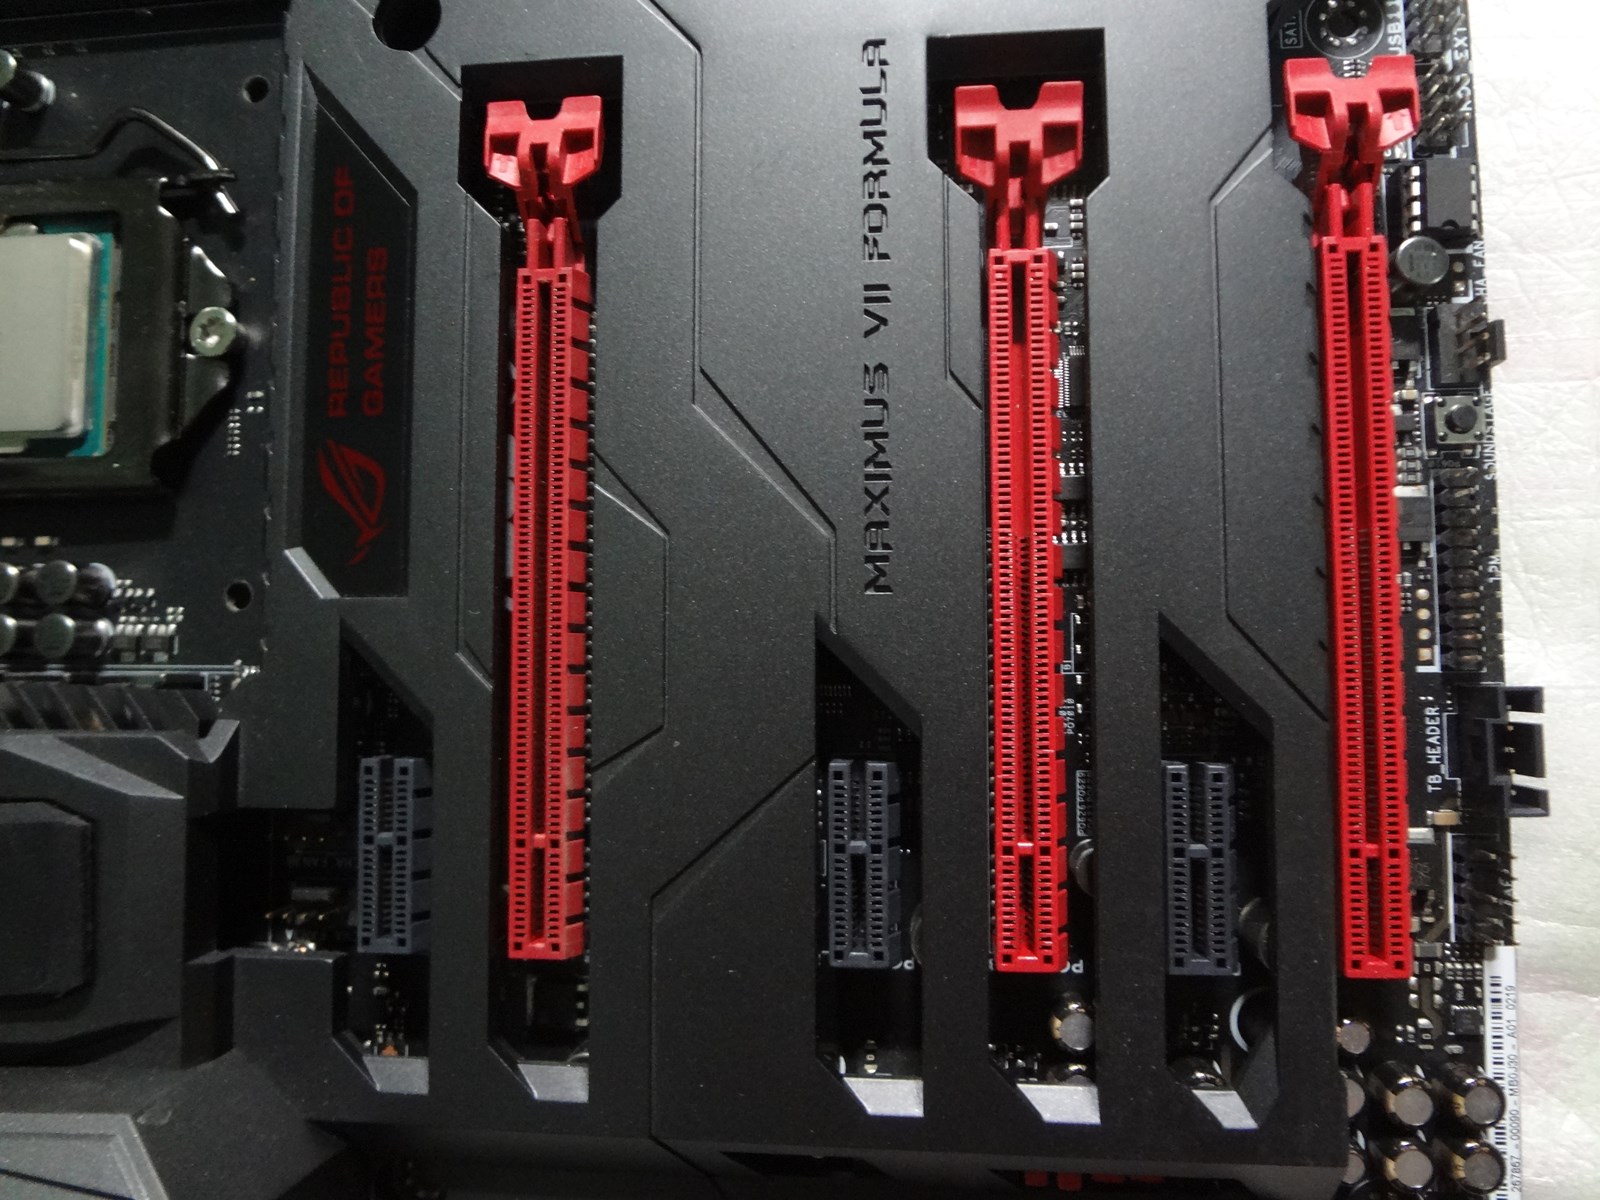
Top to bottom: PCIe 2.0 x1 slot 1, PCIe 2.0/3.0 x16 slot @x16, PCIe 2.0 x1 slot 2, PCIe 2.0/3.0 x16 slot @x8, PCIe 2.0 x1 slot 3, PCIe 2.0 x16 slot @x4
The motherboard supports AMD CrossFireX™ Technology and NVIDIA SLI. Maximum dual GPU bandwidth is x8 + x8 mode.
RAM slots:
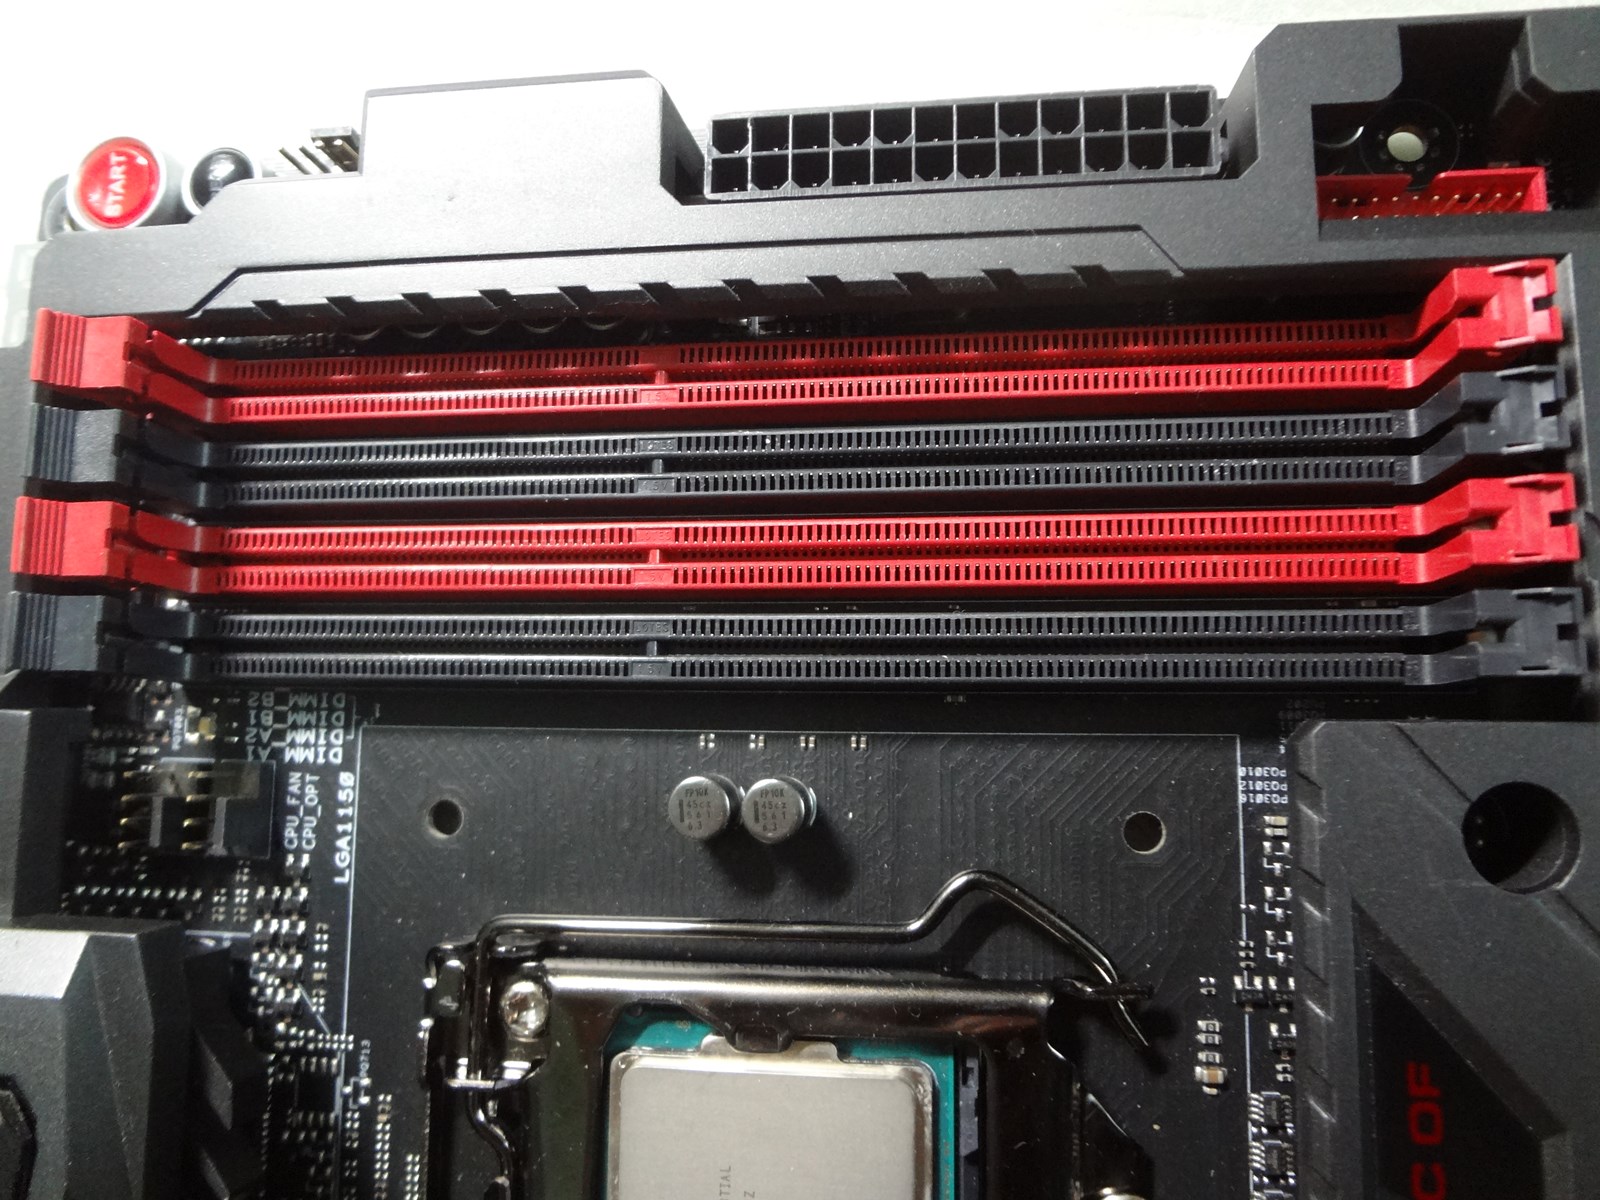
4 DIMM slots are provided supporting up to 32 GB of memory each memory module being 8 GB in size. Maximum overclocked memory support is upto 3300 MHz.
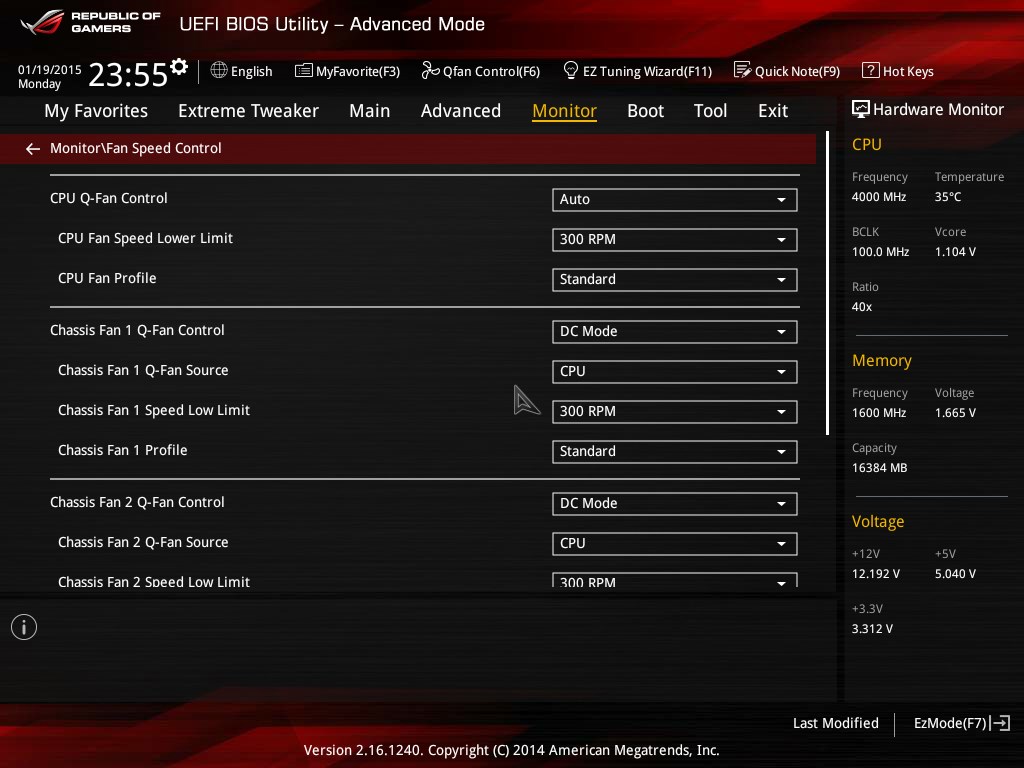
Layout is very good and I was very happy with the placement of the fan headers.
4. Component analysis, Internal headers, front panel headers, switches:
I was not permitted to open the cover of the board and so could not have the inside scoop of the components.
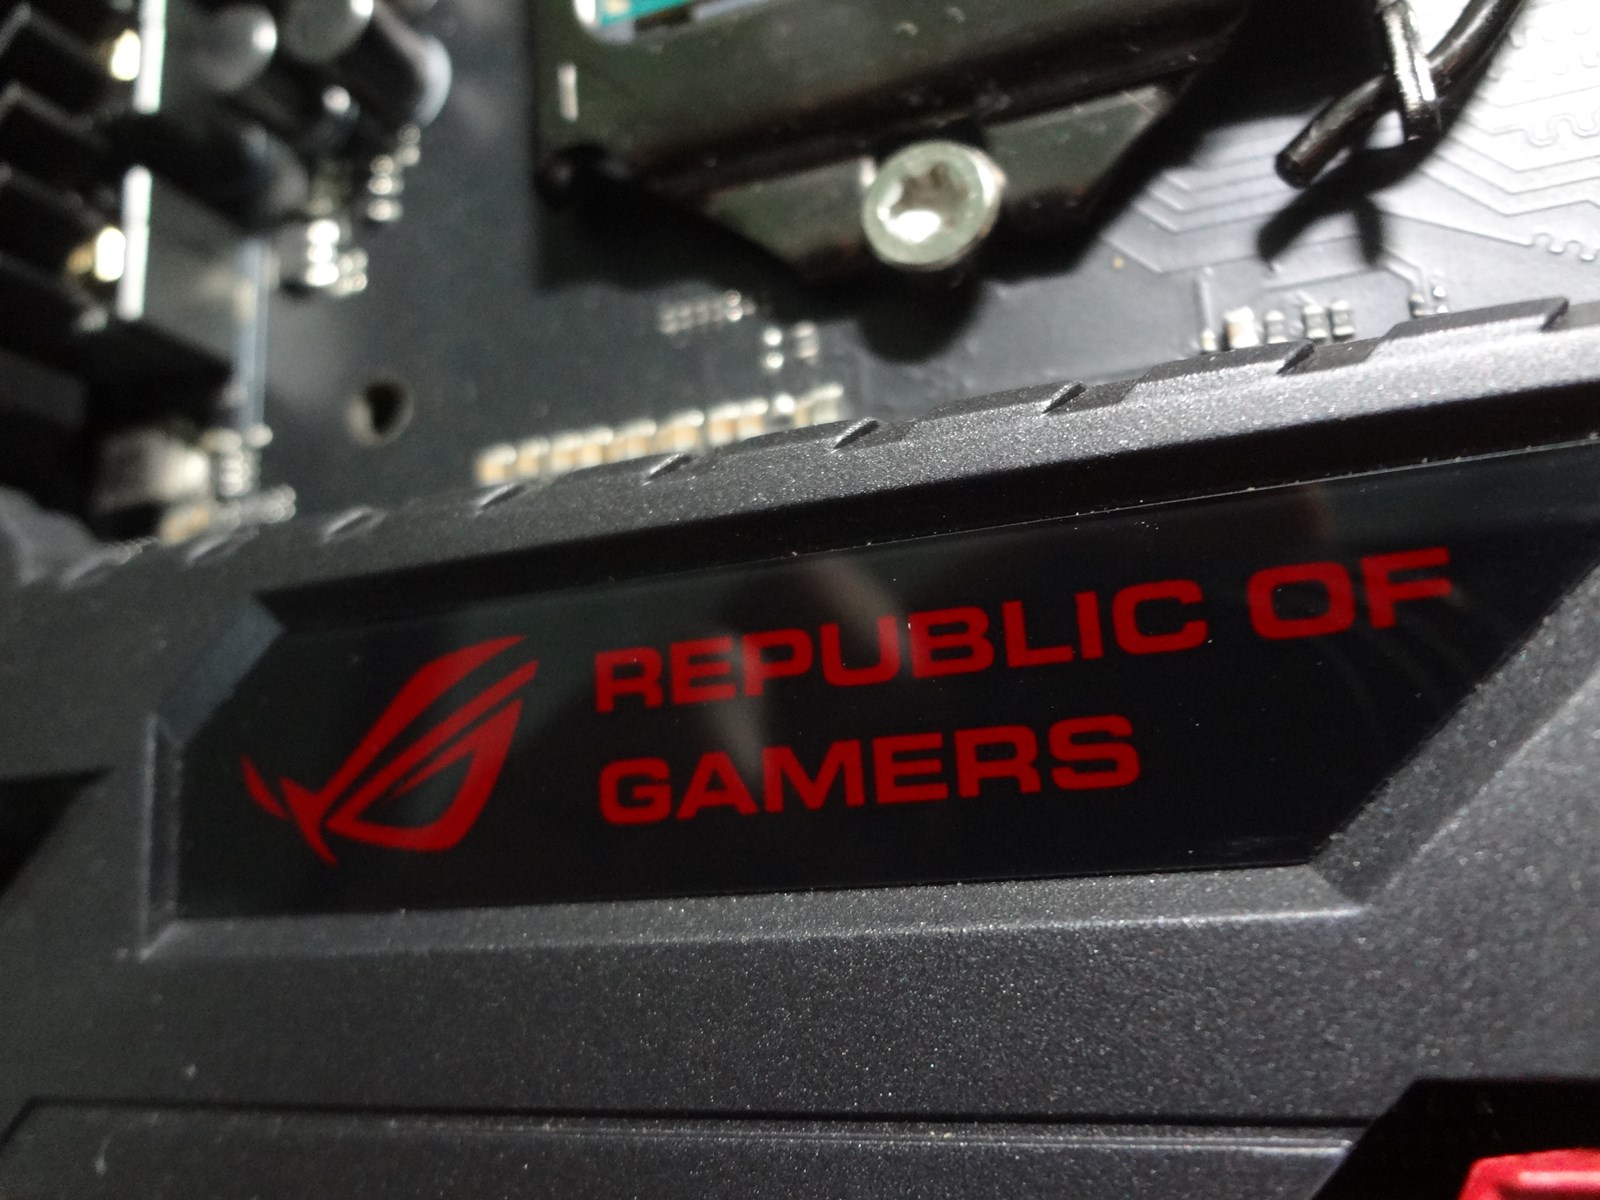
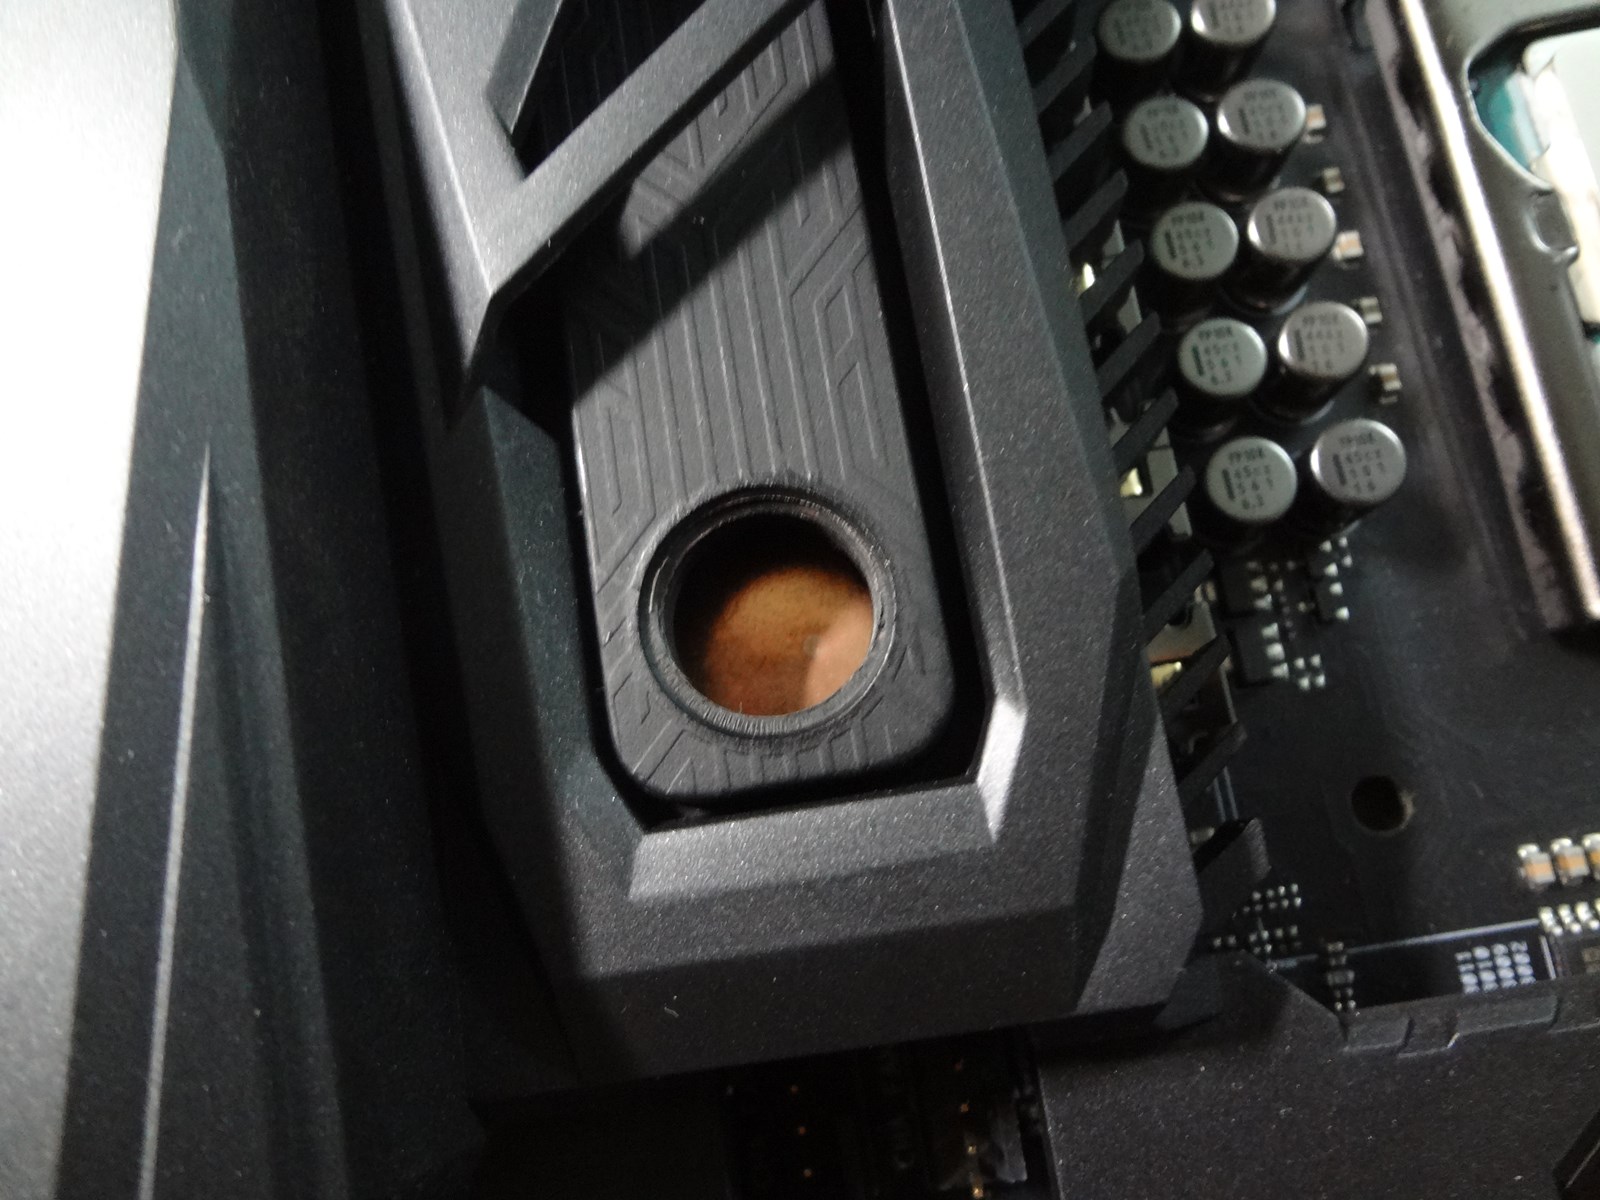
At the centre of the board, there is a Republic-of-Gamers logo done on a glass layer which glows on standby power and is PWM based.
The power design is 8+2 phase. The chokes are of premium quality and features 10K solid state capacitors.

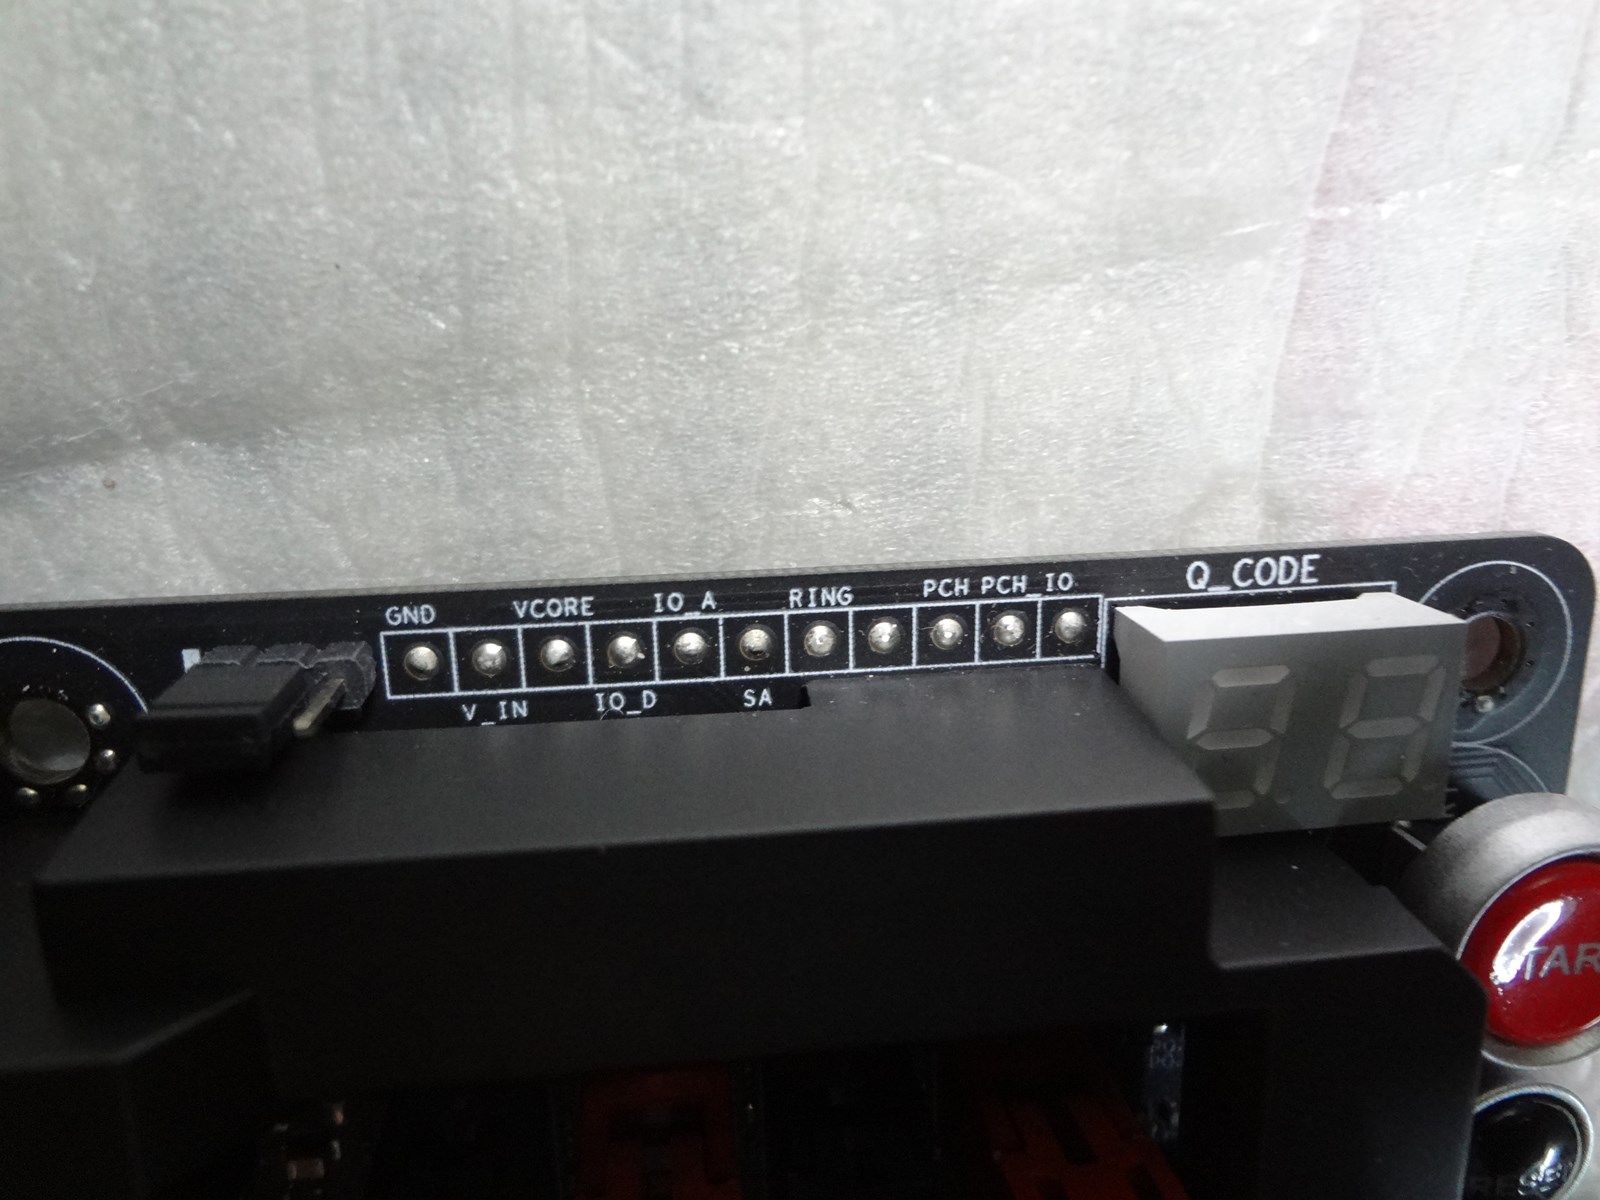
There are onboard power and reset buttons and a POST code reader provided for diagnosing problems. There is also a chassis fan header just beside the reset button.
The mPCIE Combo III connector and another chassis fan header is situated near the top left corner of the board.
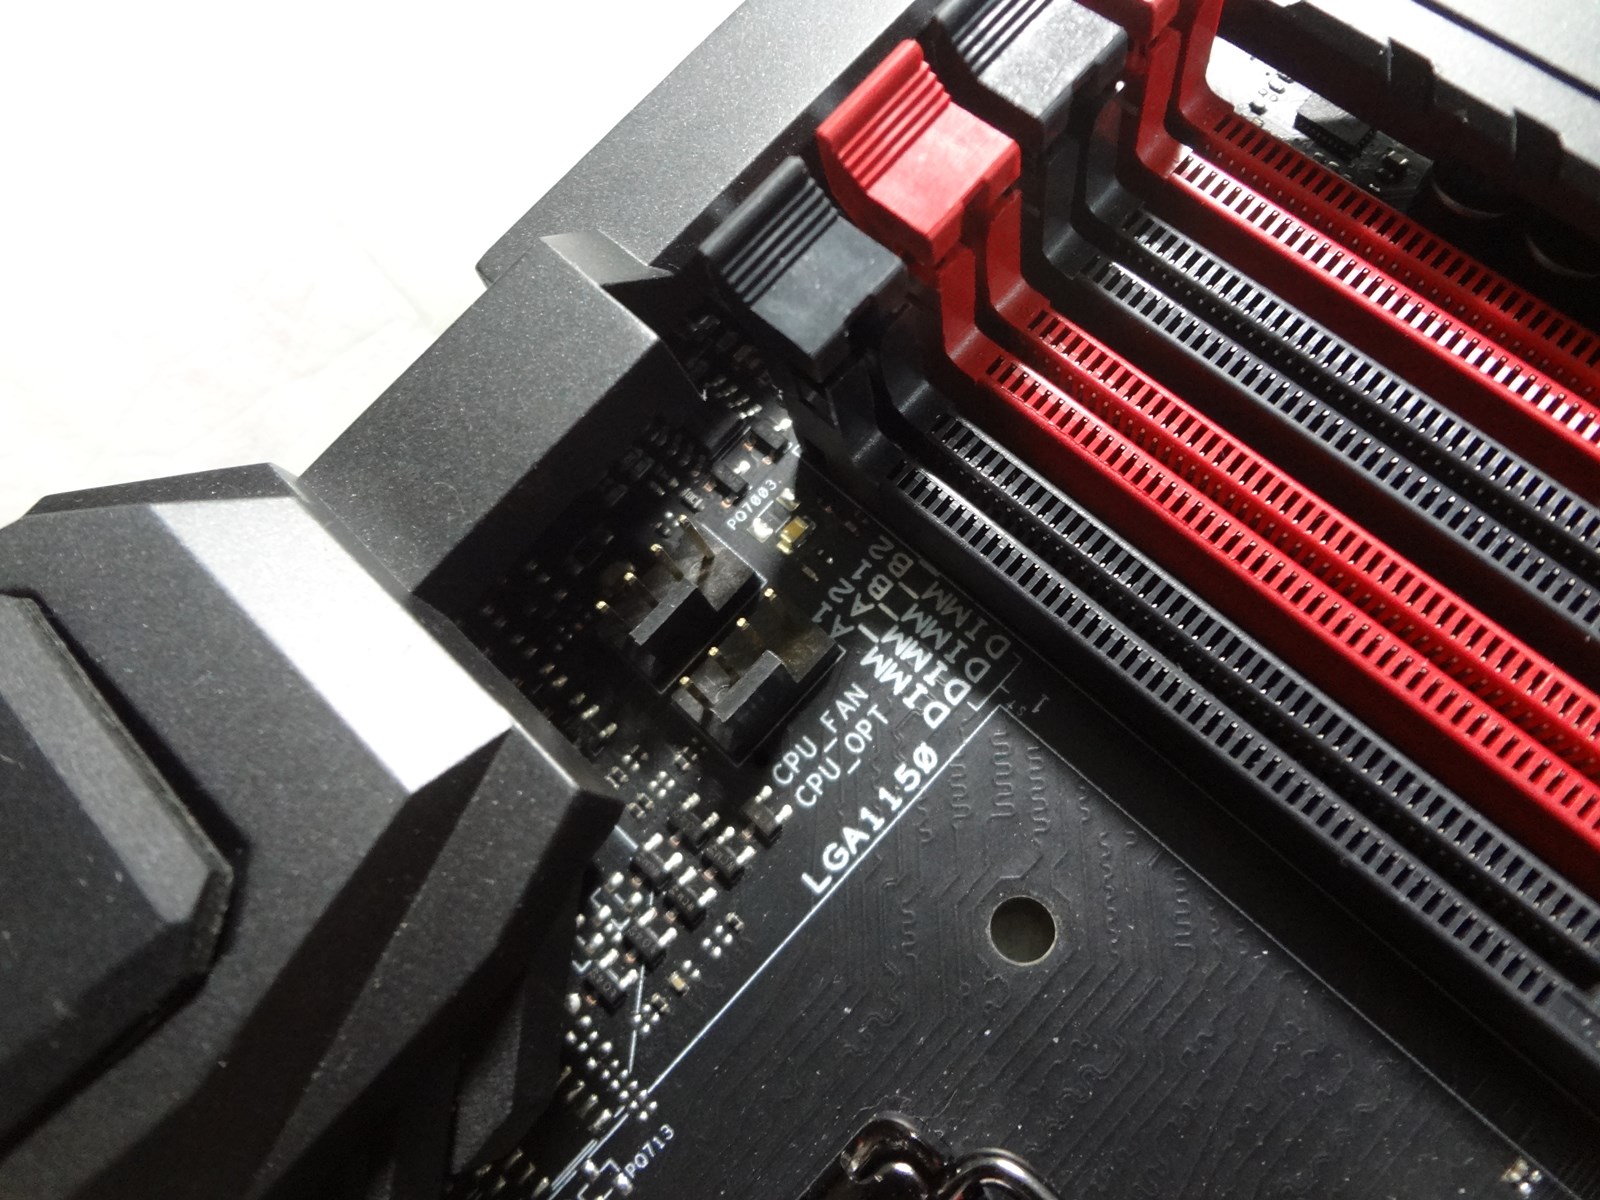
The CPU fan header and an optional CPU fan header is provided to the left of the RAM slots.
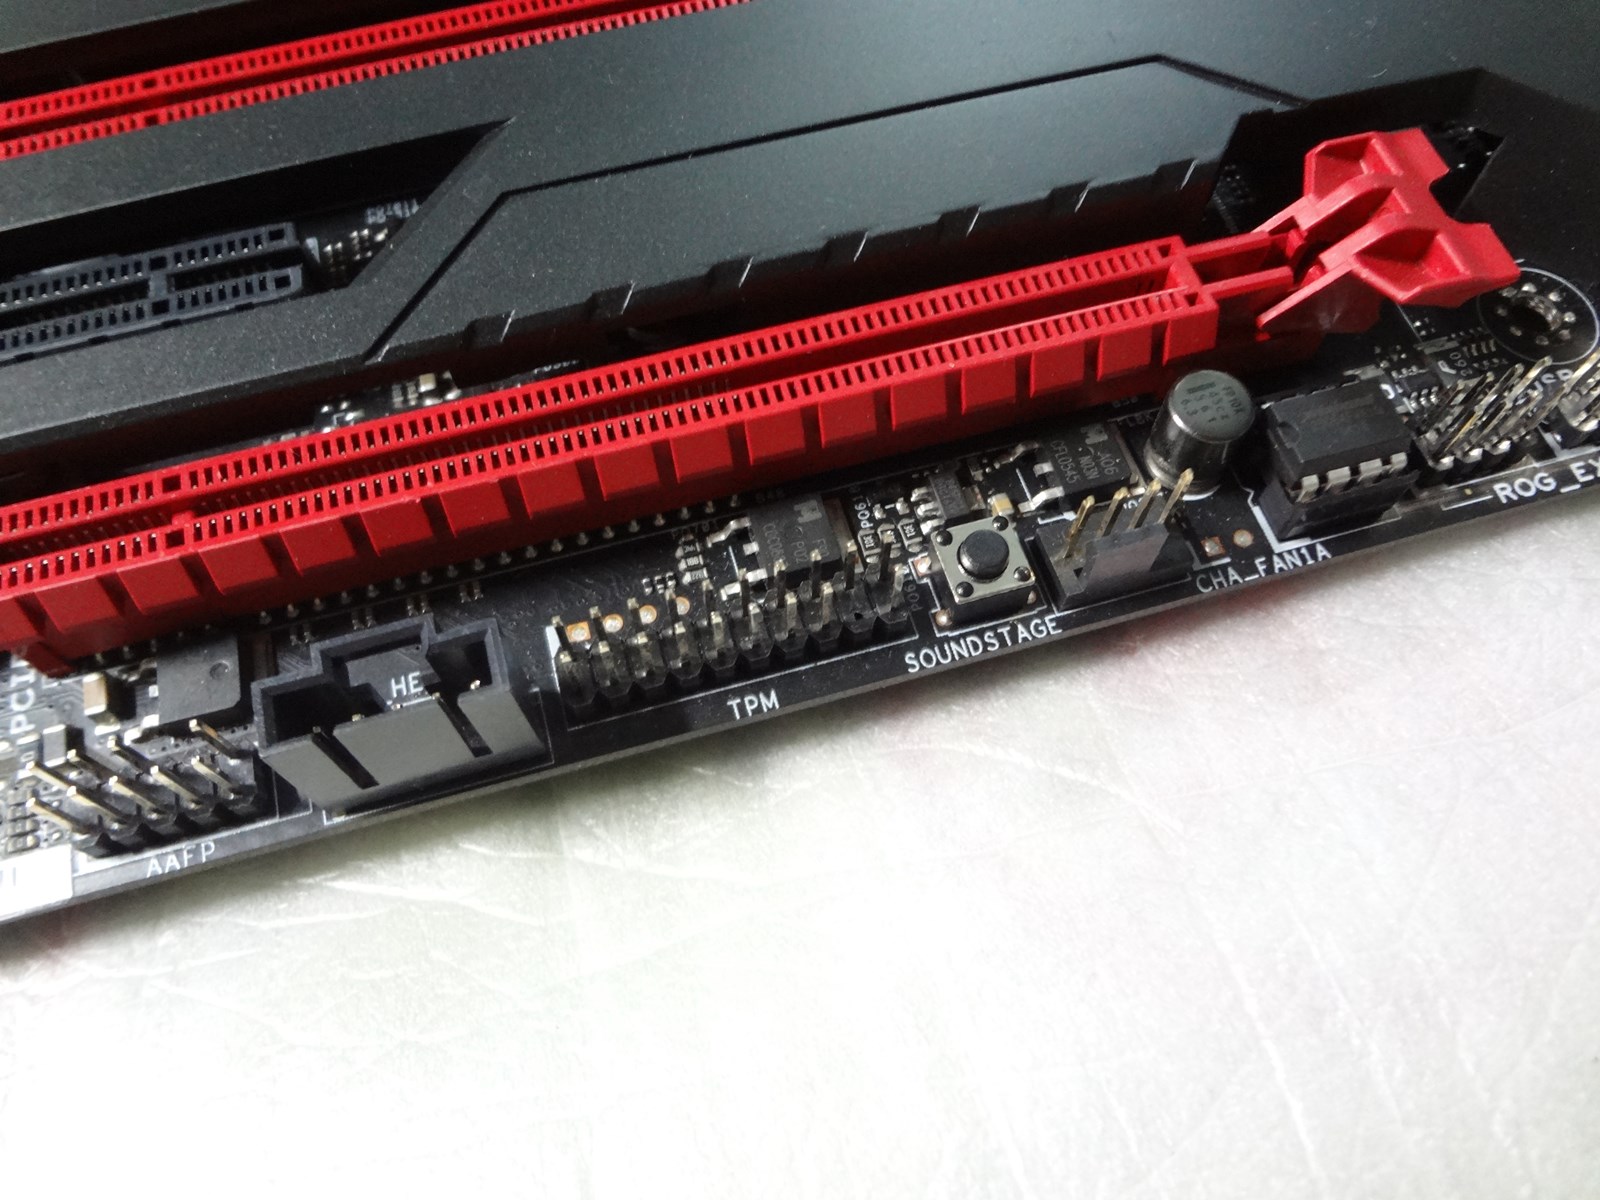
The front panel header is standard. There is a keybot button for easy overclocking and XMP settings. There are some chassis fan headers and USB headers as well along with the ROG ext connector, soundstage button, front panel audio and TPM headers.
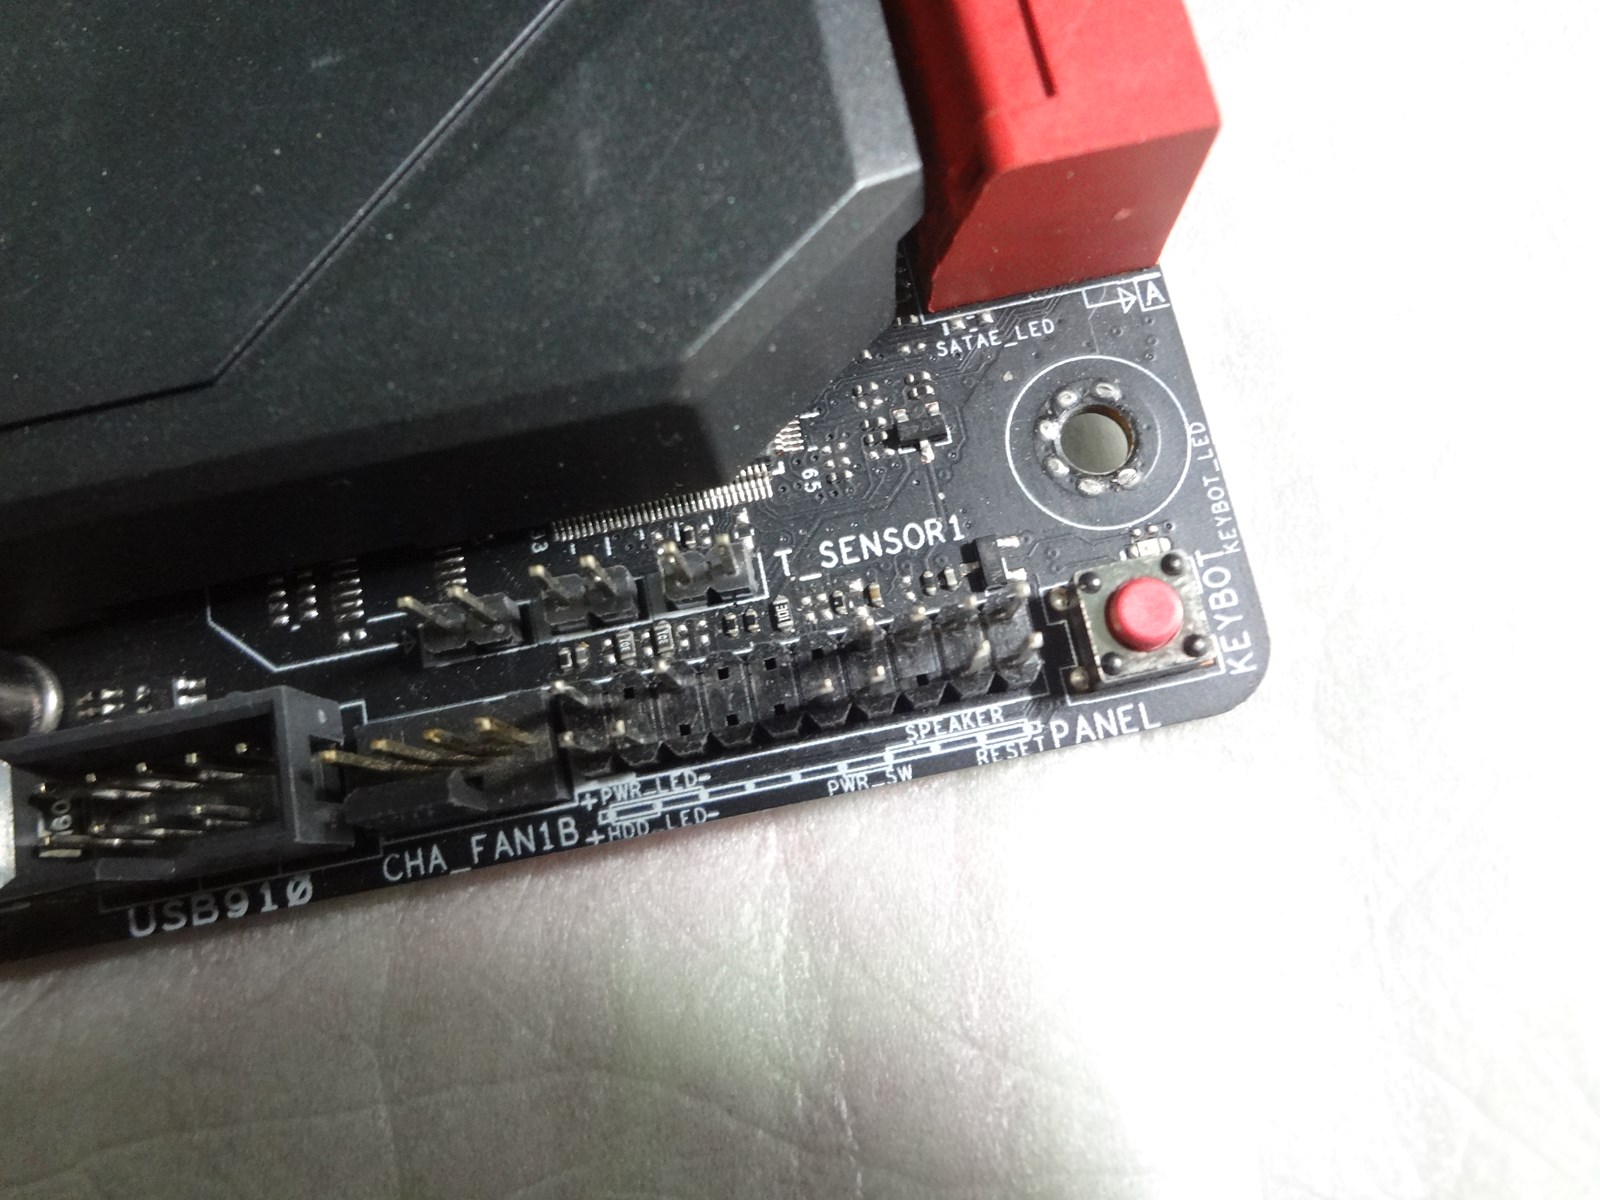
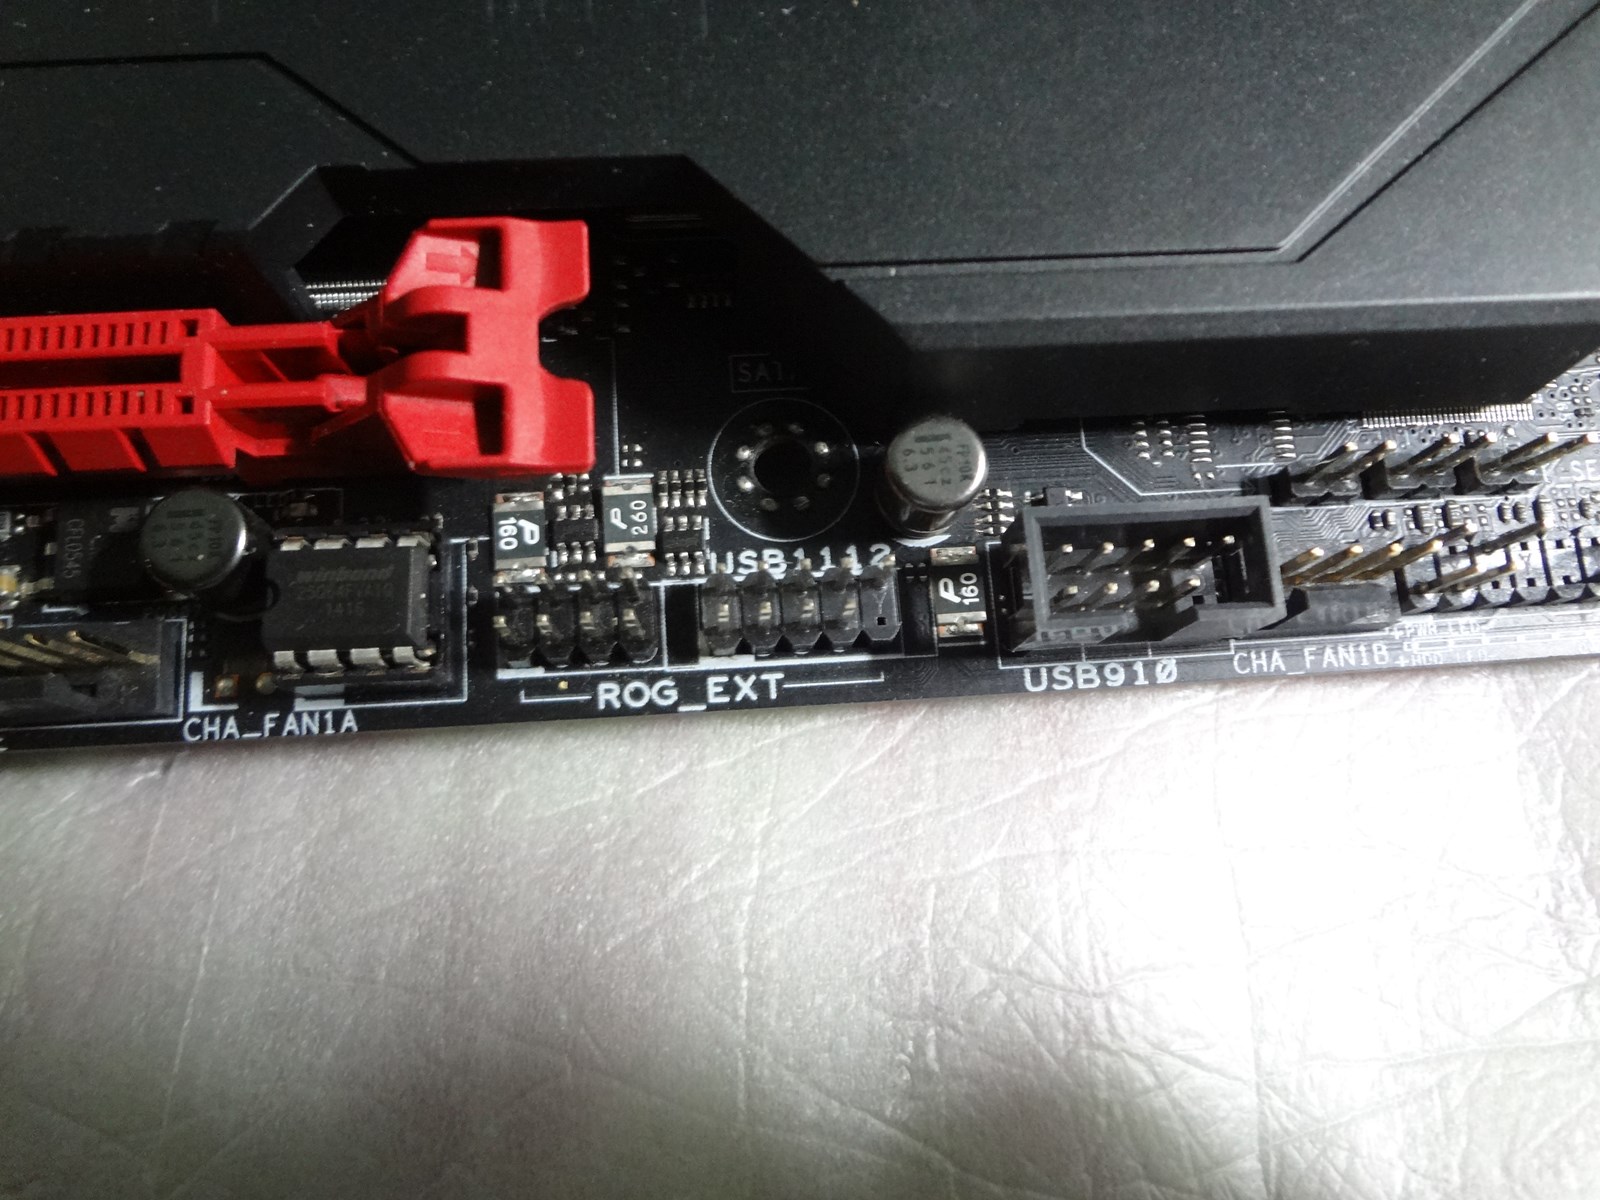
There are some other chassis fan headers as well.
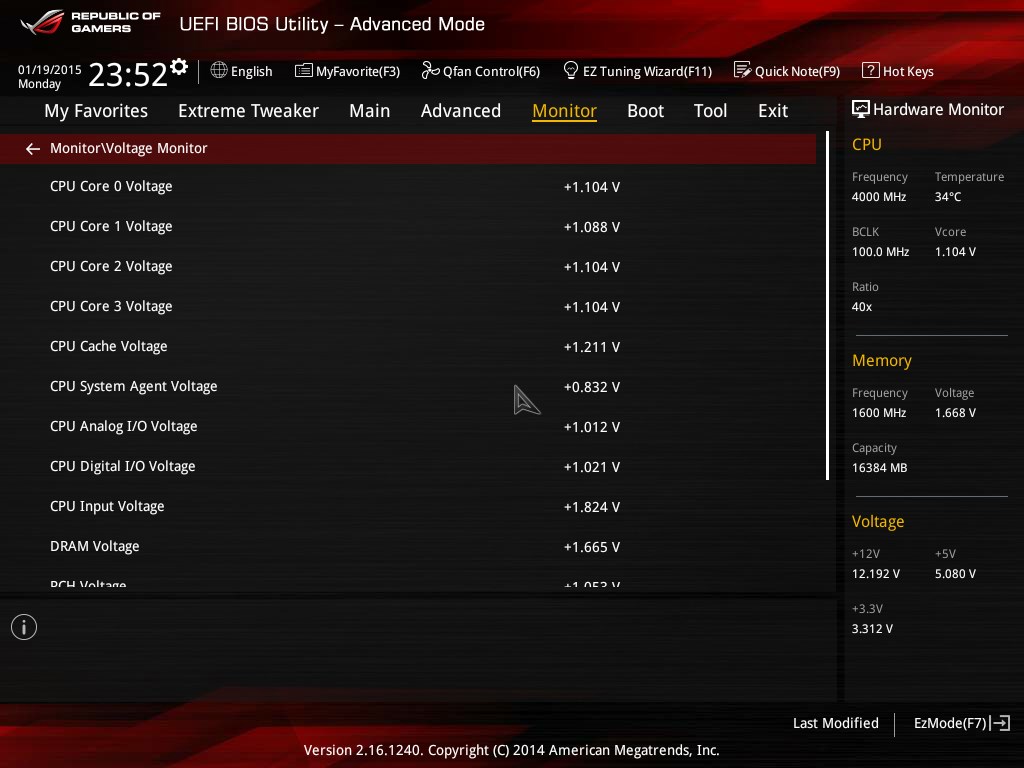
Near the top-right portion of the board, voltage test points are given for easy realtime DIY and diagnosis.
The front panel USB 3.0 header is included near the power connector.
The VRM heatsink is fully ready for water cooling and is fully based on copper.
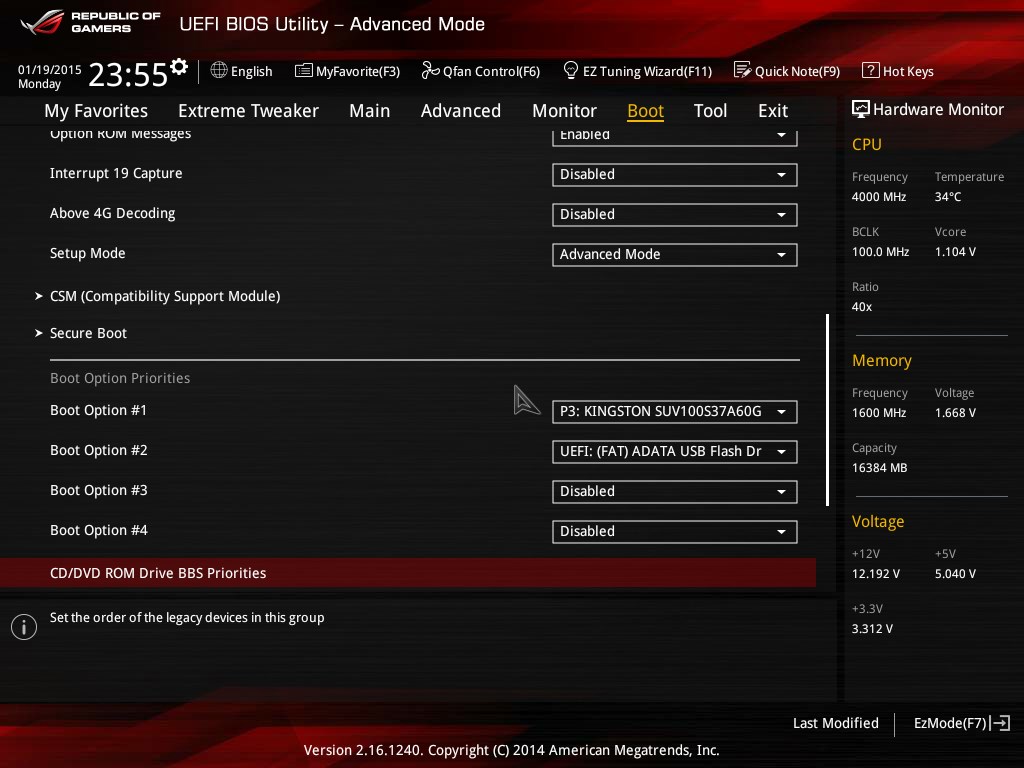
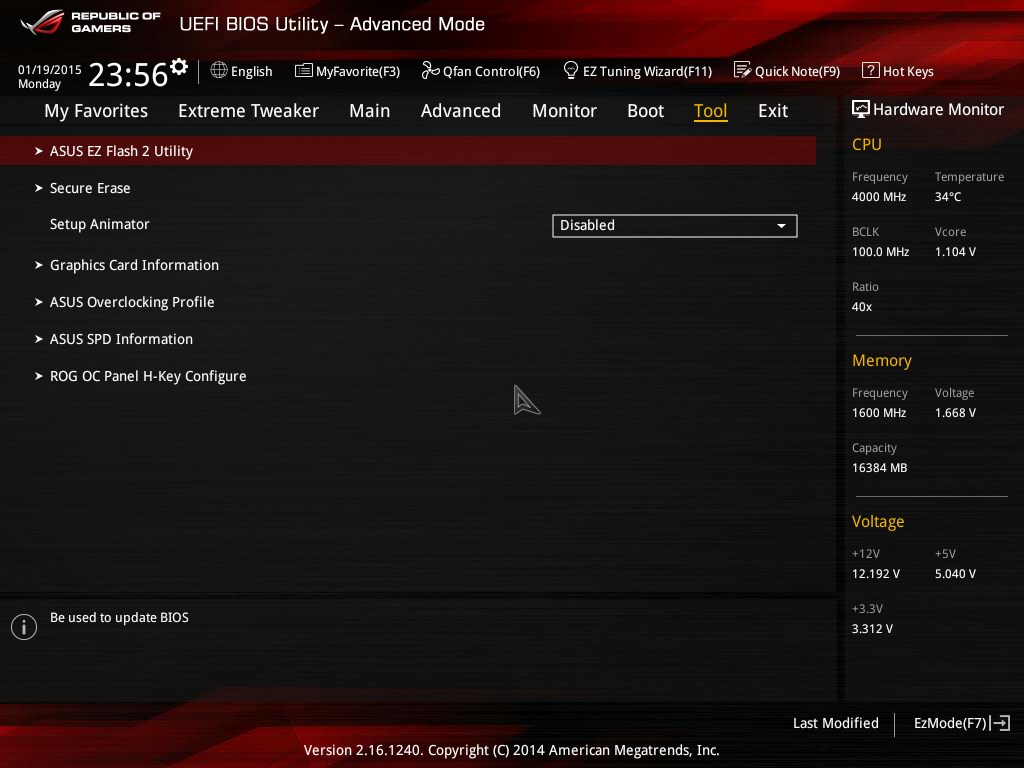
The UEFI/BIOS is stored in a 64 MB Winbond chip. It is user replaceable in case the chip needs to be replaced.
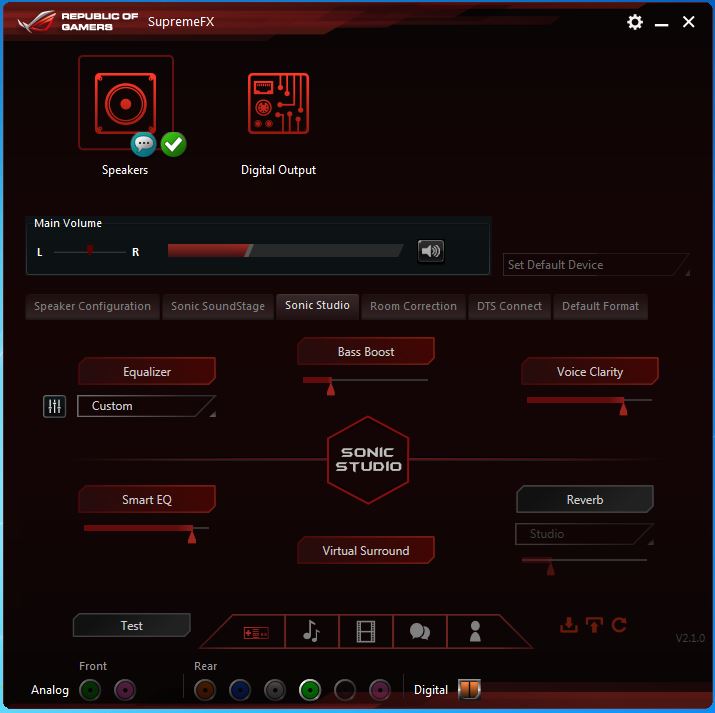
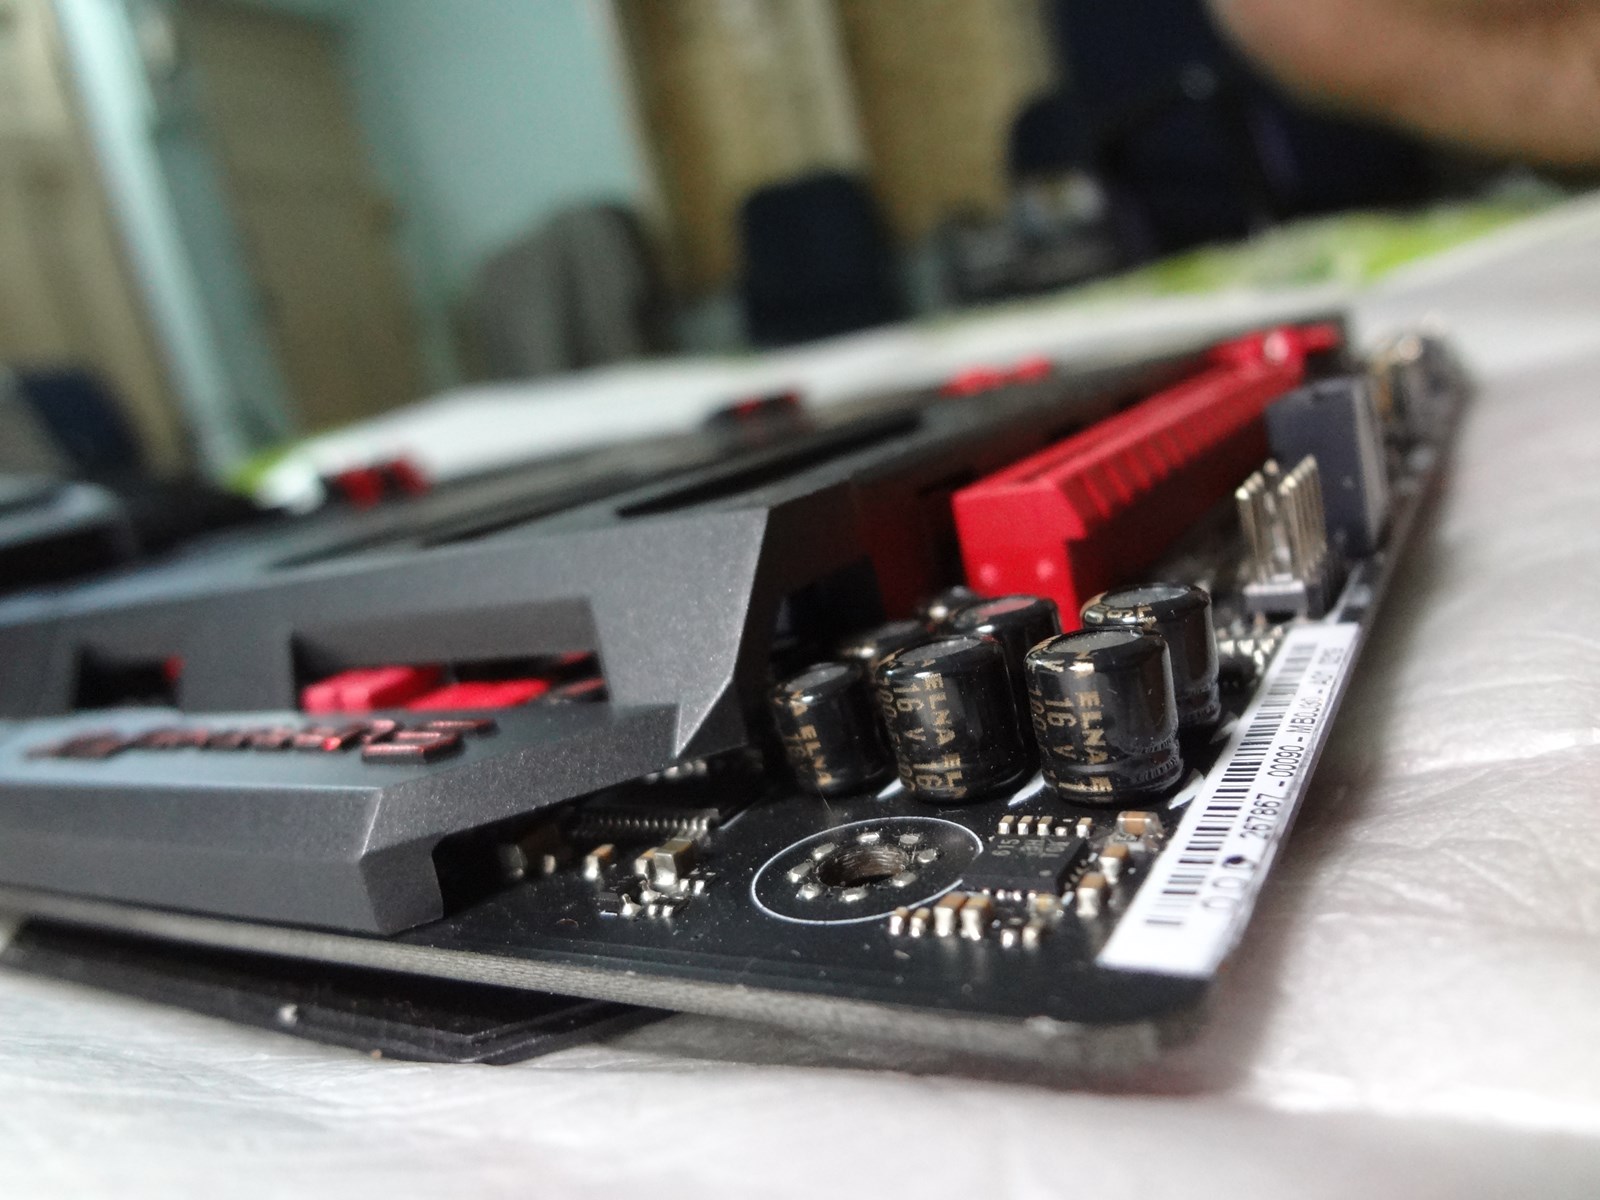
ELNA premium capacitors are used for the audio filter.
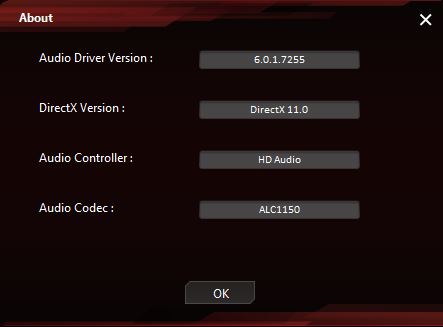
The audio IC is a Realtek ALC 1150 chip having a Signal-to-Noise Ratio(SNR) of 115db. I must say that practically, the audio quality of this board was top notch with high dynamic range and excellent separation between the left and right channels.
There was an issue with this particular board and there was a very loud thud noise while it was just powered on or shut down. I reported the issue to ASUS India for inspection.
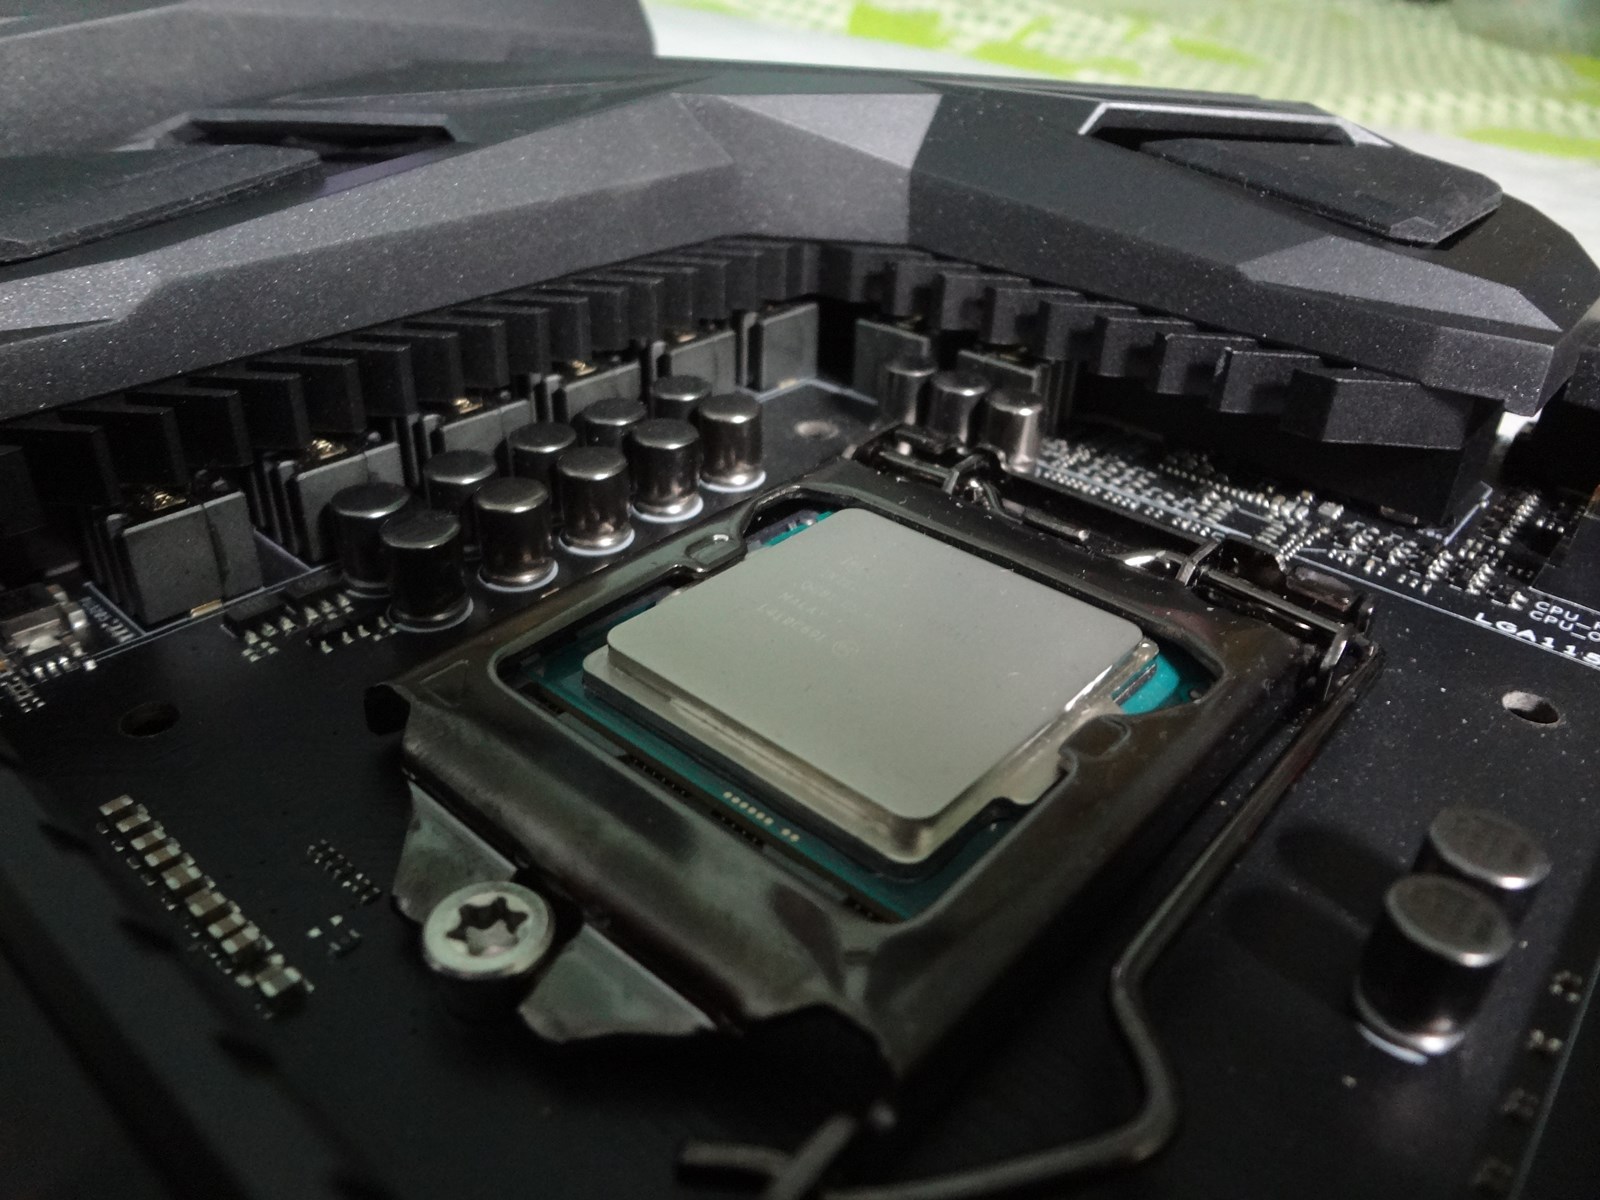
Notes: The CPU socket is very delicate. Install the CPU with utmost care to prevent damage to the socket. Do not touch the socket pins or the base of the CPU.
When opening the socket lever, just be careful of not scratching the board with the lever. This can be redesigned by using a plastic cap on the end of the lever and/or using a membrane on the surface of the board near this area.
5. Test system:
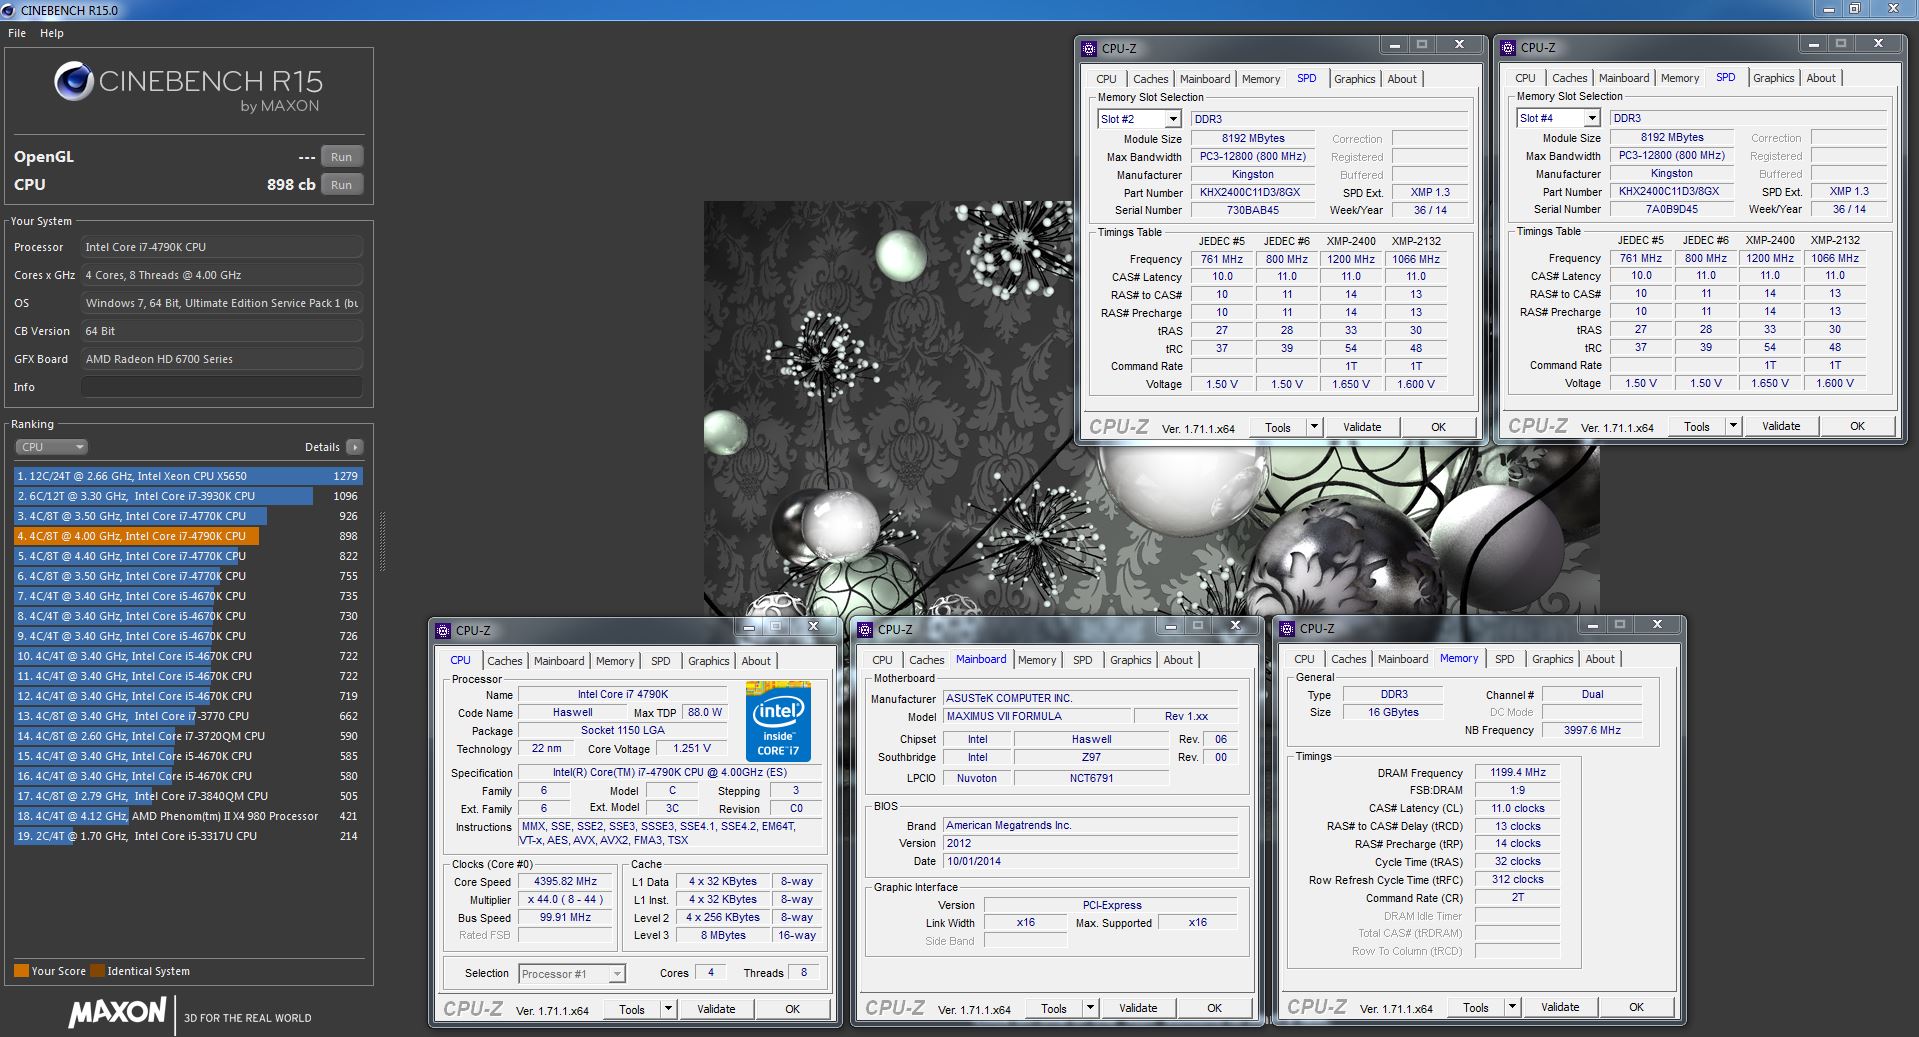
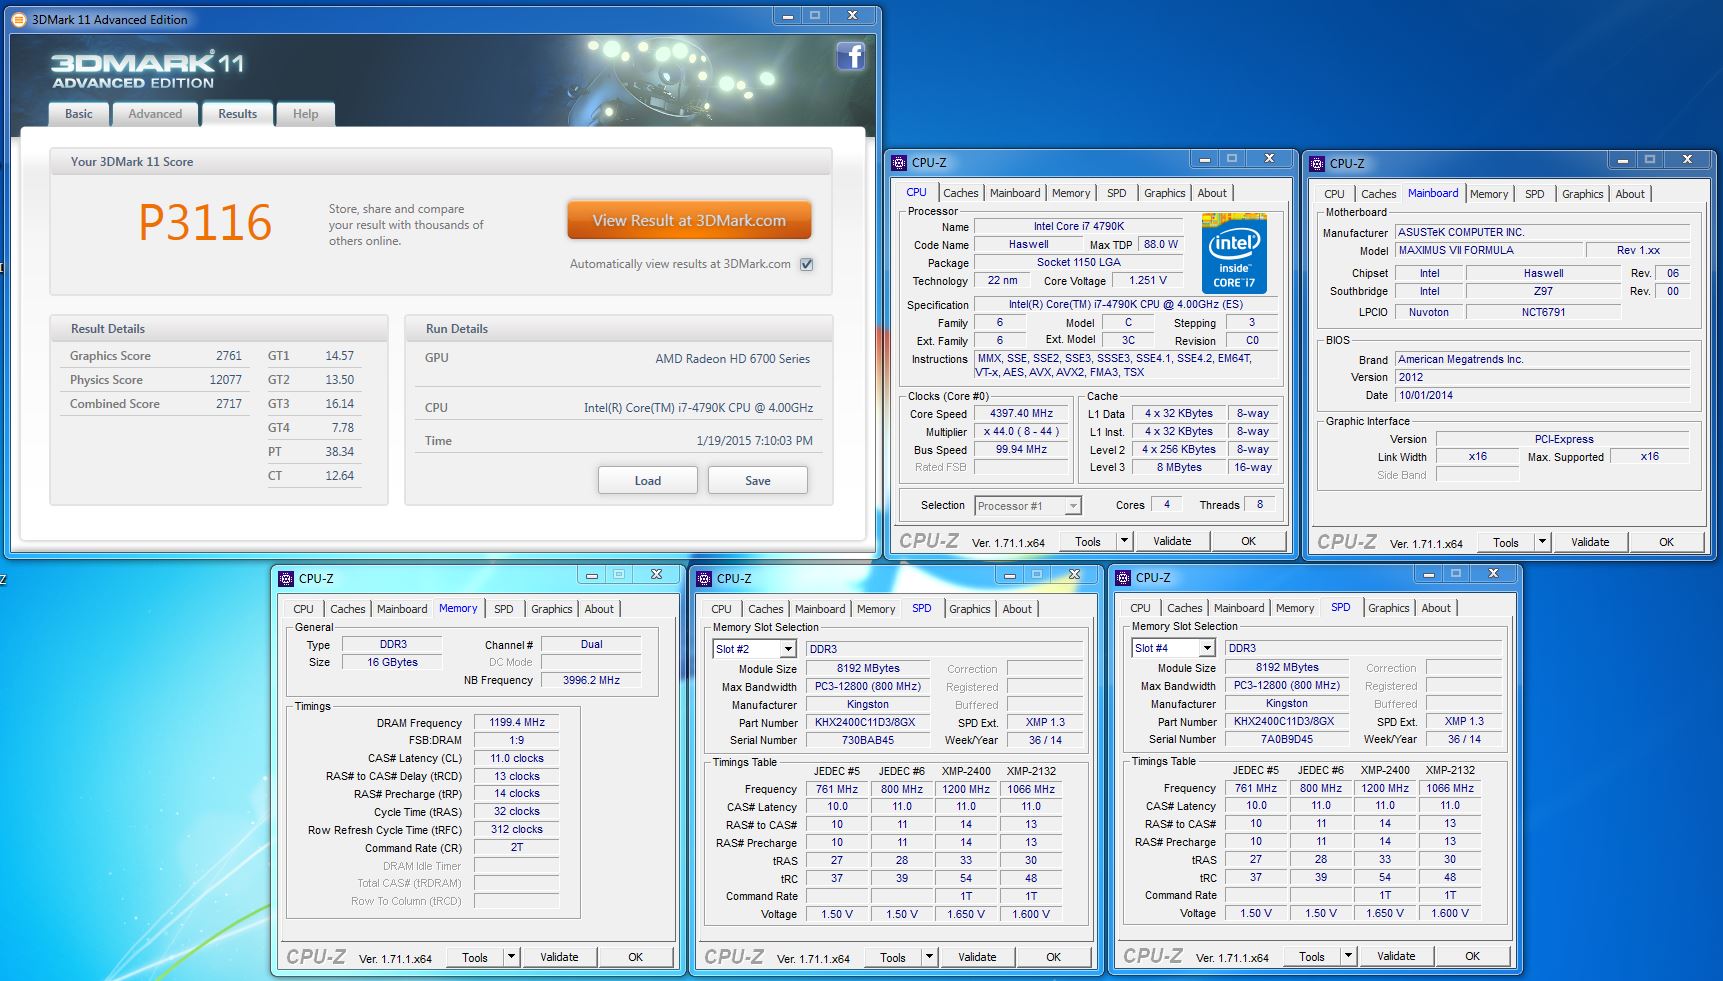
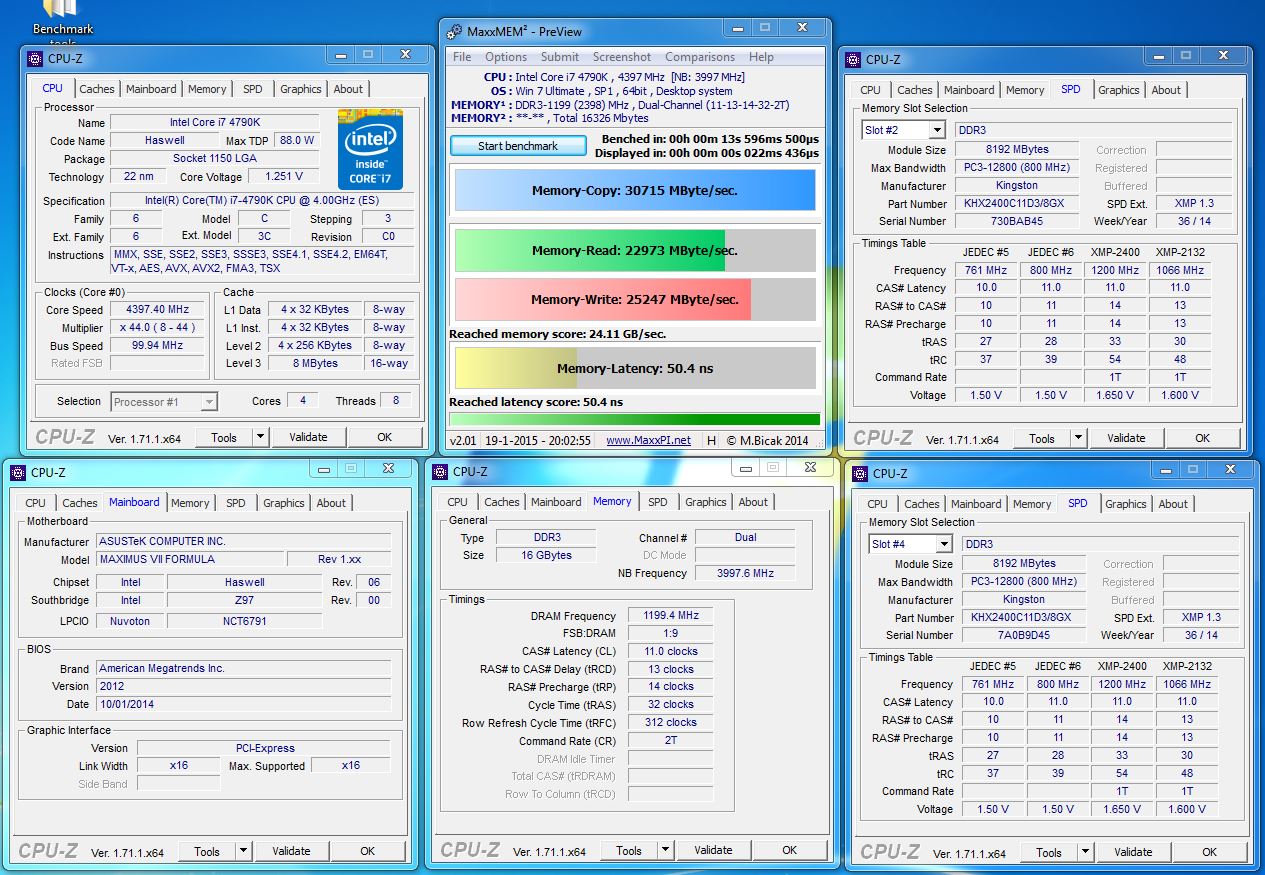
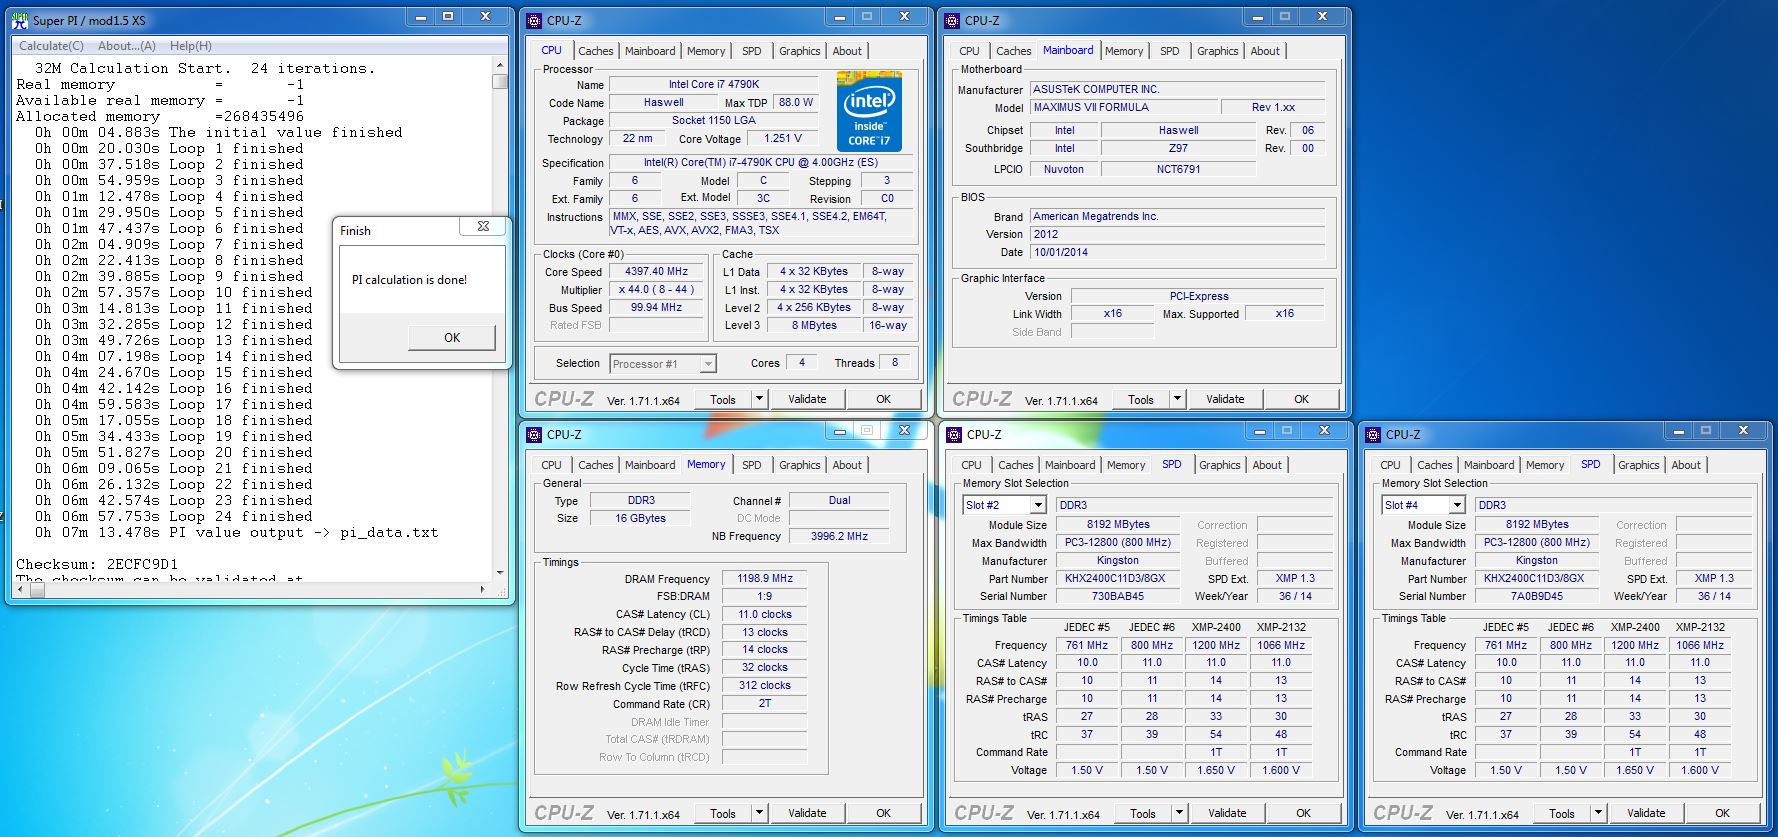
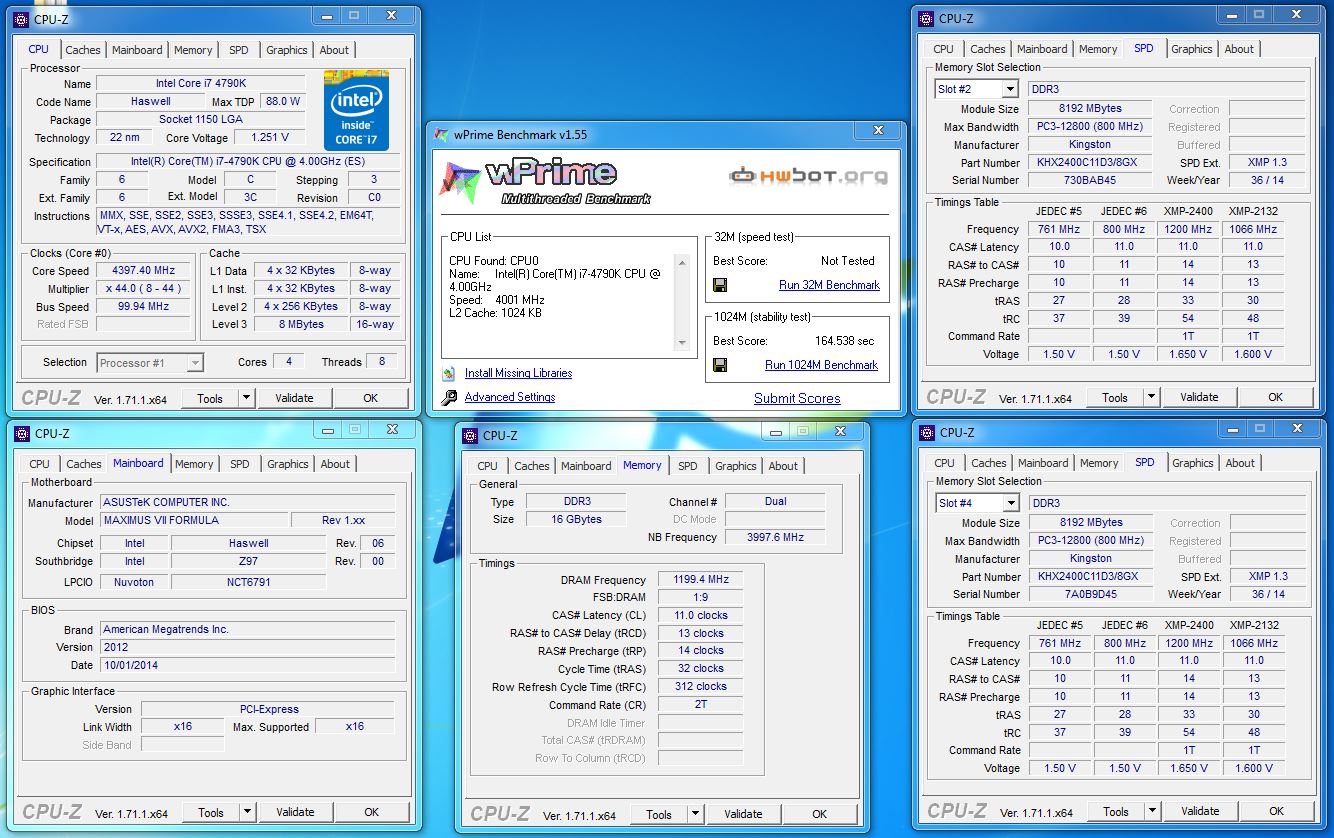
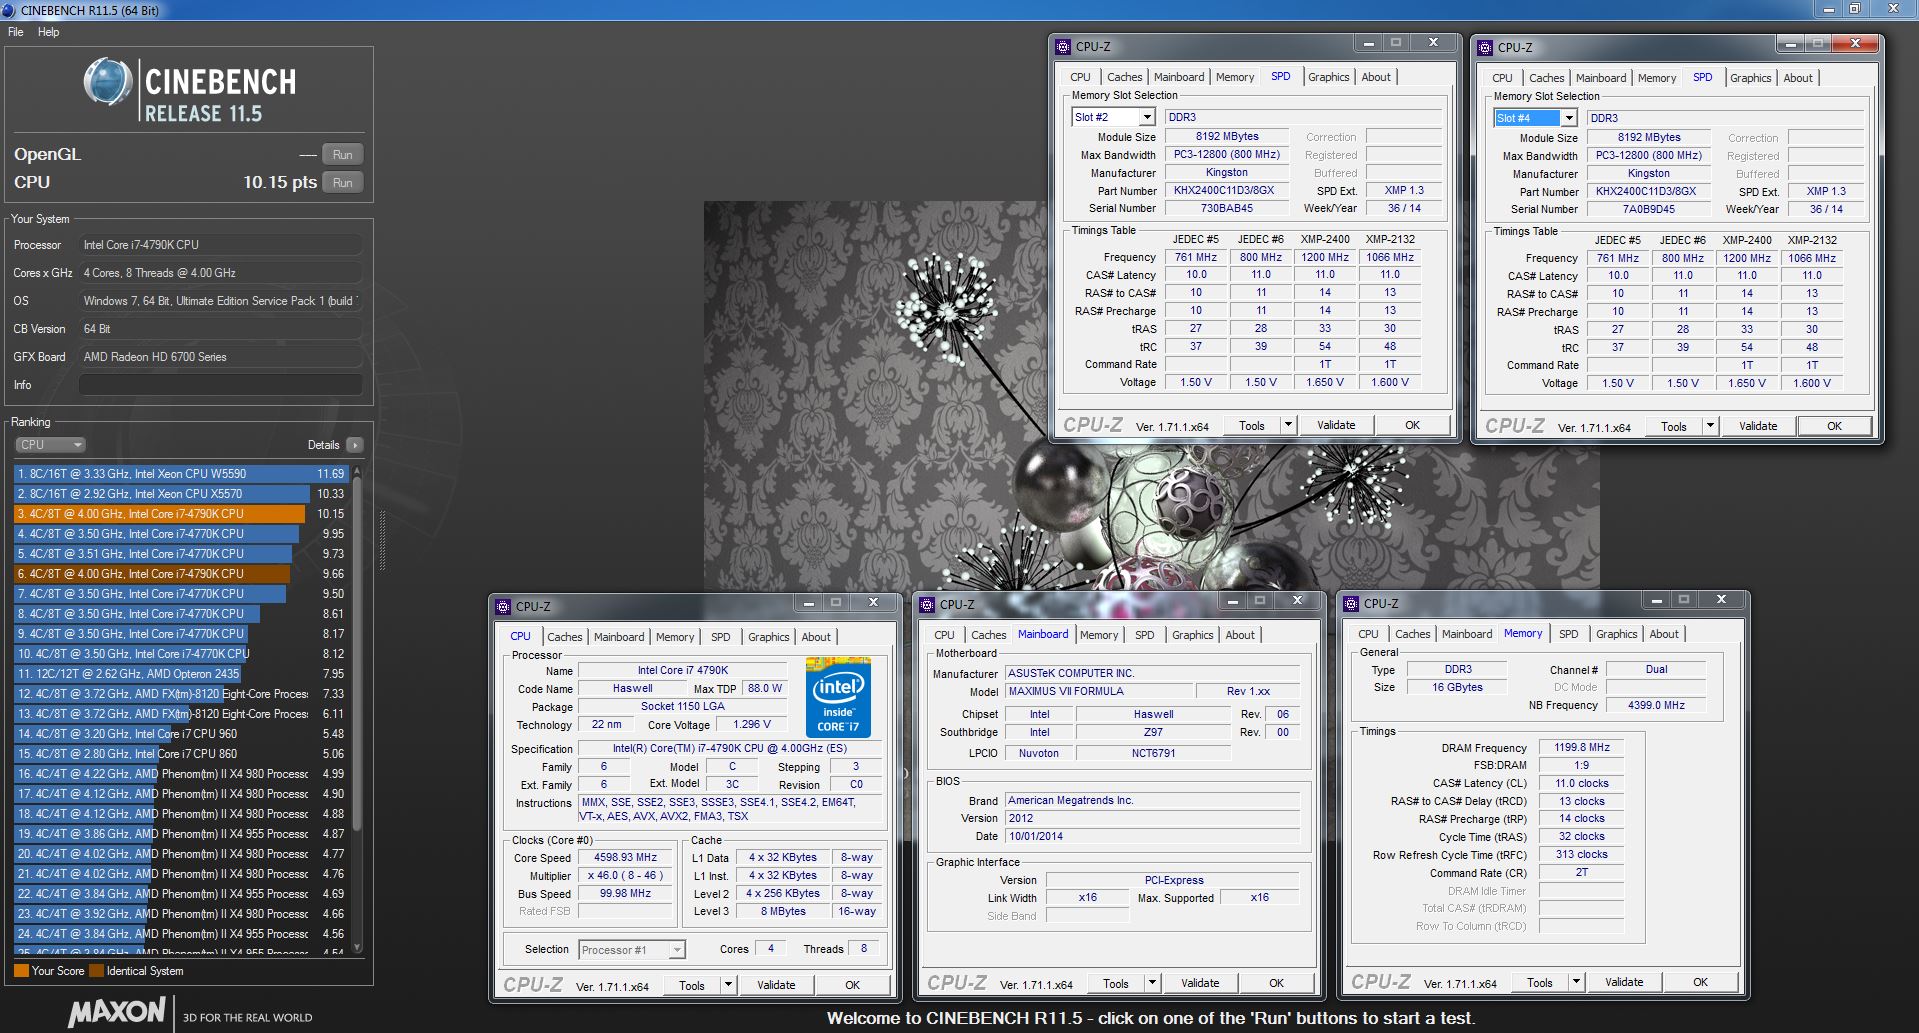
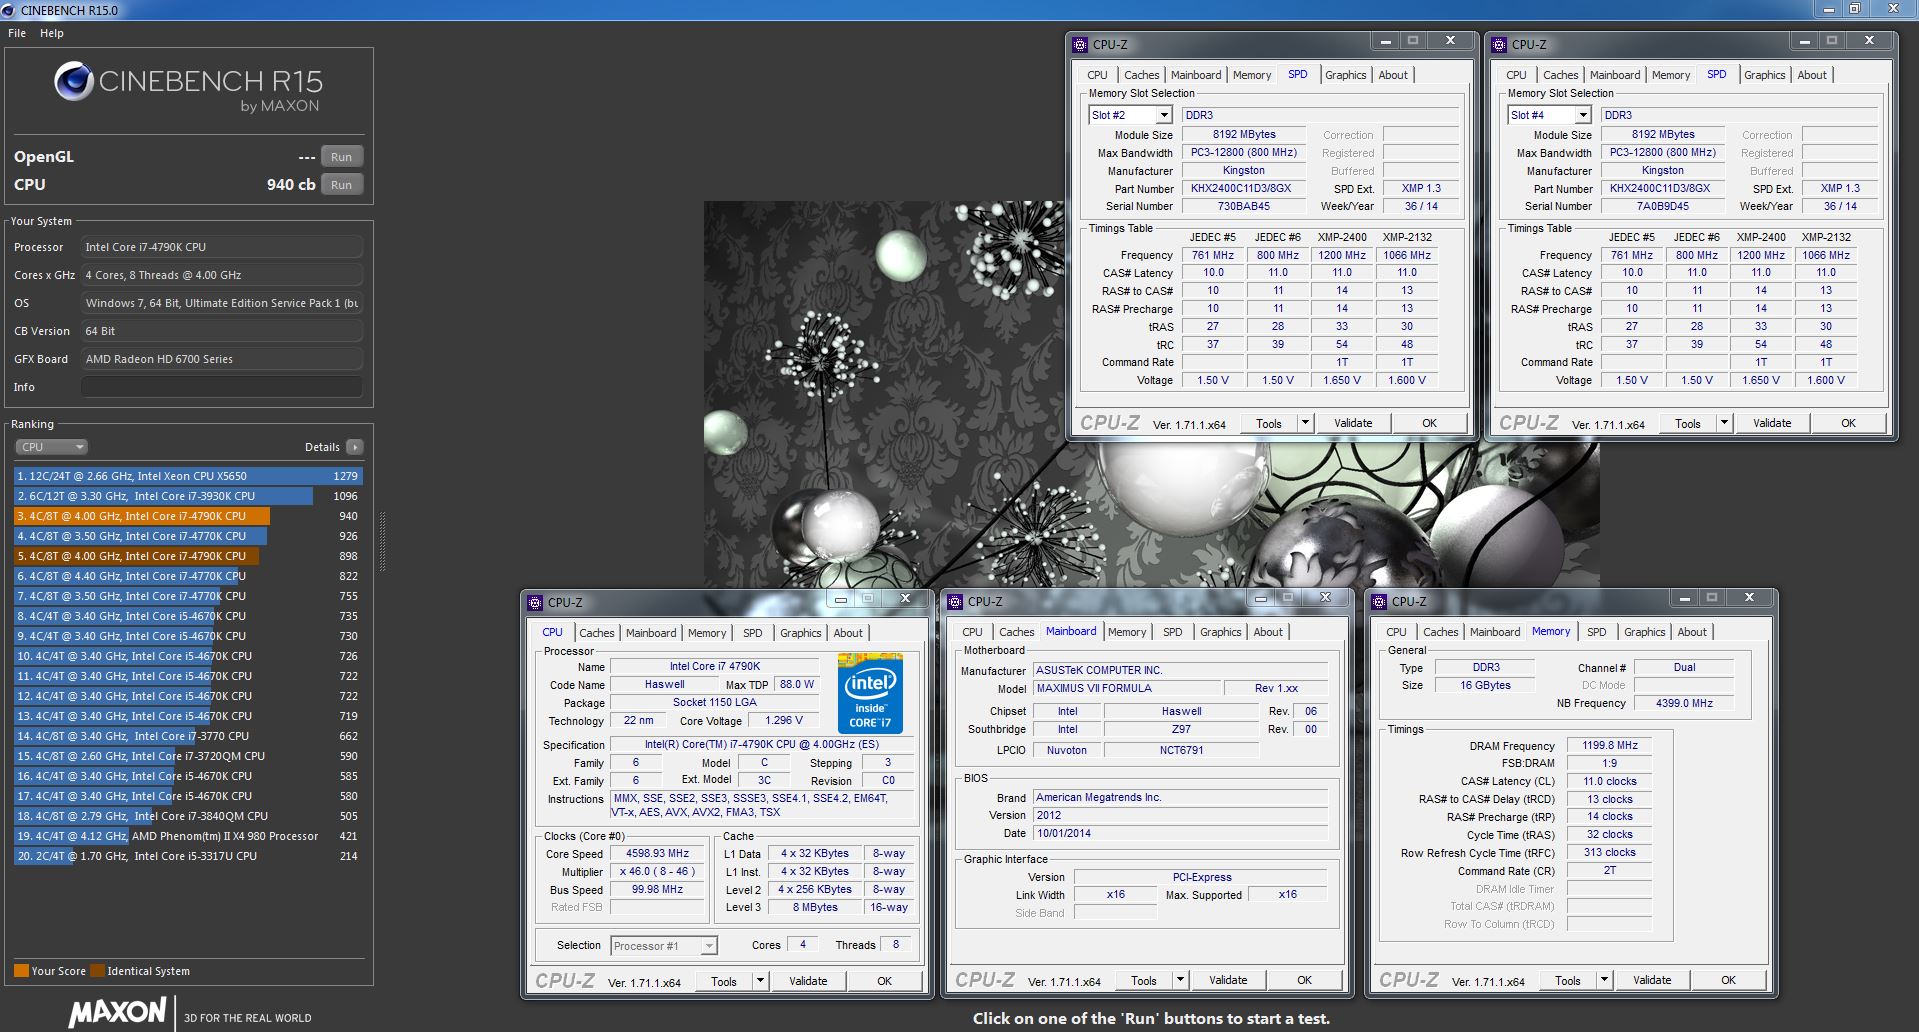
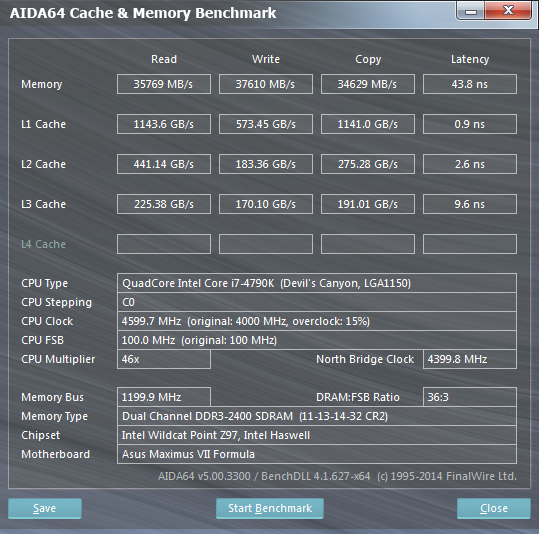
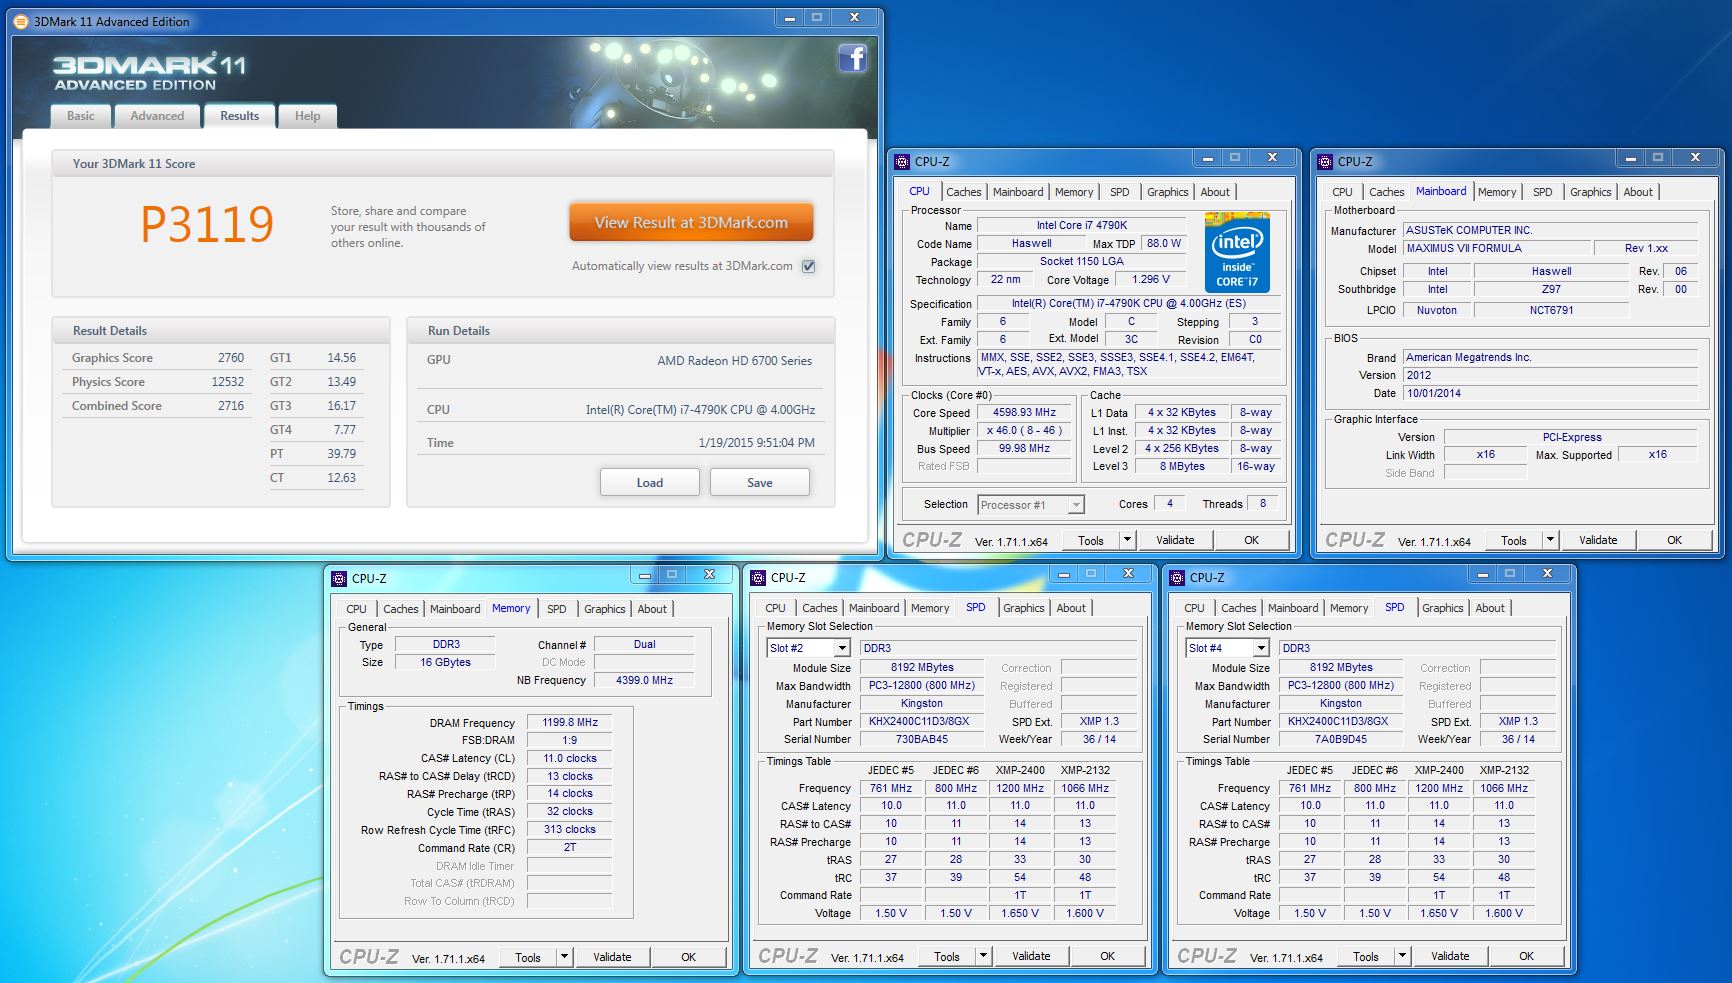
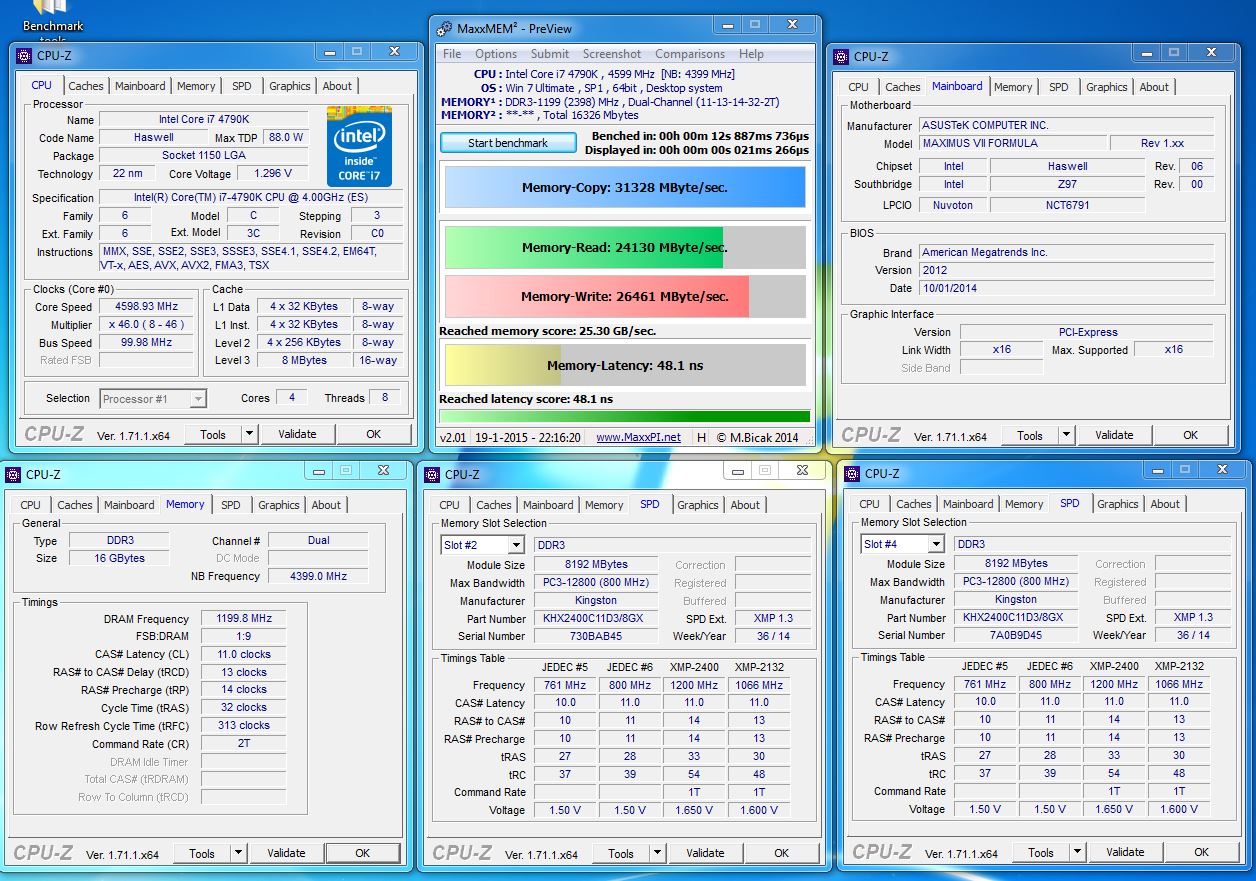
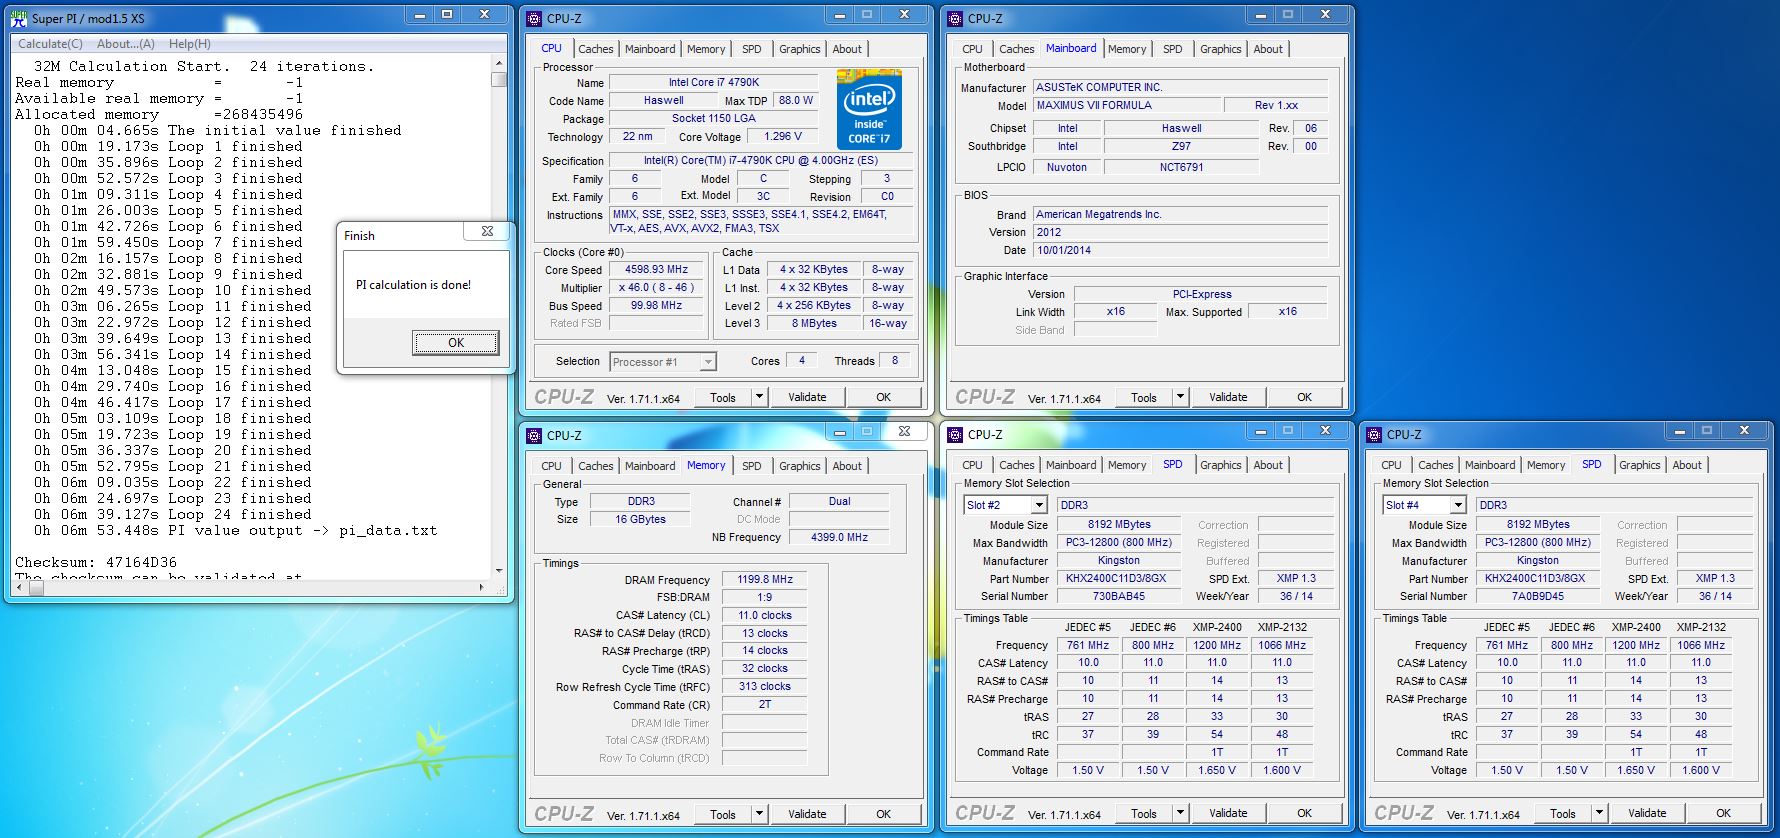
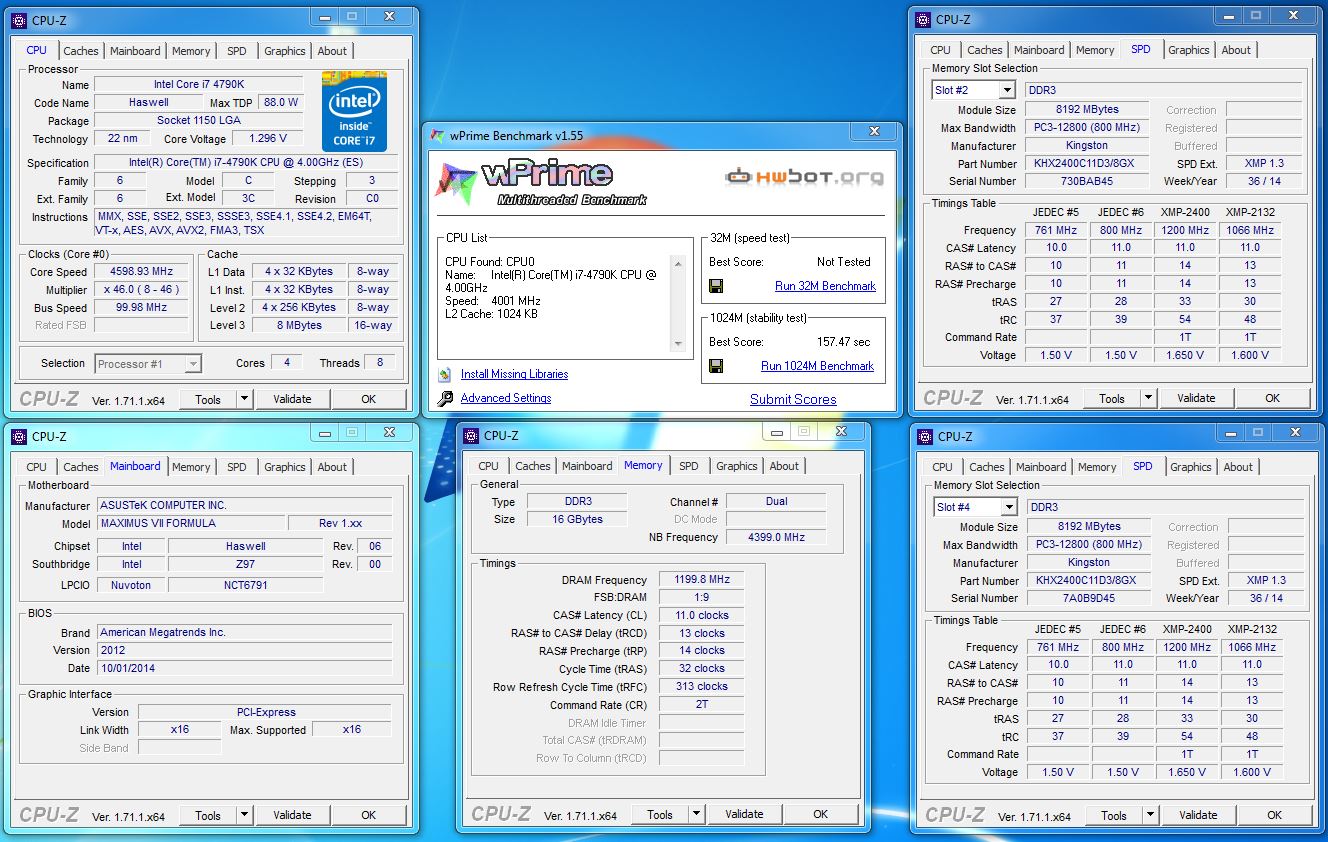
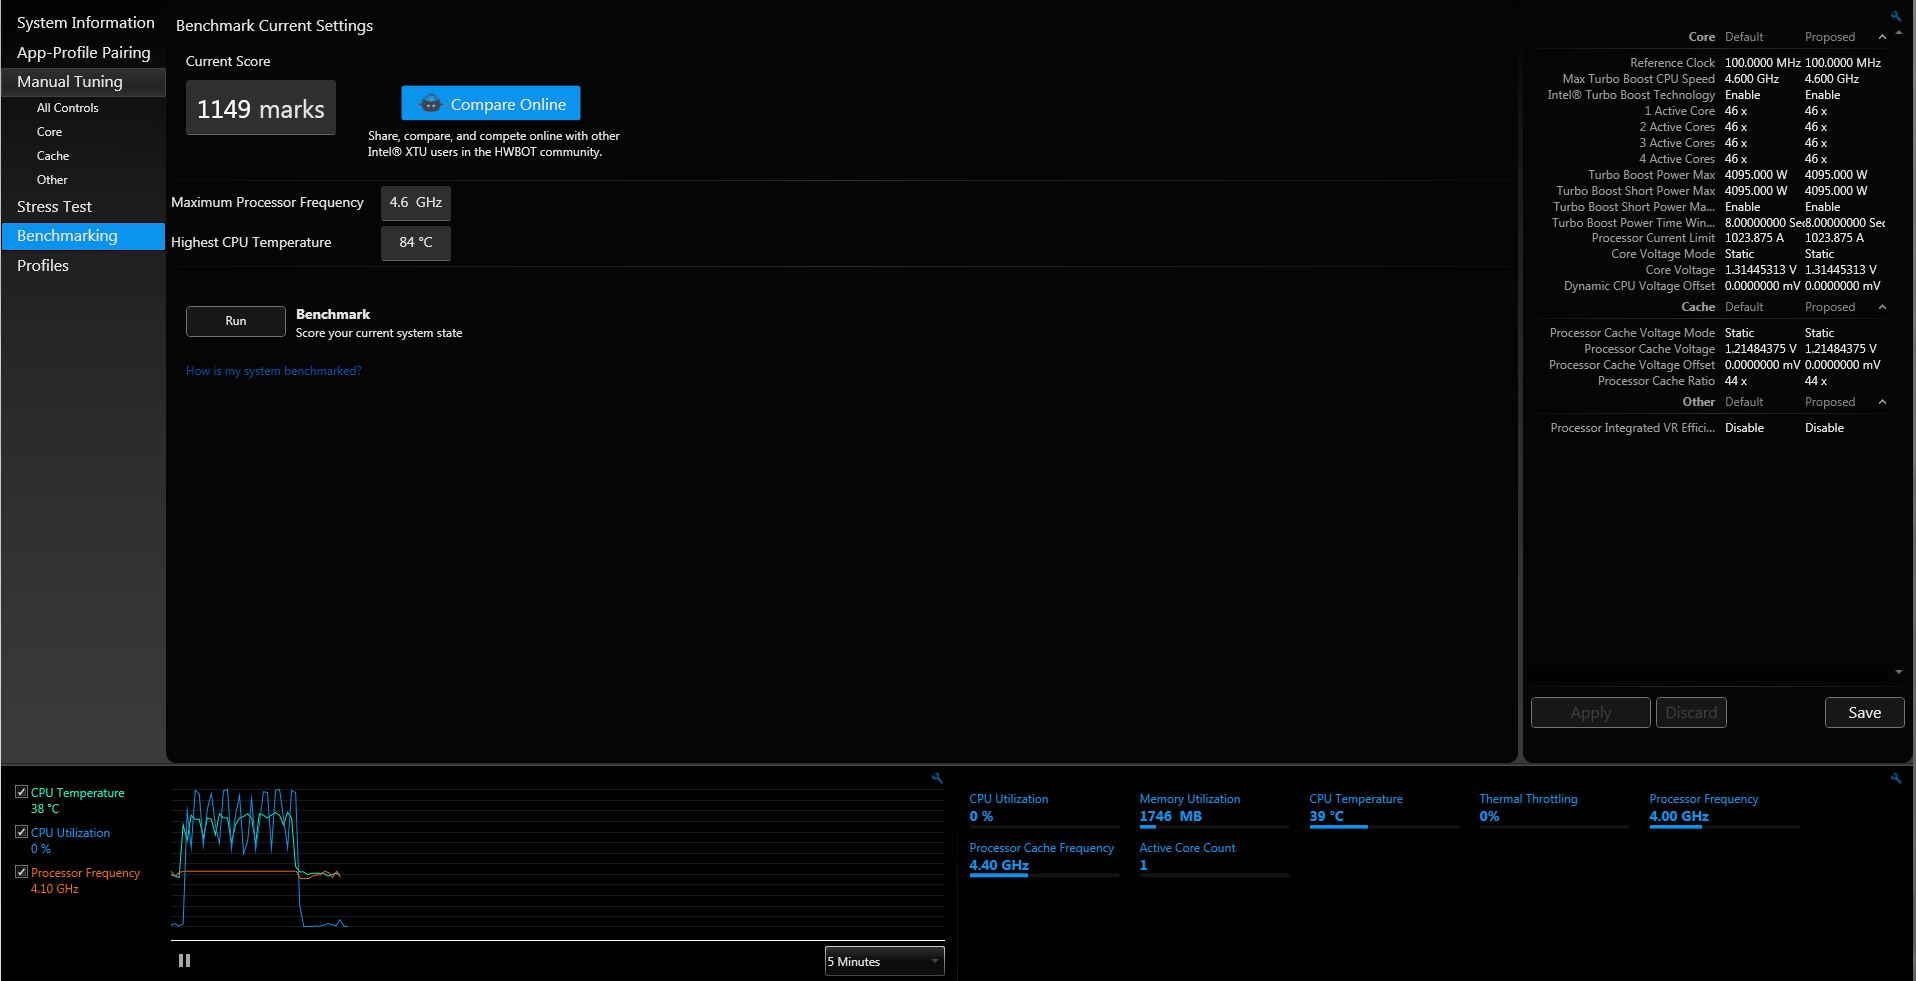
CPU: Intel Core i7 4790K
Motherboard: Asus Maximus VII Formula
RAMs: Kingston HyperX Savage DDR3 2400 MHz CL11 (2*8 GB)
CPU Cooler: Cooler Master Seidon 120V with push pull configuration
Graphics card: Sapphire Radeon HD 6770 1GB DDR5
Hard disk(s): Kingston 60 GB SSDNOW V100
Power Supply: Corsair GS 700 2013 edition
Monitor: Dell S2240M
Chassis: Open test bench table
Software: Microsoft Windows 7 Ultimate x64 Service Pack 1 and all updates till then.
Please check part 2...
Hi everyone, hope you are all doing fine. This time I am reviewing the ASUS Maximus VII Formula motherboard featuring Watch Dogs PC Game. This motherboard is based on the Intel Z97 chipset and is targeted towards high end gaming segment.
Here is the link to the motherboard(Asus official site) : ASUS Maximus VII Formula motherboard
Here is the link to the specs as on official site: Motherboards - MAXIMUS VII FORMULA - ASUS
2. Unboxing and packaging:
The box has got a good aesthetic appeal with the Watch Dogs protagonist, Aiden Pearce pictured on the front side which is secured via velcro. You can see the board through a transparent plastic layer under the top cover.
The back side of the box has detailed write up of the overview of the board and special features are explained.
Packaging was very good. The accessories were well packed inside another box below the motherboard.
In box accessories:
mPCIE Combo III:
Glad to say M.2 support is there on this module which we did not find in the GIGABYTE Z97 Gaming G1 WiFi BK.
The WiFi antennae is state of the art and looks excellent. Here are some photos:
The cable connectors on both sides are gold plated and are of good quality.
The I/O shield is metallic black in color with foam on the back coated with an aluminium layer for electric screening. I forgot to take photo of the I/O shield, so apologize for that.
3. Layout:
The board:
The motherboard is based on a black and red theme as seen on Republic-of-Gamers segment.
Cleaning was good mostly. There was little excess soldering flux on some areas.
Back I/O ports:
The back panel features:
- A PS/2 port supporting a keyboard or mouse
- Two USB 2.0 ports
- Six USB 3.0 ports
- HDMI and Display Port
- RJ-45 ethernet port
- Six audio jacks for 8 channel audio support with support for optical S/PDIF output.
- Clear CMOS and ROG Connect switches
Power connectors:
The board is powered using the standard 24 pin EATX and 8 pin EPS plugs.
Please note that there are device detection LEDs here as well for diagnosing problems.
An additional 4 pin power connector is given for even more power required during extreme overclocking.
Expansion capabilities
SATA ports:[/B]
The motherboard has 10 SATA ports at 6 Gbps conforming to the SATA-III specification, two SATA Express ports with support for two SATA 6 Gbps ports each. 6 SATA ports are controlled by the Z97 chipset while the rest are controlled by ASMedia controller.
Expansion slots:
Top to bottom: PCIe 2.0 x1 slot 1, PCIe 2.0/3.0 x16 slot @x16, PCIe 2.0 x1 slot 2, PCIe 2.0/3.0 x16 slot @x8, PCIe 2.0 x1 slot 3, PCIe 2.0 x16 slot @x4
The motherboard supports AMD CrossFireX™ Technology and NVIDIA SLI. Maximum dual GPU bandwidth is x8 + x8 mode.
RAM slots:
4 DIMM slots are provided supporting up to 32 GB of memory each memory module being 8 GB in size. Maximum overclocked memory support is upto 3300 MHz.
Layout is very good and I was very happy with the placement of the fan headers.
4. Component analysis, Internal headers, front panel headers, switches:
I was not permitted to open the cover of the board and so could not have the inside scoop of the components.
At the centre of the board, there is a Republic-of-Gamers logo done on a glass layer which glows on standby power and is PWM based.
The power design is 8+2 phase. The chokes are of premium quality and features 10K solid state capacitors.
There are onboard power and reset buttons and a POST code reader provided for diagnosing problems. There is also a chassis fan header just beside the reset button.
The mPCIE Combo III connector and another chassis fan header is situated near the top left corner of the board.
The CPU fan header and an optional CPU fan header is provided to the left of the RAM slots.
The front panel header is standard. There is a keybot button for easy overclocking and XMP settings. There are some chassis fan headers and USB headers as well along with the ROG ext connector, soundstage button, front panel audio and TPM headers.
There are some other chassis fan headers as well.
Near the top-right portion of the board, voltage test points are given for easy realtime DIY and diagnosis.
The front panel USB 3.0 header is included near the power connector.
The VRM heatsink is fully ready for water cooling and is fully based on copper.
The UEFI/BIOS is stored in a 64 MB Winbond chip. It is user replaceable in case the chip needs to be replaced.
ELNA premium capacitors are used for the audio filter.
The audio IC is a Realtek ALC 1150 chip having a Signal-to-Noise Ratio(SNR) of 115db. I must say that practically, the audio quality of this board was top notch with high dynamic range and excellent separation between the left and right channels.
There was an issue with this particular board and there was a very loud thud noise while it was just powered on or shut down. I reported the issue to ASUS India for inspection.
Notes: The CPU socket is very delicate. Install the CPU with utmost care to prevent damage to the socket. Do not touch the socket pins or the base of the CPU.
When opening the socket lever, just be careful of not scratching the board with the lever. This can be redesigned by using a plastic cap on the end of the lever and/or using a membrane on the surface of the board near this area.
5. Test system:
CPU: Intel Core i7 4790K
Motherboard: Asus Maximus VII Formula
RAMs: Kingston HyperX Savage DDR3 2400 MHz CL11 (2*8 GB)
CPU Cooler: Cooler Master Seidon 120V with push pull configuration
Graphics card: Sapphire Radeon HD 6770 1GB DDR5
Hard disk(s): Kingston 60 GB SSDNOW V100
Power Supply: Corsair GS 700 2013 edition
Monitor: Dell S2240M
Chassis: Open test bench table
Software: Microsoft Windows 7 Ultimate x64 Service Pack 1 and all updates till then.
Please check part 2...