One more step towards a networked home, I needed a NAS server where I could keep adding disks as necessary with no restrictions ! Every ready made NAS server in the merket has its own restrictions like huge cost, missing RAID capabilities, not expandable to more than four disks, missing NAS/Samba mixed usage and so on.
So build my own NAS box was the mantra. What I needed:
1. Cheap processor with low power consumption
I already had a dual core 330 Atom board at home, just had not found a use for it. This CPU would be perfect for the NAS.
Newegg.com - Intel BOXD945GCLF2 Atom 330 Intel 945GC Mini ITX Motherboard/CPU Combo - Motherboard / CPU / VGA Combo
Cost Rs 3500.
2. Small cabinet that does not take up space or power and makes no noise.
This was the tough one, especially in India. After a lot of research, I zeroed in on the Panache T3300 as the cabinet. It is small, in fact really compact and runs off a DC power board. This means that there is no PSU in the case (hence no fan/noise) and it runs off a DC adapter like a laptop. Disadvantage is the lack of a DVD drive.
View attachment 8549
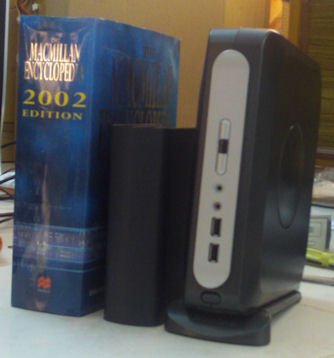
Note the Panache box kept next to a WD external hard disk and a encyclopedia to get a idea of its size ! :bleh:
Panache
Cost Rs 3200.
3. Operating system for the NAS box
Lot of options here. Windows embedded, standard linux distros and more. But what caught my eye is the FreeNAS distribution. It is a embedded OS that runs off a 200mb image, configured completely from the web and works like a charm on the Atom. More importantly, very configurable and very expandable. Just perfect for my needs ! :hap2:
FreeNAS: The Free NAS Server - Home
Cost Rs 0 !
4. Install disk for the OS on the NAS box
An 3.5" disk is out of question on the small panache box. A 2.5" disk is acceptable, but still draws 4-8 watts of power for no reason. And the minimum size is 40gb when I just need one GB of space.
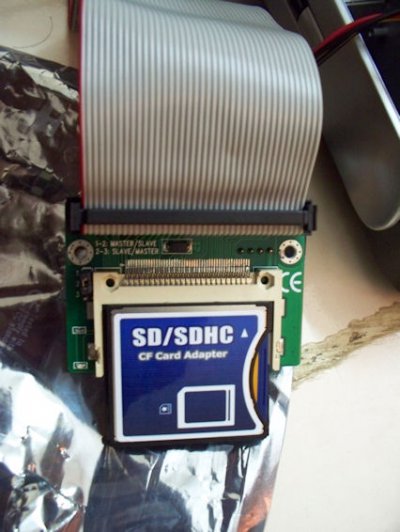
A little more research got me onto a fantastic solution. I found out that there are IDE adaptors for compact flash cards for about Rs 100. The bad news is that a compact flash card is expensive. But here also, I stumbled across a great solution. A CF adaptor that used cheap SD cards internally !!!
View attachment 8548
A 2GB disk for a grand total of Rs 1000 and uses 0.2 watts of power!!!
DealExtreme: $2.04 CF to IDE Adapter
Cost Rs 100
DealExtreme: $14.91 SDHC SD/MMC to CF Type-II Card Adapter (Upto 32GB)
Cost Rs 700 + Rs 200 for a SD card (Be a little carefull when you buy a SD card. It has to support DMA access, otherwise the OS will not install on the disk)
5. Memory. Less is more in this case !!!
A 512 DDR2 stick would have been plenty, but I had a spare 1GB stick with me and used it. Can hardly see any difference in performance between this and a 2gb stick.
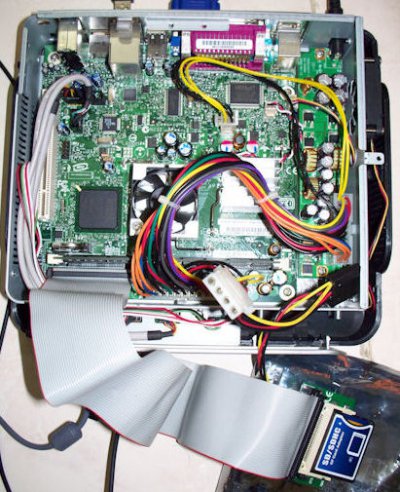
All set, I assembled the Atom box and made sure everything is working.
View attachment 8550
Now is the time to download the FreeNAS OS and boot off the OS with a external DVD drive. There is a nice option to install the embedded system to the disk. Choose this and install the embedded FreeNAS OS to the attached compact flash drive.
Attach the external USB drives that you want to share, assign a IP address and reboot the machine. At this point, the NAS box becomes headless. No need for a monitor, keyboard and mouse. All you need is a power and network cables attached to it along with the USB drives. Connect to the NAS box from a browser at http://myfreeNASipAddress and configure the attached drives, the network shares, the services and everything else from the web !!!
You are all set. The network access is extremely fast and you can add as many USB drives as you want and share them on the network either via NFS or Samba. You can even setup software raid for the drives that need protection.
View attachment 8547
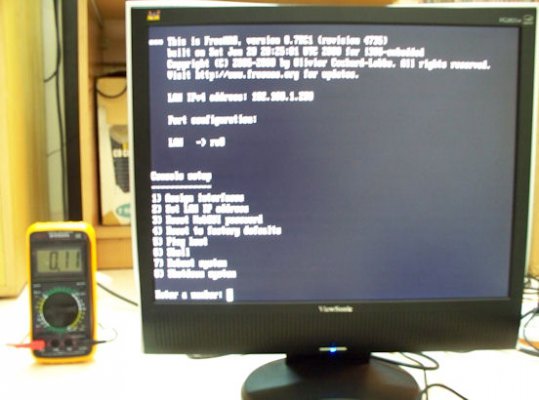
The headless NAS box up and running, attached to a monitor. See the power being drawn on the side. Just 0.11 Amps, which translates to a grand total of 25watts for a fully running NAS box. :hap2:
Total cost of the setup was 9k without the external hard disks. For a NAS server that is expandable to as many USB disks as you want with RAID options, this is worth it ! :clap:
P.S : If you want to use the data or information in this post, make sure you link to my original article at my blog : Random musings : Build your own expandable NAS box !


 Will be much easier if I need to move the disk to a windows machine.