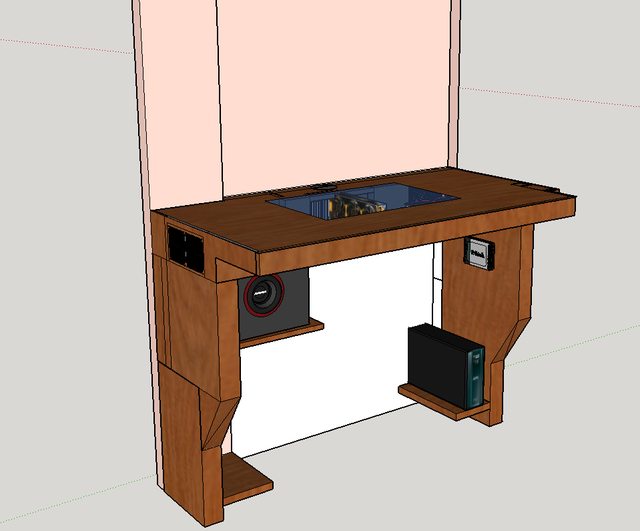
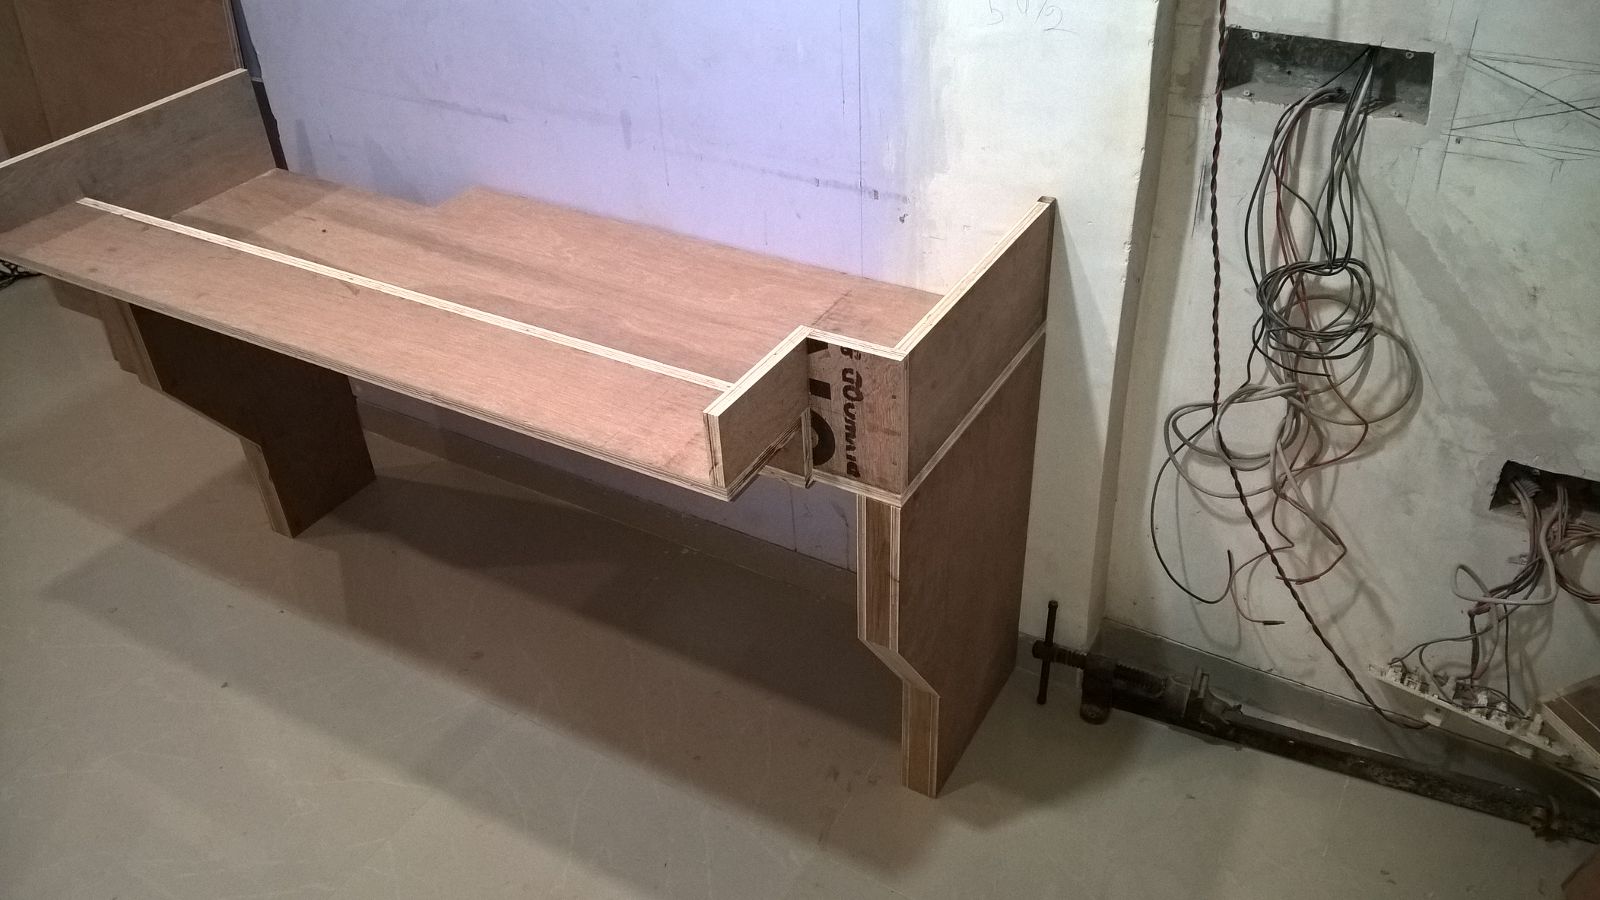
Just curious, Why a pair of fans in facing the bottom? DeskPC builds generally have one on either sides of the table.
How do you plan to open and close the table in case it needs maintenance? Why the strange edges on the right side of the table
The fans at the bottom are for exhaust.. the fans on the left side of the table is for intake. the right side would be up against the wall so no place to exhaust air out hence at the bottom.
I haven't decided on how the opening / closing mechanism will work for now i am thinking of using Hydraulic pumps to lift it up or using detachable hinges to lift it up & keep the top aside for servicing.
The only edge on the right side of the table is due to the corner of the wall where it will be placed. this system will be close to the window and i've given that cut so that roman blinds that will be installed on the widow will work properly. the same cut is on the other side of the window on the wadrobe as well.
Looks solid. Anyways some things to keep in mind:
1. Make sure you keep the build as neat and clean as possible as dust will be a NIGHTMARE for these kind of builds and trust me theres nothing more depressing that looking through that window and seeing dusty parts. The main reason why I abandoned my desk is because it required cleaning every 3 weeks. I dont know how dusty your room is, but mine was bad enough for me to give up the project on maintenance alone. Also, you need dust filters over the radiator or you may see dust on the top of your glass window in a week or two.
Dust will definitely be an issue, But I regularly clean my systems every month anyways. with an A/c in the room it should be a little less dusty.
2. Consider laying the gpu sideways along the bottom end of the motherboard. You will need a PCIe extension cable and something to prop it up slightly (so it doesn't block the front panel pins) but it look absolutely awesome. PM me if you need one of these cables. I ordered one and got 2 by mistake. I'll give you them if you can pay for shipping.
I do have PCI Extension cables like 10 of them

i was using of Mining build. I am not 100% sure i want to place the GPU on the side... right now. but will see how it will look when i start placing components inside the table. I am not sure how good these cables are and i don't want to add more points of failures in my system.
I am also planning to paint the GPU to red... not the whole part only the one thats yellow.. as i have the same Sapphire R9 290 Tri-X GPU. anyone has any idea of the paint code for the Asus Red color. so i can get a spray can from somewhere.
3. MEASURE all cable lengths.
- I can see that the PSU power cables won't be able to reach the hard drive bays and maybe even the SSDs if you try to route them under the motherboard. You will need to extend them with new cables or open the connectors on your PSU and add more cable to it (easiest option but its bye bye warranty for the PSU). If you want new calbes will need to import the connectors+cable or contact somebody to make the cables as you cannot get extension cables for the sata drives easily in India.
- Also, you may be cutting it fine with the SATA data cables if you route those from under the motherboard too - remember sata data cables are usually 30-45cms. The limit is 1m but cables above 45cms are difficult to find again.
- Same issue for the power cables for fans on the extreme left but those cables can be easily made so thats not a problem.
Good Point. For PSU I have Corsair RM1000, i was going to get extension cables imported. these would be in red color. even though they are not easily available i can get them imported.
4. I see you've used Altec Lansing VS2421 as reference for the speakers. Is that what you are going to use because I have the same thing and I had cable length problems with that too. If you keep it where it is in your images, you won't be able to push it too far on the right of the table. Again measure and see for sure.
No that is just for reference, Mine is Altec Lansing VS4621 Octane 7 2.1 one cable is short 1 m but the other one is longer about 1.5m so it should be fine.
5. Is the height of table correct? Have you compared it to similar sized tables and will your computer chair fit underneath it if thats what your plan is? Don't forget to include the handrests of your chair in the chair height during measurement.
Height of the table would be upwards of 30 inches. around 32 or 34 inch not higher than that. yes my chair fits underneath the table not completely though. I have the tendency to sit on the chair & put my leg up on the table so its not necessary for me if the chair fits inside or not but yes it should be fine to place the chair inside the table when not in use.. although that clearance is not that important to me.
6. Why the extra space on the left and right sides of the table? Why not pull it in slightly on both sides.
that placement can be adjusted when i am marking up the design for now that how i've placed them. only the basic structure will be made ready rest of the finishing of it will take a lot of time.
7. How are you going to power it on? I see you have ideas for the USB, but power? Theres an easier solution. Try sourcing parts from old cabinets like for example -
Elite 431 or
Elite 110. Notice how the usb3, audio/mic, power, reset are one single part? That one part alone could be enough for your build. You could try sourcing it if you ask CM nicely and offer to pay for it. If you import it you'll surely get it but I didn't have the patience for that so I asked around a bit and got the front panel for
Elite 335 for free from CM. It wasn't what I wanted, but I was able to stick the power button where the blank firewire spot is and it worked as a reasonably good power button and I had the rest of the connectors that I wanted.
I've ordered this to help power on the system. I will also be getting a few leds for hdd activity - the power switch is already a led one so i don't need power led. these will reside either at the front or on the top i am not sure where. if on the top i'll have to make a socket. so that when i remove the top panel the switch unplugs itself.
This was available from DX.com'
There are alot of things i still need to watch out for but i think over all this is what i have to make it work. I have all the hardware needed for the build but things like
1. Hard Drive Bays (Don't know where to source these)
2. PSU Extension cable
3. Power / Reset Cable (Will be custom made by my cousin for that push button)
4. LEDs (will be custom made by my cousin)
5. Motherboard & PCI Back panel (Dont know where to source these)
6. Honeycomb Grill for fans with filter (Dont know where to source these)
7. Way to lift up the top for maintenance ( thinking of using Hydraulics or detachable hinges)


 i was using of Mining build. I am not 100% sure i want to place the GPU on the side... right now. but will see how it will look when i start placing components inside the table. I am not sure how good these cables are and i don't want to add more points of failures in my system.


