NZXT Phantom 410 Product Review
I have been Fortunate enough to have had worked with both the Phantom cases by NZXT. While I personally own the Full Tower white edition, I am elated to having My hands on the 410 edition, Thanks to PrimeABGB.
Presenting a complete review of the much anticipated Phantom 410 midtower case. Owning a Full tower Phantom, comparisons are bound to happen, highlighting a proper difference between the two.
1. Boxing, Package & Contents
The boxing & package style is enticing with a big black box holding the entire thing padded with Styrofoam inside. The glossy finish on the body is well protect by a normal plastic bag and also a stick on plastic sheet while the transparent side panel partition is protected extra by 2 more plastic stick-ons. Nicely done. Product manuals & easy guide are the companions. All the necessary Screws are provided in a box inside the Cabinet.
2. The Case
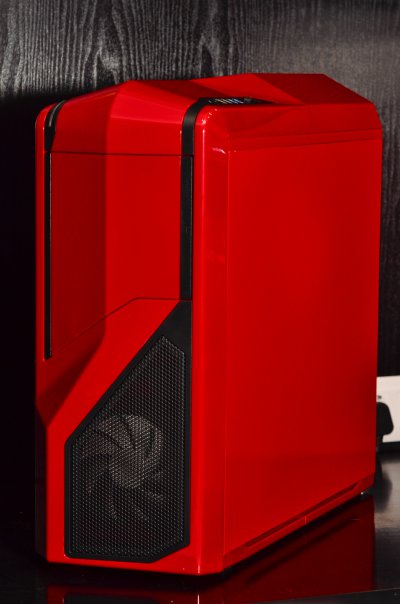
The Cabinet Typically NZXT, is made with Steel & Some Plastic. The steel gauge is thick, strong & Heavy ! ( The Midtower weighs in over 7.5kgs ) The plastic seems a little brittle but nevertheless is shaped nicely. The Cabinet either looks great or dumb. It's the same with Many NZXT cases, you either hate it or Love it as with Phantom, Hades, Vulcan, Tempest, M59, Gamma etc, while certainly being unique.
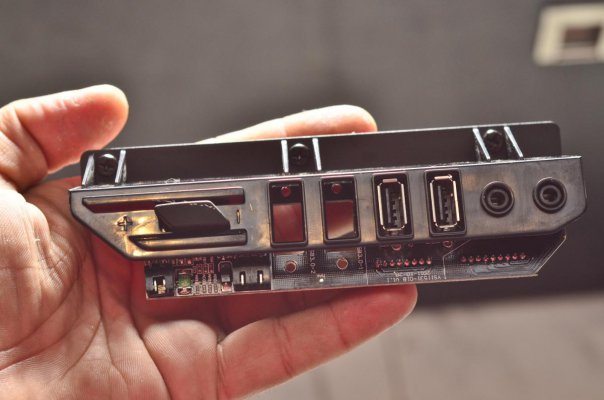
With worldwide feedback being good on NZXT Phantom, NZXT continued to make a new mid-tower structure to meet a different market demand. The Phantom 410 exterior design is almost the same as the Big brother while the inner structure design is quite different. The front door now opens on the left which defies logic considering that the cabinet will most probably lie on the right side of the user. There is no Magnet, but a clip system which definitely is not up to the mark. The door itself is smaller in size than the Phantom. The top panel has 2 USB3.0 & 2.0 ports & 3.5mm slot each for Mic & Stereo, plus a simple 3 step fan controller on the right side & a Power, reset button with small HDD indicator & a long power indicator LED on the right side.
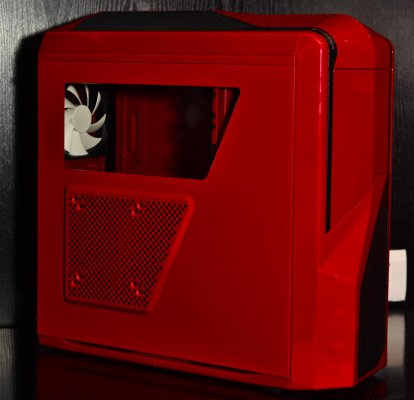
The side panel has a small transparent cut out as default & can accommodate a 120/140mm side fan. The front & top panel can be pulled out for easy access to fans & for modders. more on this later
The bottom of side has 2 rails all along the side of the cabinet with enough room for air for the bottom fans.
3. Expansion & Cooling
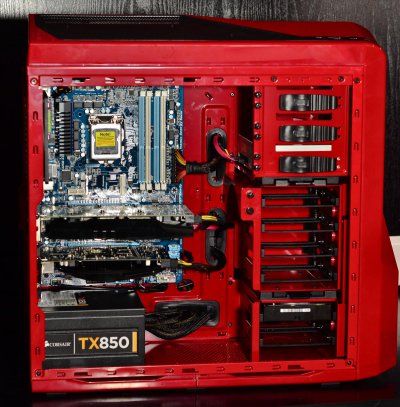
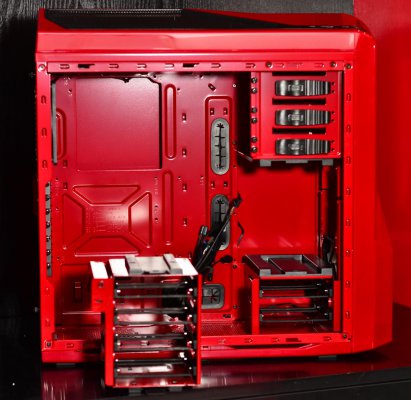
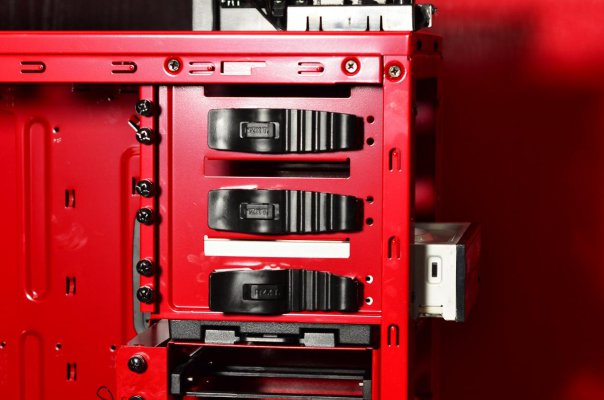
6 HDD trays ( 2 + 4 Removable cage), 3 ODD slots, all screw-less for easy installation. HDD trays are by default facing the Motherboard tray side making wire routing more easy & stealthy. The removable cage which makes way to install big GPUs is easy to use & remove. The rear of the Cabinet has room for 7 expansion slots from the board. The ODD slots are covered by removable covers with a simple latch system but are Solid PVC instead of the Mesh ones on the Phantom.
A Front & Rear 120mm Fan & a top 140mm are supplied with the case with room for another 120 Front, 120/140mm side, 140mm top, 120mm bottom & 120mm/140 internal fans. This internal fan can be fit on the side of the Removable HDD tray & can cool either the HDDs or be facing the rear. It can even be tilted 20deg upwards to blow air onto the RAM sticks. All intake fans are provided with a simple Metal mesh system with filter only on PSU intake. You can swap the top 2 fans for a dual 120/140mm radiator. There are also 2 Grommeted Holes just below the rear fan for external placement of Radiators on custom Liquid Loops.
The Top plastic panel can be removed & even the top steel portion of the Cabinet can be screwed off for easy installation of a Radiator or even cutting & drilling ( Modders can cheer over this.) Even the Front panel connectors can be screwed off & can be refit with weapons of your choice !! All front panel connectors are wired black & the USB3.0 has an internal 20 Pins connector.
[attachment=13790:Top Side.jpg] [attachment=13785:FPC detached.jpg]
The case has a built in Fan Speed controller which is 3 steps simultaneous control for all fans, unlike the Phantom which had individual control for all 5 fans. The circuit is powered by a single Molex connector.
4. Ease of Use & Installation
The Motherboard Tray cannot be removed & fits ATX, m-ATX & ITX boards. The I/O panel can be fit in nicely without cutting/bruising your fingers.
The Standoffs are supplied with a female connect & screw bolt, which makes it easier to screw the standoffs than doing it by the fingers. 3.5/5.25" devices are screw-less installations while the expansion slots have a mesh held in place with thumb screws. Remove the mesh, attach your device & screw it back. Make sure the front panel is fit before slotting in the 5.25" devices else the panel won't fit later because of slots on the front panel.
This is a MID-TOWER, treat it like one ! It can fit all the GPUs, the slightly longer ones after you remove the HDD cage.
Wire Management is same like the phantom with plenty of room to hide all wires. Note that non-modular PSU of more than 650W will have more number of wires which will require neat wire routing if you want to hide all the wires whether used/unused behind the tray. As can be seen in the snaps i could hide all the wires of a Corsair TX 850 PSU all behind the tray making the side panel bulge a bit. It was typically time consuming, but definitely doable ! A Modular Supply will help in this case !
5. Conclusion
a. Heavy even the amount of plastic present.
b. MOC- Plastic is a little finicky, but top notch elsewhere.
c. Easy to use
d. Looks either Awesome or Ugly depending on your taste, but surely different than any other chassis seen in the market.
e. Pricing is a bit steep @ approx 6100 @ PrimeABGB store. You could add in a grand more for the full tower version.
f. Typical NZXT product, never complete but not complaining much. A Good alternative to a full blown Full tower @ a lower price. ( check point 5.e !! )
g. Transparent side panel could've been larger like NZXT Apollo.
f. Choose from a Black Hawk, A Mean Red Beast or a White Eagle !!NZXT Phantom 410 Product Review
[attachment=13784:Finished Look.jpg]