OC & Modding Rebuilding an old and mostly problematic TVS Gold Keyboard

SunnyBoi

Branch Manager
Staff member
Patron
A good friend gave me this keyboard a year ago as he wasn't using it. I soon realised it had some problems - mainly sticky keys. I assumed it would be easy to fix and worst case I can get some replacement keys to change them and start using the keyboard. Oh how wrong I was!

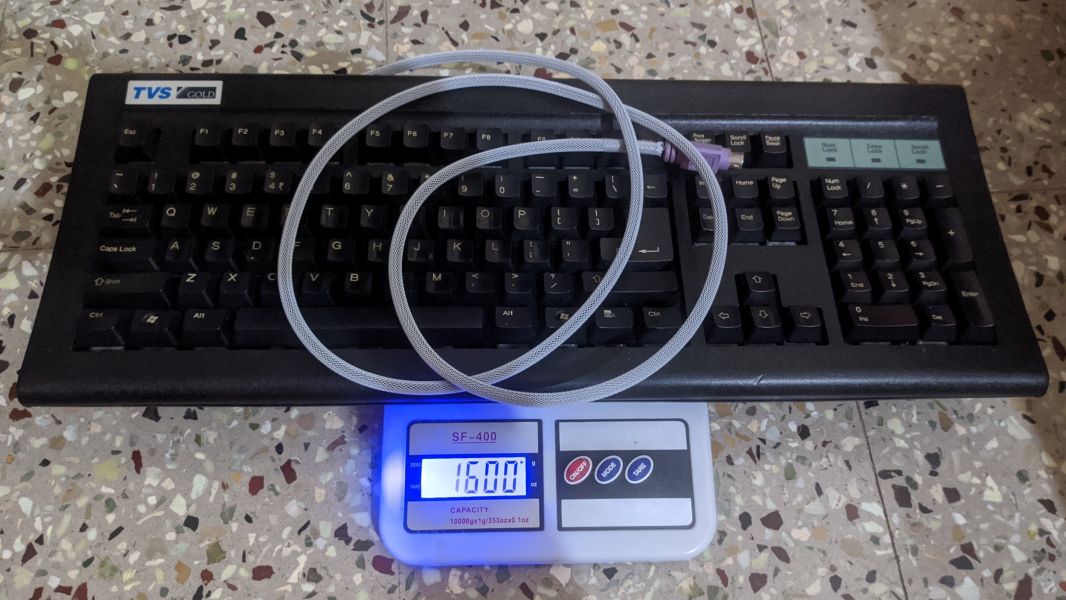
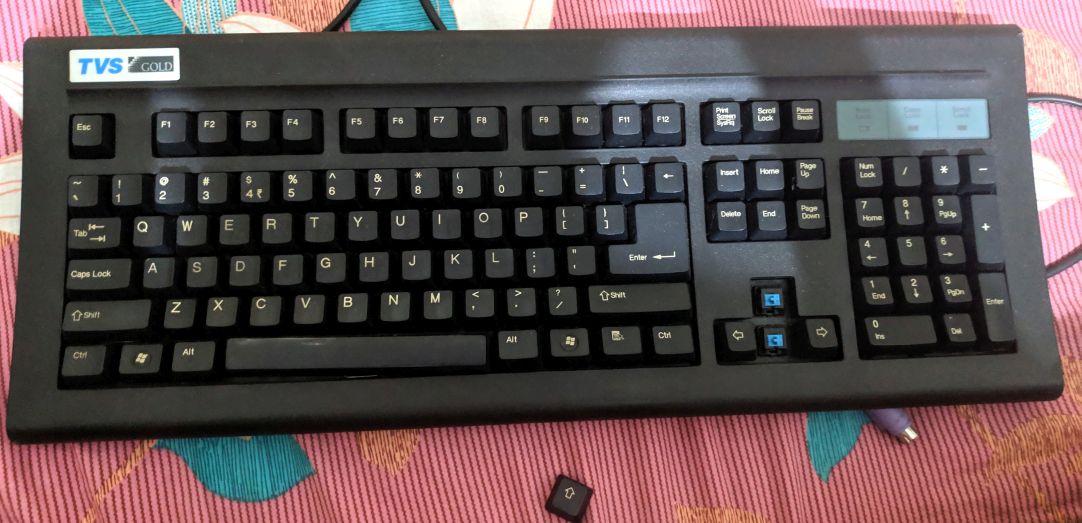
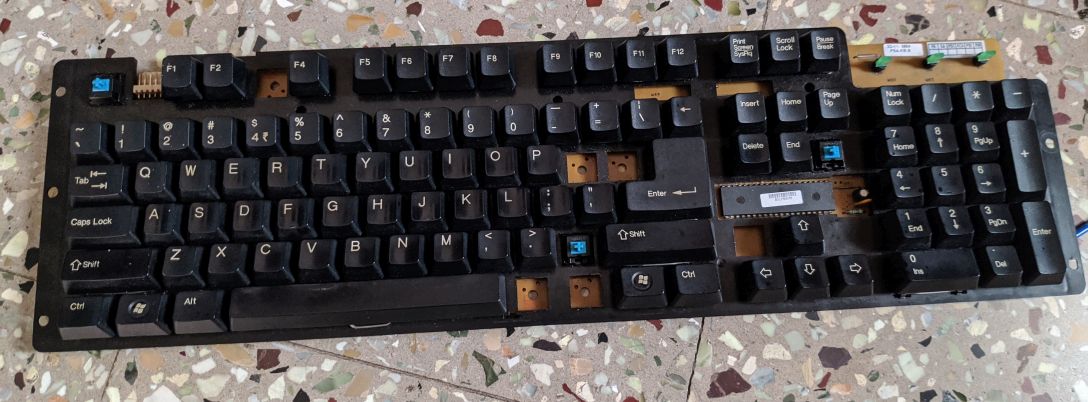
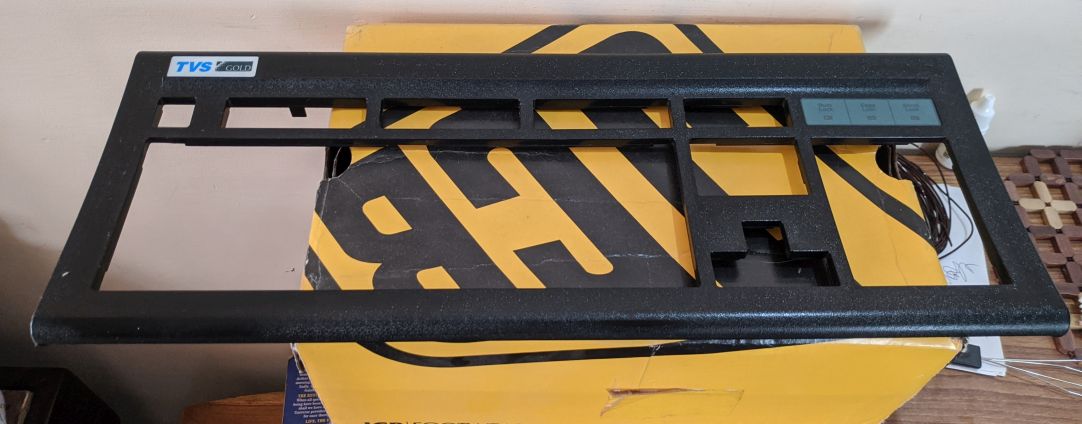
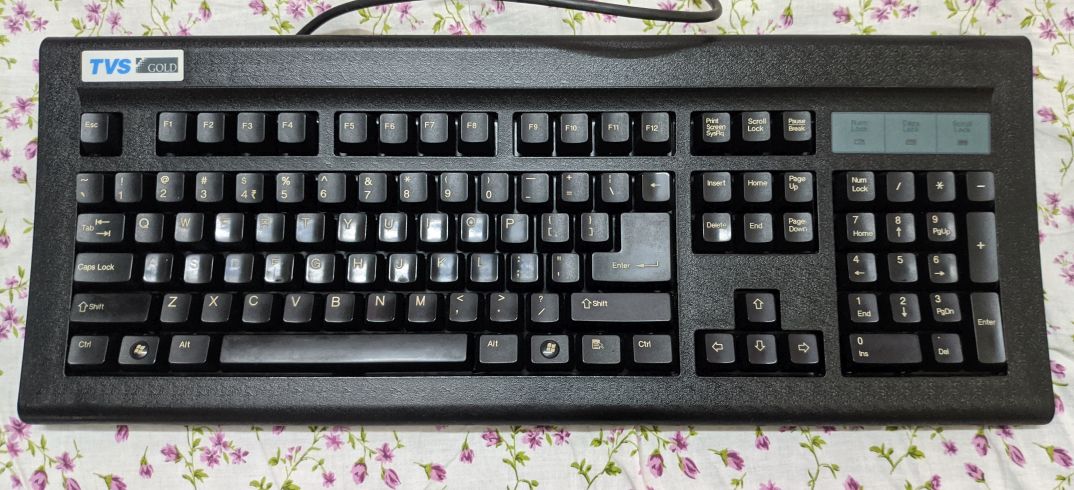
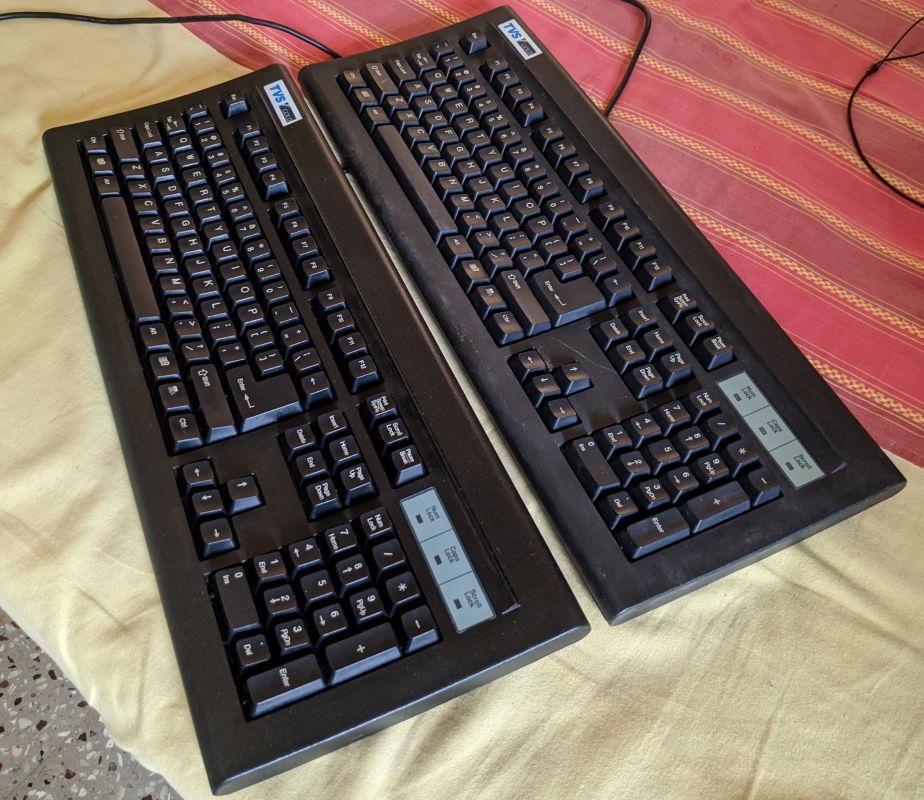
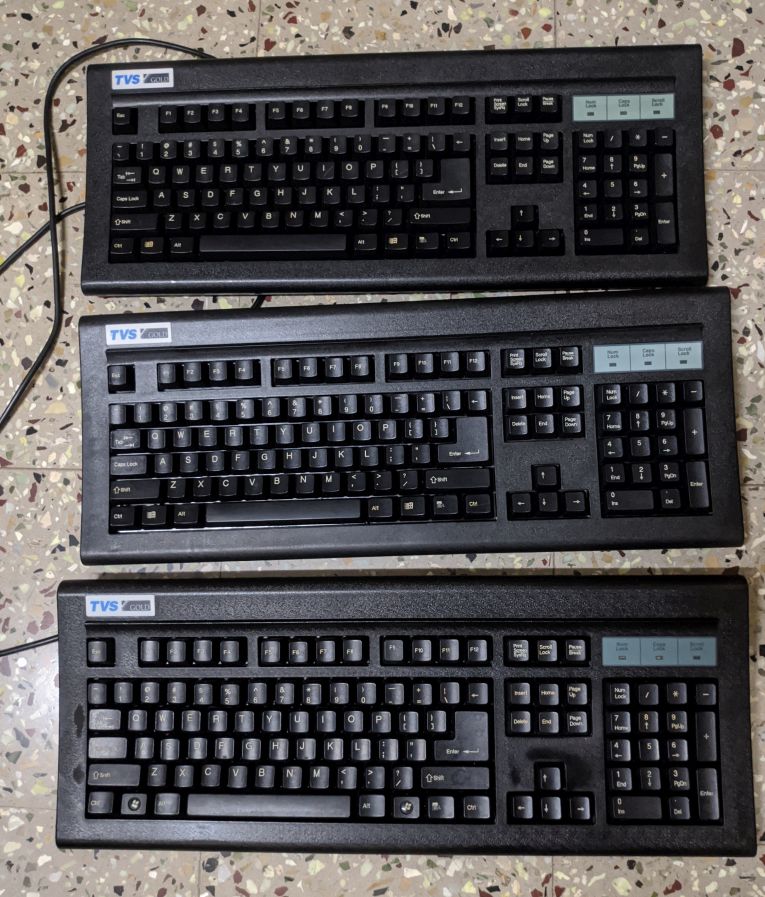
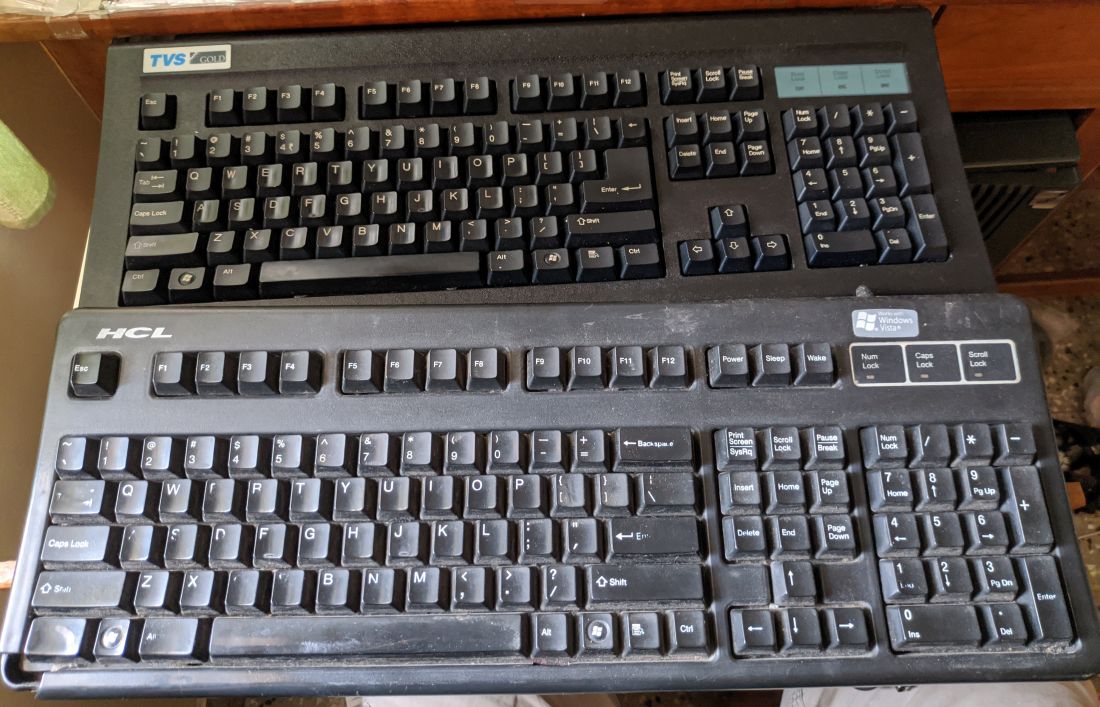
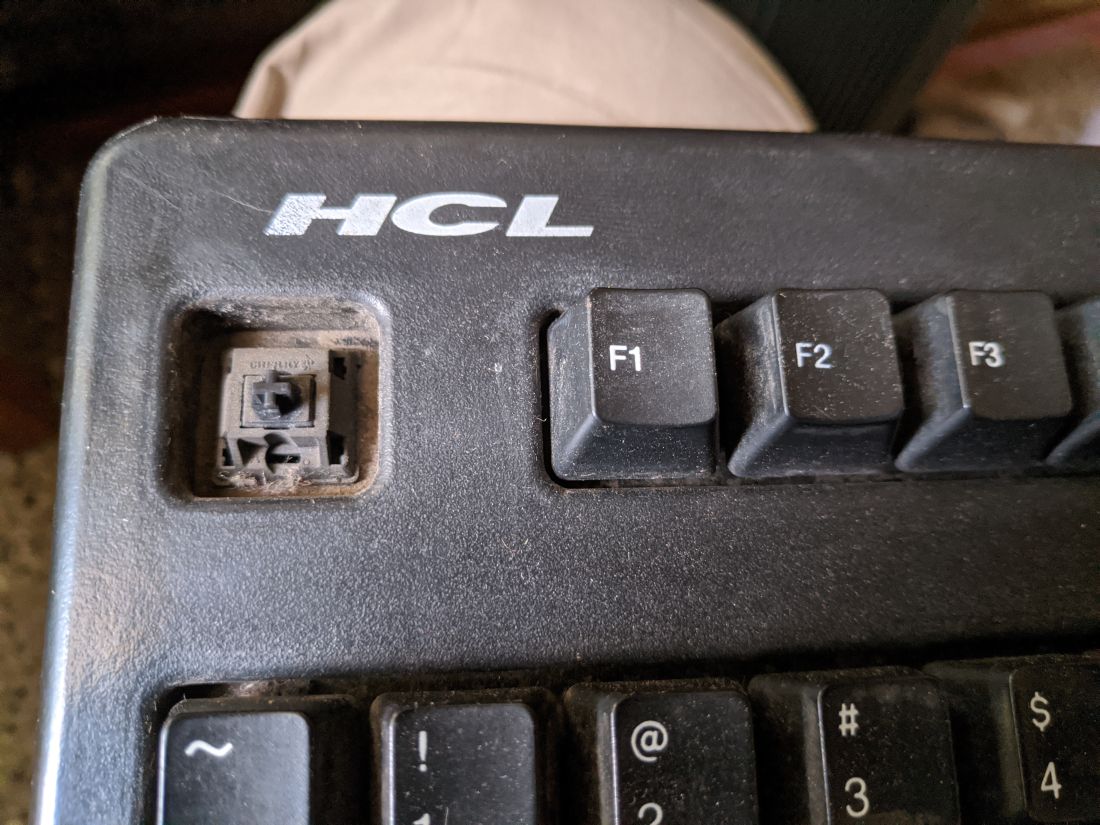
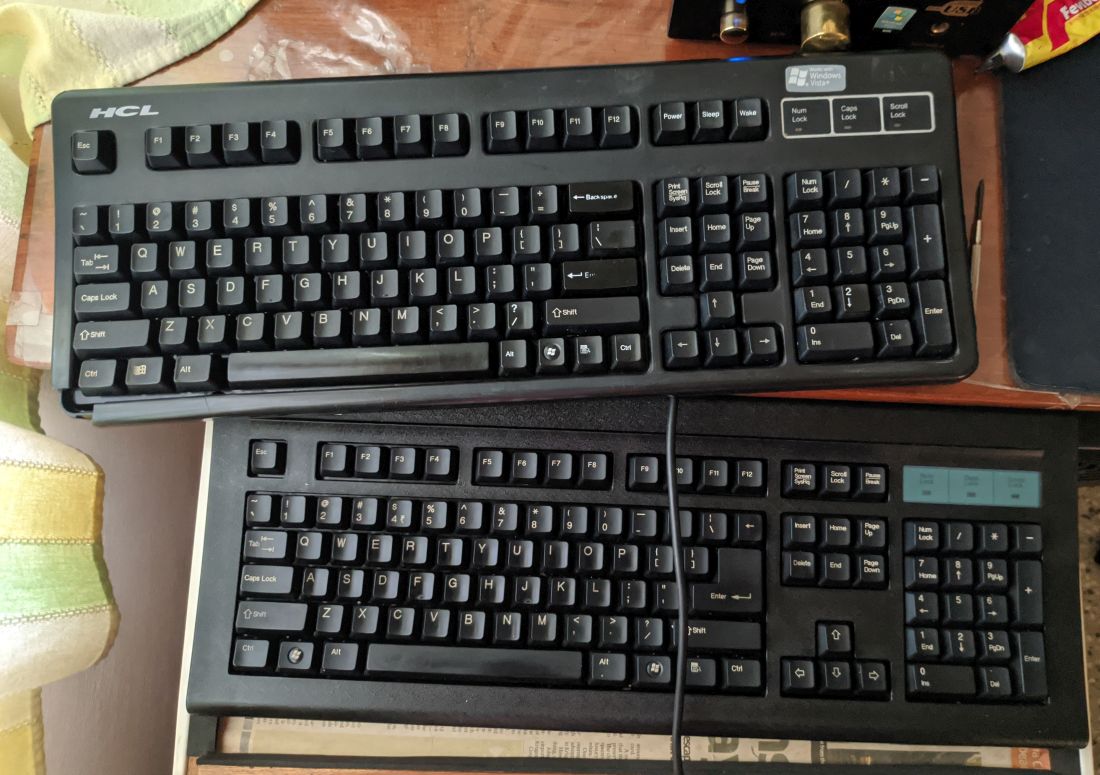
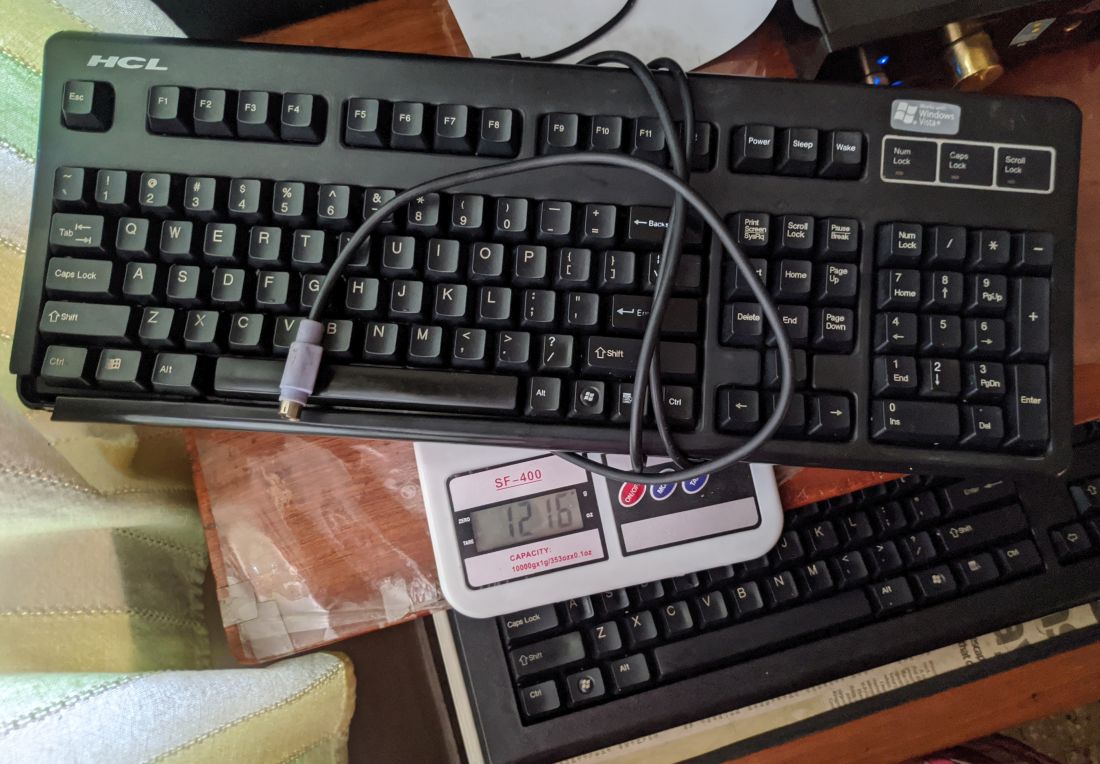
The keyboard at first - The venerable TVS Gold with Cherry MX Blue switches. The case looked grey and keycaps have wear marks

oi37exO.jpg


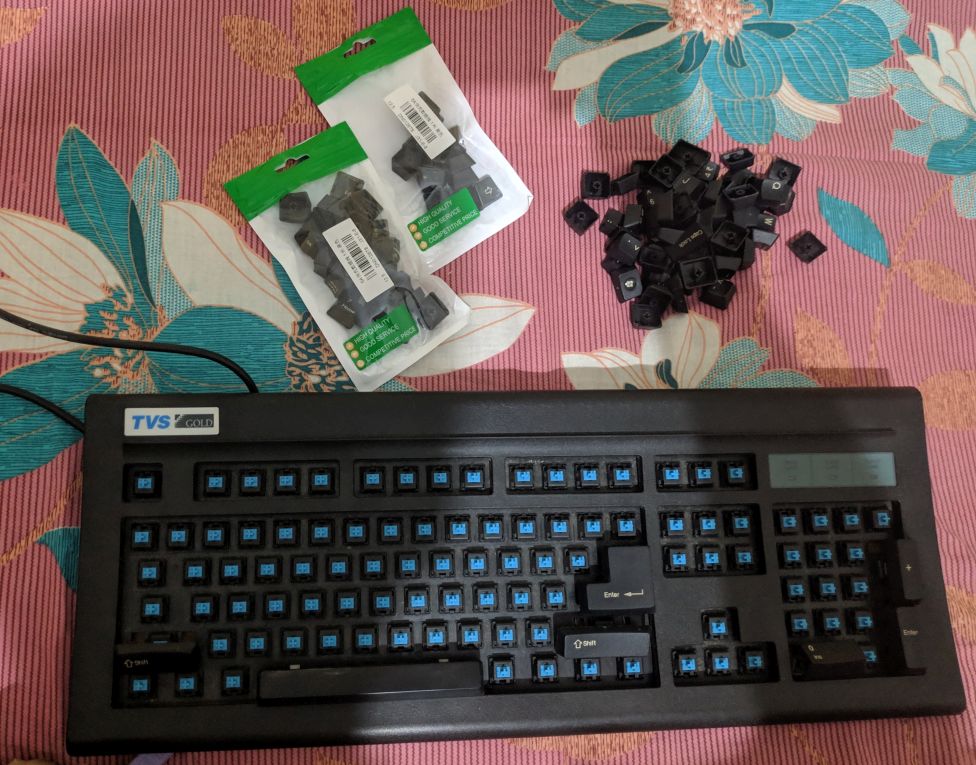
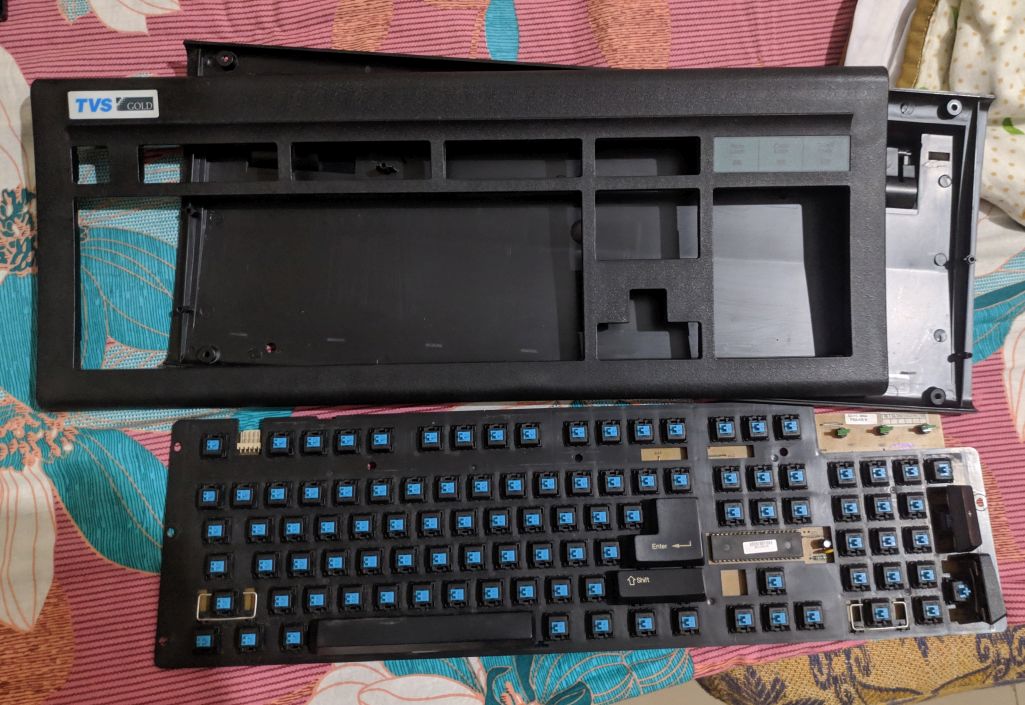
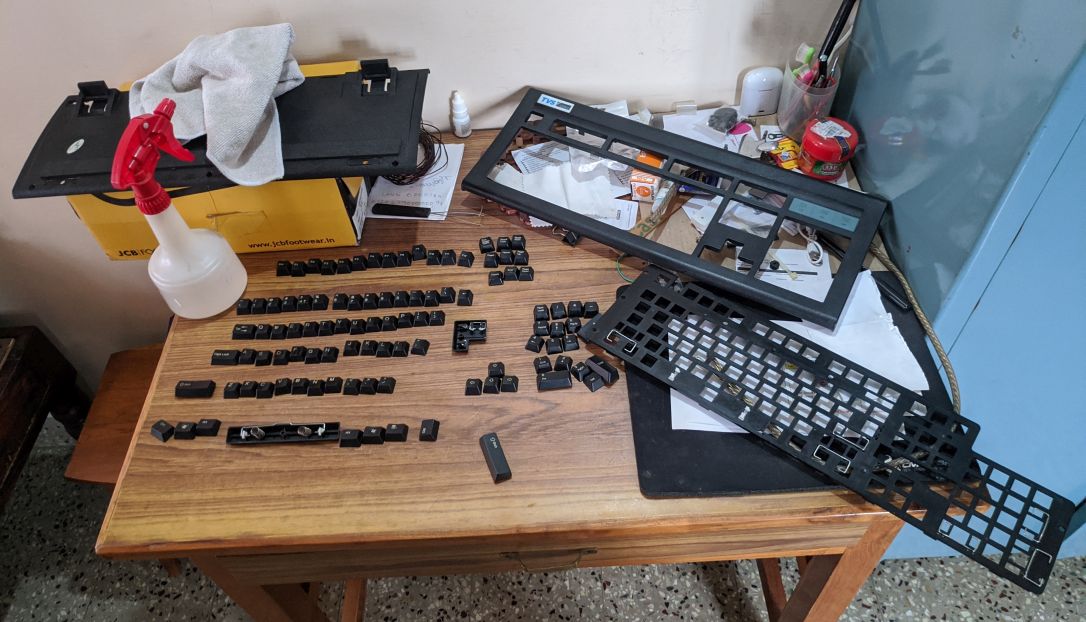
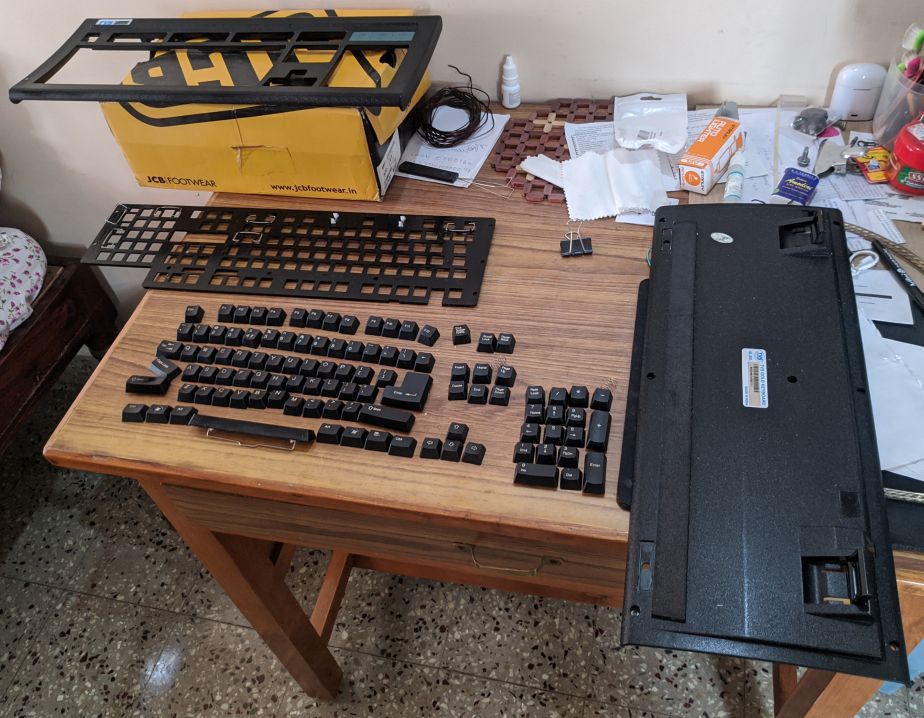
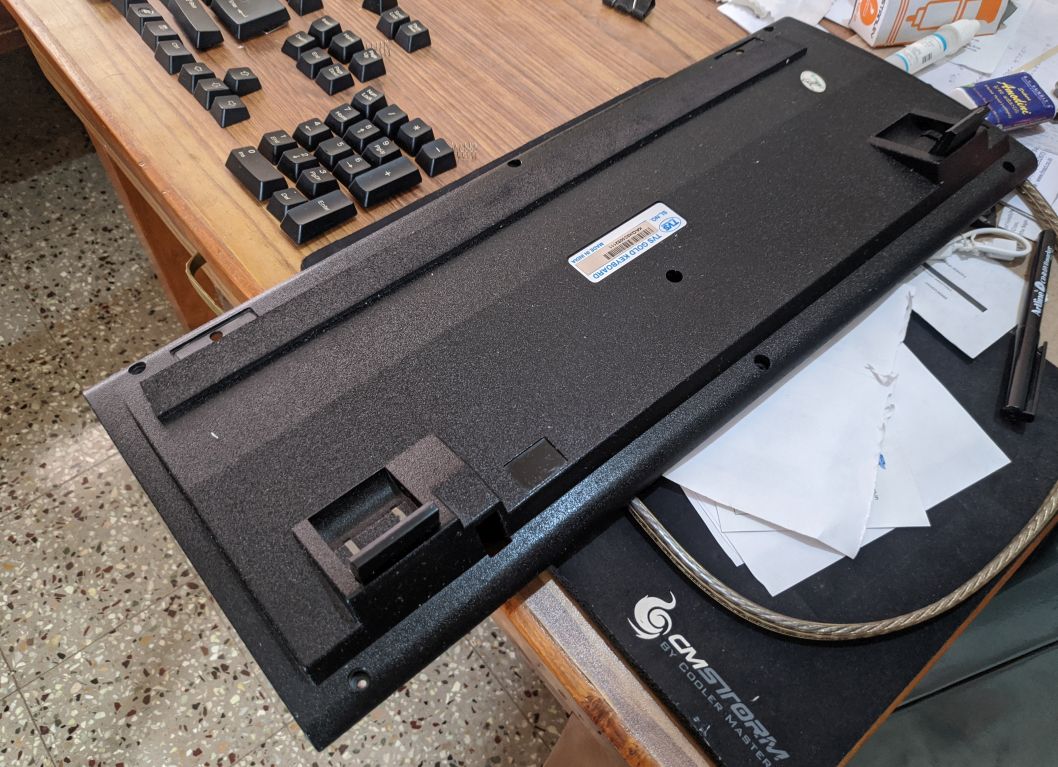
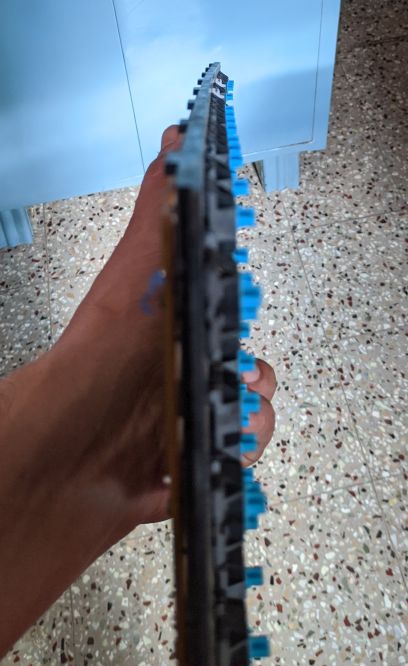
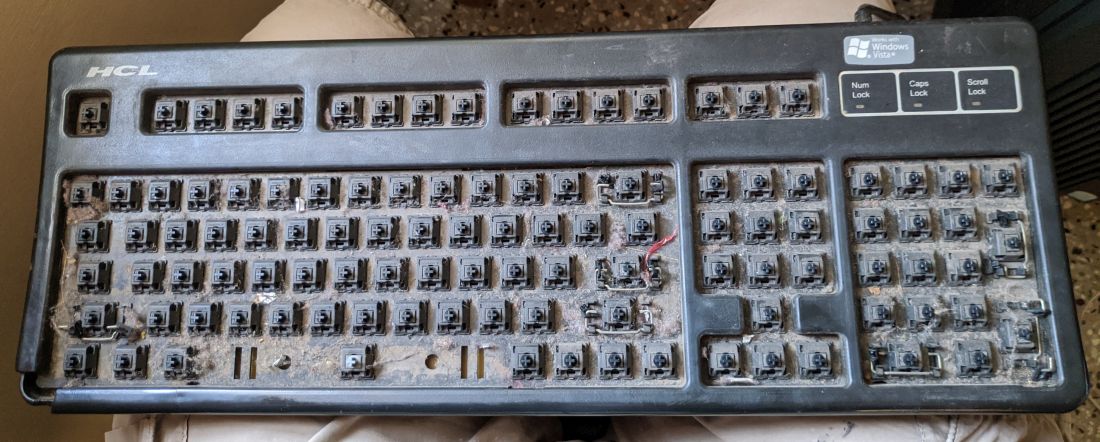
First order of business - start the teardown! Bagged different section of keycaps in different bags so I dont get confused.

VzvPU3m.jpg


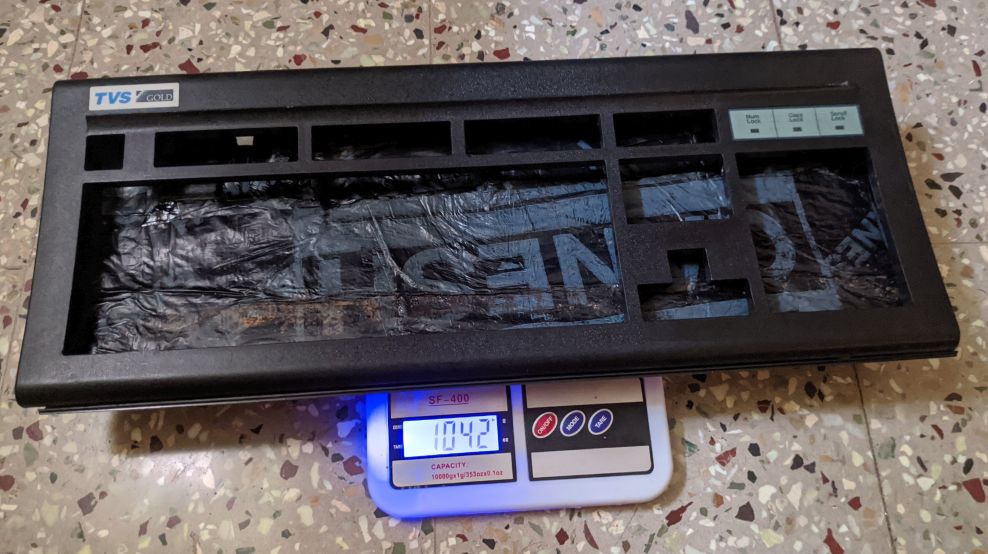
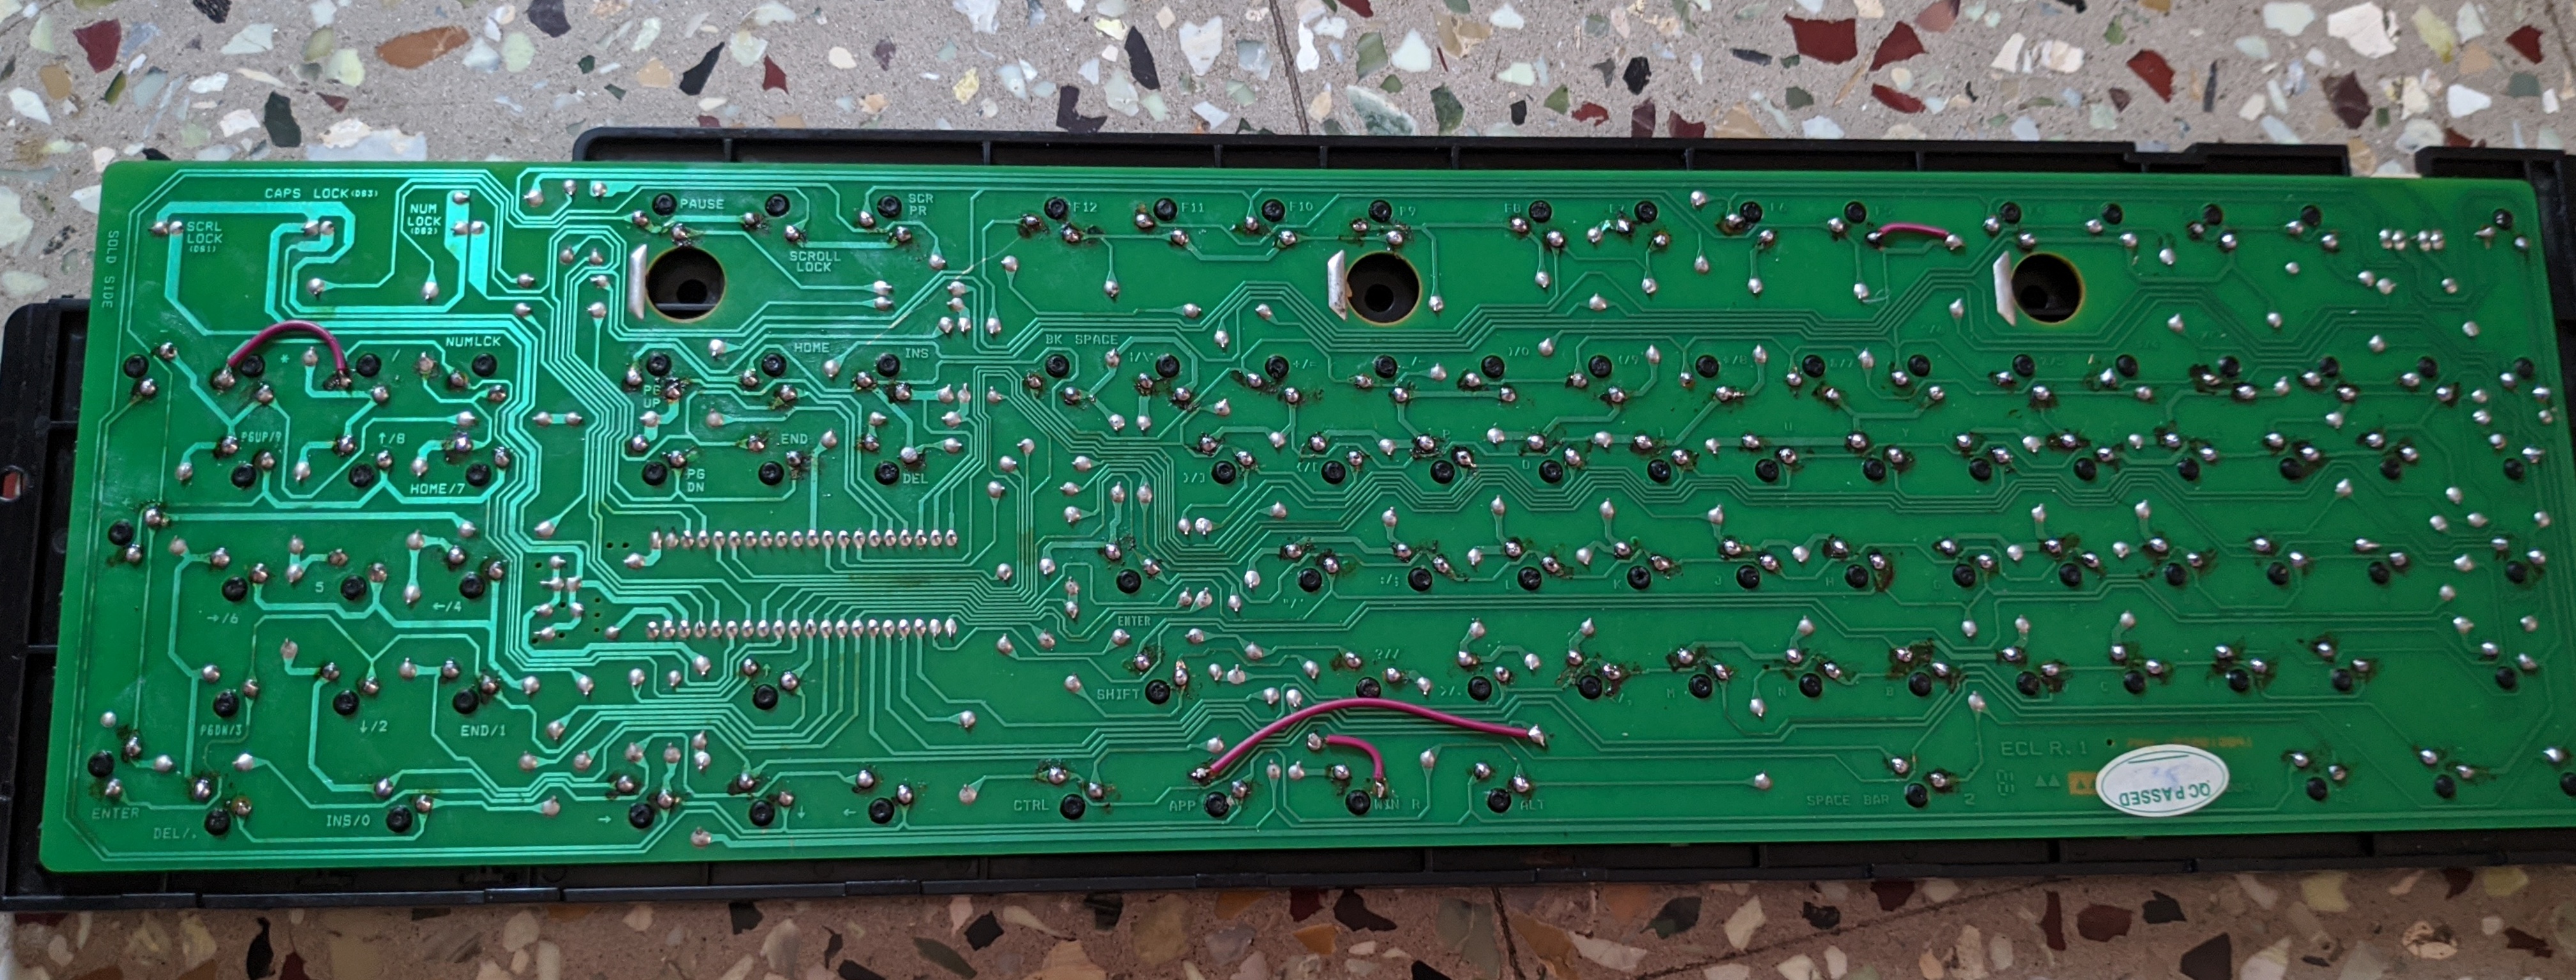
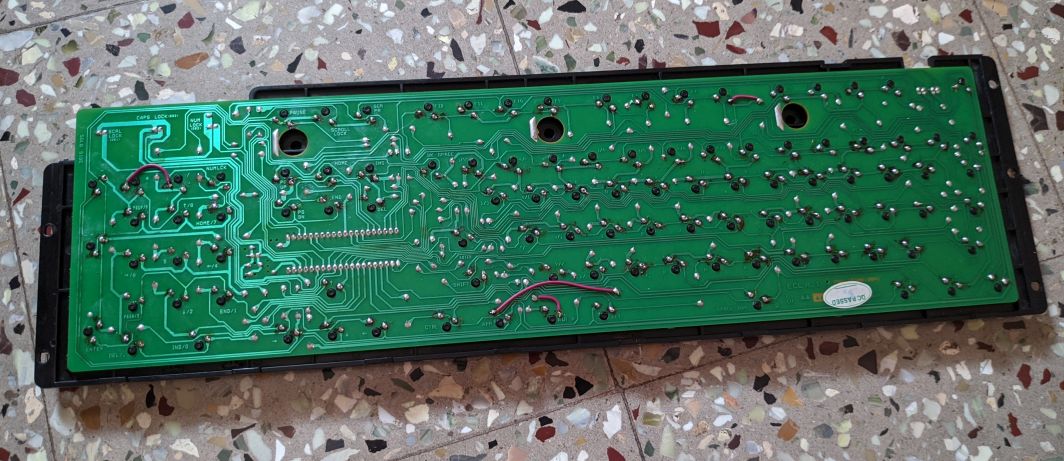
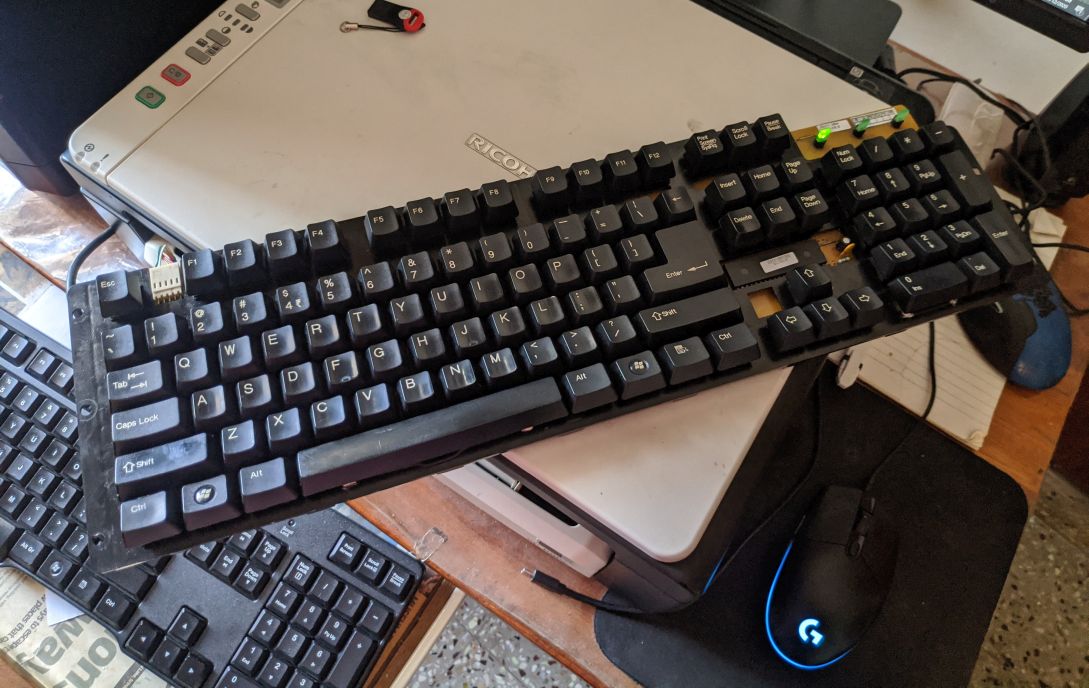
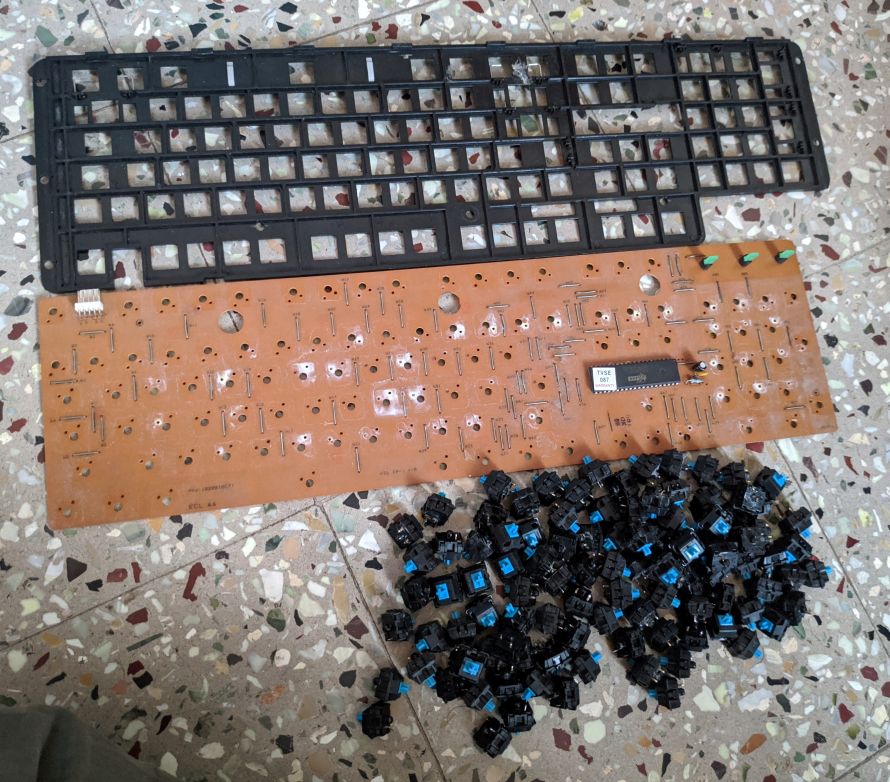
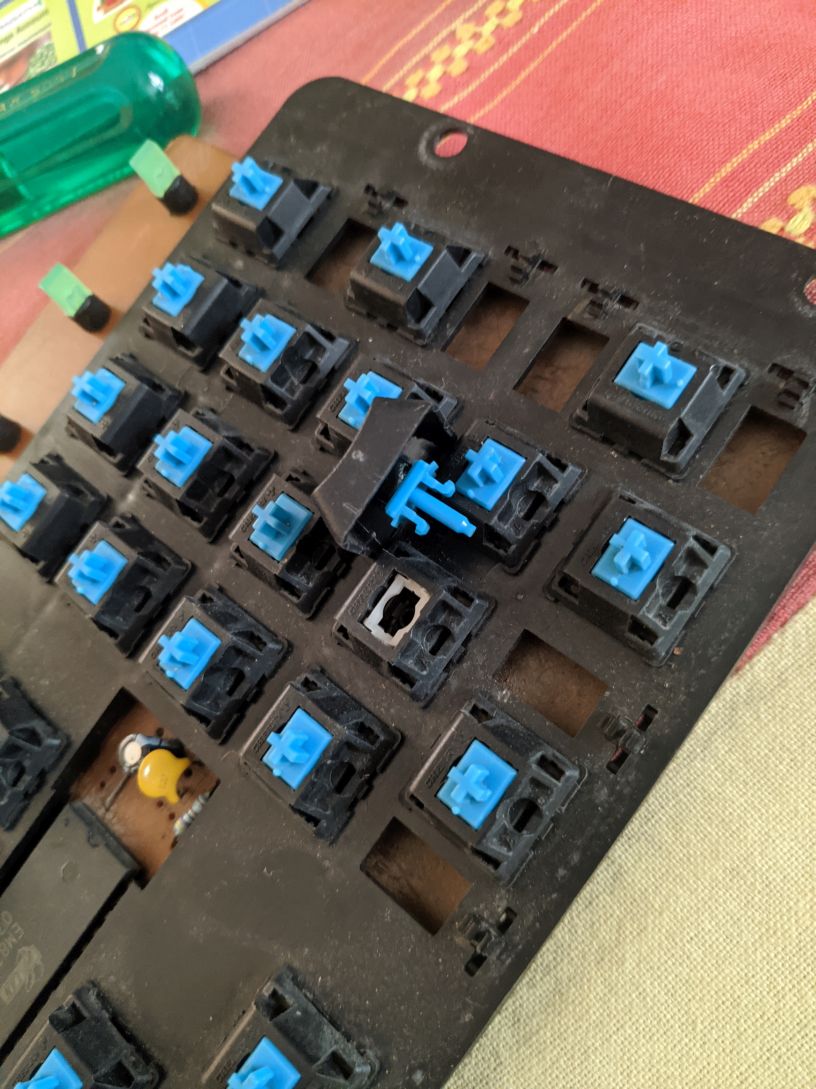
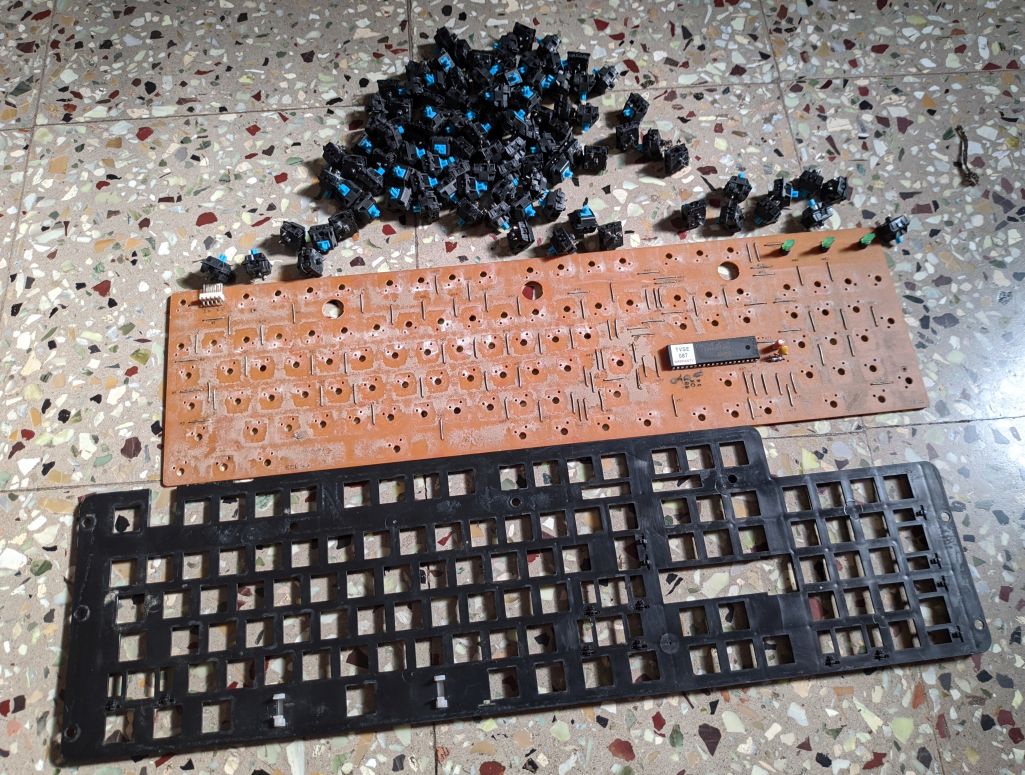
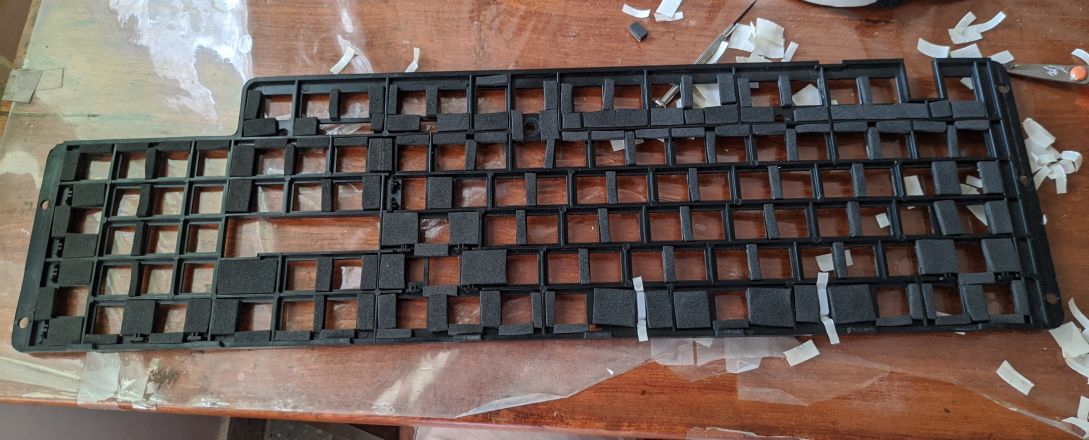
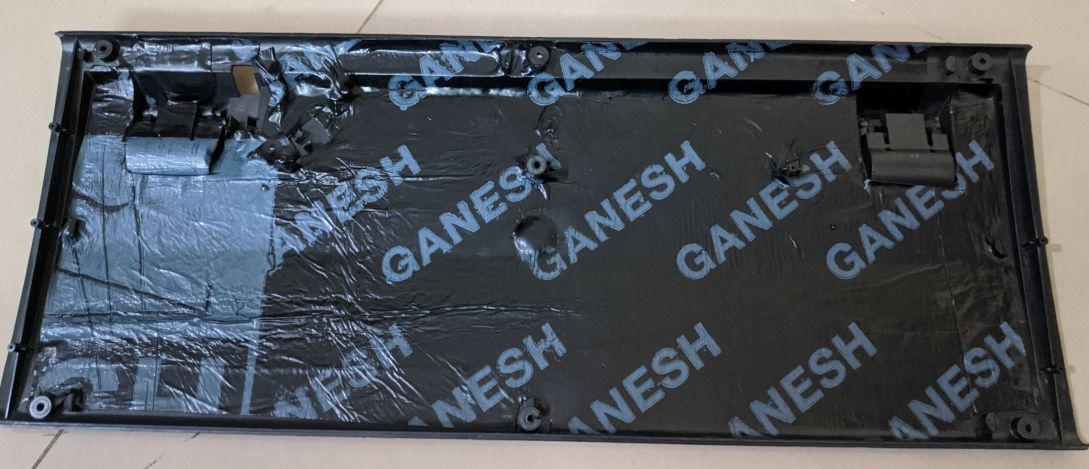
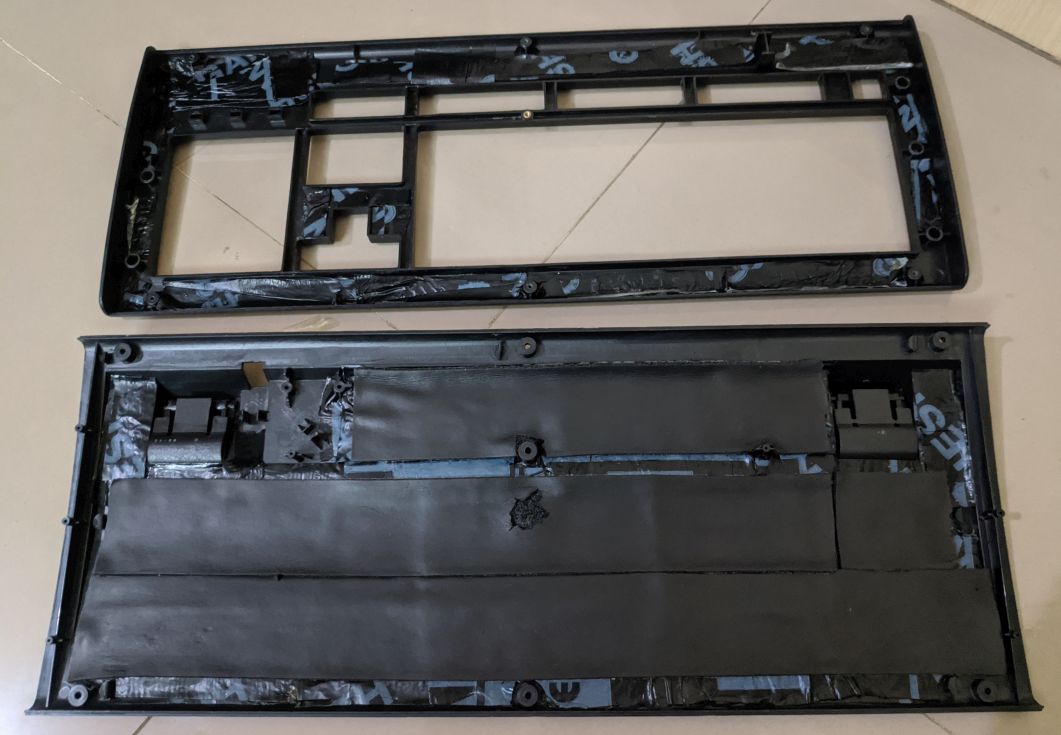
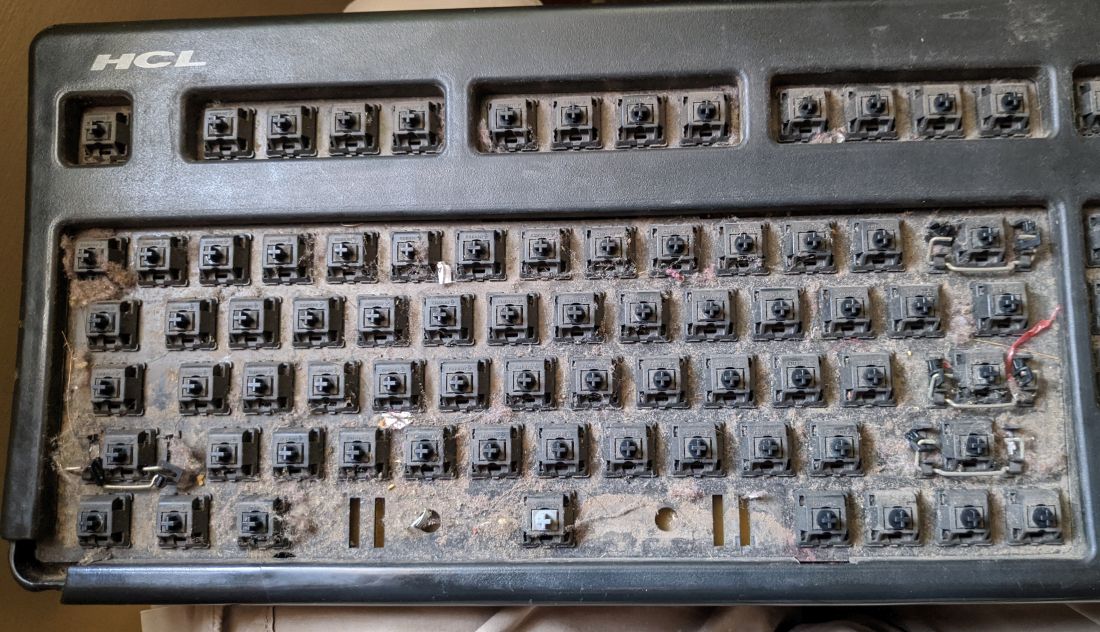
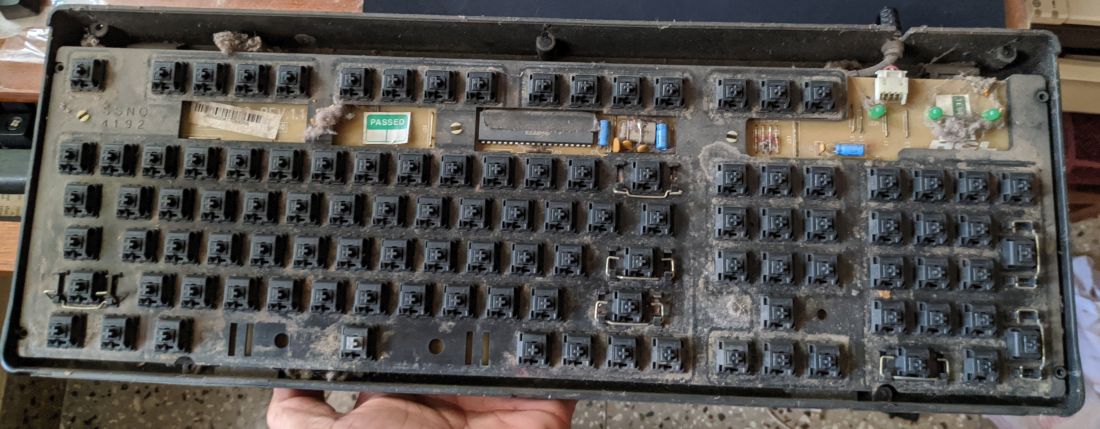
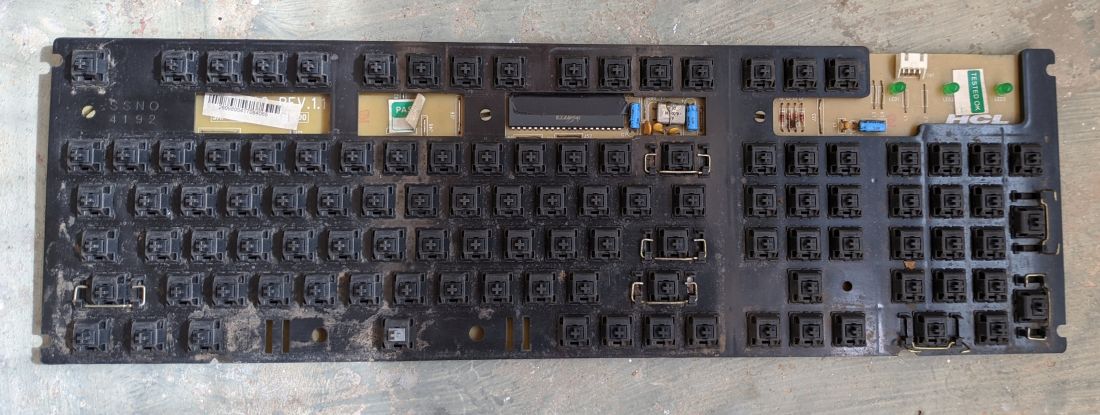
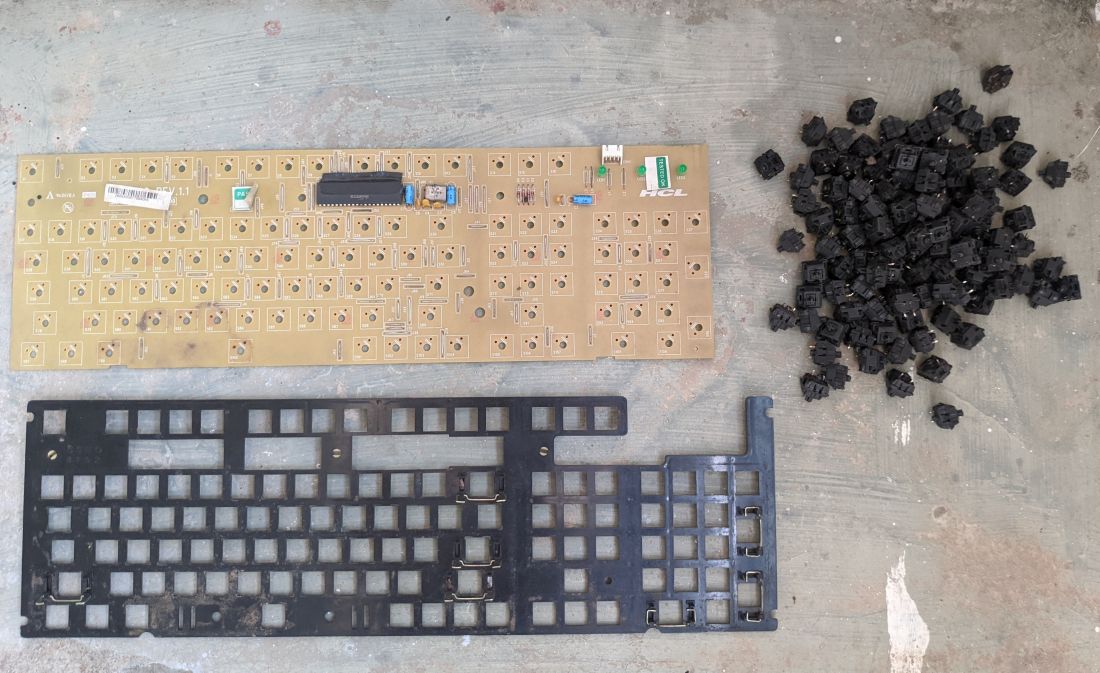
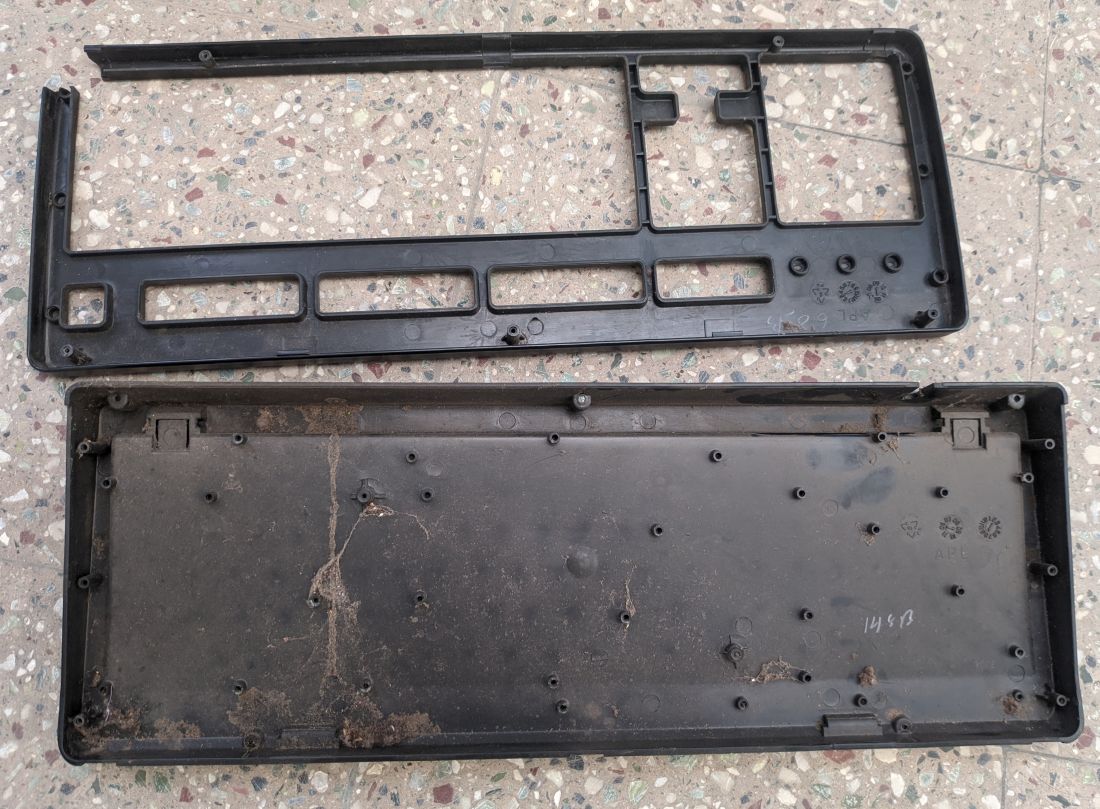
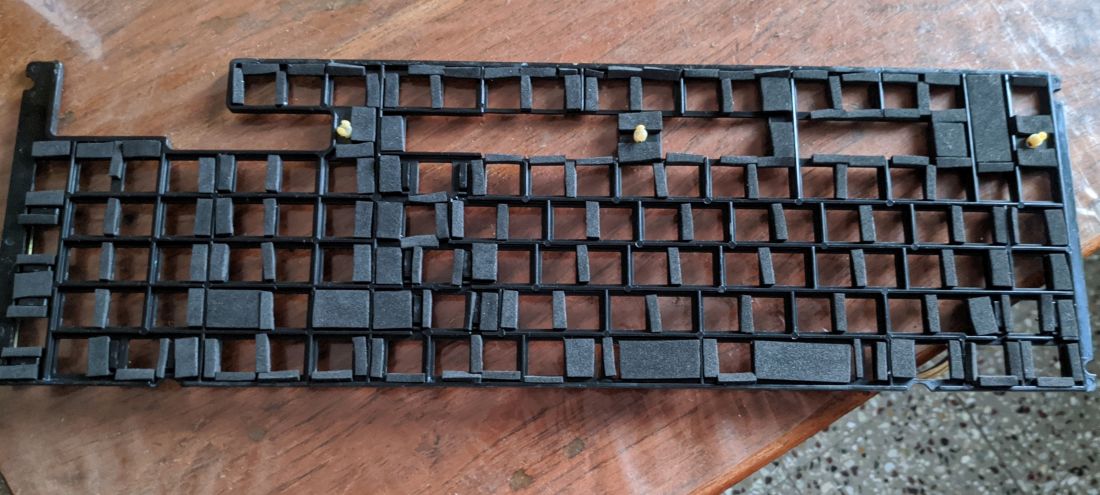
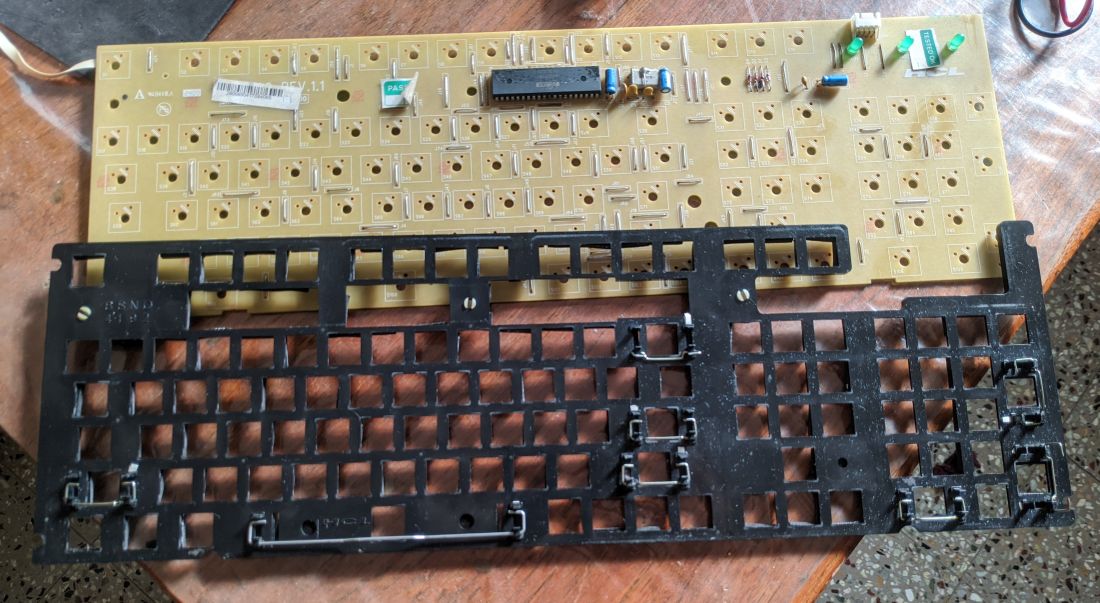
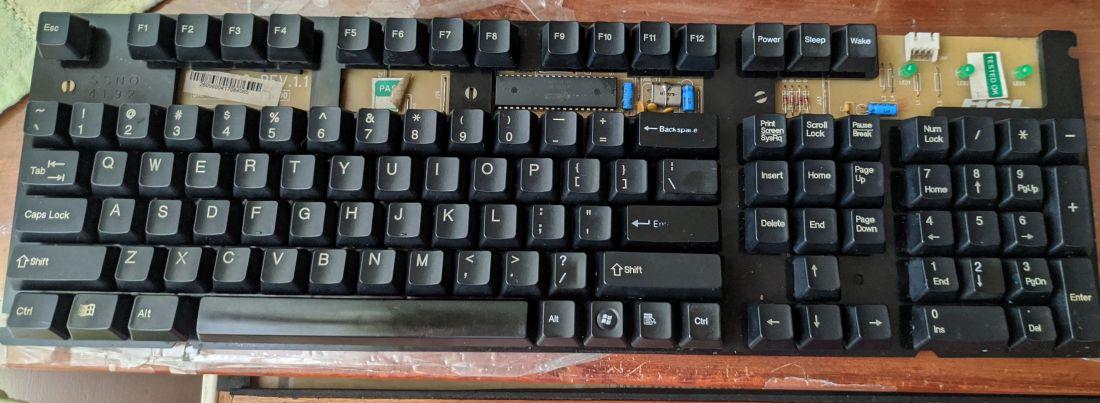
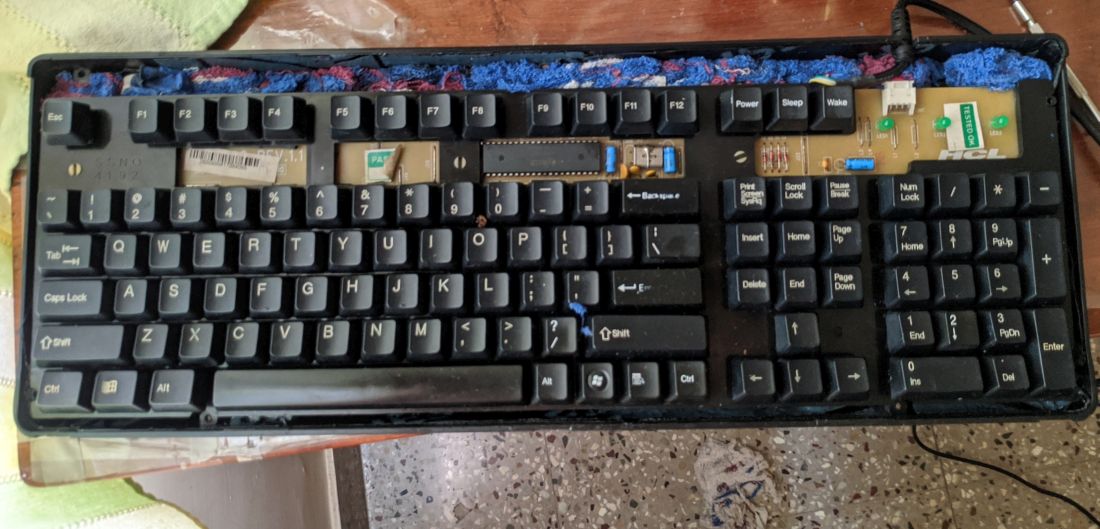
The surprises that lay beneath the case

Hq0eUqS.jpg


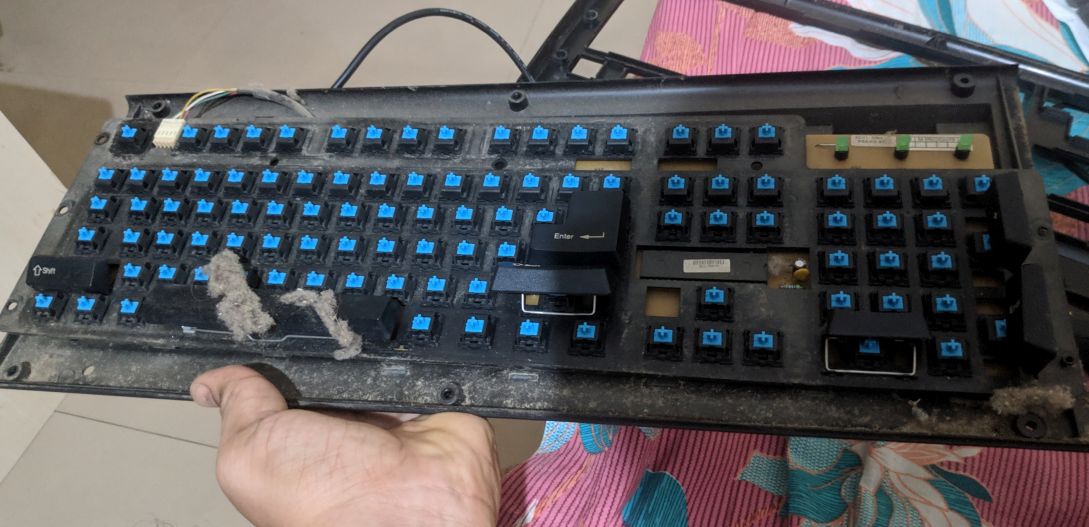
Everything cleaned thoroughly

G72xrLb.jpg


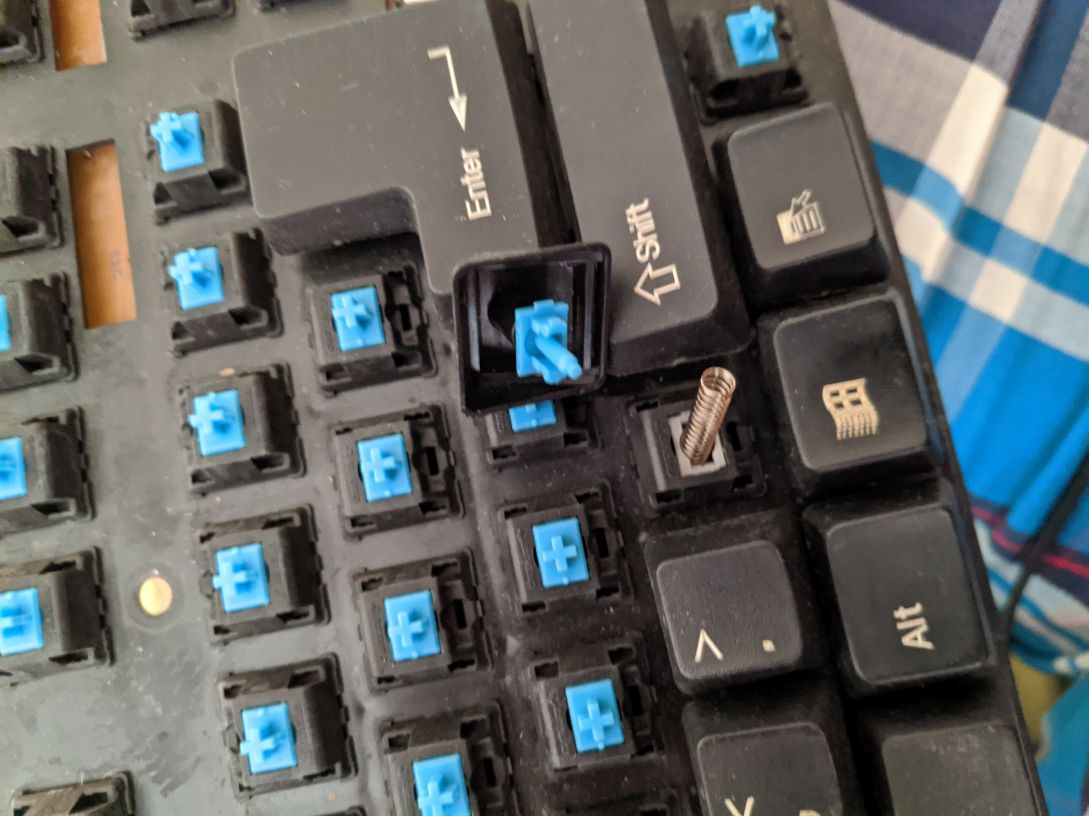
I assembled everything back together and I saw the main problem - the switches were sticking. They'd press inside and get stuck, the key registers as pressed all the time. AT this point I felt I should just get a bag of 10 new switches from Ali express, change them and call it a day. So I went to Ali Express and ordered a new bag of 10 Cherry MX Blue switches.

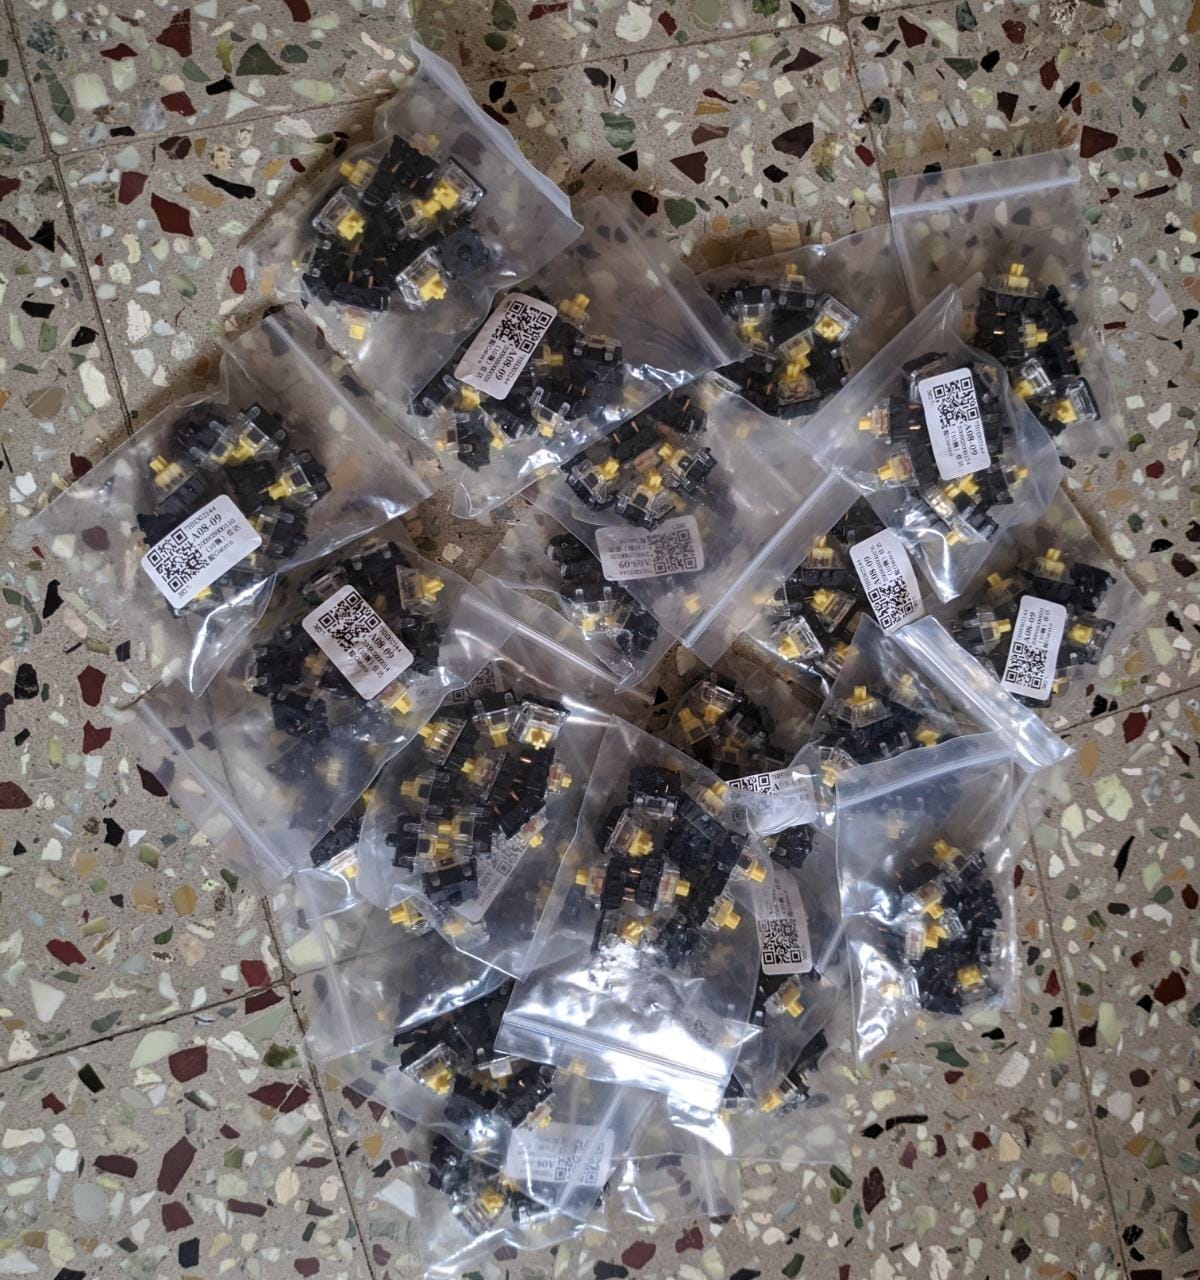
I got the switches just over a month later and started checking rest of the switches. Al this point I realised I needed a lot more than 10 - over 20 in fact. Sigh
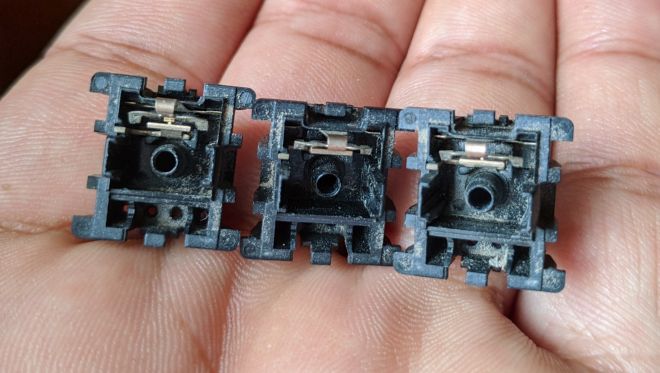
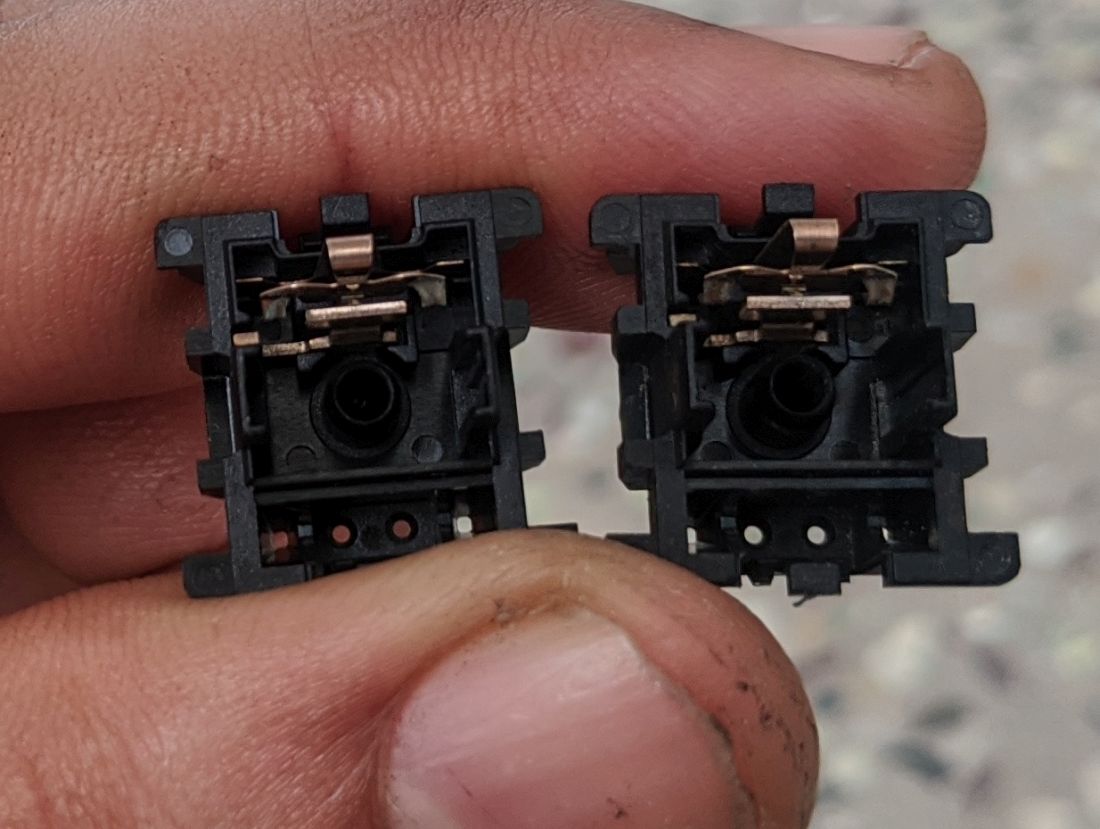
Sticky keys :


This is when I started doing some research and checking if the old switches can be fixed. I got a few leads on how to make a tool and open the keys without having to desolder the switches themselves. I made tools from a small binder clip, they did not work as the black plastic tray was stopping the switches from being opened.

I grew frustrated at this point and went full retard - sprayed the keys with WD40 hoping they'd fix it. Long story short, they didn't. Ugh. It made the keys feel heavy and weird.

Right now I felt super frustrated and one with this keyboard. I went online and bought myself a Monoprice MP810 and called it a day.

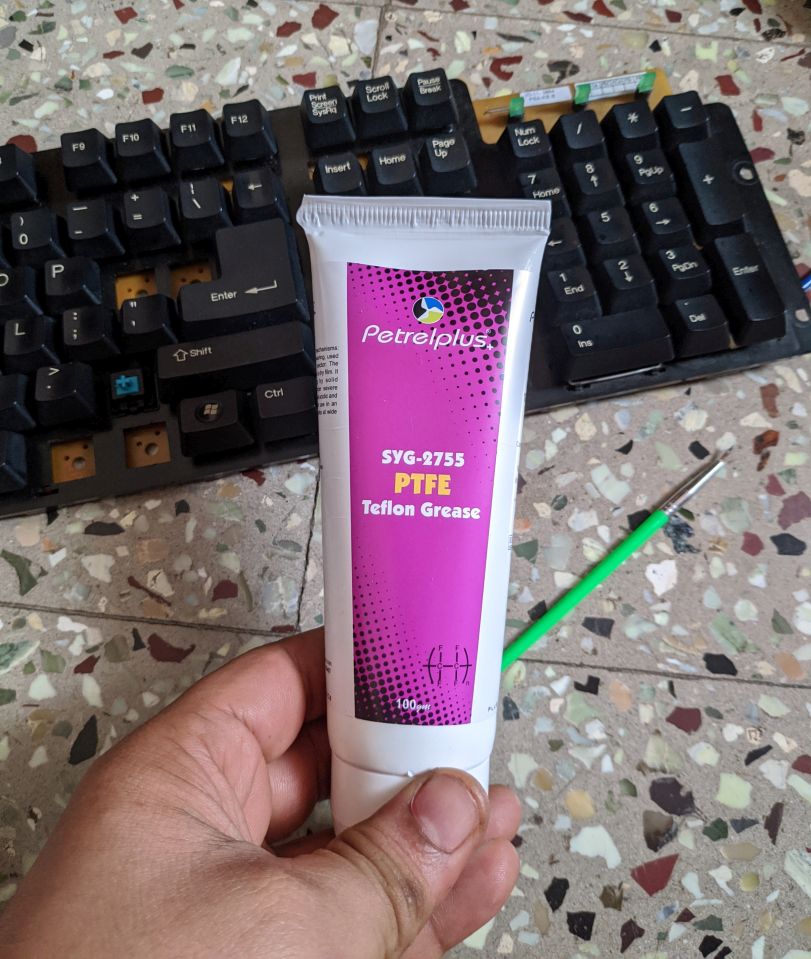
A year later and thanks to the Pandemic I had some free time and finally decided to take up fixing the TVS for good. I read around and made a list of things I needed : Lube/Grease and a small paintbrush. Small paintbrush was easy to get, went our usual stationary shop and asked for the smallest brush they had. The lube was a difficult choice. Everyone online recommends the Krytox 205 which in itself is crazy expensive, not to mention it is not available in India.

I looked around amazon and found this :


I hoped this would work, 295rs for 100 grams isn't bad considering I had other uses for the remaining lube. So I ordered and waited. I got it a week later and initial impressions were that it was very slick and it should work well.

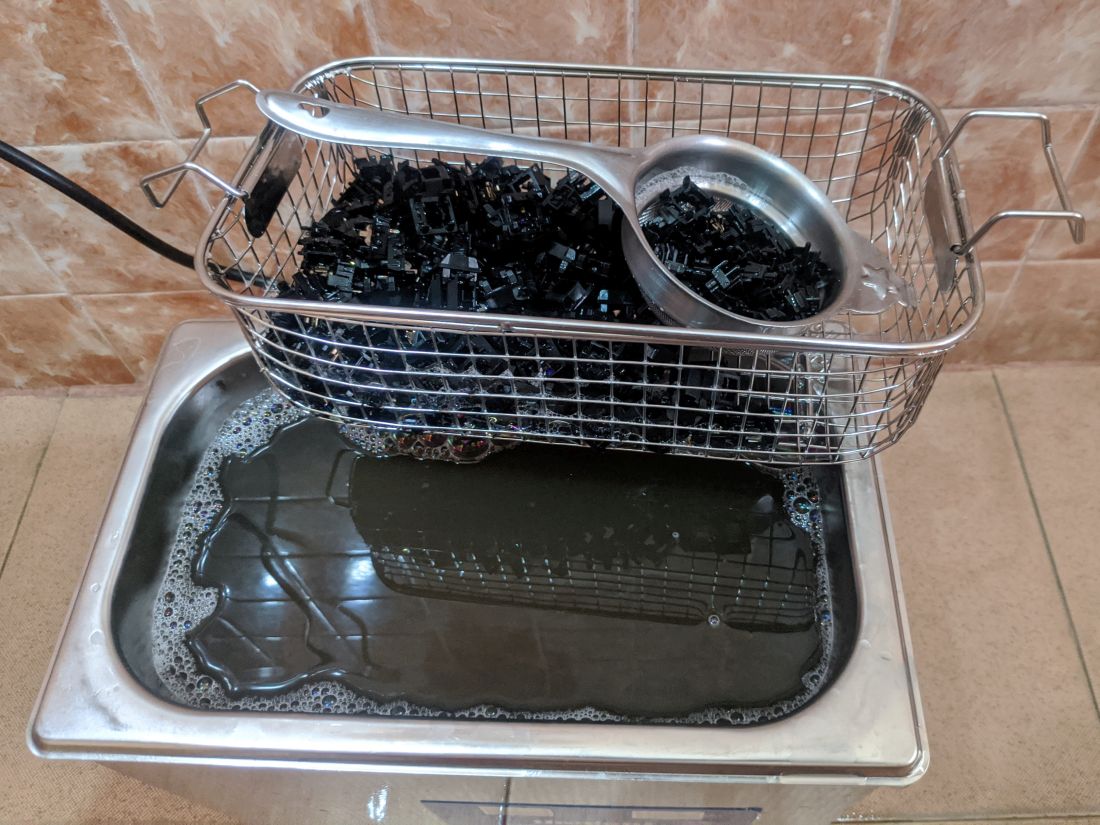
Took out the keyboard, broke it down, used a Dsol wik to soak up solder and take out some bad keys

Qkh3rLr.jpg


I had to soak the keys first in IPA to get rid of WD40 residue, it was everywhere!
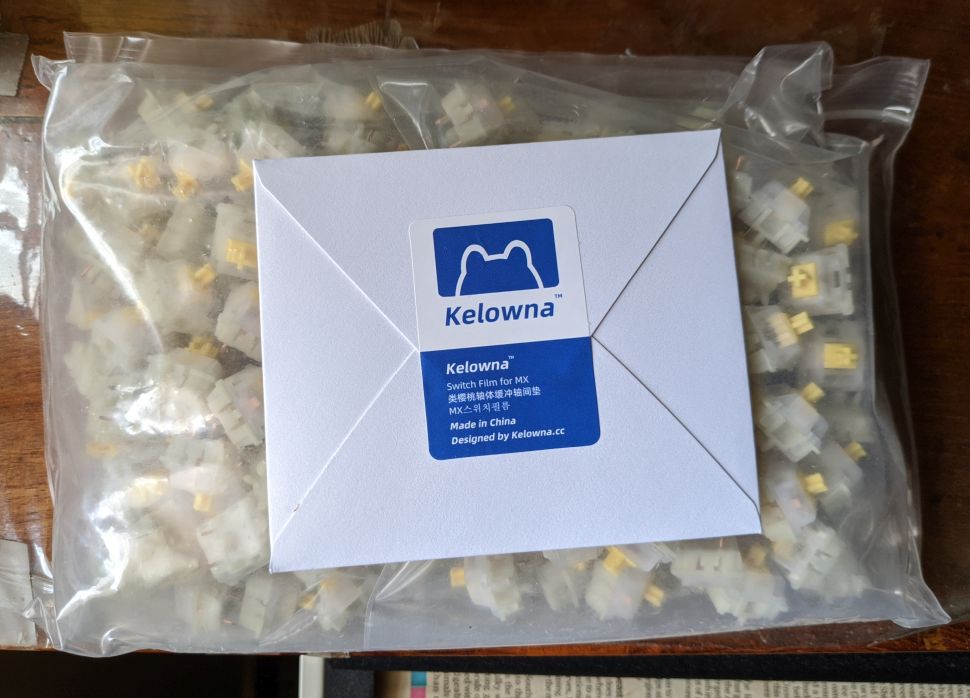
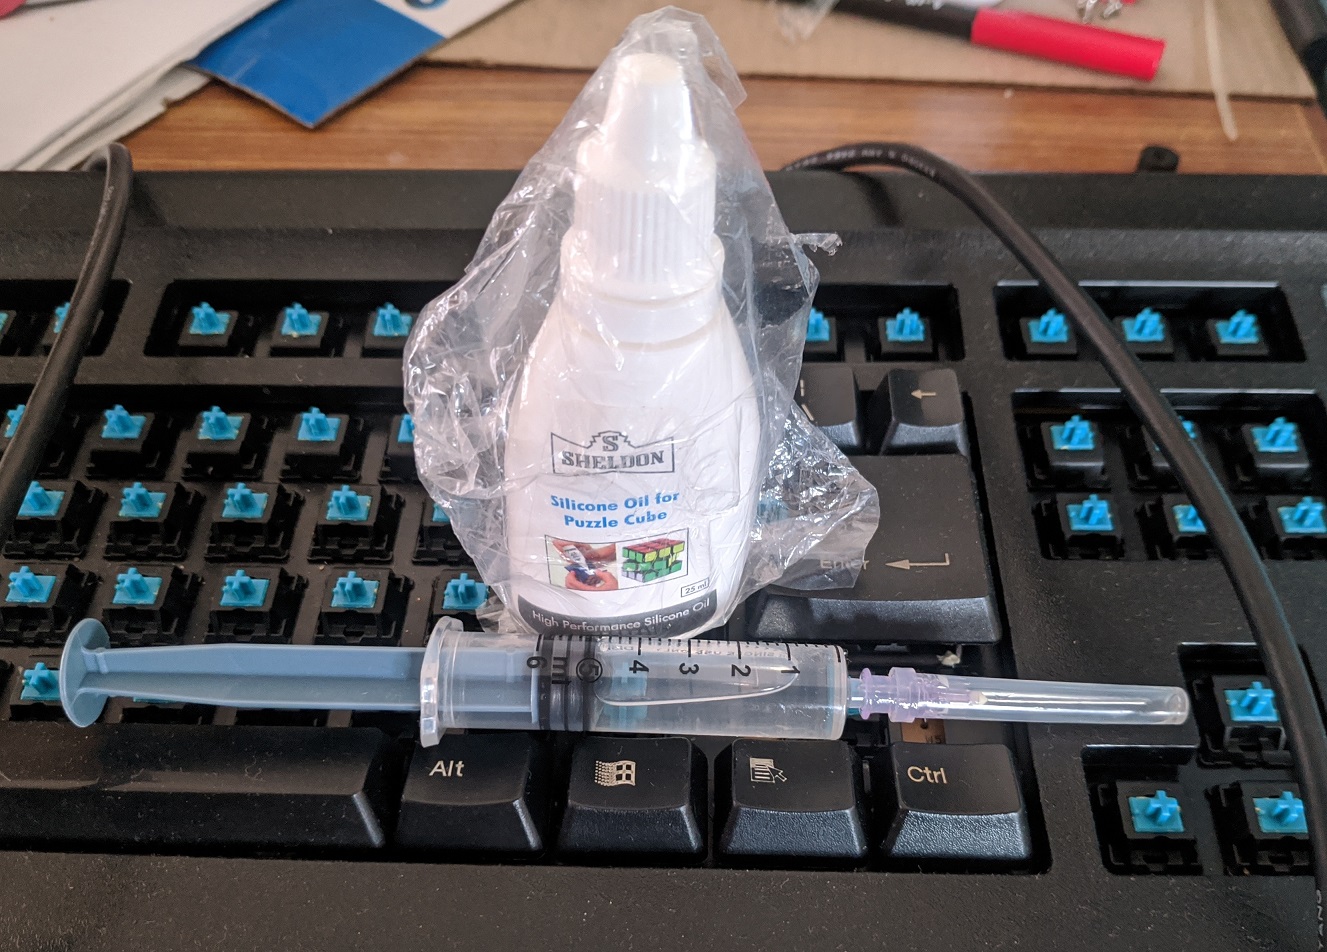
RrRhpTv.jpg


Lube of Choice

777CpdU.jpg


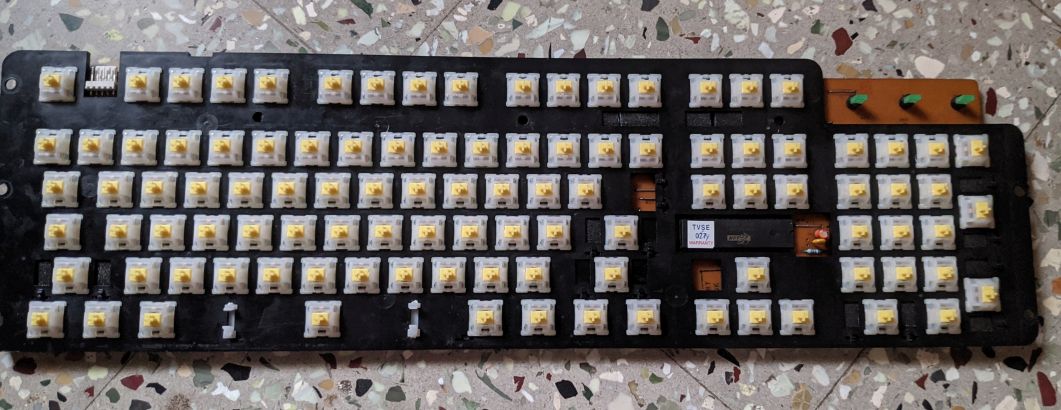
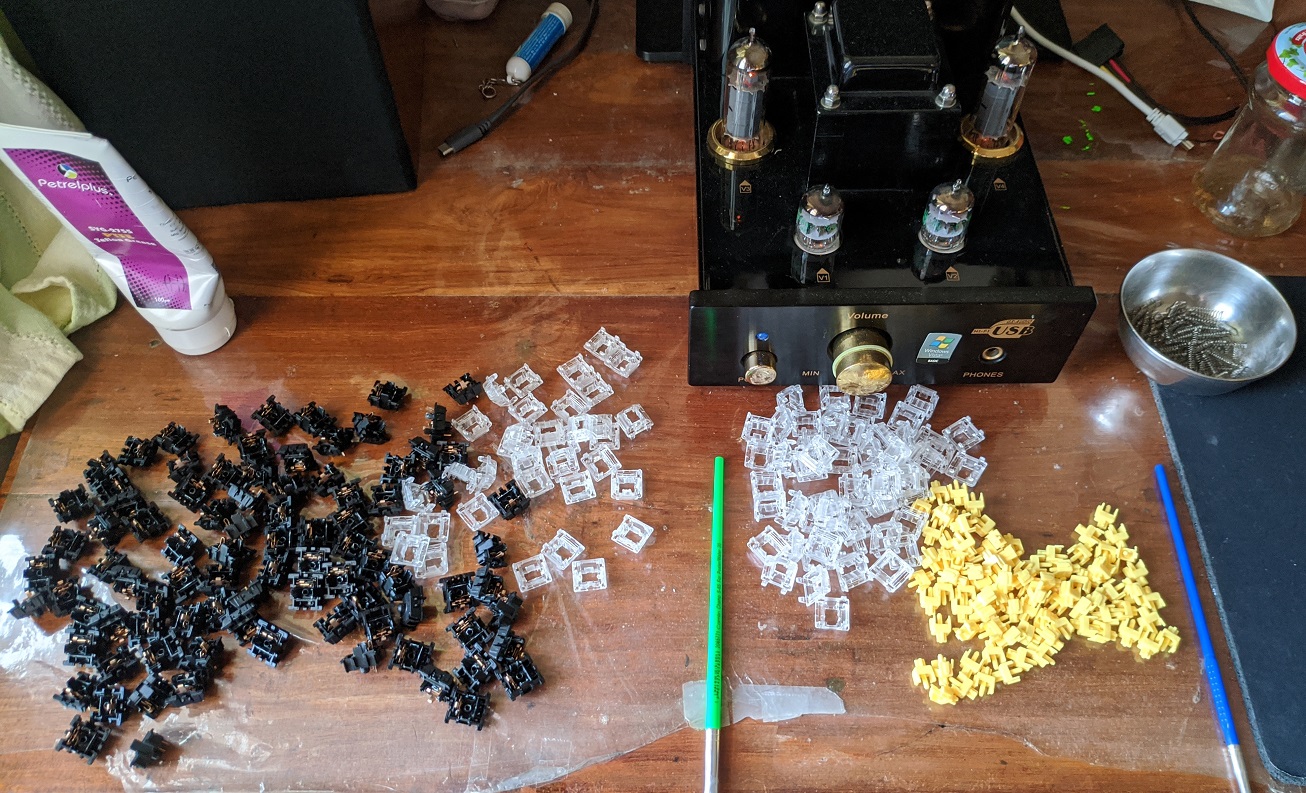
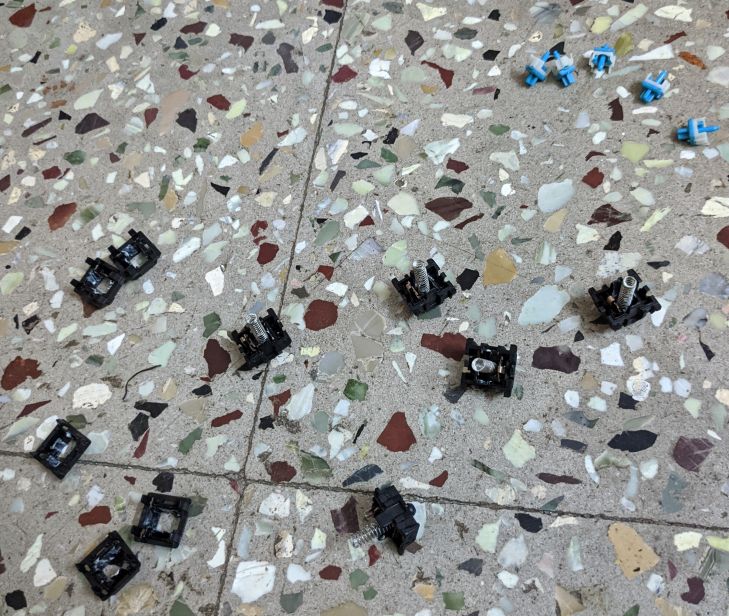
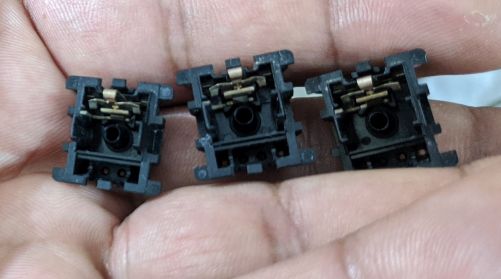
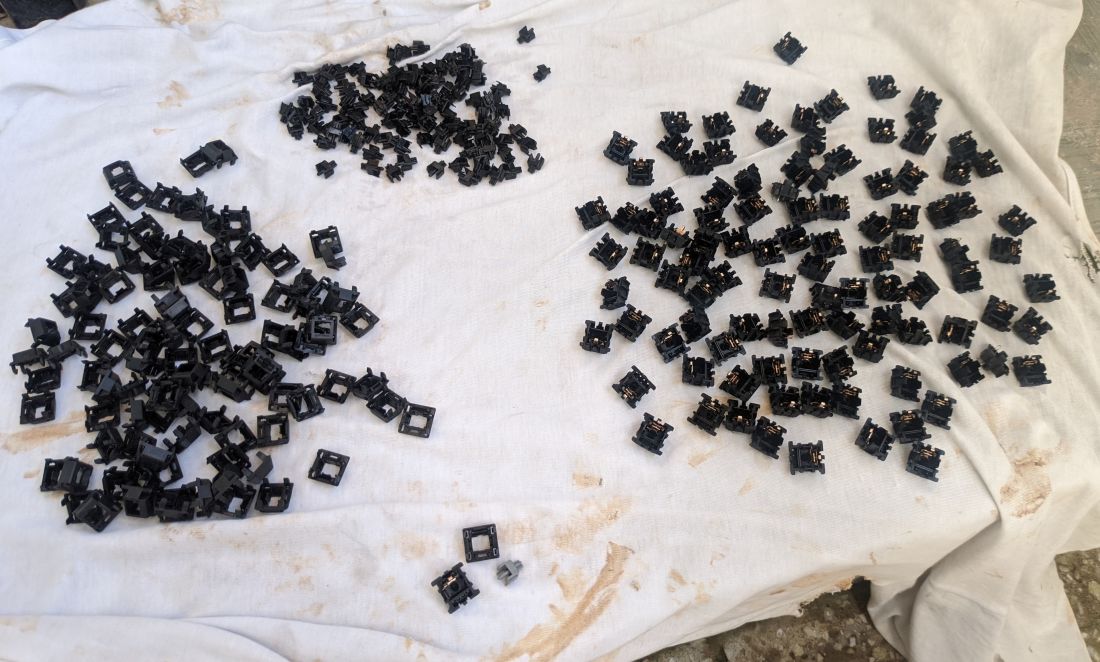
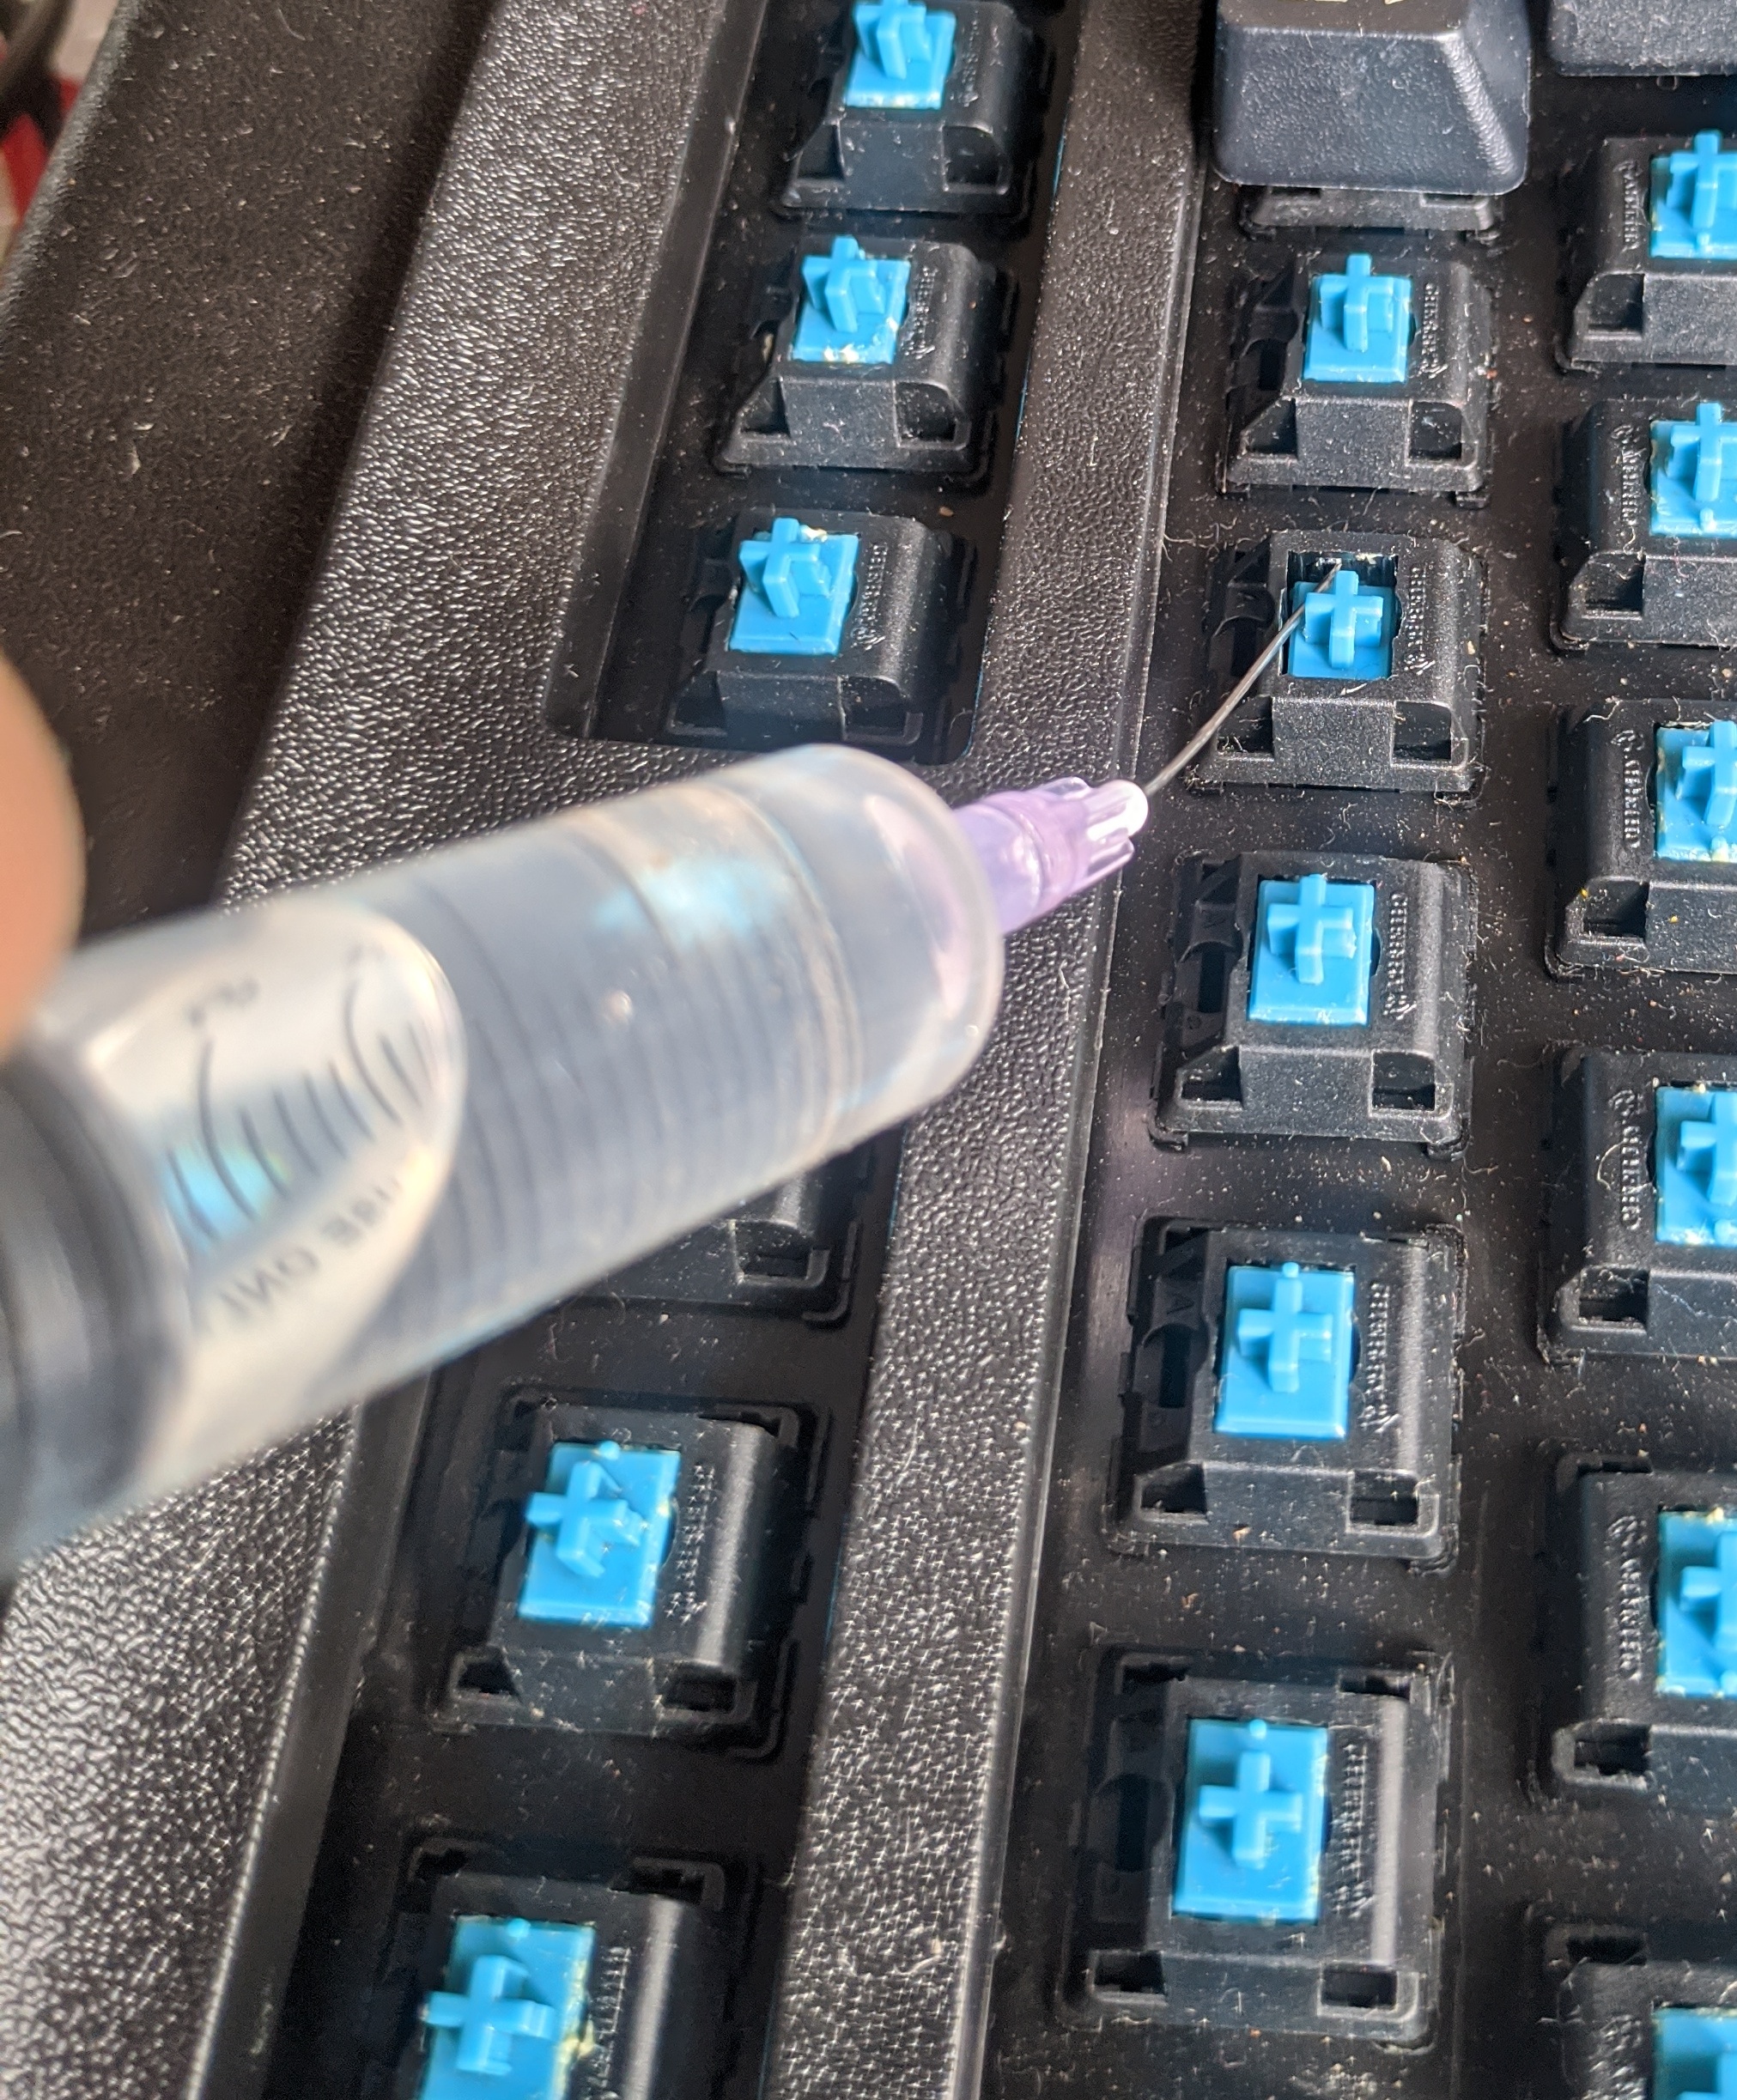
Switches opened up and lubed, ready to be put back together.

f9HOEod.jpg


Initial results were promising - 4 out of 5 stopped sticking and that was a good percentage! I had 10 spare switches and even if there are 10 bad ones it wouldn't be a problem. This is the cue I needed to start with the whole keyboard. Right now I realised I needed something else to help with desoldering, perhaps a desoldering pump? I went to the electronics shop and got myself a desoldering pump, not knowing how to use it or how effective it will be.

Get home and start using. It was useless and super frustrating. Back to DSol wik. It was difficult even with the DSol wik because I had never attempted desoldering in this scale. Destroyed a few traces but slowly got the hang of it and started Motoring.

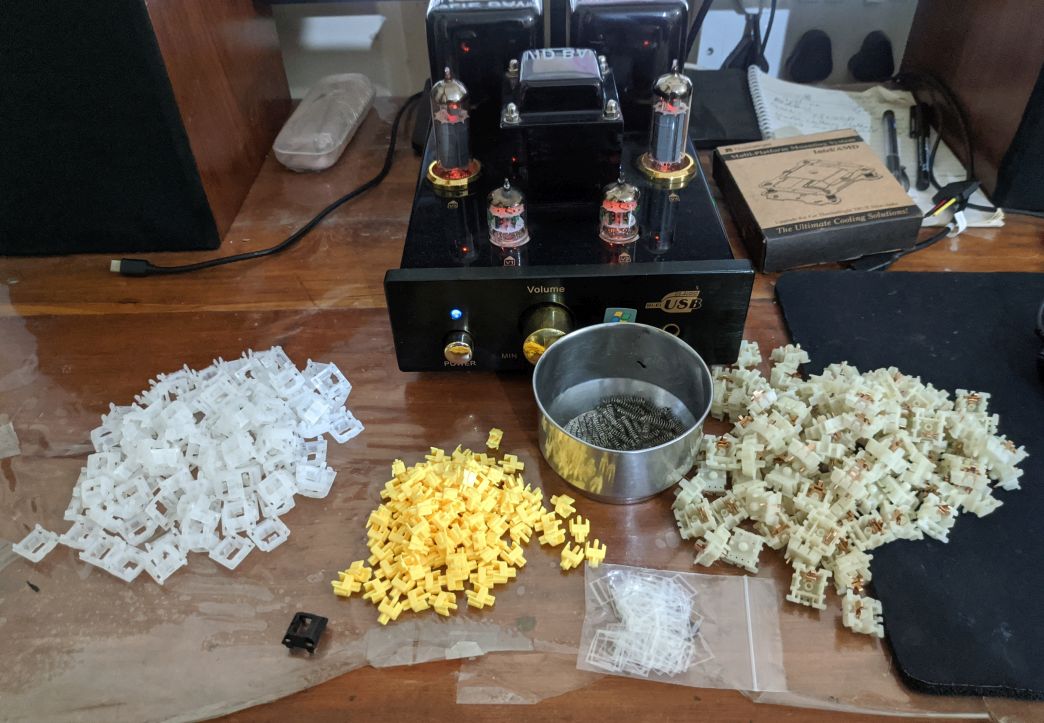
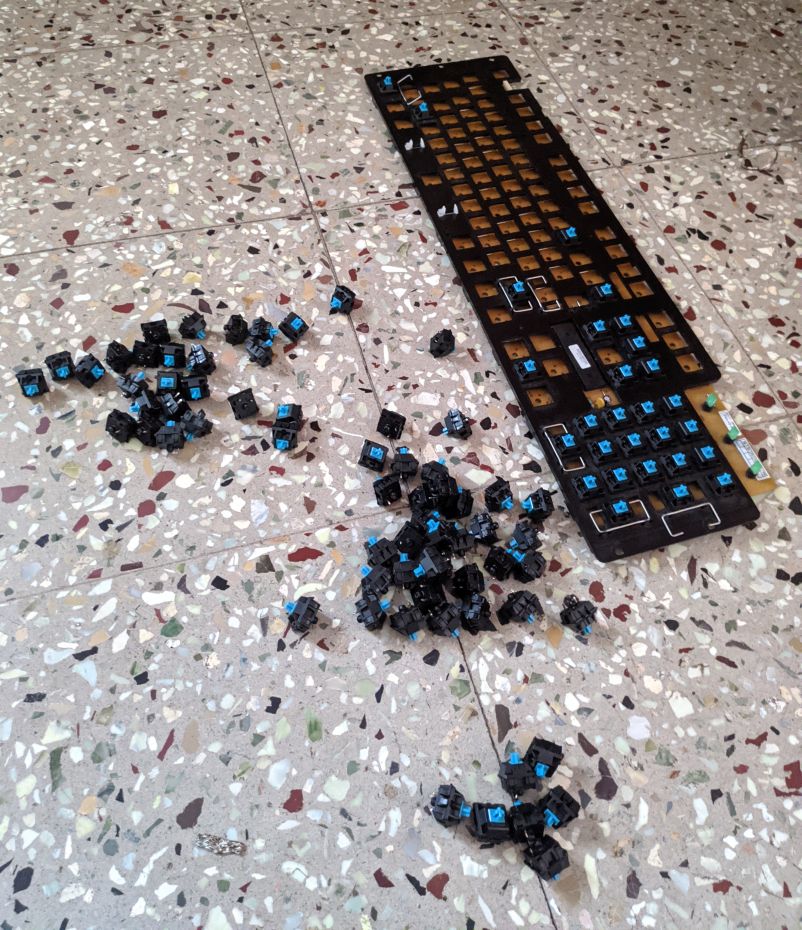
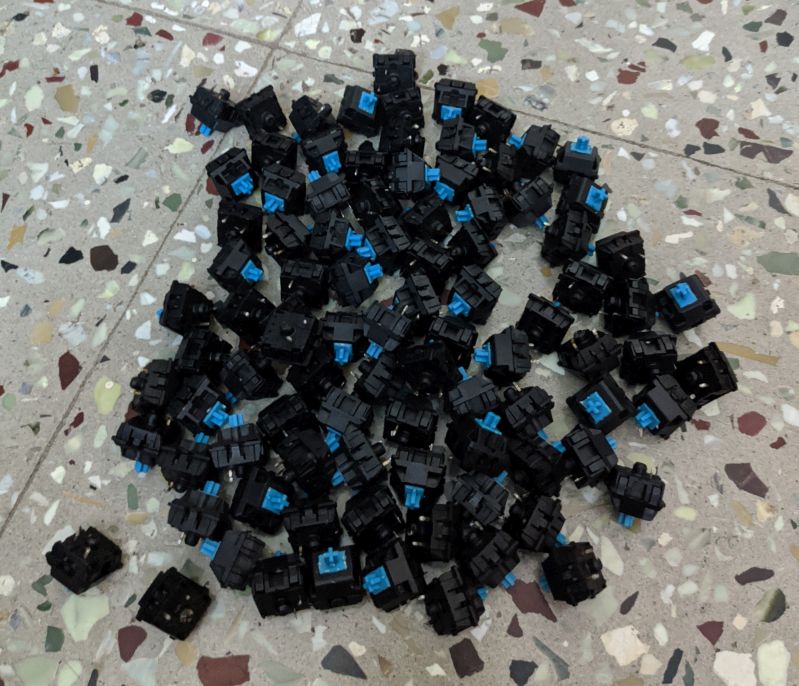
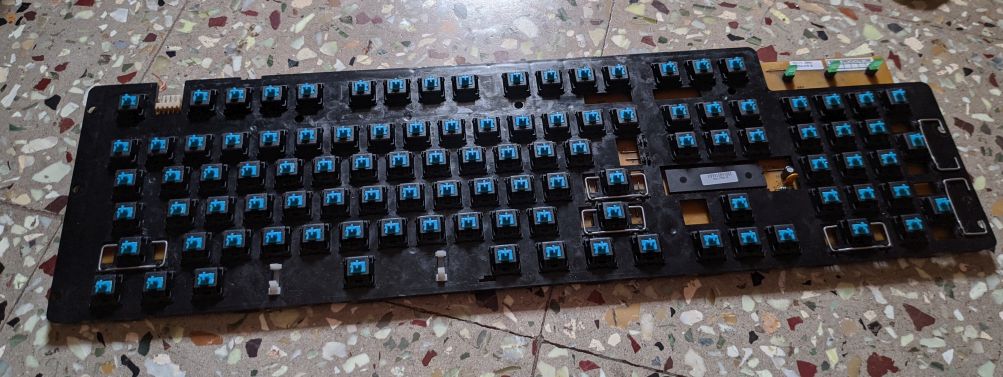
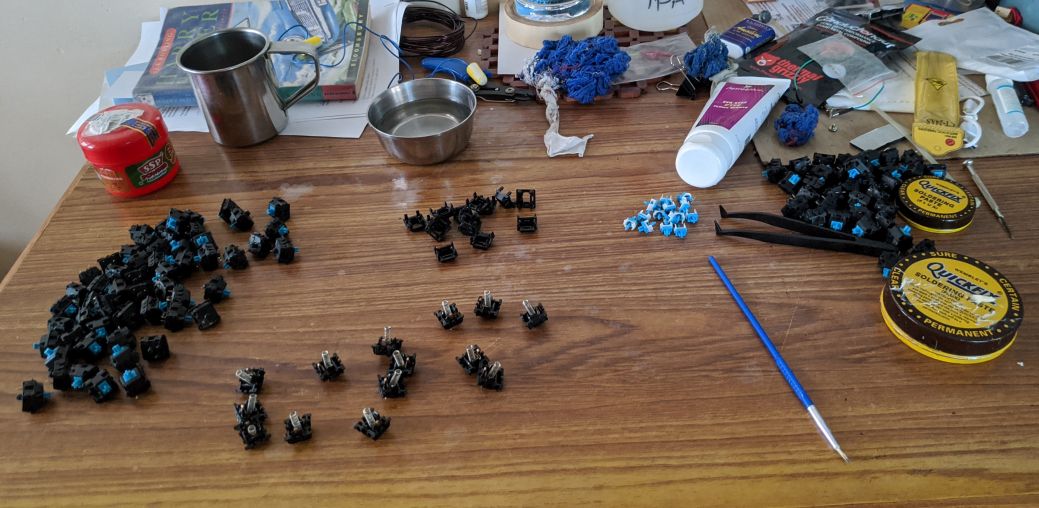
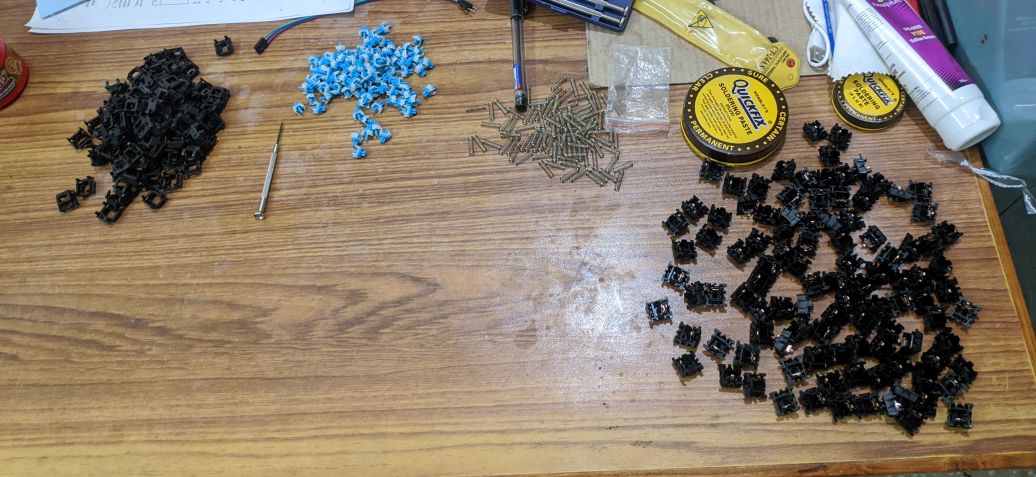
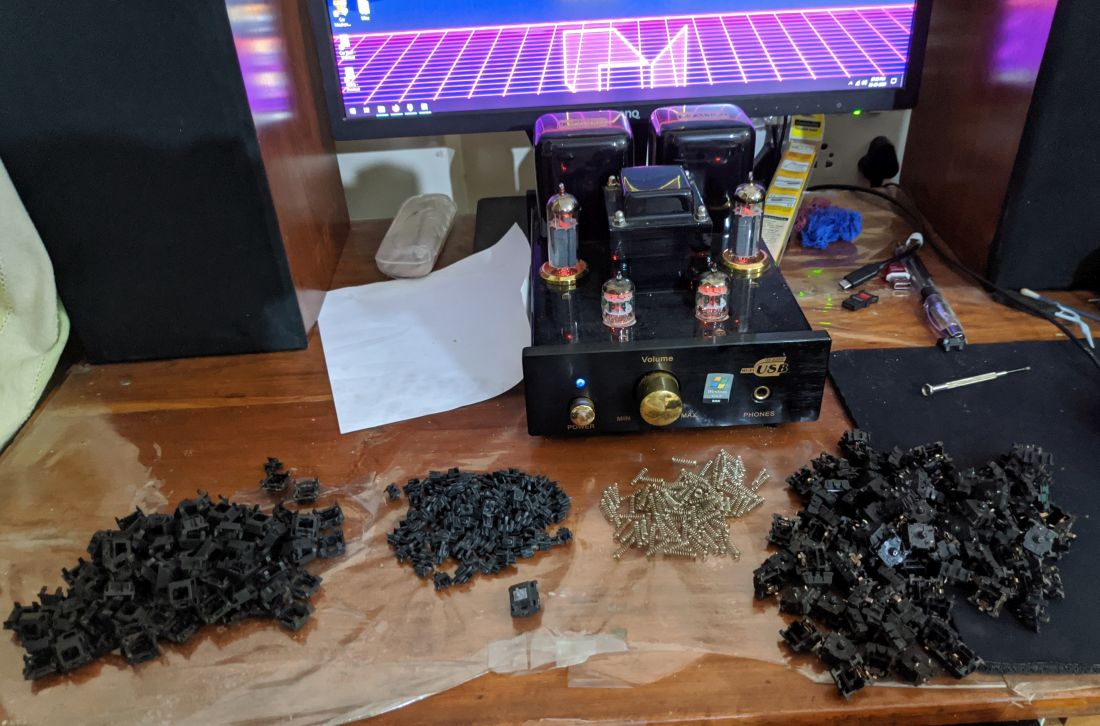
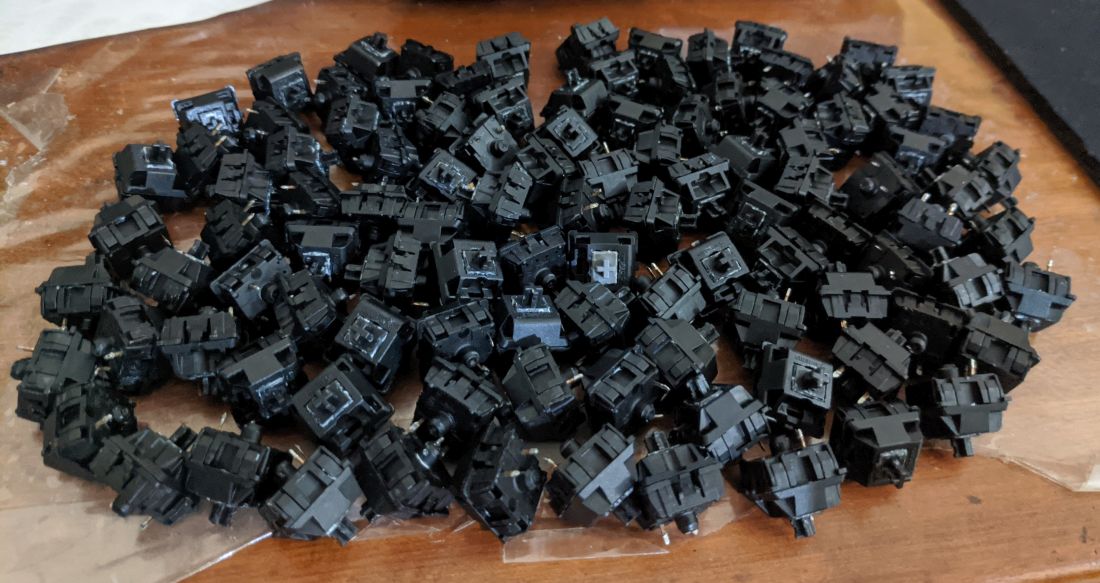
Eventually I got bored of desoldering these many keys and started with opening cleaning and lubing switches

TTy5VWp.jpg


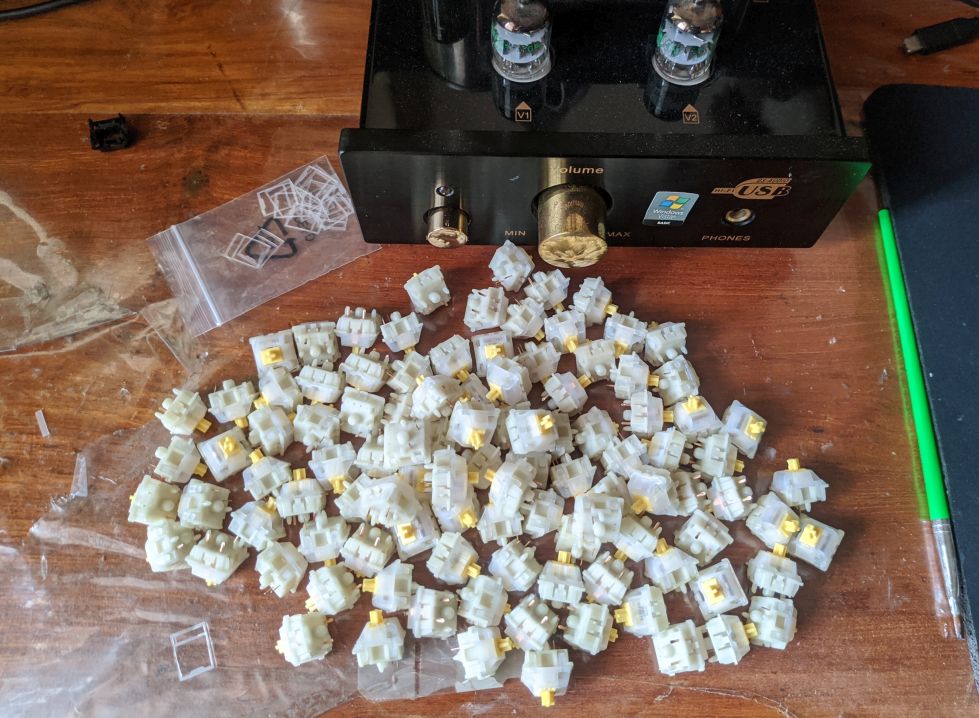
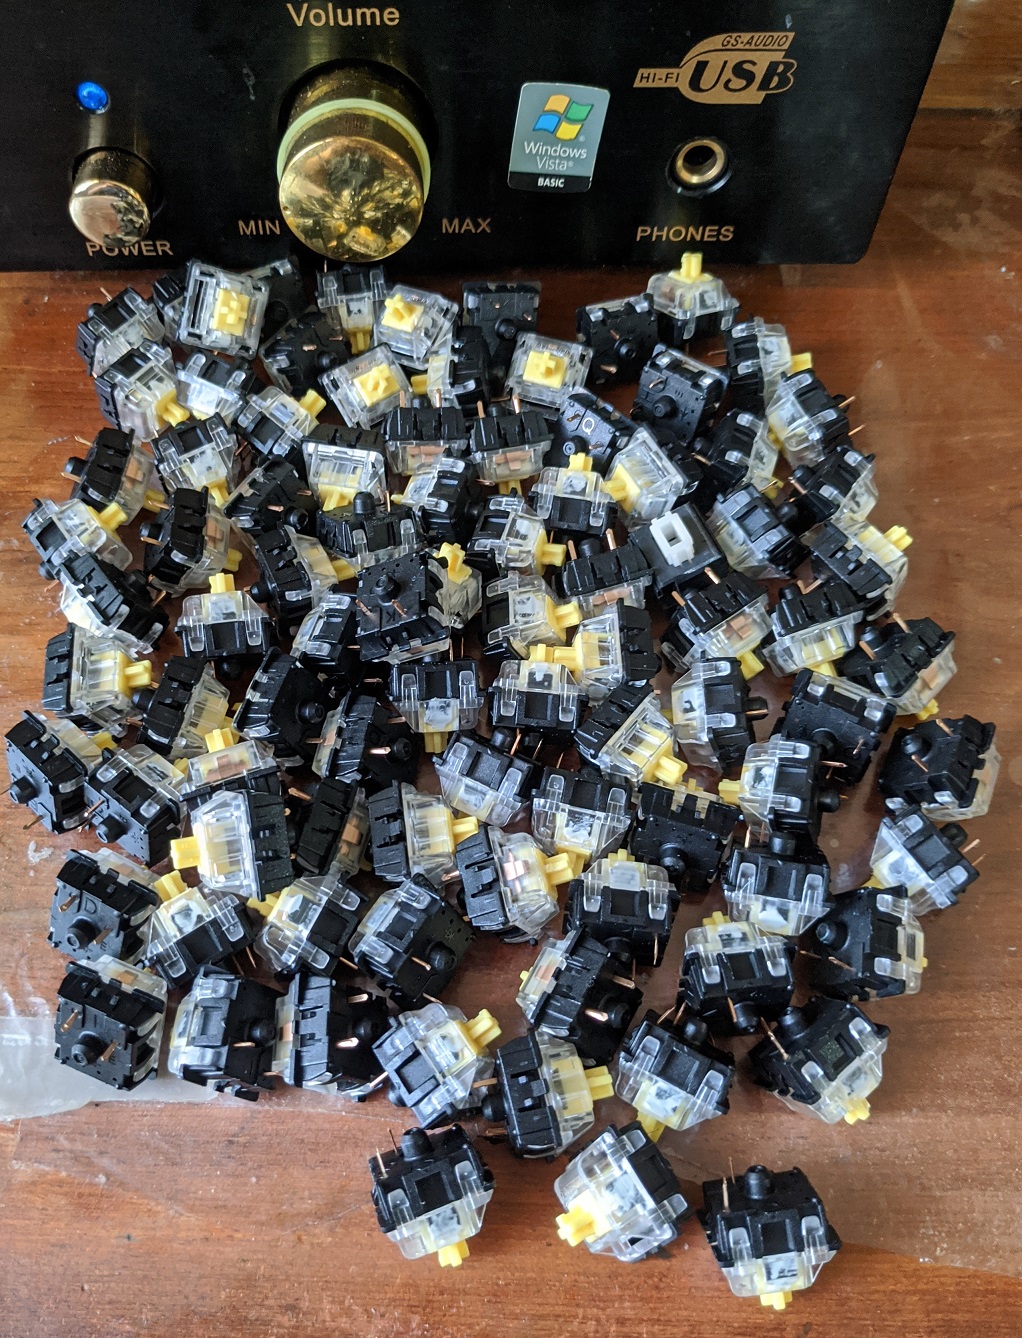
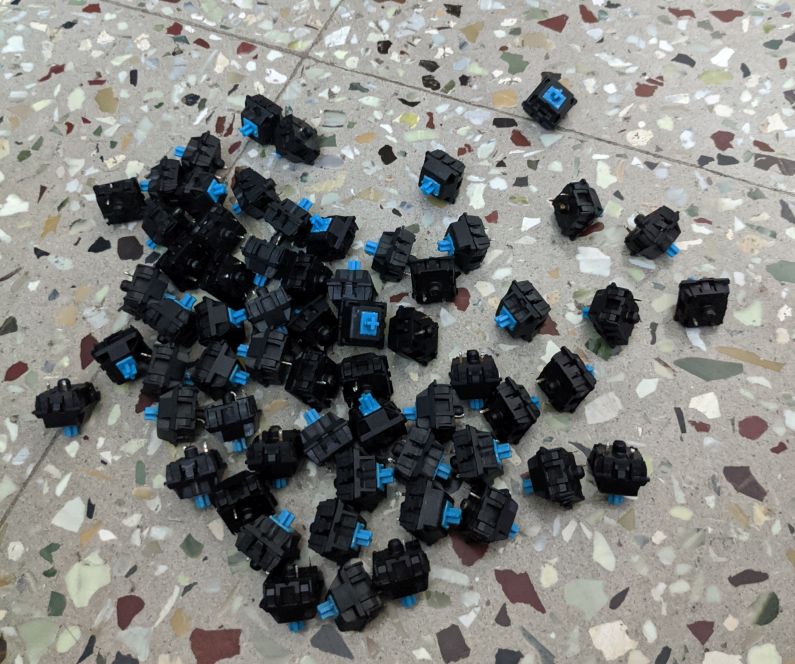
One big batch done woohoo!

DaLAa9l.jpg


Off to remove rest of the switches. All out except these 6 and I run out of DSol wik!

0CUQ8Qa.jpg


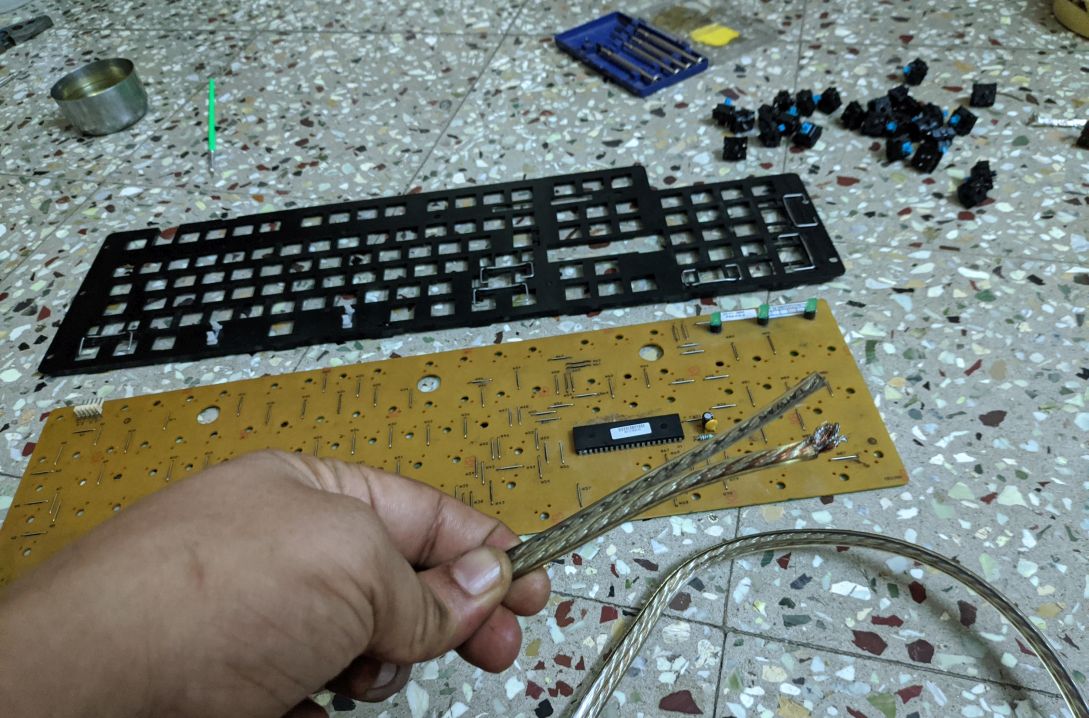
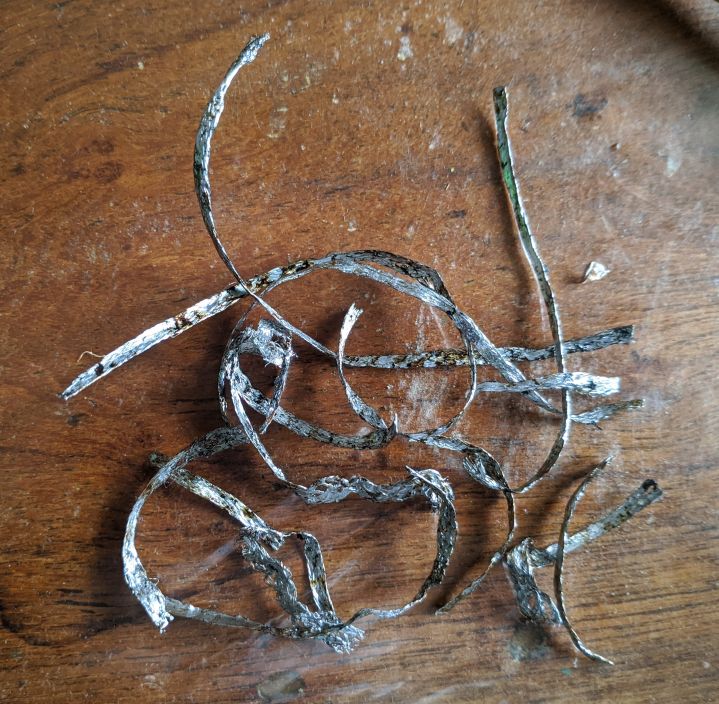
Aargh, with this being a saturday, I had to wait another 2 days before I can get more from the shop. Rummaged around the garage and found something that might work, Speaker wire! Made of copper with thin strands, this might just work. Hallelujah, it did!

1V91vrs.jpg


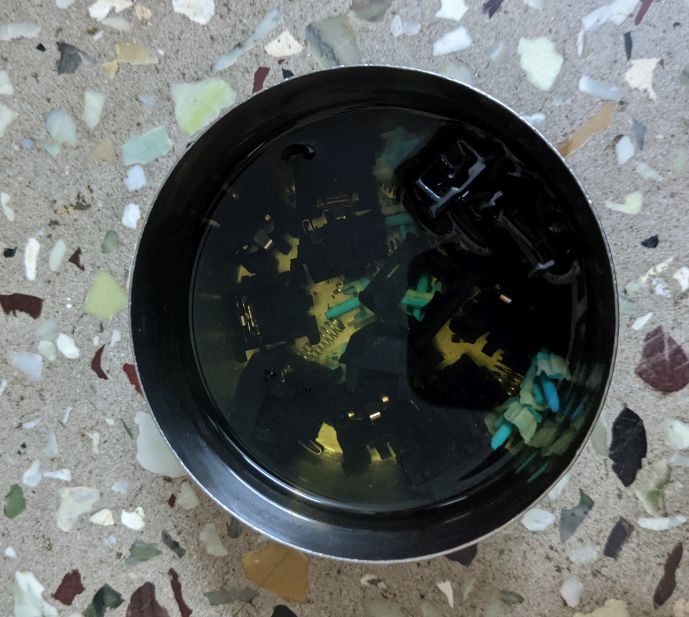
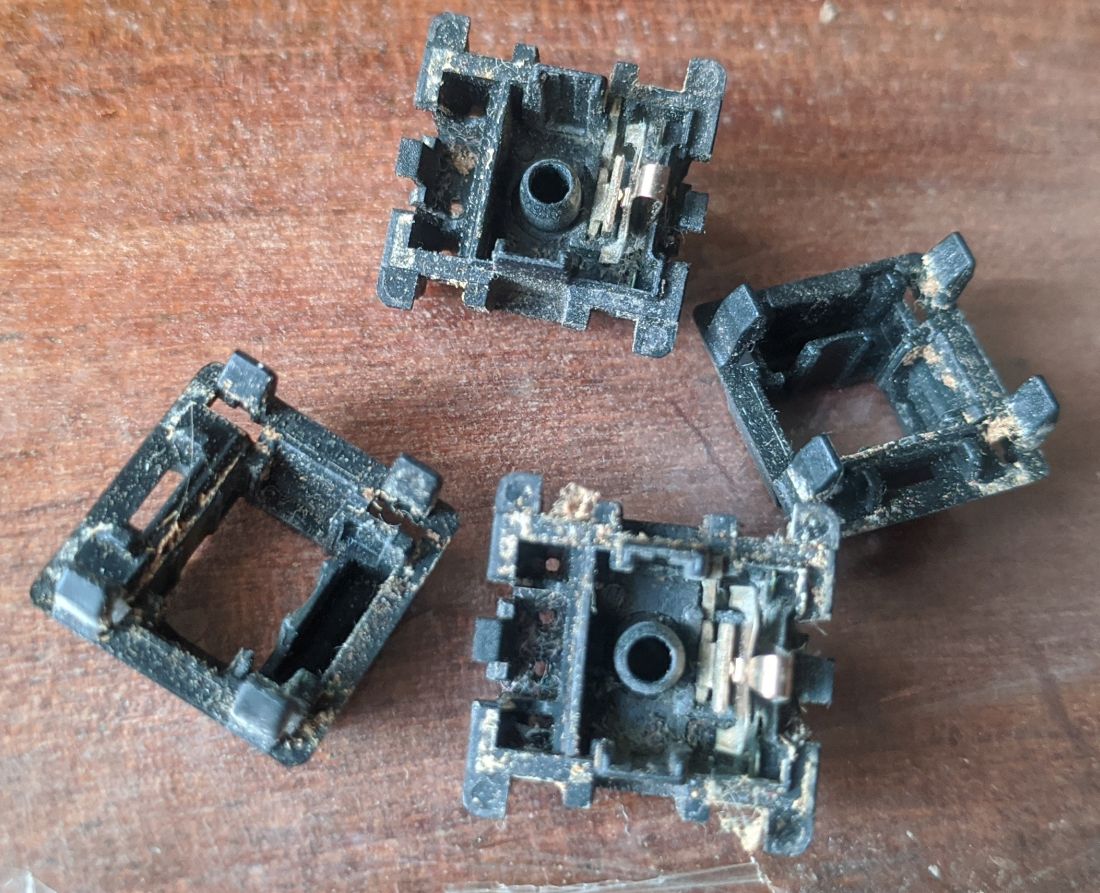
The IPA would turn yellow/orange after soaking around 10-15 switches, All this is the WD40 residue. Some switches even had those dirt balls in them, thankfully all of them are out.

VLOw5nh.jpg


After a long day - started at 12.30PM and finished with desoldering, cleaning and lubing 104 switches by 10.30PM with no break or anything to eat.

3gDrxWQ.jpg


I never expected this project to take so much time or effort. By the end of the day, my arms, palms, back and legs were all aching, so much that I forewent dinner, took some pain meds and slept off.

Come next day, it was time to finish off everything. I decided to give the keyboard a full ceramic coat to bring back the deep black colour.

Start wiping down everything with IPA. Wiping down all 104 keys made me decide to forego coating the keys - its just too much effort.

nIyzJVK.jpg


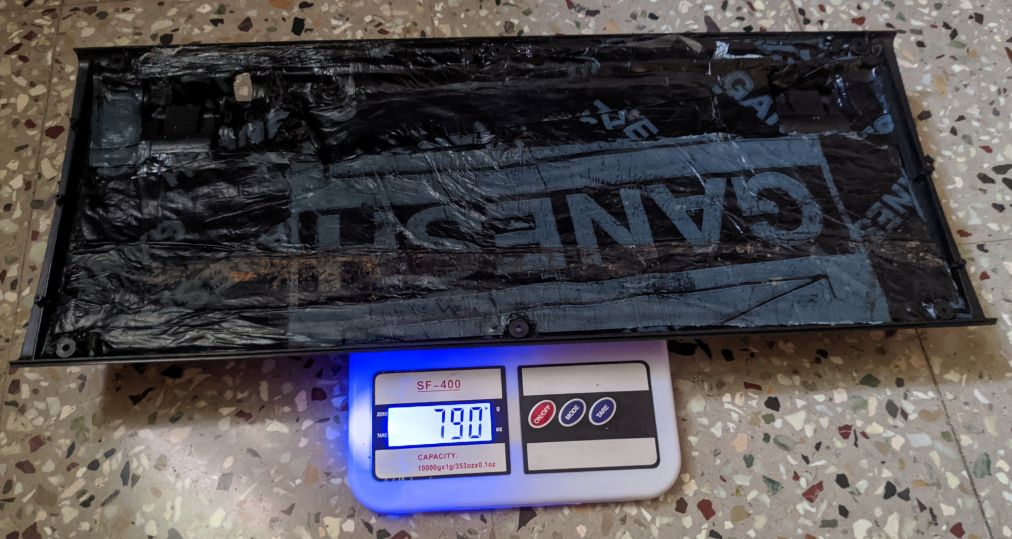
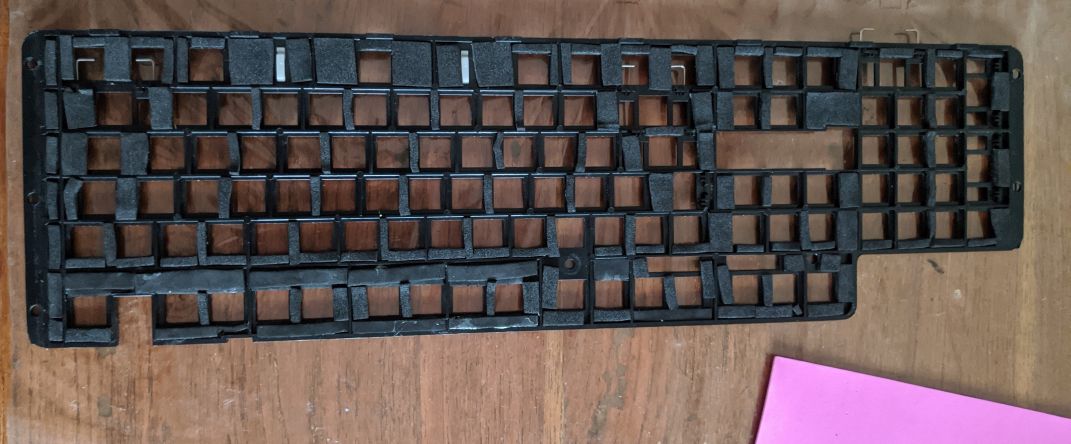
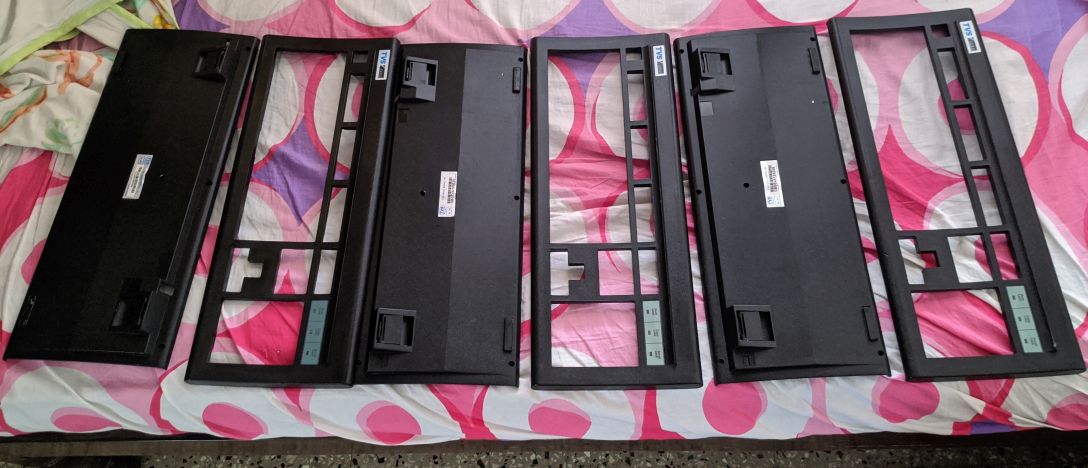
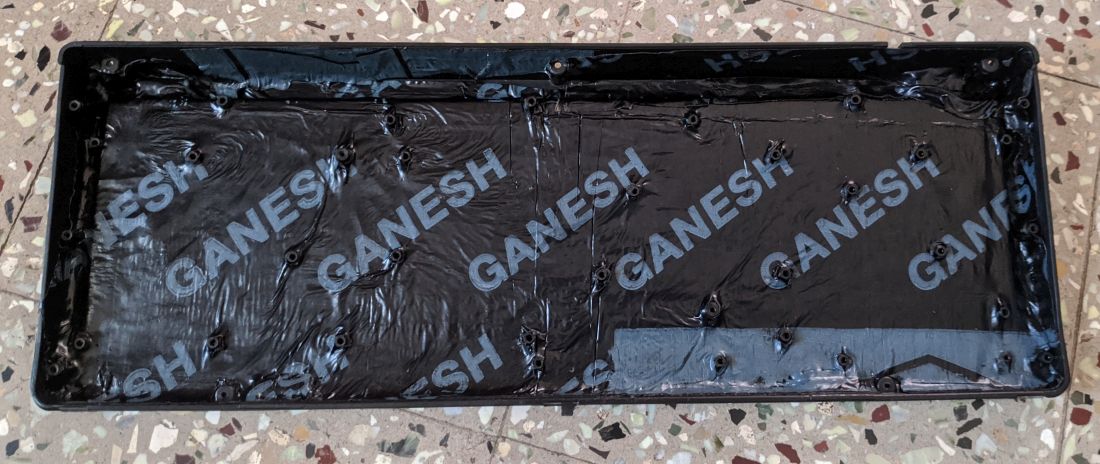
Cases and PCB plate coated. It should make maintaining keyboard easier since dust will not stick readily to coated surfaces.

B93e9tf.jpg


6vmTP6q.jpg


81X836y.jpg


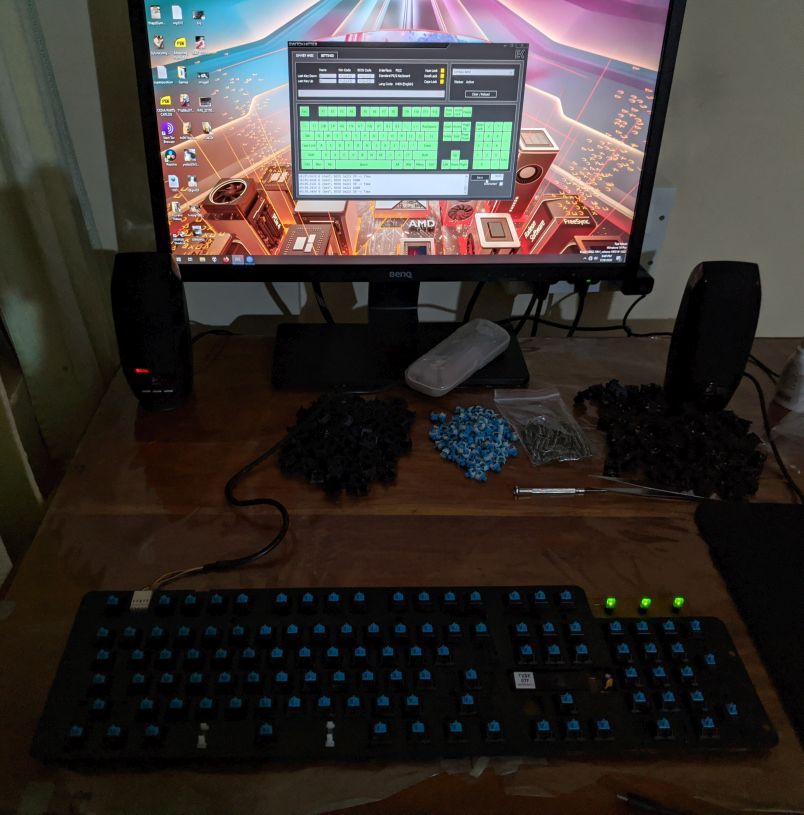
Once the coating on the plate cured, it was time to assemble the keys

BjQVU1r.jpg


Since I mothered some traces, I had to put in wires to make them work.

peXSRXL.jpg


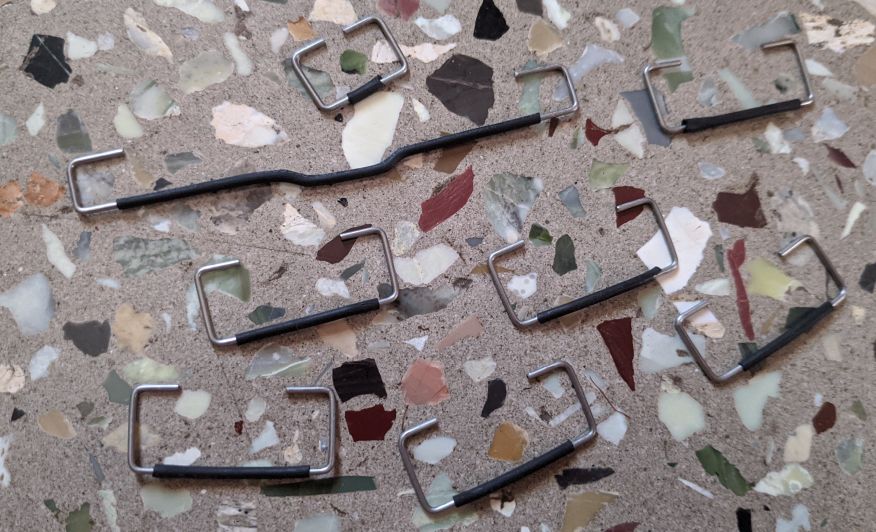
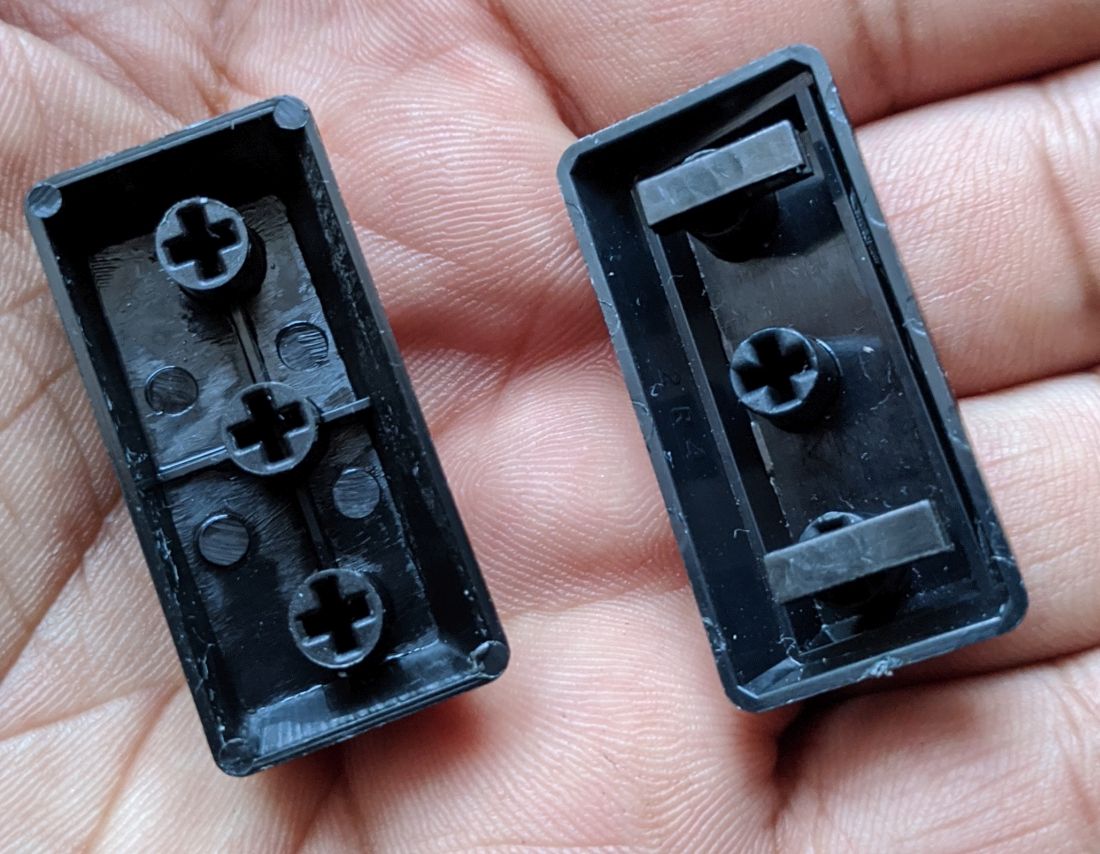
Tried my hand at putting some heatshrink on the stabilisers to quieten them.
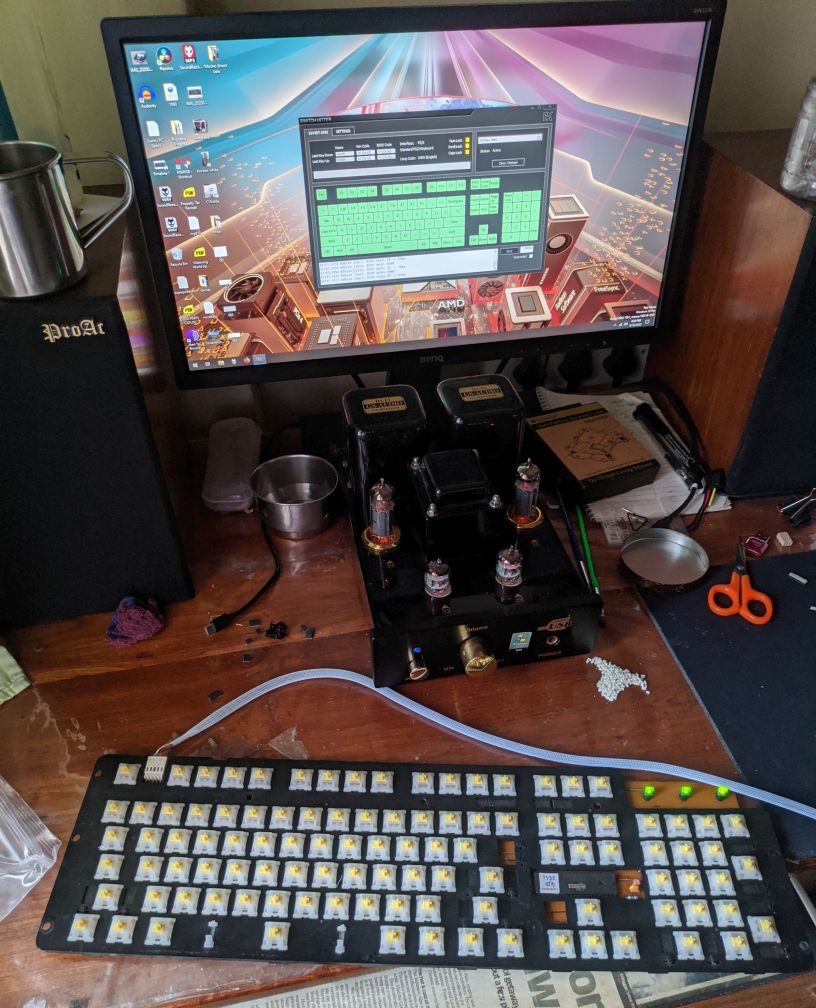
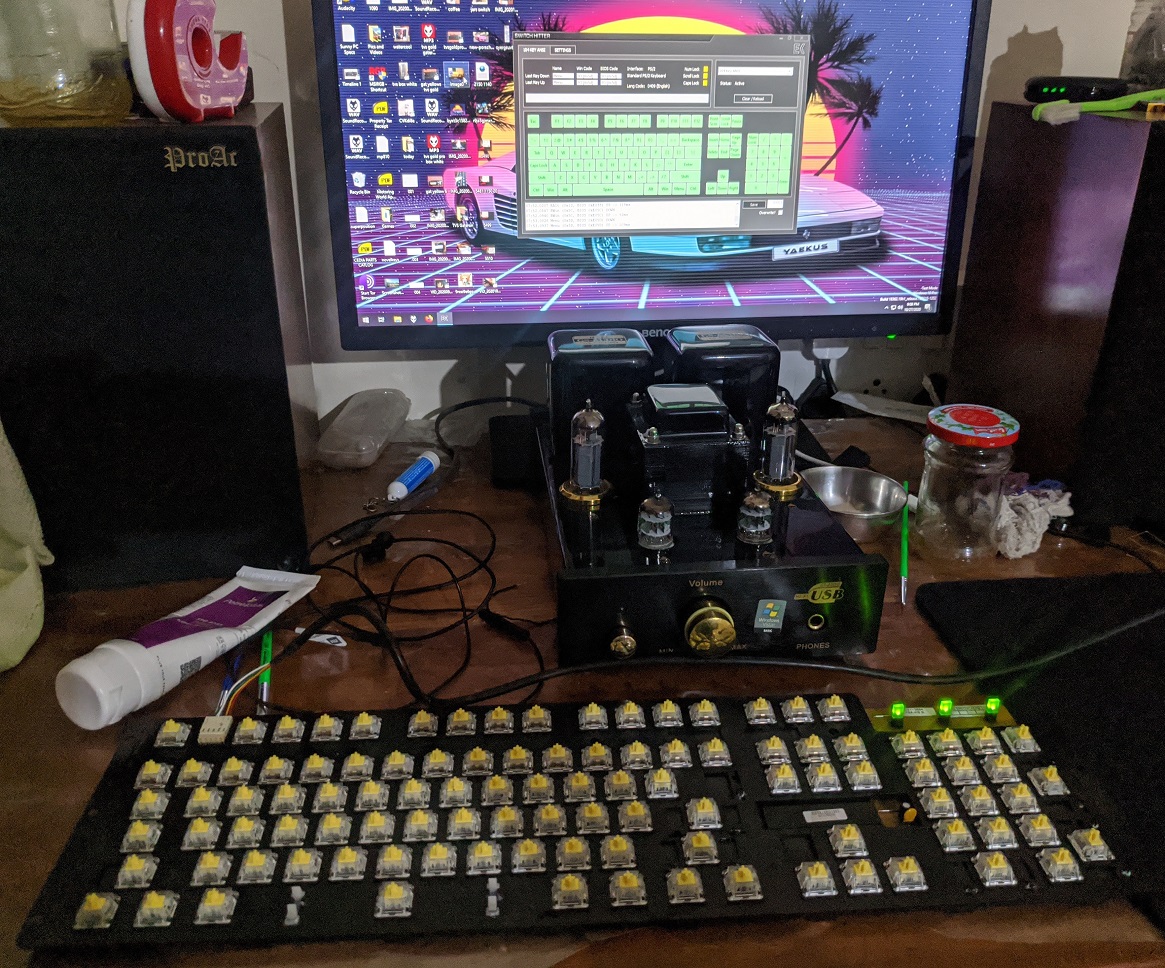
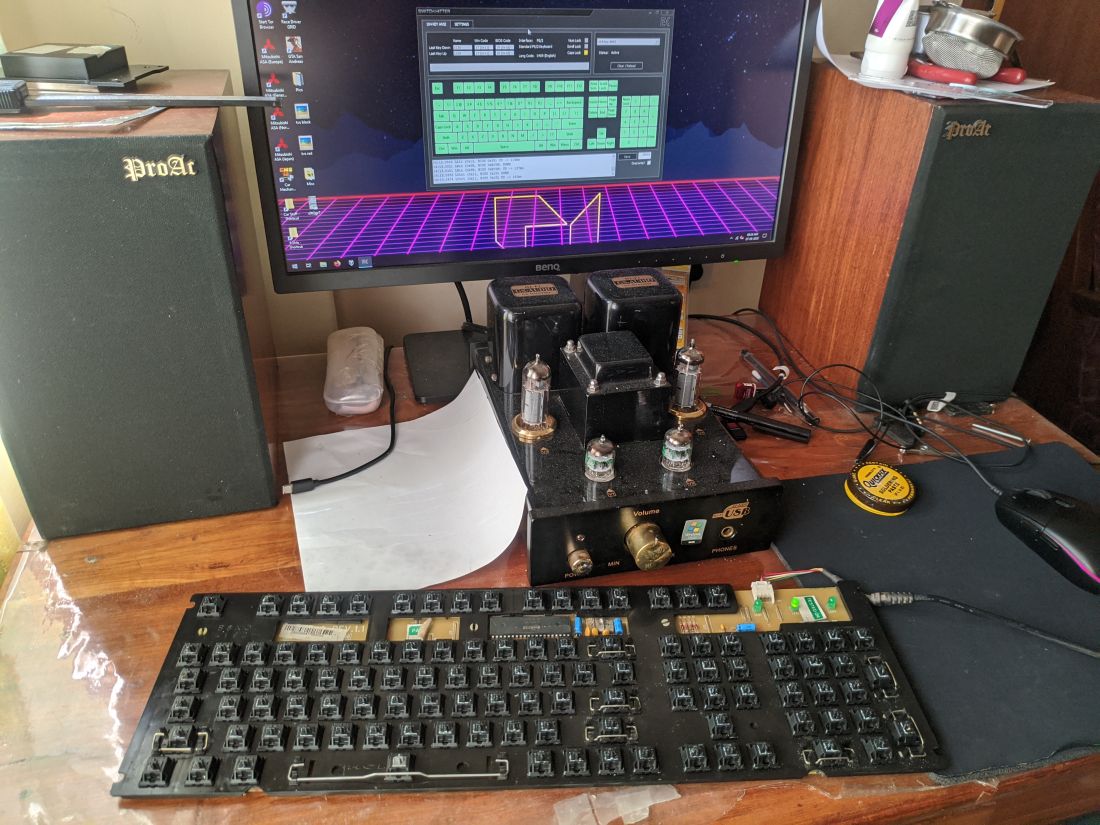
ipkKVtZ.jpg


Testing 1-2-3

5s8VSjR.jpg


Turns out key for 6 wasn't working. Checked with a multimeter and the key was stuck closed even with the key not pressed. Desoldered and opened up the key, the contacts were still closed. At this point I junked the key and replaced it with a new lubed key from the 10 spare switch set.

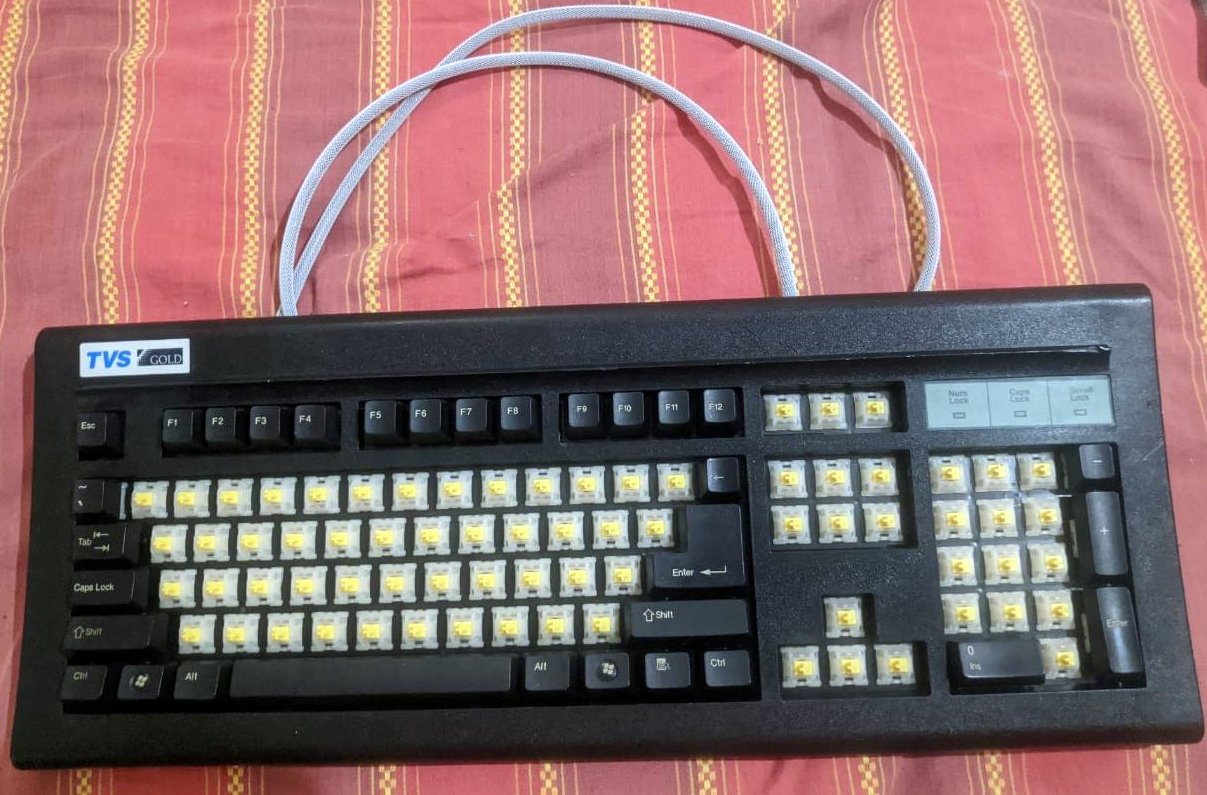
And finally, everything is assembled!

m8hiNzy.jpg


Here's a video of how the switches sound - They are super silent unlike MX Blues, more like browns right now, probably because of the heavy/thick lube Ive used. I anyways like a silent keyboard more and this is just what the doctor ordered!

 
After I finished rebuilding my TVS, I started reading further into mechanical keyboards and the various mods that can be done to make them better. One of the main mods was to dampen the switch plate, i.e., the black plate that sits on top of the PCB holding the switches. But - I was pretty much done with this keyboard, desoldering and soldering back these 104 switches again was not worth the effort.

So I thought of getting more keyboards to practice. Hopped onto OLX and bought myself these

igjldgs.jpg


First thing I did was to check and understand what kind of improvements I managed to get from all my efforts. here's a comparo between the best keyboard of the bunch and my modded TVS:


Getting to work, switches were out from the first keyboard. I picked the best looking keyboard of the bunch and decided I would keep moving on with the next in line, I was okay with scrapping one keyboard and using it for parts.

fXuJIoX.jpg


Oh man, looks like this keyboard had taken some form of water damage. Apparently these keyboards have been rebuilt before and I noticed few keys have already been changed. I got more DSol Wik, with more experience under my belt I did a better job at desoldering the keys with just one trace damaged. Here's all the spent DSol Wik from desoldering the second keyboard

uXnF6Wd.jpg


Anyways, off to opening, cleaning and lubing keys!

2Y0v04S.jpg


When it came to dampening the switch plate, I started off with some EVA foam. They did not have adhesive, the strips had to be secured with dabs of fevibond (synthetic rubber adhesive). They were just 2mm thick and so I had to put 2 layers to ensure they're on level with the plate.

This was very labour intensive. I rummaged around my tape collection, found some 4mm thick closed cell tape that matched the EVA foam in texture and feel, plus it had an adhesive layer on one end! Cutting them into pieces and the width was also perfect! This made the job sooo much easier and soon finished damping the plate.

pARK2Hn.jpg


Soon enough I finished assembling the whole keyboard back. All switches work yay!

2BcVZ8S.jpg


The case got the same ceramic coat treatment as before. Here you can see the second keyboard assembled v/s a yet untouched keyboard, the difference is night and day.

oiGCQ6e.jpg


So when I told a few of my friends and TE members on my current project, they wanted few of these keyboards! Excellent, now I can practice building the keyboards and friends can have and use them. Win Win situation for me and them!

Moving on to the next keyboard. Here you can see the PCB bowing in, this gets corrected past dampening.

j8PhRso.jpg


The next keyboard started giving me troubles. Couple of keys were "glued" to the keycaps with the same fevibond, I yanked too hard and the stems broke off from the switch, they got stuck to those keycaps. Pulling the stem away wasn't helpful, stem broke off with part of it still inside the keycap rendering them useless.

paijkrk.jpg


k3czYl4.jpg


I was not granted with a happy sight past desoldering the switches. There was so much sand on the PCB, looked like it spent its time in the desert lying in some dump before someone got them, cleaned it and sold them to me. Oh well.

L7Wkqxq.jpg


Looking at the switches themselves. They had sand inside them. Aargh, cleaning them took forever

osCxnL7.jpg


The end result after cleaning was good to go!

7C7A9x1.jpg


I tried a different approach this time with disassembling all the keys in one shot, clean lube and assemble them. I had taken less time than the first keyboard to do my second one and this took even less time. All in the name of reducing time and improving on my efficiency and process.

VvNK82e.jpg


Third keyboard now is also a go! You can see the next batch of keys opened up and cleaned, ready to be assembled. Couple of keys which were damaged were now taken from this lot. The third keyboard was again full of sand. Looks like this will be a recurring theme.

Uc8pGYc.jpg


I stopped for a while and desoldered the last keyboard as well. Since Id be scrapping the last keyboard, I thought I might as well combine all the parts from last 2 keyboards and make one good keyboard. So here below are 200 cleaned and lubed keys, ready to be assembled!

RvZgimW.jpg


Here's the switch plate from the last keyboard. some changes/improvements were done, not placing pads wherever not required + I used some of the leftover paper backing strips from the tape to eliminate any wiggle from the space bar stabilisers.

PXGFObk.jpg


Three keyboard cases cleaned and coated. I don't know even now why I coated the last case, since it had the most physical damage on it and would probably never used but oh well.

3hIR0nU.jpg


Three good keyboards assembled! Yay!

no6FVm2.jpg


So the plan right now was to give away two keyboards and I'll keep one for myself since the first TVS Ive done above will replace the sad cheap keyboard there and third keyboard from this lot will be used with my Ryzen PC.

Few days passed and some discussions started happening around damping the plastic case as well, most of the folks stuff some foam/neoprene sheets to fill up the void inside and make the keyboard sound better. Well, I went one step better and got some tar sheets used for water proofing. These sheets have an adhesive side so they can be stuck and have relatively high density so they'll do very well to absorb vibrations on the plastic case which otherwise would give out reverberating sounds upon key presses.

Two layers of tar sheets go on the case. One wasn't enough, two made the most change removing the plasticky sounds upon knocking the case.

KpjqPb2.jpg


The same tar treatment was given to the top case as well, neoprene was added to further fill the void, essentially eliminating any air gap between the PCB and the case.

dJUr1Ls.jpg


All this has made a terrific change to the way the keyboard sounds. Here's a typing test with the damped case and ofcourse the lubed keys and dampened switch plate.


Next I compared one of the damped keyboards with the first TVS, which ofcourse does not have damping in either case or the switch plate. Results here


The difference is massive. I tore down the first keyboard and performed the same case damping on it. The switch plate however stays how it is. This is how it sounds now


So I can now finally say I have reached the end game of what can be done to a TVS keyboard and I cannot think of any other ways to improve it. It is very obvious that I am very very very happy with the outcome and I have learnt a lot along the way on how small changes in the keyboards make differences, changes from different lubing techniques and their outcome in feel and sound and much more.

So am I done with modding keyboards? Not quite. What's next? There is a lot. Stay tuned!
 
Last edited:
After my foray into fixing TVS keyboards, I wanted to try something different. I have been long hearing about how there were HCL Mechanical Keyboards with Cherry MX Black switches, it got me intrigued too.

So I hopped onto OLX, found a fellow selling a HCL keyboard that was looked like the mechanical models. Bought it and it arrived few days later.

6KPWzcB.jpg


Oh boy she's a dirty one. The top case was cracked and missing a piece on the bottom left too, one of the feet that raise the keyboard was missing too, if the badly worn keycaps weren't so obvious to being with. Oh well the important part are the switches right?

FUjc1EL.jpg


Yup, Cherry MX Black indeed.

Removing the entire set of keycaps revealed how dirty this keyboard was. I'm just trying to prop myself up saying this is going to be a wonderful transformation! Hmmm.

35OKEcl.jpg


I see something interesting - is that a Cherry MX Grey on the spacebar? Yes it is!

ChHq9IM.jpg


They keyboard was given the leaf blower treatment and a brush. Opening the top case revealed more dust.

khF7dh4.jpg


It's out of the case! on to desoldering switches.

jssRkR9.jpg


Desoldering these switches was an interesting experience. I initially thought the PCB was of a higher quality compared to the TVS but it kept giving me troubles. I did rip off a few pads but managed to get all the switches out.

pxa36tP.jpg


The cases and the dust that was in it. They were manufactured in 2009 and so the keyboard is 11 years old by now.

eYMTrAl.jpg


Looking at the keycaps I got an idea, why don't I use the keycaps from my TVS Gold on these? at first glance, the HCL keycaps looked to be thinner and inferior compared to TVS keycaps. Here you can see the HCL on left and TVS on right, the TVS has na additional thicker plastic ring on top while the HCL is thin throughout.

hrTfvN5.jpg


So how much does a TVS stabilised key weigh? 2.43 grams

sKGUkXx.jpg


How much is the HCL in comparision? 1.94 grams. So HCL keycaps being worse wasn't placebo after all.

bc3UFZf.jpg


Taking apart all switches. I kept the MX grey switch separate since it was much heavier than the standard black and did not want its parts getting mixed up.

RbGsY5m.jpg


The stems on these switches have a LOT of wear on them. Each of the stems have two deep grooves on the north and south faces, corresponding to the contact point on the tops. Even the center cylindrical stems show signs of wear.

Y6AqVFA.jpg


I expected this when I got the keyboard though, just pressing a few keys and I could feel as if I was pressing something filled with sand. I did not do any pre-restore-sound-test because I knew with how bad a shape this keyboard was, using it any more would make it worse.

With that aside, I found that someone sometime had spilled sambar on the keyboard. Few of the switches were "sambar dipped" with red residues around and inside the switches as well.

7GUcg00.jpg


A comparision of springs from MX Grey on left and MX Black on right. The metal on the grey is much thicker and compressing it took more force too.

bzZnsb2.jpg


Finally all the split parts went into my new toy - an ultrasonic cleaner! Phew, no more scrubbing dirty switches with a brush, definitely saves me at least an hour of labour and time I was not looking forward to.

4p28UhP.jpg


Just look how black the cleaning fluid has got! These were the dirtiest switches I've got my hands on, till now!

Every component blown and left out to dry.

6SxmPYw.jpg


Just look how these sambar dipped switches have transformed! Not even one tiny speck of dust or dirt in them and the contact leaves have all cleaned up so well! All hail the ultrasonic cleaner!

ubSi25H.jpg


The next step is lubing and re-assembling all the switches. I did a test with one switch assembled dry, one with a thinned out lube and one with the full thickness lube. The full thickness lube switch sounded better and feltr less scratchy and so this is how I will proceed with lubing!

I had switched to a thinner lube for the springs and using the bag lube method. I could still hear the springs on the last TVS keyboard Ive built and was not happy with how it worked. For this HCL, I went ahead with using the same lube for the springs as the switches. This meant I had to apply lube on every switch with a brush meticulously - This took more time and I spent well over 6 hours in lubing and assembling the switches.

Finally they were done!

UFLDoD4.jpg


When it came to dampening the switch plate, I went ahead with my tried and tested formula of using foam tape cut in pieces.

AtMwPZe.jpg


The PCB and switch plate were cleaned to get rid of any and all sambar related residues on them. Lot of the stabilisers on this keyboard were loose and were rattling. The same technique of using paper between the switch plate and stabiliser legs was reduced to make them as tight as possible.

9NjTWPl.jpg


The HCL Keyboards have 3 plastic dowels on the top, between the Esc/Function row and number rows. This helped keep the switch plate and PCB be in perfect alignment as I was putting back the switches. This is a huge plus over the TVS where I had to first put a few switches along the edges, press them down and solder them and hope rest of the switches are in alignment. Love it!

I've also upped my solder game. Switched to a new Soldron 35W iron and new solder wire and the results show! Almost all the switches have those concave blobs on them and they look so pretty! If only I hadn't messed up so many pads while desoldering I could have had a pretty PCB for this keyboard too!

FSqOb7b.jpg


Right - with the PCB and switches soldered, time for a test. Yes it works! ( well almost - three switches did not work - [ Page Up and - on numpad. Turns out mothered traces were the root cause and I soldered jumper wires to fix them which are visible in the previous pic)

vQo6j0H.jpg


Right moving on to the cases. The bottom case of the HCL has a set of grooves along the edge and that makes it inherently more rigid than the TVS case. I debated a lot in my mind whether I should use tar sheets on these or not, it might not work as well as it did with the TVS and might be a waste of time. The case had a lot of standoffs to support the PCB and getting around them would also mean lot more effort.

I went ahead with it anyway. Two layers of tar sheets were applied.

TpUhQP9.jpg


Some nitrile foam went on top of the tar sheets.

WZS9rfq.jpg


Was it worth it? The sound profile when knocking it definitely changed for the better, the keyboard is now heavier, feels more sturdy.

Moving on to the keycaps. I've used the TVS keycaps wherever possible - the only HCL keycaps which were reused were the backspace, \, Enter, space and right alt, win, menu and ctrl keys. The obvious power sleep wake buttons again were reused.

Hm3eIUO.jpg


Fitting everything together - there was still some empty gaps in the case and I wanted to use polyfill in them. I searched long and hard in my garage but just couldn't find my sack of polyfill. Oh well I used some new cotton waste to pad up the space instead.

nTgPZHc.jpg


Its fully assembled! yay! I have not done any cosmetic enhancements to the case i.e., ceramic coat on them yet.

xYudk2k.jpg


Checking the weight, its around 1.2KGs, around 100-150 grams less than my rebuilt TVS. Its smaller than the TVS width wise and feels more dense.

fiKkMJ1.jpg


So. Final impressions.

Switches

My first mechanical keyboard was a Filco Majestouch with Cherry MX Black switches. I used them only for a week, they were too heavy for my with my fingers becoming tired when using them. I soon sold it to a good friend and a TE member while I replaced it with a MS Natural Ergo 4000 keyboard. Ever since I've avoided MX Blacks because of their weight.

And so here I am with another keyboard with MX Black switches. While I was just pressing the switches in random, it felt so less weighty than the Filco. Once I assembled the keyboard with the keycaps et all, it felt heavy again - very similar to the filco experience. I have typed this whole post in one stretch on this keyboard and my fingers do feel a bit tired. I have a tendency of trying to bottom out on each keypress which if avoided with the blacks you could be possibly less tired. I want to keep using this keyboard for a while and see if I like it or not. It was interesting to see a MX grey being used for the spacebar, something I have noticed only on old keyboards with MX Black switches. This led me to think that these keys might be Vintage MX Blacks, but it wasn't so.

The wear and tear on the sliders has caused more stem wobble than usual but that's about it. These keys still sound scratchy which I feel is inherent with all Cherry switches.

Construction and build quality

The obvious flaw on the keyboard is the most obvious one at the beginning - the flimsy top bezel. Very delicate and mine arrived broken. This is the weakest part of the keyboard and thankfully it only gets better from here.

The bottom case has ridges hence it is more rigid than the TVS. It even has lot of standoffs supporting the PCB so by default the keyboard has very minimal/no PCB flex.

The keycaps I got very visibly worn. The quality of print on top of keycaps was worse compared to the TVS, not to mention they are lighter. I have not tried the keyboard with the stock keycaps, perhaps I will do so on my next HCL.

The PCB and switch plate are better on the HCL. The alignment dowels are a welcome addition and helped prevent bent pins when reinserting switches to the plate and PCB, which is something that kept happening with the TVS very often.

Sound

When I rebuild my keyboards, one of the goals is to make them as quite as possible. This keyboard after the rebuilt is very silent, even more silent the the Filco with the same switches. With all the extensive damping, there is no reverb sounds or any spring ping. My only complaint is with the spacebar and it seems its hitting *something* underneath, maybe I'll try adding an o-ring on the stem and see if it helps silence the space bar.

I will do a more thorough before/after comparision with my next HCL. As I have explained before, the switches as it reached me were in a very bad shape and I did not want to make them worse anymore than they already were.

Keycap Options

This keyboard uses the standard ANSI? key layout and you can probably get more keycap options for these compared to a TVS with its huge enter key.

However, the last row on the keyboard is non standard with its layout being

Left Ctrl - 1.5u
Left Windows - 1u
Left Alt - 1.5u
Spacebar - 7U
Right Alt - 1u
Right Windows - 1u
App - 1u
Right Ctrl - 1u

If you want to order keycaps for a HCL, make sure you have these. Oh the HCL has 3 extra keys - Power Sleep and Wake, make sure you have blanks or something to cover these up as well.

And finally, here are some videos/sounds for the end result.


Awesome thread, and great dedication @SunnyBoi
I myself bought a second hand motospeed ck 108. It has outemu black switches. Keeping de-soldering my last resort. I'm also thinking of getting the same lube and applying it as much as I can without de-soldering the keyboard. Will post the results here.

IMG_20200924_112801__01.jpg
 
I'm also thinking of getting the same lube and applying it as much as I can without de-soldering the keyboard.
You can get this sheldons lube


Fill it up in a syringe

sZdp0w7.jpg


Depress the switches and put a very small drop on each side of the slider. This lube is quite thick so it wont be very easy but hey this is the best solution given the situation.

QV41LEJ.jpg


It will not be as effective as fully lubing the switch but wt will work much better if you do not intend on desoldering switches.
 
Thanks @SunnyBoi for great suggestion.
Actually after doing some research on outemu switches I found that these are not worth lubing because of poor quality and in some time I'll start feeling the scrachyness again.
I thought of giving up on this little project because of this. But now i'll try your suggested lube and method. Should be really easy compared to de-soldering and lubing method.
Thanks again. :)
 
If you ever decide on desoldering switches, just replace them with better ones. Watch this space ;)
I'm sure that you must have the knowledge of this or have figured it out by now. I have some questions/doubts on changing the switches for my keyboard.
  1. My current motospeed ck 108 is an RGB keyboard. Will the new switches function the same way as the current one.
  2. Currently there're 2 soldering points and both sufficiently surve the purpose of registering the key strokes and led lighting. Will I be able to find switches which work the same way?
  3. The cost and availability factor, I tried searching the switches (searched for cherry mx since they're the best according to most people) on online platforms but couldn't find on Indian ecom websites. And on other country ecoms they're expensive.
  4. Is it worth it? Now the most important question. As you might know that motospeed is Chinese brand and even if I manage to change the switches to better ones, will the circuit board hold for long enough to recover the cost and efforts involved in changing the switches?
Please let me know your thoughts.

Have you tried looking at Meckeys? PCB will likely fail before switches, It might be worth the adventure if you're into that sort of thing.
 
You can get this sheldons lube


Fill it up in a syringe

sZdp0w7.jpg


Depress the switches and put a very small drop on each side of the slider. This lube is quite thick so it wont be very easy but hey this is the best solution given the situation.

QV41LEJ.jpg


It will not be as effective as fully lubing the switch but wt will work much better if you do not intend on desoldering switches.
I ordered the silicone oil suggested by you 3 days ago and today it arrived. Decided to lube the keyboard using syringe method today itself.
Took me around and hour for the whole process. Pardon my photography skills.

Prepared all the required tools.
IMG_20200927_095145__01.jpg


Removed the key caps and kept them in the same order so that it becomes easy to put them back.
IMG_20200927_095811__01.jpg


Finally the keyboard is ready for the lubrication
IMG_20200927_100348__01.jpg


The end results are very satisfying, the resistance which I felt earlier is gone now and keyboard also has become quieter now. Thanks to you @SunnyBoi
IMG_20200927_153152.jpg
 
If you ever decide on desoldering switches, just replace them with better ones. Watch this space ;)

Oh wow, I got sidetracked and forgot to update the thread!

I was looking around and found that a lot of folks recommended Gateron yellow switches as a very decent budget option for switches and I was intrigued. Did saome more research, apparently the Gateron Milky Yellows are the best sounding variant.

So I hopped on to AliExpress and placed an order for Milky Yellow switches. I found the seller was also selling Switch films, So thought why not get a set of those as well?

A month later they got delivered.

IZvssUa.jpg


First impressions - they are so damn smooth! Forget cherries, even lubed cherries don't come close to the smoothness, heck even the keys are silent and non-scratchy when unlubed! If anyone still believes Cherry switches are the gold standard, you have to try these!

So I picked 104 keys, split them all and prepared for lubing + filming the switches

i2arL4a.jpg


A long time later, they were done. One of the films got crunched when it moved out of position, once the film is deformed, you cannot sue them again. My guess is you have to replace the films once you open the switches again for whatever reason.

Gf2rb3X.jpg


Moving on to rest of the components - I had one set of TVS cases + PCB lying around since I had junked one keyboard. Use them for this build.

When damping the case, I went overboard to see what difference it would make - Ive added enough damping sheets that I will not need any foam, the tar sheets themselves will take up all the space inside the case. 790 grams, that is A LOT!

pH3kOkH.jpg


Just the cases alone tip over 1KG

aQGVxz7.jpg


Soon the switch plate was damped with foam and switches soldered!

Gnh4GAA.jpg


I used up some white sleeving I had for the PS2 cable as well. Looks weird but okay. That isn't rice next to the amp, its the extra plastic I had to trim off the switches. I got 5 pin switches and the TVS does not support 5 pin switches and hence I had to use a nipped and take off the extra legs on each switch.

WM6KasT.jpg


I was short on keycaps though, I took them off the first keyboard Ive rebuilt and onto this. They look so good!

AuZ90tp.jpg


The keyboard now weights a whopping 1.6KGs! That is twice as heavy as the stock keyboard!

XvLXcOF.jpg


First impressions - This keyboard is head and shoulders above anything I've ever tried! The keys sound sooo good, not to mention the feel, the slickness and smoothness - it must be experienced. I recorded a small video below but they do not coem close to the actual feel of the keyboard, it is just magical!


The story is not over though - Another batch of Gateron Yellow switches with Clear top and Black bottoms have arrived. It will be interesting to note how different these feel.

adNwN9a.jpg


Stay tuned!
 
The story is not over though - Another batch of Gateron Yellow switches with Clear top and Black bottoms have arrived. It will be interesting to note how different these feel.
I finally decided to act on this day before yesterday and decided to give the OG TVS from the first post an upgrade with gateron switches!

It all starts with opening the switches and lubing the insides

UzE6RnQ.jpg


Aaaand they're done!

MTEp6N1.jpg


It took me an hour to desolder the old switches and another 20 minutes to add the new oens in. Soon enough the keyboard was 100% functional

8fL4Xsi.jpg


Here it is! The OG TVS on top with the new Gateron Clear top/black bottom Yellow switches and the earlier milky yellow gateron keyboard below.

RVnSIiX.jpg


Here's a typing test comparing the two :


First impressions, I was not happy with the outcome. The clear yellow switches sounded very scratchy and felt as smooth as the milky yellow switches - which is completely opposite experience compared to what others feel/say about these.

However a day alter, they're feeling better. Hopefullly they get better as the days go on. They're surprisingly a bit quieter which is always a big plus in my book.
 
Doesn't mineral oil lube degrade plastic? The usual recommended grease is dielectric. Also congratulations on the build and saving huge amounts of money! Who is it better to buy the switches from in this pandemic? KBDFANS or Aliexpress?
 
@SunnyBoi ,

Awesome and kudos for achieving the feat.
I have got a TVS Gold and I meticulously opened it up, did a kind of restoration that you did with HCL. I opened, hand washed, rinsed and lubed each key I had. While soldering back, it feels like I burnt the pcb for some of the switches .eg. D key, P key etc. since they're not working anymore, I tried with a switch that worked with Enter and F11 keys positions.

Can you show me how can I get it fixed.? Absolute no idea on that!

Trace the connection to the previous solder point and solder a piece of wire between the switch leg and that point. I have messed up a few solder pads myself, here's how Ive tacked them. Hope this helps

SjSbqjZ.jpg


Doesn't mineral oil lube degrade plastic? The usual recommended grease is dielectric. Also congratulations on the build and saving huge amounts of money! Who is it better to buy the switches from in this pandemic? KBDFANS or Aliexpress?

As per my experience, teflon grease is perfectly fine. The keys on the keyboard that were lubed from the first post worked perfectly till they were replaced with Gateron Yellows, they've been dispatched to another friend who will be using them in his keyboard projects.

I dont think you can order from either sources now atleast for the time being. Hope that issue gets resolved soon.
 
I ordered the silicone oil suggested by you 3 days ago and today it arrived. Decided to lube the keyboard using syringe method today itself.
Took me around and hour for the whole process. Pardon my photography skills.

Prepared all the required tools.
View attachment 91089

Removed the key caps and kept them in the same order so that it becomes easy to put them back.
View attachment 91090

Finally the keyboard is ready for the lubrication
View attachment 91091

The end results are very satisfying, the resistance which I felt earlier is gone now and keyboard also has become quieter now. Thanks to you @SunnyBoi
View attachment 91092
Update after 2 and half months. The experience is still really good and I feel like the key smoothness has become better with time (maybe it's just me).
 
Trace the connection to the previous solder point and solder a piece of wire between the switch leg and that point. I have messed up a few solder pads myself, here's how Ive tacked them. Hope this helps

SjSbqjZ.jpg


As per my experience, teflon grease is perfectly fine. The keys on the keyboard that were lubed from the first post worked perfectly till they were replaced with Gateron Yellows, they've been dispatched to another friend who will be using them in his keyboard projects.

I dont think you can order from either sources now atleast for the time being. Hope that issue gets resolved soon.
Thanks a bunch I'll do it and will let you know the result.
 
Back
Top