OK, so this is not as glam as the other guides out here, but posting it hoping
it is useful to someone.
--------------
It's winter, and the days are getting shorter and the nights colder.
You reluctantly pull yourself out of your nice warm bed for yet another
manic day. Turn on the geyser for a hot bath, and only a stream of cold
water emerges. Wise guys might say - Thande Thande
Paani Se Nahaana Chahiye, but sorry, that's not on my list of cool things to do
on a cold winter day.
Now that we have established the raison'd etre for Operation Garam Paani,
let's go over the modus operandi.
Those of you who don't know how to deal safely with mains voltages may kindly
chicken out at this stage and call your friendly neighbourhood electrician.
An instant geyser is a remarkably simple device. Inside the sheet metal outer housing, there is a strong tank assembly made of stainless steel, with an inlet
and outlet for water. A heater element in the tank is connected to the mains
via a thermostat and when the power is turned on, the element heats up,
warming up the water. The thermostat has a long metallic tube like
body which senses the temerature of the water in the tank and cuts out the power when the set temperature is exceeded. (recall bi-metallic strip from your
high school physics)
A neon lamp (with a suitable current limit resistor, of the order of 100k ohms) is
connected in parallel with the heater element terminals to indicate when
the heater element is energised.
[attachment=6677:12225.attach]
Bring your tools out of cold storage (what else! It's winter).
You will need a tester/screwdriver, pliers, and a couple of spanners (#8 and
#10, for the Johnson instant geyser which I have).
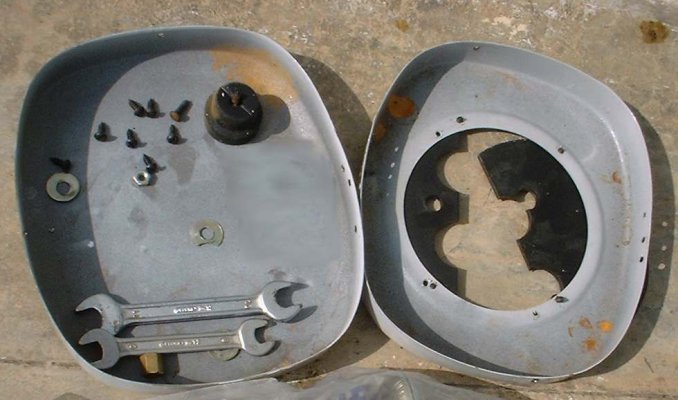
Firstly, disconnect the power and remove a few screws to open the bakelite
covers at the bottom.
[attachment=6679:12227.attach]
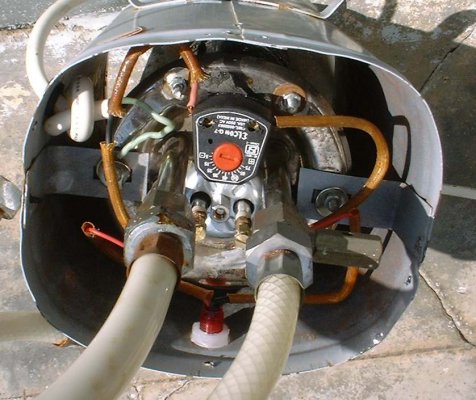
Check that all wires inside are properly connected and there are no obvious shorts or burnt out wires.
Turn on the power. BE VERY CAREFUL - you could get yourself killed if you touch a live wire.
With a tester, carefully check if you have power at the heater element terminals.
If not, you may have a faulty thermostat. You can get a replacement for around Rs 50 to Rs 100.
Thermostat Replacement
===================
[attachment=6684:12232.attach]
It is quite easy to replace the thermostat. The thermostat has two connections - the live wire from the mains, and a connection to one of the heater element
terminals. (The other terminal of the heater element will be
connected to the neutral wire of the mains.)
Loosen the two terminals and remove the two wires, and pull out the thermostat gently, but firmly.
Push in the replacement and reconnect the two wires.
Heater Element Replacement
=======================
If your tester indicates that power is indeed reaching the heater element, then you
need to check if you have a faulty heater element. Disconnect the power.
Set your multimeter to measure resistance and check the resistance across the heater element terminals.
The bright ones among you can calculate the expected value - a typical heater element is rated at 3000W at 230V.
If your multimeter indicates an open circuit, you have found the culprit.
A replacement heater element will cost around Rs 200 to 300.
Replacing the element needs you to fully disassemble the geyser.
Disconnect the inlet and outlet water connections and unplug the geyser.
Bring the geyser down and remove the end-caps of the sheet metal
housing.
[attachment=6678:12226.attach]
This typically invoves removing a rubber beading, and removing a few screws.
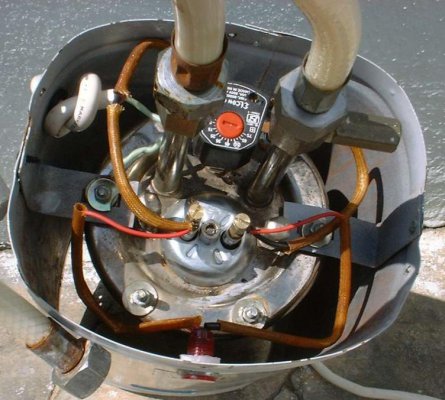
You should now see that the heater tank is attached to the sheet metal body via a couple of brackets.
[attachment=6679:12227.attach]
Using a spanner (or a plier, if you are tool constrained), remove the nuts restraining the tank.
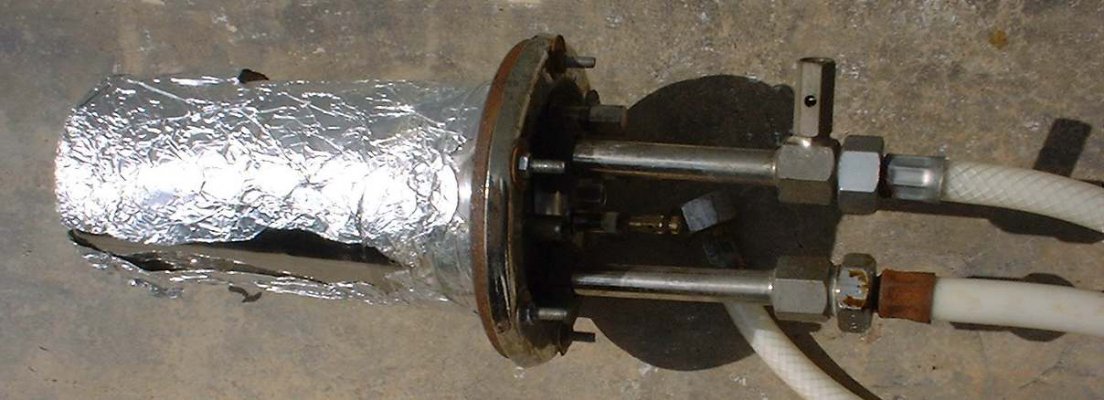
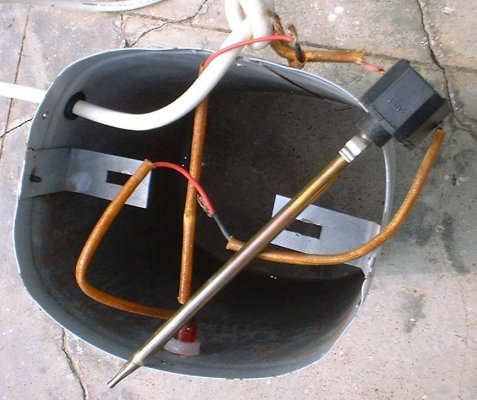
Remove the thermostat and gently pull the tank assembly out of the housing.
[attachment=6680:12228.attach]
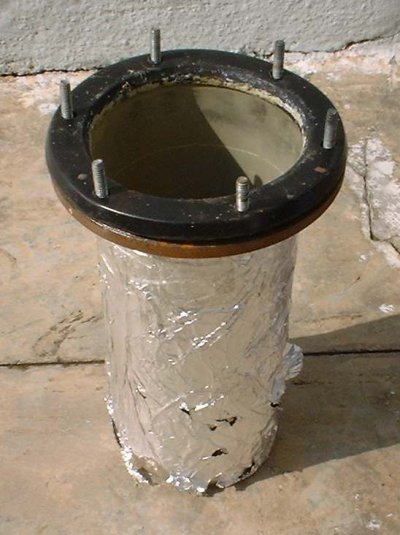
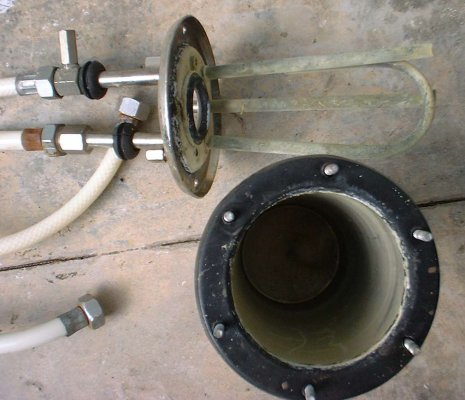
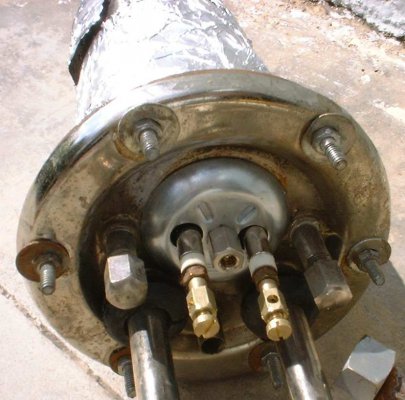
The flanged stainless steel tank has a strong cast iron O-ring, with some
threaded studs. The end cap is bolted on tightly on to these studs.
A neoprene gasket makes a water tight seal.
Remove the nuts and separate the end cap from the tank.
Note that the Safety Earth (green wire) is probably connected to one of these nuts.
[attachment=6682:12230.attach]
[attachment=6683:12231.attach]
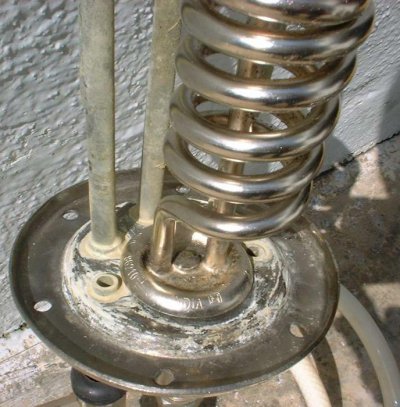
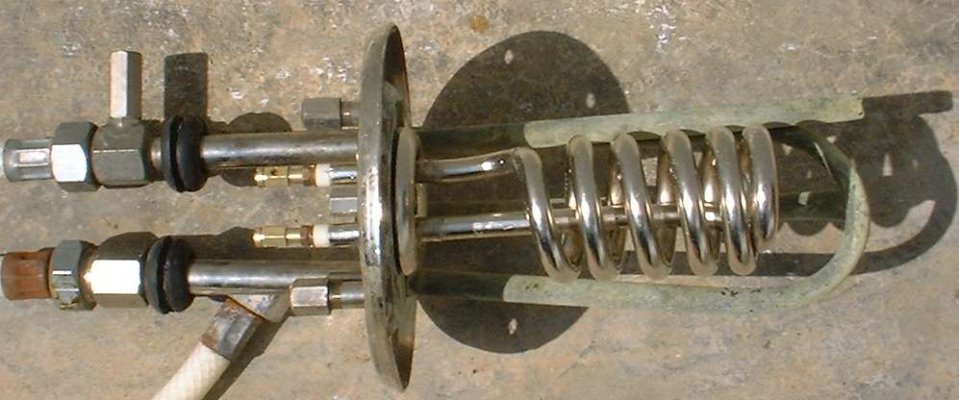
You should now be able to see the copper pipes for the inlet, outlet and thermostat.
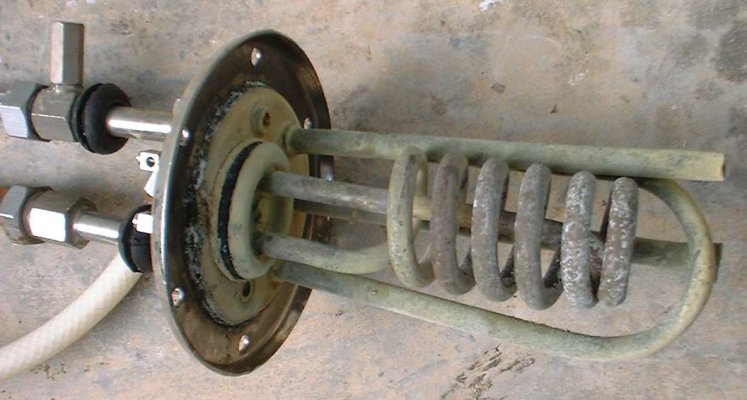
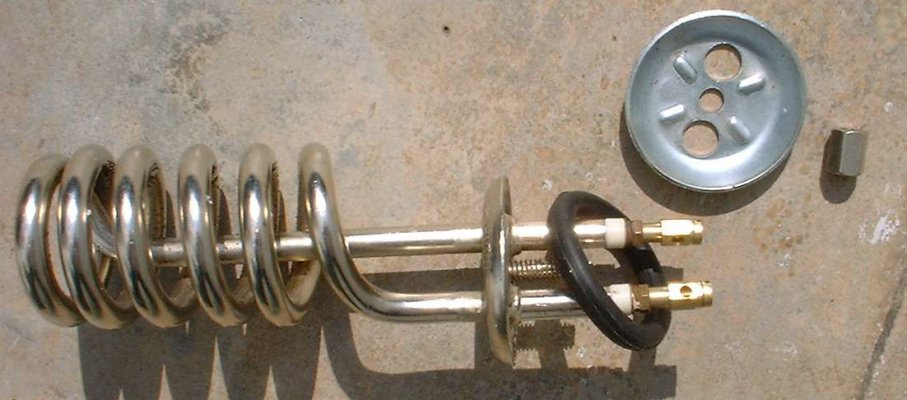
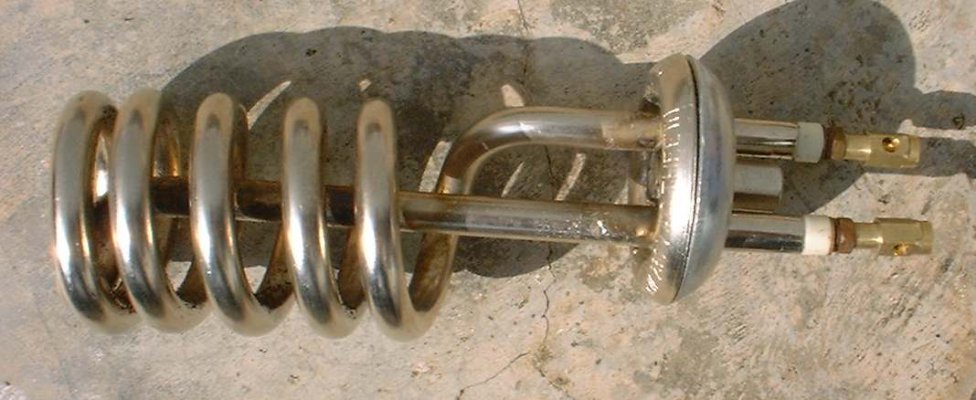
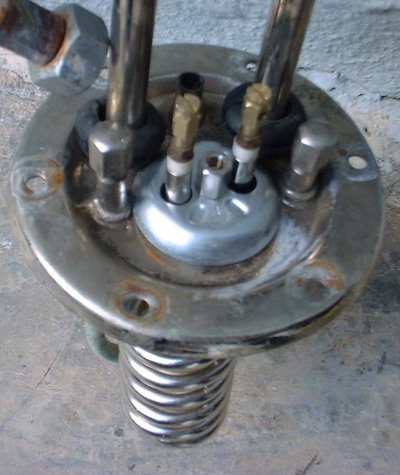
The heater element is fastened by means of a metal cup and a nut. Loosen the nut and remove the old element.
[attachment=6681:12229.attach]
Here also, to make the joint water tight, you can see that a neoprene O-ring is used.
Your new element should have come with a new O-ring. You can now fix the new element, being careful to fix the O-ring properly.
[attachment=6685:12233.attach]
[attachment=6686:12234.attach]
Tighten the nut firmly, but do not overtighten.
You can now replace the end cap over the stainless steel tank and tighten all the nuts in the ring uniformly.
Insert the water tank assembly back into the geyser housing. Fasten the nuts to firmly fix the assembly to the metal brackets of the housing.
Replace the thermostat and carefully reconnect any wires you may have disconnected earlier.
BE SURE TO RECONNECT THE SAFETY EARTH (green wire) to one of the
nuts of the water tank.
Replace the end caps of the metal housing and fix the geyser back to the wall. Reconnect the water and power connections.
Your geyser should be functional again!
Attachments
-
 g001.jpg53.1 KB · Views: 2,378
 -
 g002.jpg61.1 KB · Views: 2,471
 -
 g003.jpg84 KB · Views: 13,264
 -
 g004.jpg65.8 KB · Views: 2,433
 -
 g005.jpg62.9 KB · Views: 2,419
 -
 g010.jpg60.1 KB · Views: 2,487
 -
 g009.jpg59.1 KB · Views: 2,341
 -
 g008.jpg75.4 KB · Views: 2,801
 -
 g007.jpg50.1 KB · Views: 2,316
 -
 g006.jpg82.5 KB · Views: 5,185



 (was in VIII grade) ... Thx anyways.