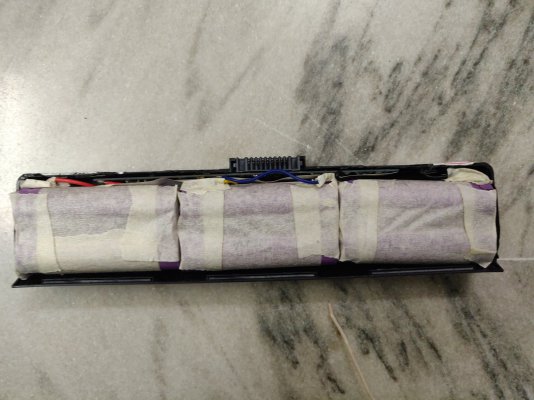
Guide Replacing old/dead cells in a laptop battery pack

It started with this thread on TE. My 12 year old Inspiron 1545 battery (not original) was not charging. Initial thought was that battery was dead, but after some tests found that it was the adapter cable which was faulty. Replaced the adapter cable, meanwhile I also ordered 6 18650 type cells from here , thanks to @SunnyBoi for the website link.

Although it is best advised that batteries should be spot welded so that less heat dissipates inside the battery while welding, hence less chance of cell damage. But on the other hand, if you do normal soldering and manage to reduce the contact time of soldering iron and battery terminal (less than 2 secs), the heat transfer can be minimized. I decided to go with soldering method for obvious reasons.
Posting this guide here, hoping it might help someone who prefers and enjoys DIY.

Gathered all the required tools, Soldering iron, soldering flux, soldering metal, plier, batteries and a 100 grit sand paper.
Battery was opened already during my previous experiment. Most batteries require to be opened by force, same was the case here..
IMG_20210727_174435.jpg


Next thing was to sand the battery terminals with sand paper, had 100 grit with me so used that.
IMG_20210727_174940.jpg


In this dell battery the cells are connected in series in a pair of 2 cells as shown below (image taken from internet):
1627445385612.png


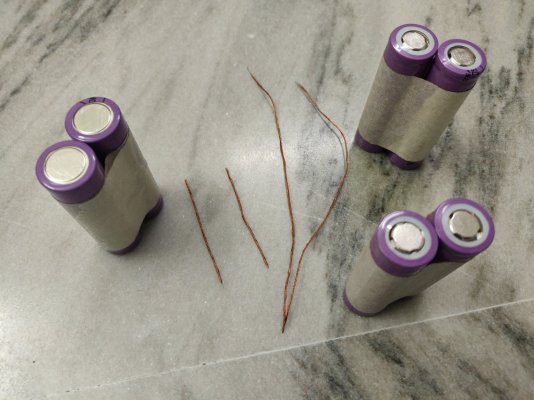
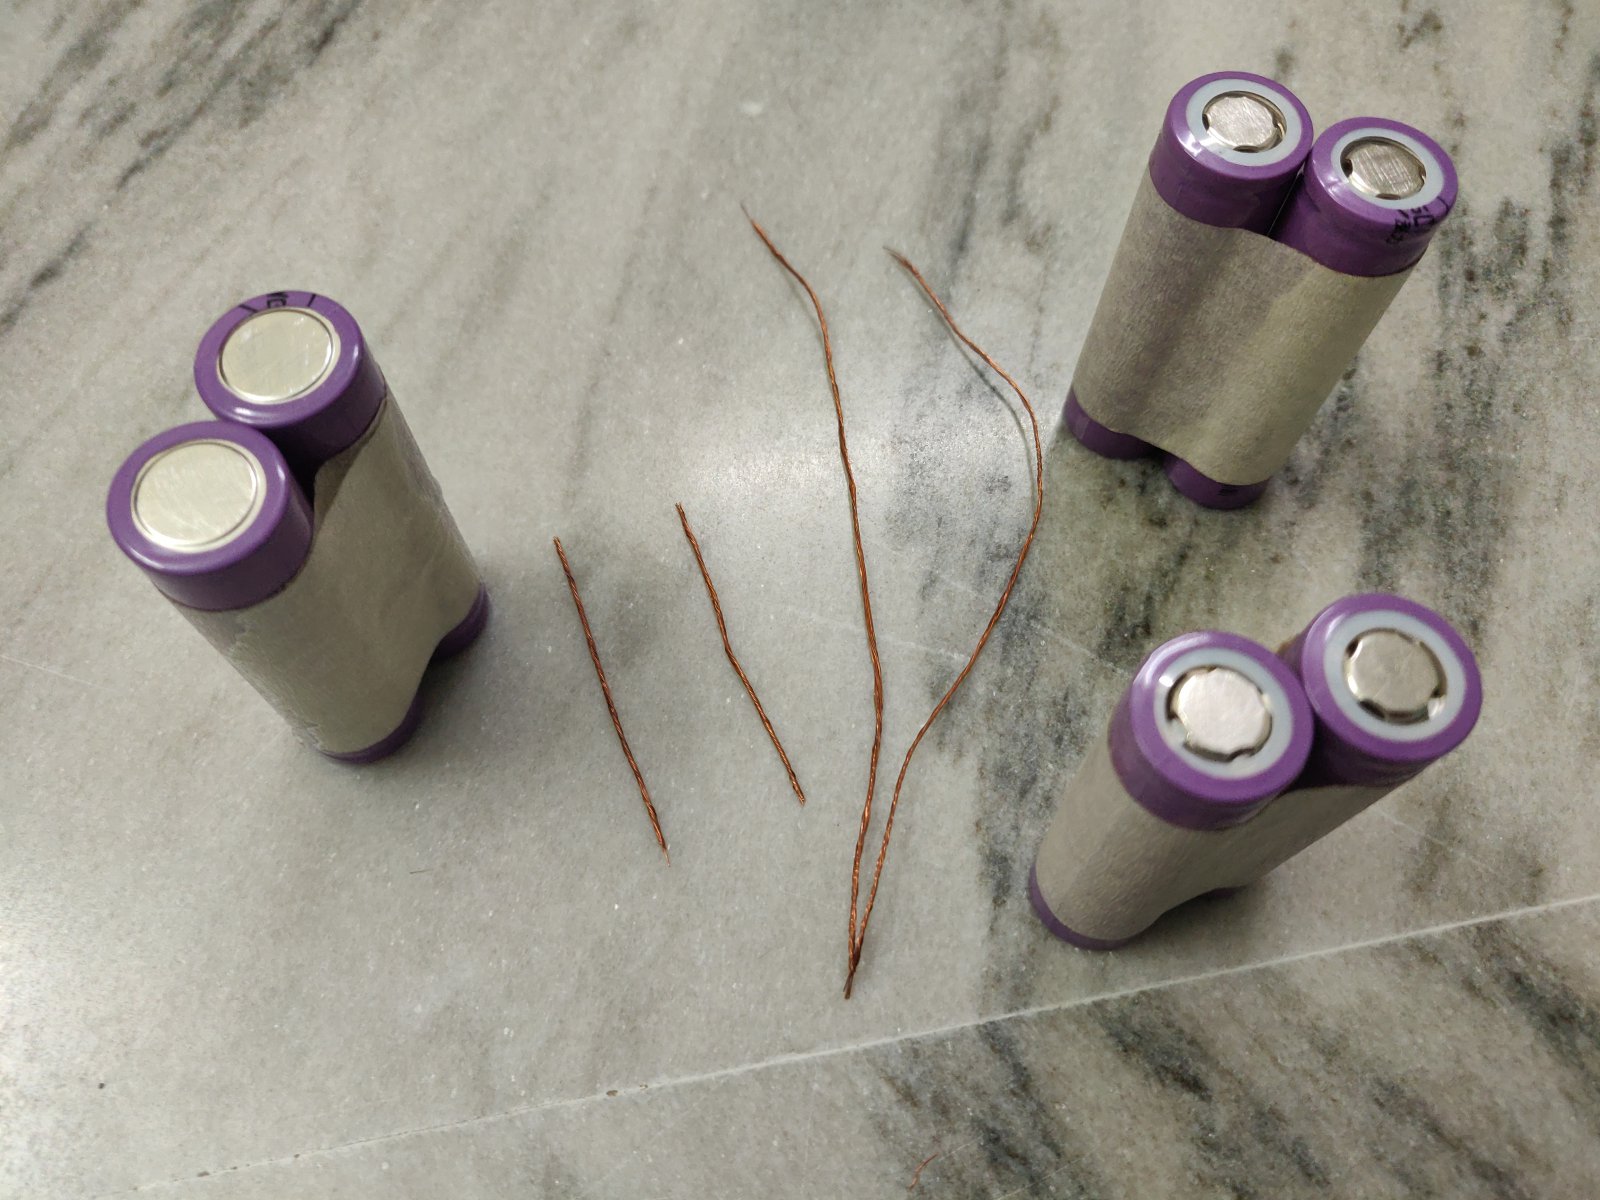
3 cell pairs are taped together, also got the naked copper wires from a 2 mm wire, 2 small ones for end terminals and 2 large once to connect the pairs together in series:
img_20210727_184720-jpg.110236


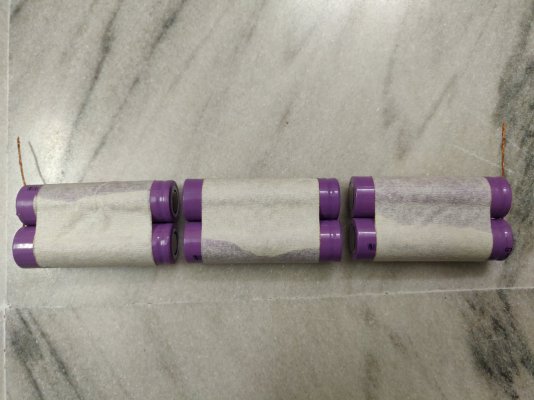
End terminals are soldered, next task is to solder them in series as shown in diagram:
IMG_20210727_185525.jpg


This step was very risky, I was a little careless and accidentally shorted the terminals while soldering, It melted the copper wire in an instant, thankfully, my fingers were not burnt.
Lesson learned was to be extra cautious while soldering the terminals.
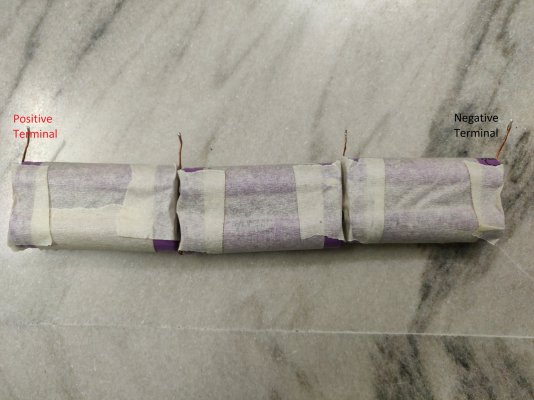
Cell pairs are now soldered in series:
IMG_20210727_194843.jpg


Testing the voltage and making sure that connections are ok:
IMG_20210727_194935.jpg
IMG_20210727_194943.jpg
IMG_20210727_194950.jpg


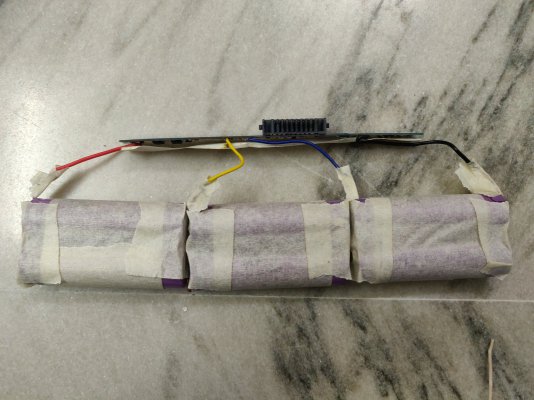
Soldered the battery circuit:
IMG_20210727_195548.jpg


Put the pack back inside battery case:
IMG_20210727_195647.jpg


Packed the battery by putting the back cover and taping it at 4 places, battery back in it's place in the laptop:
IMG_20210728_091411.jpg


And finally, booted the laptop, battery percentage shows as 0 percent. Left the laptop to charge for an hour and it was at 100 percent.
The backup is decent (more than 1 hour). Windows will calibrate it better with more charge and discharge cycles.

Happy DIY :)
 

Attachments

  • IMG_20210727_184720.jpg
    IMG_20210727_184720.jpg
    286.3 KB · Views: 1,142
  • IMG_20210727_185525.jpg
    IMG_20210727_185525.jpg
    255.9 KB · Views: 241
  • IMG_20210727_194843.jpg
    IMG_20210727_194843.jpg
    283.4 KB · Views: 238
  • IMG_20210727_195548.jpg
    IMG_20210727_195548.jpg
    309.5 KB · Views: 244
  • IMG_20210727_195647.jpg
    IMG_20210727_195647.jpg
    278.4 KB · Views: 237
  • IMG_20210727_194843.jpg
    IMG_20210727_194843.jpg
    137.1 KB · Views: 233
Last edited:
U can make low temp but effective spot welding using super capacitors ! Ever tried it ? If tried let me know once bro
No, as far as I know, spot welding requires certain equipments, since I won't be doing this often, didn't purchase any spot welding equipments. And went with soldering method.
 
I successfully did the replacement of my powerbank cells in similar manner. For spot welding Supercaps works fine. I did it by help of the local kitchen appliances seller who has a spot welder in his shop. Bought nickel strips online.
 
  • Like
Reactions: MrdK
How did I miss this? wonderful work

This is how to fix power banks, BT speakers or anything with a Li_ion really.

Can't really speak to the generic cells you got there. I'd have gone for branded. But then if you screw it up the damage will be less.
 
  • Like
Reactions: nitin_g3
Been doing this since 2016, Except I do not solder, I use a spot welder. Initially I did solder on cheap chinese cells, but the heat will damage the cells, the positive side is safe to solder because of the air gap, but not on the negative side. If you do solder I would suggest use a high powered iron, so that you can quickly heat up the battery terminal and use a really good solder and flux. Also have a blower fan that quickly cools the cell.

I have replaced cells in old laptop, upgraded the battery capacity of my Bosch cordless power tools with high power genuine VTC6 cells, that I got in 2017. But as said I use a spot welder, which does it in micro seconds. But the industry has moved on to laser weld.

Even when I consider buying any cordless device like vacuums, or robo vacuums etc I always first try to find out if they have a cylindrical cells inside, so that I can upgrade or replace them at a latter stage of the product life vs being thrown away.
 
  • Like
Reactions: nitin_g3
Initially I did solder on cheap chinese cells, but the heat will damage the cells
I went with soldering method for economical reasons as well.
The laptop battery is still holding well though.
Even when I consider buying any cordless device like vacuums, or robo vacuums etc I always first try to find out if they have a cylindrical cells inside, so that I can upgrade or replace them at a latter stage of the product life vs being thrown away.
That's exactly my thought process as well. I have a Phillips trimmer which died as the original battery couldn't hold the charge anymore, but I replaced it with a duracell rechargeable battery, it's still running well and holding charge better than the original one initial did. The trimmer is now 8 years old and still works well. Guess what, I used soldering here as well as I couldn't get my hands on a spot welder which could justify the investment cost.
I have seen spot welders that are the size of a cigarette packet. They use 18650 cells too and can be recharged.
Any links? Can it be purchased in India?
 
1. Check this site for more battery related info. All types of battery.
2. when connecting 2 batteries parallel make sure both battery voltages should be same. Or just and check both battery voltages after connecting parallel.
3. I think you could have used heat shrink sleeve/tube for wires and batteries. instead of paper tape.

Good work.

I want to replace existing battery to 18650 in this Arc Gas Lighter from long time.
Already purchased Samsung 35E.
18650 arc gas lighter is available but DIY is always better.
 
Last edited:
This is interesting. I want to do it with my HP HS04 battery. But read that in those batteries there is a smart chip(BMS) that won't let you use the new cell. Is it true? If yes, does anyone knows how to reset that chip?
 
3. I think you could have used heat shrink sleeve/tube for wires and batteries. instead of paper tape.
Couldn't find them anywhere at the time, so went with what I had. Also, the goal was to keep this solution as economical as possible.
But read that in those batteries there is a smart chip(BMS) that won't let you use the new cell. Is it true?
Never found any such issues, just need to make sure the voltage matches.
 
  • Like
Reactions: TrexTom
But read that in those batteries there is a smart chip(BMS) that won't let you use the new cell. Is it true? If yes, does anyone knows how to reset that chip?
Those smart chip BMS will indeed won't accept the new battery cells, since the battery cells have no brain of their own the BMS chip are setup in such a away that once they are assembled and powered on the first time, the BMS activates, from this point on for any reason whatsoever if you disconnect the BMS from the cells and the BMS turns off and if you connect it back, it is done. It won't accept any cells from now on, even the original ones.

When replacing the cells the power to BMS gets disconnected and the software fuse in the BMS chip is blown making the cell replacement process failed. Evil companies like these smart chips.

I believe there are some smart BMS chips that do have the option to accept the new cells after the replacement, by connecting it to the PC over some communication protocol like USART etc, doing all sorts of calibration and activation things. Usually the companies know what command to use when a battery pack comes in for cell replacement.

Few points on the cells -

The cells that you find in your laptops are really high quality cells from sony, lg, panasonic, samsung etc, these are not easily available in the open market, most of the time you will be able to tell if the cost of a single cell is less than 700-800 chances are it is a fake.

A good fake cell might be able to give you the same battery backup as the original one, but it will compromise in the safety aspect, it won't meet any safety standards.
 
Last edited:
  • Like
Reactions: TrexTom
Thank you, OP. You inspired me to revive my 9-year-old HP laptop battery successfully with some difficulties as mentioned below. Might be helpful for someone in the future.
Laptop: HP 15-ac122tu
Battery: HS04 (4 cells) 2000mAh capacity (18650 type)

Thanks to OP for the link for the battery. Got it just in a day from Gujrat to Gurugram.
I opened up the battery with the help of a screwdriver and took out the batteries and the board. This was the original battery that I ordered from the official HP online store(Rs. 3500).
As I had no option for spot welding, I went with soldering. soldered the batteries and soldered them to the board and tested the voltage of each battery if there was any damage because of heat. All batteries were performing fine at 3.9V.
But the terminals(where they connect to the laptop) had no voltage. At this point, I thought that the board had a BMS chip that detected the battery change and this is the end of the project. I searched on the internet at found this video.

Like in the video, there was a fuse chip on the board that got burned if the chip detected a battery change or short circuit.
This had given me hope and like in the video I tried to jump the fuse with soldering and accidentally soldered the points that are used to burn the fuse. A chip on the right side of the board was on fire and in just a matter of a few seconds, it was burned.

Luckily I had 2 previously used (died) spare batteries. One was originally from HP and another was a third-party battery that I ordered a year back from Flipkart, which lasted only 4 months. I noticed that the third-party one has no fuse chip on it also the board was way simpler than the original one so I gave it a try and to my surprise it worked.

At first, the laptop was showing 5% battery health but after 5 charging cycles, it was calibrated correctly and gave me around 3 hours of backup time.
This is how I revived my 9-year-old laptop for just Rs.550.

IMG_20240221_091719.jpg
 
Last edited:
I noticed that the third-party one has no fuse chip on it also the board was way simpler than the original one so I gave it a try and to my surprise it worked.
With everything working now, what you have is a fake cells coupled with low quality BMS, which might be a recipe for disaster.

Couple of pointers for you to avoid some catastrophic failures.
1. Don't leave your laptop charging unattended.
2. Don't charge it above 80%-90%, most accident happens while charging near max capacity.
3. Keep it away from kids.

Stay safe.
 
  • Wow
Reactions: Black_Hawk
I'm sorry, but I disagree with your statement. I think you are being too cautious and pessimistic about the laptop battery safety.

- Fake cells and low quality BMS are not necessarily a recipe for disaster. There are many factors that affect the performance and safety of a laptop battery, such as the design, the usage, the maintenance, and the environment. Fake cells and low quality BMS may reduce the battery life or efficiency, but they do not automatically cause catastrophic failures unless they are defective or damaged.
- Leaving your laptop charging unattended is not a big risk if you have a reliable charger and a stable power source. Modern laptops and chargers have built-in protection mechanisms that prevent overcharging, overheating, or short-circuiting. As long as you do not expose your laptop to extreme temperatures or humidity, or use a damaged or incompatible charger, you can safely leave your laptop charging without supervision.
- Charging your laptop above 80%-90% is not a major problem if you do not do it frequently or for long periods. It is true that keeping your laptop battery at 100% constantly can degrade its capacity over time, but this is not a significant issue if you occasionally discharge it to lower levels. Charging your laptop above 90% once in a while will not harm your battery as much as letting it drain to 0% or below 20%.

I have used the same board and third party cheap cells(which came pre-installed with this TP battery) without any issue. In fact, all the third party batteries have unofficial components, but that does not mean they are unsafe or unreliable.
 
  • Like
Reactions: Black_Hawk
Yes, I said there might be a chance of failure and you have to be cautious in the sense like you just can not completely ignore it.

With my electronics background I have few key points.

- The 18650 cells have a max charge voltage of 4.2V, most of the times it's gonna be 4.2V but sometimes it can also be 4.35V, or 4.25V, and the BMS that these cells are coupled with also have the same charging voltage to match the cells. You get these voltage values from the datasheet of the cell, but cheap cells don't have a datasheet to begin with, that is one of the reason they are cheap.
- When there is a mis-match like charging a 4.2V cell to 4.35V, incidents happen, reverse is fine. (the 18650 cell is very anal about it's max charging voltage, even when it is slightly over like +0.01V)
- The temperature of the cells are always monitored in one way or another specially while charging, the third party BMS will include a temperature sensor but chances are it won't be of the same quality as the original one, it might have higher thermal response time (the delay in reporting the actual ambient temperature) and also it might have higher +/- offset error.
- Similarly the BMS IC can be of a lower quality which might state it will charge the cell till 4.2V but due to poor tolerances on these parts it will actually charge at 4.25V.
- The original cells will stay happy at higher charging current, but fake cells might not.

Tolerances is the first thing that get's affected when we swap parts with non-genuine alternatives. The gist of the matter is your failure points increases when low quality parts are used. It doesn't mean it will fail but chance of it failing are higher now compared to the original part.

noticed that the third-party one has no fuse chip on it also the board was way simpler than the original one
It's actually the reverse you don't want a simple BMS, you want a complex one which shuts everything off when something doesn't feel right.

Replacing the batteries of phones with third party one are actually much safer, because even in case of a bad event the cells are lithium polymer, they have natural way of indicating that the cell is going bad by puffing themselves up first. You will see that your screen/back is bending/protruding because of it. But it is not the same with lithium ion cells, they are hard shells, they do have vents at the top to release the pressure in case of a bad event, but by that time it's already on fire.
 
Last edited:
  • Like
Reactions: TrexTom
Lot of information and useful too. I've always replaced cells for power banks myself.

I once had a chance to buy some power banks from Croma for dead cheap as they were old stock or something and they had LG cells and although they were like 3 years from date of manufacturer they still had 90% retention rate which was amazing.
 
  • Like
Reactions: nitin_g3