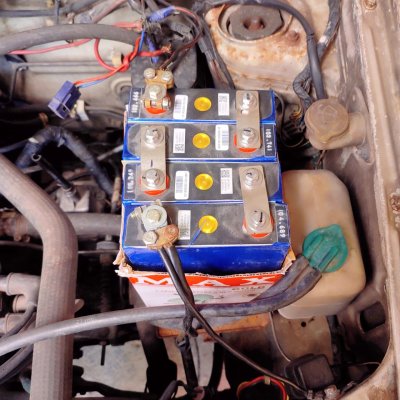
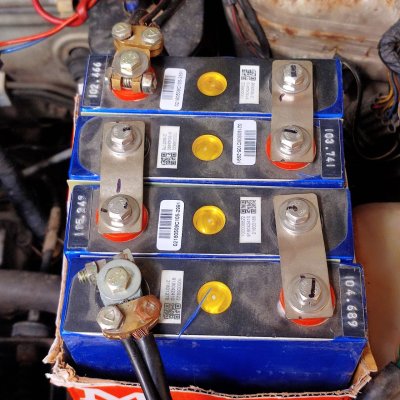
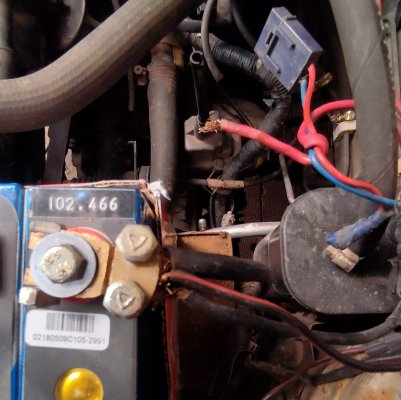
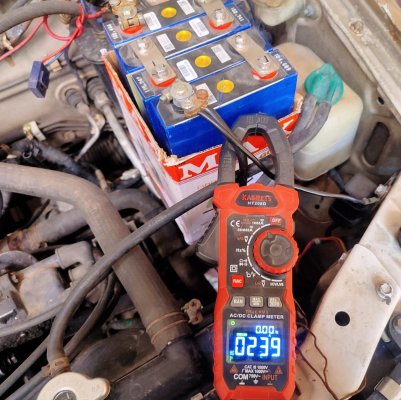
Teardown & Rebuild of a MuscleGrid LiFePO4 Server Rack Battery

The capacity testing finished, the numbers didn't look right so I did it again and they still aren't close to what I was expecting:

+Ah to 3.65V (initial charge)-Ah to 2.5V (1st test)+Ah to 3.65V (full charge)-Ah to 2.5V (2nd test)
Cell #167.9 Ah103.108 Ah98 Ah103.035 Ah
Cell #273.2 Ah101.501 Ah99 Ah101.574 Ah
Cell #367.6 Ah103.062 Ah100 Ah103.100 Ah
Cell #474.4 Ah102.713 Ah101 Ah102.163 Ah

Putting aside that these cells were not top balanced before shipping (even though MDS Enterprises claims they do), the capacity testing results are not indicative of 'Grade A' cells — they're just average, just like the rest of the 'C grade' cells inside the MuscleGrid pack.

Either this is as good as you can expect from cells manufactured by Narada Power or there's an issue with my testing methodology. The variances in the second charge is indicative of something not being right (how do you drain 103Ah, put in 98Ah and get 103Ah back out of a 105Ah cell?). The first two cells were tested in a much warmer climate compared to the other two, I'd say a difference of over 10 degrees, so that might be the reason.

The numbers between the two capacity tests are close enough to rule out wiring inadequacies or insufficient contact. So the discrepancy in the full charge numbers might be within the margin of error of data collection (I did not reset the current meter between cells the second time around, the numbers were calculated cumulatively with a resolution of 1Ah vs 0.1Ah in the initial charge).

Aside from that mystery, it's not very confidence-inspiring to learn that cells that were tested 20 months ago as 105Ah by the manufacturer and presumably were kept in storage the entire time by the importer now measure between 101.5Ah to 103Ah (let's say an average of 102.5Ah). That's a loss of around 1.5Ah per year of storage or a decrease of 1.5% SoH per year.

Is this good, or bad? Looks like I have some research ahead of me.

As it turns out, these are mislabelled — they're 100Ah cells, not 105Ah.

Apart from the capacity, the size and weight of these are much closer to the Narada FE100A cells than the FE105A cells I was expecting (195mm vs 235mm and 1.9kg vs 2.2kg).


After some back and forth, MDS Enterprises confirmed with their (Chinese) supplier that these were intentionally mislabeled because of unspecified "BIS issues."

To their credit, MDS Enterprises have offered a return/refund but I declined. They've also clarified that they pay a third party to do the testing. I could easy see workers/technician at the testing facility randomly printing out made-up numbers on the stickers without actually doing any testing to meet their their targets. So the conflicting test numbers is not surprising but still unexpected.

To recap, these were mislabelled from the supplier and then not tested at all by the testing facility. And then they were sold to me. I guess that's how it goes these days.

With that cleared up, these are excellent 100Ah cells and should match up nicely with the rest of the lower-grade 105Ah cells from the MuscleGrid battery pack.

I did some extra testing in the middle of finding all of that out, and here's the charging profile for the newer cells:
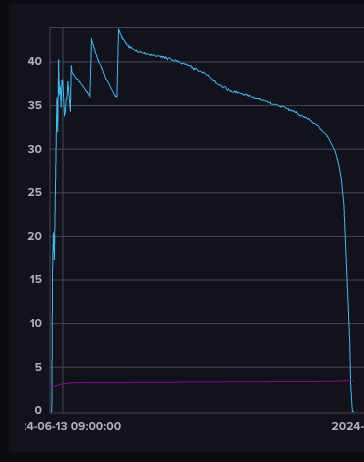
Screen Shot 2024-06-14 at 12.17.02 PM.png

These newer cells accept charge far more readily (a lot more peaks here) so either the MuscleGrid cells have a different manufacturing technique or they're used cells that don't accept charge as easily as new ones. That's 168 minutes, so a savings of about 38 minutes with the newer code.

What this means is that in a battery pack, the new cells will reach full charge much more quickly and the BMS will have to burn off excess power from them until the rest of the cells catch up.

Anyway, the project continues.
 
  • Like
Reactions: n1r0 and Tobikage
To recap, these were mislabelled from the supplier and then not tested at all by the testing facility. And then they were sold to me. I guess that's how it goes these days.
AFAIK there are just 3-5 LiFePO4 battery manufacturers in China, but they cater only to large customers (50K to 100K), cells which fail to meet the standard / quality threshold in those orders are auctioned, These smaller Chinese suppliers buy those lots, put in the terminals, replace the QR code and sell it to buyers like us / MDS. I am not sure any testing beyond 'working/not working' happens on any of these.
 
  • Like
Reactions: rsaeon
That would explain a lot of what we're seeing on western youtube with DIY LFP builds.

.

I couldn't leave well enough alone, so I got a bunch more of the digital pots and put them in parallel:

photo_2024-06-17 12.49.54.jpeg

This brings down each step from down 100E of a single digital pot and the 50E of what I did previously, to just 17E. The graph is less spiky now:

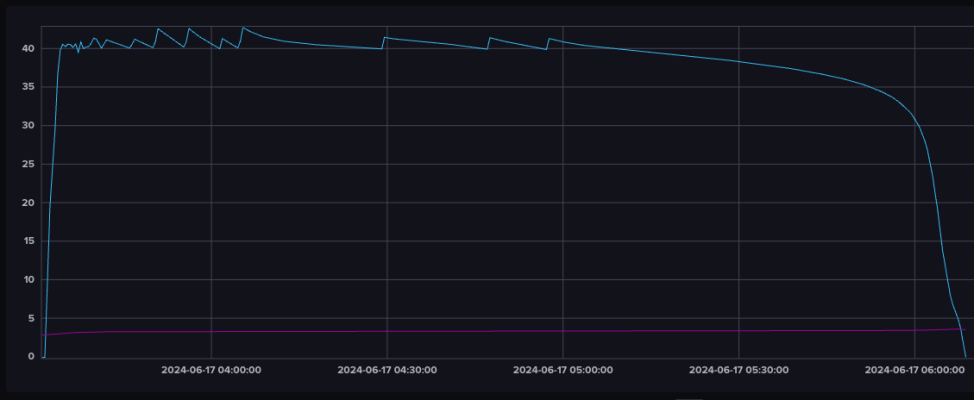
Screen Shot 2024-06-17 at 12.47.21 PM.png

But the time savings isn't as significant, it's now 158 minutes, a savings of just 10 minutes in charging time — the added cost just doesn't make sense.
 
Highstar were the first ones I found, along with a brand named Orange. I didn't do much research into them because I was looking for more well-known brands.

There is a new musclegrid battery in town. They claim 120Ah 5760W with some Highstar cells which lasts 6000 cycles.

It does look like it has a more modern BMS. All of their previous batteries have been removed from Amazon and their own website, there were at least three listings — all with very low ratings.
 
Last edited:
We're often behind the technology curve in India but with LiFePO4, it is nice to learn from the mistakes/pitfalls that the early adopters in other countries have went through.


Summarizing:

There were 7 strings, connected in parallel. Each string was individually fused — however the fuse that was used didn't have a high enough AIC (ampere interrupting capacity) so it arced when it melted and shorted.

People are theorizing that one cell failed in one string, causing the other six strings to dump energy into the failed string. Supporting factor for this is that the fire restarted multiple times while it was being put out.

The cells were compressed but without insulating dividers.

Other thoughts:

I recently started cutting up G10 FR4 sheets to use in my battery build and I had the 2mm sheets. They were insanely difficult to cut. Rotary tool discs barely last a few seconds so I'm using a marble/tile cutter (first time). The diamond coated disc was worn out within minutes and I had to resort to pure speed/friction to complete the cut. So I had thought the pain isn't worth it, never mind the resin/fiberglass dust, but then I saw this thread and decided I like living more. But I'm going to switch to thinner 0.5mm sheets cut with a guillotine and use multiple layers, not the 2mm stuff.

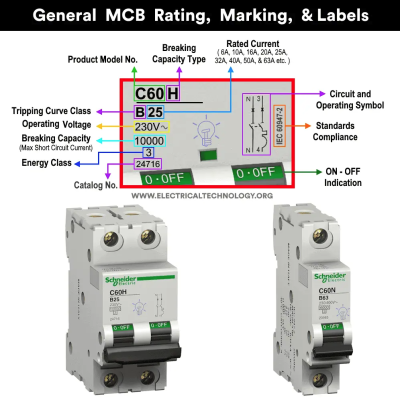
High AIC fuses are easy to find here in the NH00 form factor, they're a few hundred each. I wasn't planning on using one but now I will because the circuit breaker in this battery is just glorified switch, it's an isolator. Actual circuit breakers have different markings. And I can't find anything DC-rated with a breaking capacity above 10kA.

Screen Shot 2024-06-30 at 5.33.58 PM.png

The neutral line above is the symbol for an isolator, the other line (3,4) with the curve and pulse indicate fault protection.

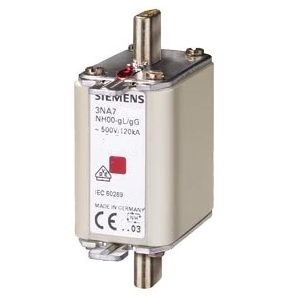
This is the type of fuse I'm going to be using, this one is rated for 250V DC and has a AIC of 120kA:

Screen Shot 2024-06-30 at 5.50.02 PM.png

 
@rsaeon i've been looking to find 2 mosfets for my tv, they just blew up. Can't find online. Checked locally at few shops. Couldn't find. Anyway u can help me get those or point me from where i can get them
 
@rsaeon i've been looking to find 2 mosfets for my tv, they just blew up. Can't find online. Checked locally at few shops. Couldn't find. Anyway u can help me get those or point me from where i can get them

Usually mosfets can be swapped out with others that are pin-compatible. Do you have a model number for the mosfets?


I couldn't leave well enough alone

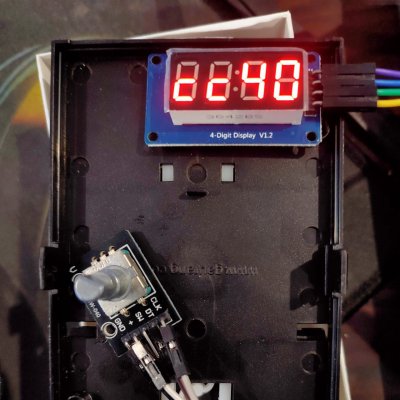
So I added a rotary encoder and a display so that I could adjust the LiFePO4 charger for smaller capacity batteries:

photo_2024-08-28 12.57.10.jpeg

I resisted the urge to add in OLED and make some cool pixel graphics — that might've been a little too much for a battery charger, ha.


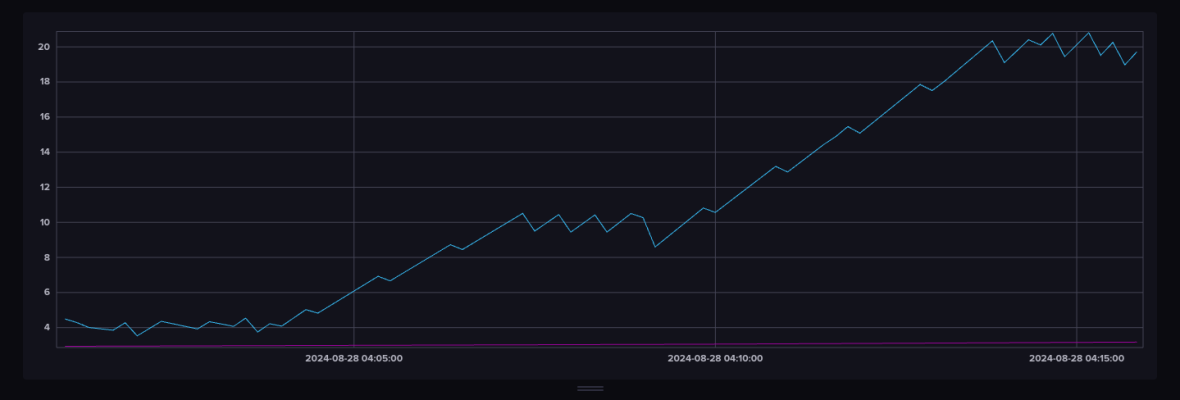
Some testing at 4A, 10A and 20A:

Screen Shot 2024-08-28 at 9.45.56 AM.png

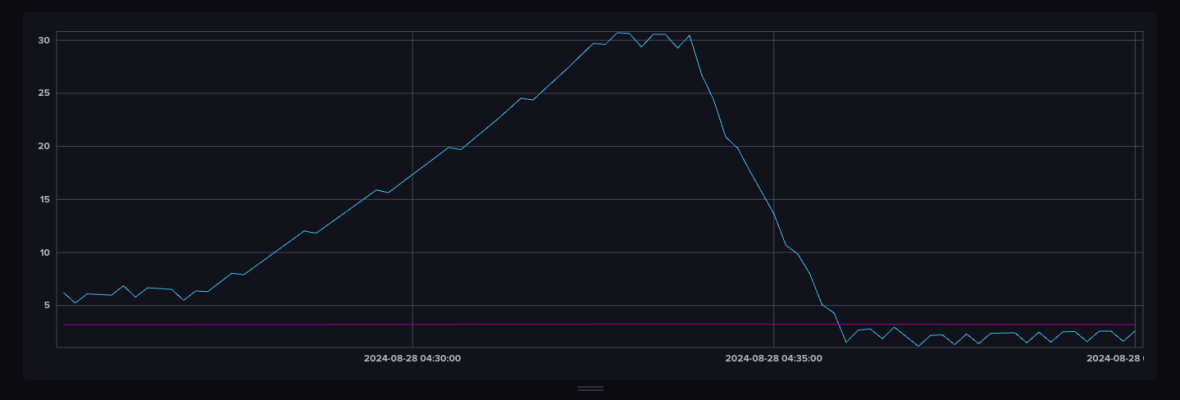
6A, 30A and 2A:

Screen Shot 2024-08-28 at 10.10.08 AM.png

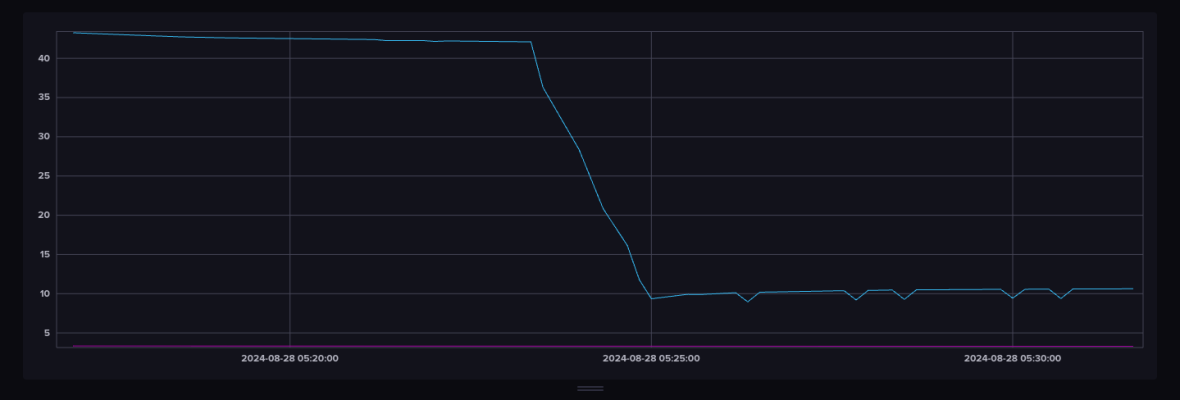
44A and 10A:

Screen Shot 2024-08-28 at 11.01.52 AM.png

Overall, not bad, and it works! Especially for something it wasn't designed to do.
 
I resisted the urge to add in OLED and make some cool pixel graphics — that might've been a little too much for a battery charger, ha.

I couldn't resist:


Video description:

An entirely unnecessary SSD1307 0.91” 128x32 OLED is added to a Tasmota-based ESP8266-controlled lithium cell charger.

Constant current charging is achieved by replacing the trimpot of a Meanwell 3.3V 40A SMPS with six digital pots wired in parallel. Tasmota rules are used to step up or down the digital pot which adjusts output voltage. Current flow is directly proportional to the voltage difference between the charger and the cell. Each step of the combined digital pots translates to roughly 6 millivolts.

Some information is displayed directly with Tasmota, like I-SET (which is current set) when a rotary encoder is adjusted. Other data is brought in through MQTT either after formatting like rounding for temperature or for information that isn’t directly available as a variable, like the uptime string.

Display updates are about 10 seconds behind real-time events, which is the shortest MQTT reporting period that Tasmota allows. This is acceptable since a PZEM-015 module provides real-time monitoring. Serendipitously, font-sizes are mostly consistent between the OLED and the PZEM's LCD.

Timestamps of note:

00:25 Default I-SET is 44A
00:43 Charger turned on
06:31 Charging ramps up to 40A
07:37 First visible over limit warning
08:15 Fiddling with the rotary rencoder
09:12 Current set to 20A
09:54 Current reaches 20A
11:22 Current set to 40A
12:12 Current overshoots to 41A
12:20 Current reaches 40A

So it's probably obvious by now but I really like making/designing monochromatic hyper-dense futuristic user interfaces. This one needs some work but it's in a good place to leave it for a while.

Anyway, by using a I2C display module instead of the TM1637 one, I freed up two pins on the ESP8266 — this allows me to add in an addressable LED for showing status (todo) and a button to actually turn on the charger (which probably should've been the first thing I added, ha).
 
Last edited:
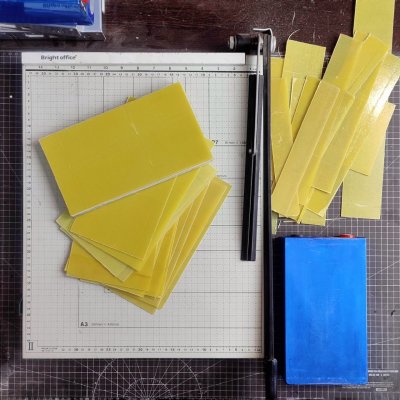
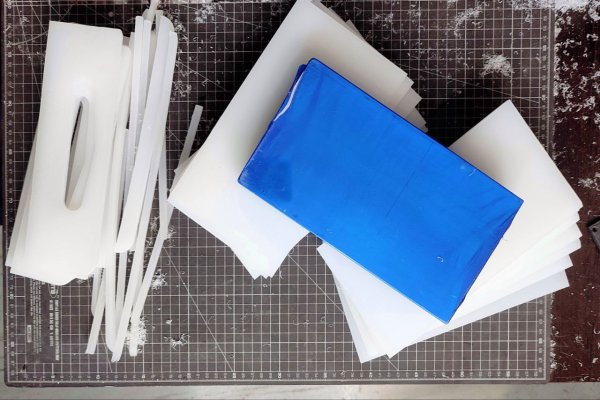
I got some 0.7mm epoxy board, commonly used as fire-resistant barriers in lithium battery packs and spent the evening chopping it up into cell-sized pieces:

photo_2024-09-09 22.27.13.jpeg

The 0.7mm was much easier to work with than the 2mm stuff I got for another project, I used a large paper guillotine here.

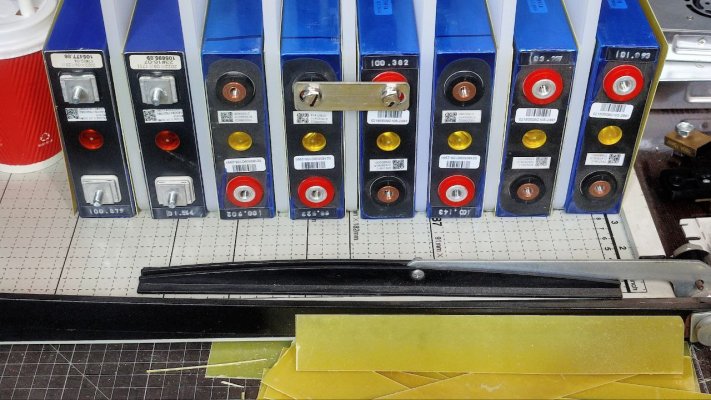
Next was a test of how the cells are going to be laid out, in two rows of eight:

photo_2024-09-09 22.27.14.jpeg

The sandwich between each cell consists of a sheet of 0.7mm epoxy board, a piece of Ikea's LEGITIM cutting board that's 8mm thick, another sheet of epoxy and then the cell.

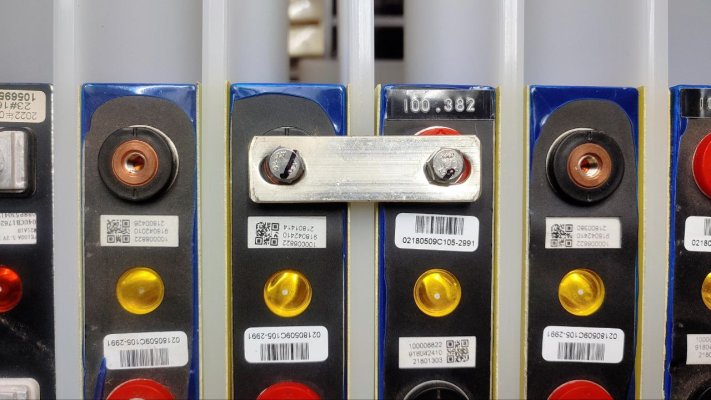
The Ikea cutting board allows for proper spacing between the cells to be able to use the commonly available 70mm x 20mm x 2mm nickel-plated bus bars:

photo_2024-09-09 22.27.15.jpeg

However, it might not strictly be the most economical solution.

Each cutting board has enough material for two spacers and costs Rs 149, seven of which are Rs 1043.

The bus bars are 99 each, seven for each set of 8 cells, so that's Rs 1386. Fun fact: these bus bars have a cross-sectional area of 40 sq mm (20mm x 2mm).

It might have been smarter/better to get raw copper stock and make my own bus bars, but that's more labour/effort that I'm not very excited about.

Anyway, I tell myself that the added 8mm between the cells is probably good for insulation/safety. Hopefully, the cutting boards aren't flammable.

On paper, the total depth of 8 cells, 16 epoxy sheets and 7 spacers comes up to 36 x 8 = 288 + 11.2 + 56 = 355.2mm, but I measured a little under 360mm after clamping down, the difference is probably due to cell expansion.

I'll have to remember to wear protective gloves next time, I have tiny fibreglass shards embedded in my palms. Lots of tiny ouches as I type this, haha.
 
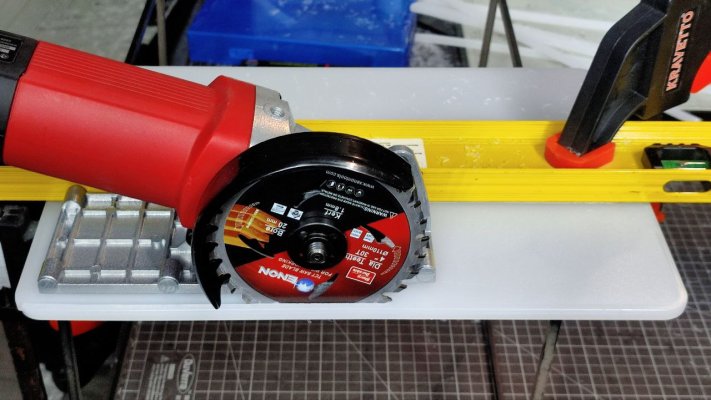
The build continues! I picked up quite possibly the only angle grinder that's sold with a base plate: https://www.amazon.in/ENON-Electric-Grinding-Polishing-Side-Handle/dp/B0CHRV9L59

It's usually tile/marble cutters that come with a base plate, and they're the flimsy type — not something that is as thick and substantial as this.

This is my first time with an angle grinder so it was both fun and scary. It took a while for me to figure out the best way to clamp down a level to use as a guide/fence:

photo_2024-09-14 07.36.23.jpeg

I did need to tweak and remeasure things between cuts until I had it just right, accounting for blade distance from the edge (84mm for me) and blade thickness (2mm).


Cutting up the chopping boards was incredibly easy:

photo_2024-09-14 07.36.24.jpeg


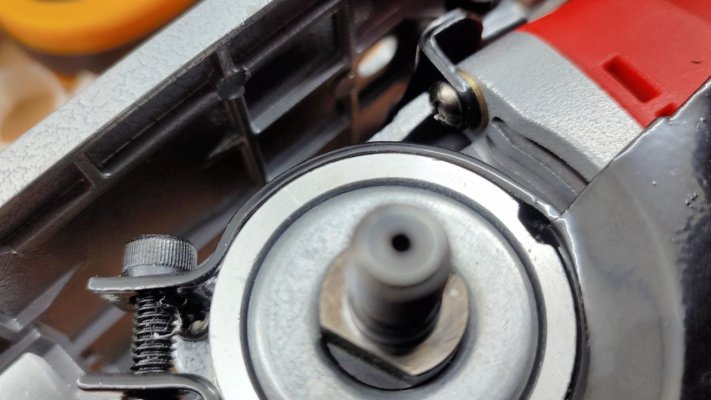
As received, the cutting disc was not parallel to the base plate, so I inserted a washer behind the mount to fix that:

photo_2024-09-14 07.36.25.jpeg
 
The entire construction will be with aluminum and stainless steel because I'm aiming for a 10 year life out of this — so no ferrous materials that'll end up rusting.

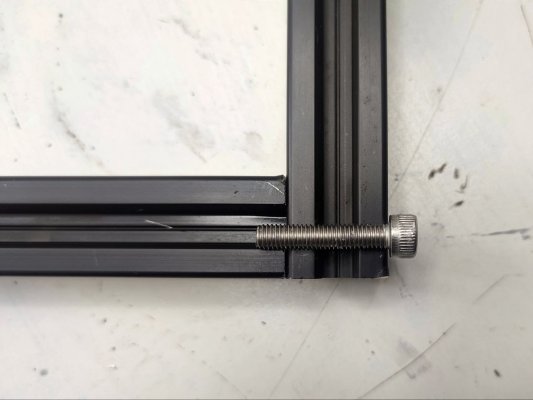
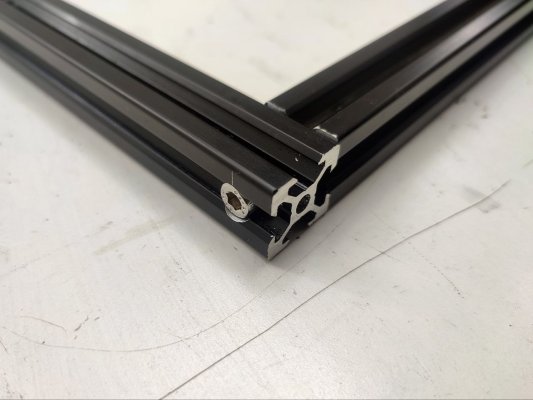
The individual cells will be framed in 2040 aluminum extrusion. However, costs can add up really quickly for t-slot nuts and brackets so I needed a way to join two pieces like this:

photo_2024-10-06 01.35.38.jpeg


Now, 3dprintronics do offer a custom service of drilling out counterbores at Rs 70 per hole, and I need about 50, so that would've been Rs 3500+.

But their profiles are made to a much higher standard so they end up costing more than the stuff I usually get from novo3d.

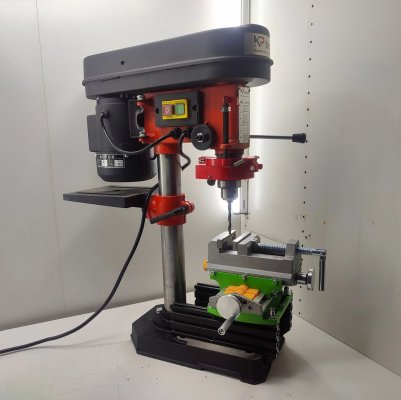
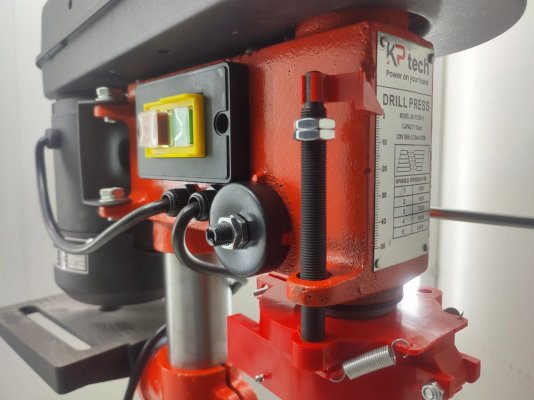
And considering that I might continue to make projects out of 2020/2040 extrusion, it didn't seem like a bad idea to get a drill press:

photo_2024-10-06 01.35.40.jpeg

This is not a very high end one but it should work fine for what I need it for.


Something I didn't know was that I would've needed around 75mm of travel, this one only goes to 50mm:

photo_2024-10-06 01.35.42.jpeg


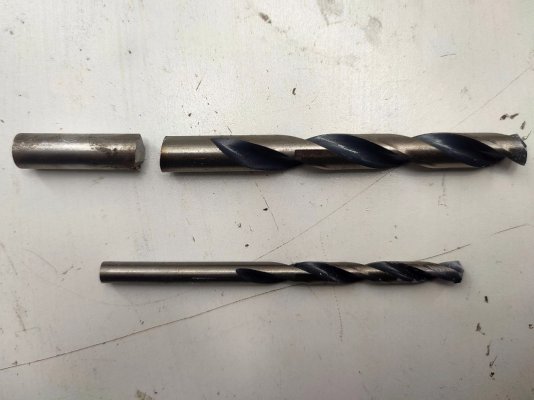
So I ended up needing to trim the bits to match in size:

photo_2024-10-06 01.35.43.jpeg

That's because I didn't want to move the work piece while switching out bits (which would have been necessary because of the limited 50mm travel).

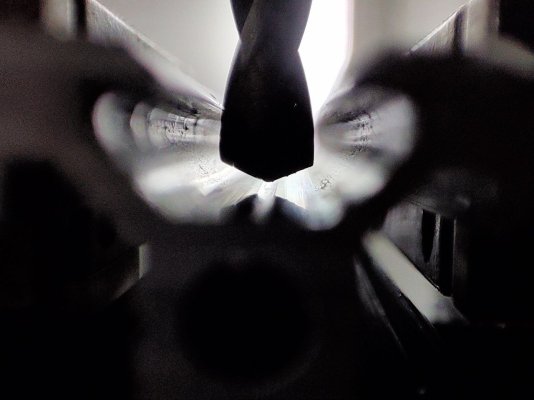
This was probably the scariest thing I've done, I used the angle grinder.


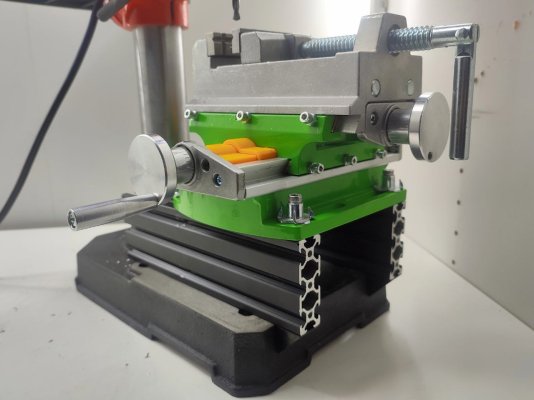
For holding the work piece and precision adjustments, I got this cross-sled vise:

photo_2024-10-06 01.35.45.jpeg

I had to first take it apart to remove play, and to reverse the vise clamp, that part wasn't very difficult.

It's mounted to the drill press with leftover pieces of 2060 from my server rack project.


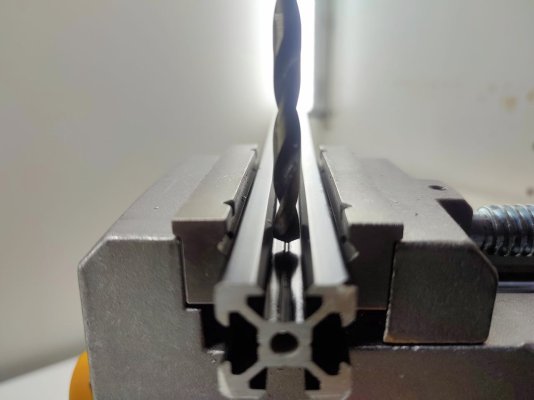
I'm able to perfectly center the drill bit with it:

photo_2024-10-06 01.35.46.jpeg

photo_2024-10-06 01.35.48.jpeg


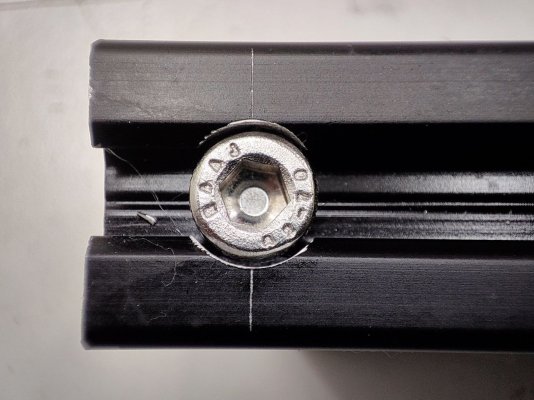
Pretty happy with lining up the hole from the edge, but centering got off in between bit changes:

photo_2024-10-06 01.35.50.jpeg

The larger 9mm bit helps with having the socket head sit flush.


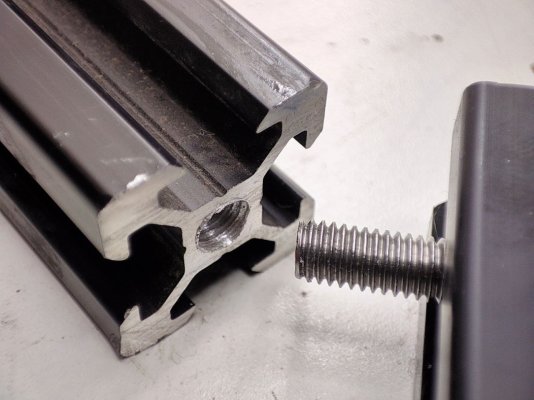
And the two pieces are fixed together by screwing into the tapped end:

photo_2024-10-06 01.35.51.jpeg

photo_2024-10-06 01.35.53.jpeg

And now I need to do about fifty more of these.
 
Didn't you check with a local machine shop? Would have worked out much cheaper + no need to deal with metal debris hazard.

It's ridiculous how fasteners can end up costing almost as much as the profiles lol. Only advantage is they are adjustable/reusable
 
  • Like
Reactions: rsaeon
I went to a few local places, the kind of places that make gates and iron staircases? They had the precision of an intoxicated water mammal, ha.

It's a shame, they have such high quality and heavy duty equipment but the best they can do is around +/- 5mm while I needed something closer to +/- 0.5mm.

I can see why 3dprintronics charge so much for a single counterbore, this stuff is difficult to execute reliably. I forgot to mention it took about four attempts to understand just how everything needed to be set up. But now that it is set up, I should be able to get consistently repeatable results.

I use a blob of coconut oil as lubricant and it helps contain most of the aluminum shavings.
 
If you cut off the end of a profile, you can use it as a drill jig to get super accurate hole placement, without measurin any measurements:


You can get a "professional" jig too:


--------

BTW are you tapping the profiles yourself as well?
 
The profiles are tapped by novo3d, they charge Rs 15 per tap. I did get a tapping set but found it difficult to make straight taps, probably need a jig or something.

I need to make two holes in the same spot, one for the shaft with a 5.5mm bit and one for the socket head with a 9mm bit, with a jig you'd only be able to make one then you'd need to change it out for the larger bit and you'd lose positioning. I did look into various jigs, even 3d printed ones, but haven't yet found an elegant solution for something that can be used for two different bit sizes without readjusting.

A drill press sounded like the best solution since I can just switch out the bit without moving the work piece. Some of the holes need to be made towards the middle of the extrusion, this'll become clearer with the next update, hopefully. Ideally, I want a large flatbed CNC and use that for drilling. Someday, maybe.

Of course, after I bought the drill press I realized I could do with just one hole and a washer under socket head since none of these joints actually need the socket head to be flush with the profile, ha.
 
  • Like
Reactions: n1r0
Your projects are on another level.

I use ashapower rover 3kva 24v inverter (rover is solar charging supported model).

Asha power is currently the best in market. Here is what I like about them
1. Low idle load current consumption
2. Can adjust bulk, absorption, float voltages, solar charging current, grid charging current, grid to solar changing voltage, solar to grid voltage. You can download their product pdf and it shows the setting possible.
3. Lithium support with good bms

Only complaint right now is the fan noise that ramps up whenever solar is charging or load is there on solar.

There is gootu 6.2kw inverter available in aliexpress. Seller asked 35k for DDP. Seems reasonable. There is a yt guy who is happy with it and he gave the links. But earlier chinese inverters blow up in Indian setting (something about inverter and ac out of phase). Maybe they are fixed now.

Planning to build 8s lifepo4. But don't know if it will ever happen since money is a problem.

All the best to your build. Will surely ask for advice in the future when I build mine!
 
  • Like
Reactions: DigitalDude