You are using an out of date browser. It may not display this or other websites correctly.
You should upgrade or use an alternative browser.
You should upgrade or use an alternative browser.
The "Everyday" show-off thread !
- Thread starter Blade_Runner
- Start date
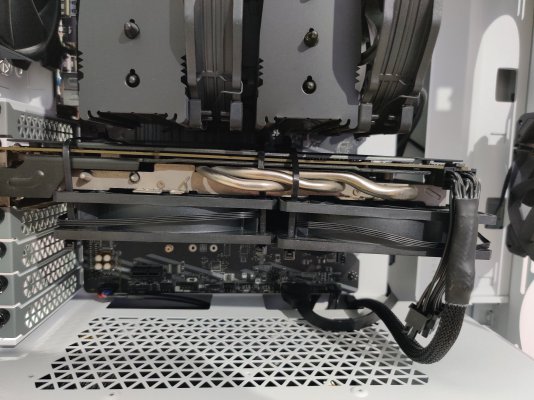
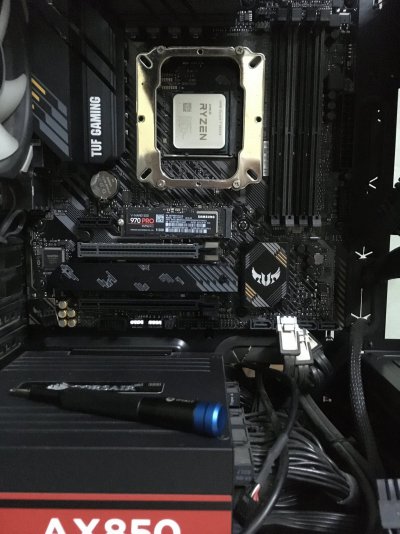
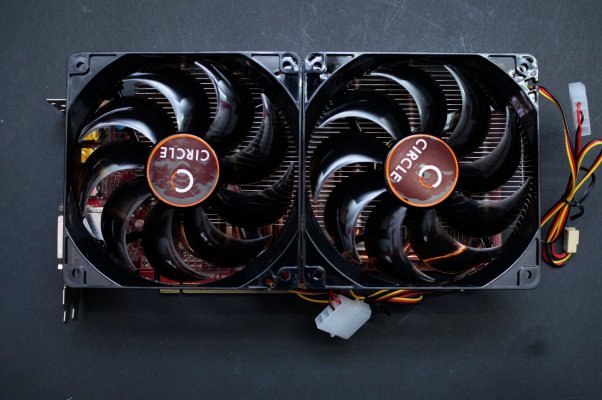
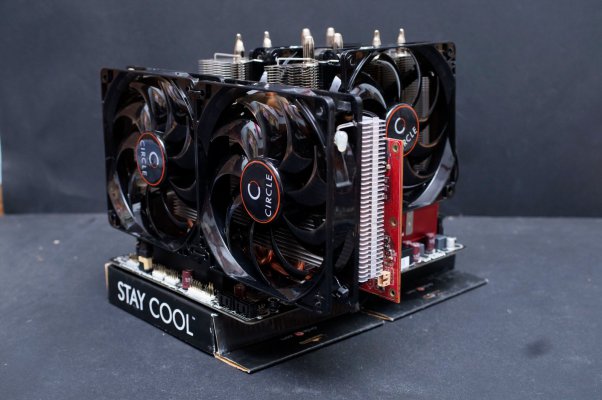
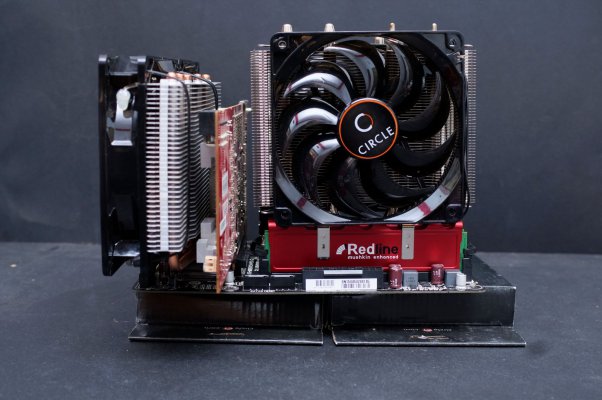
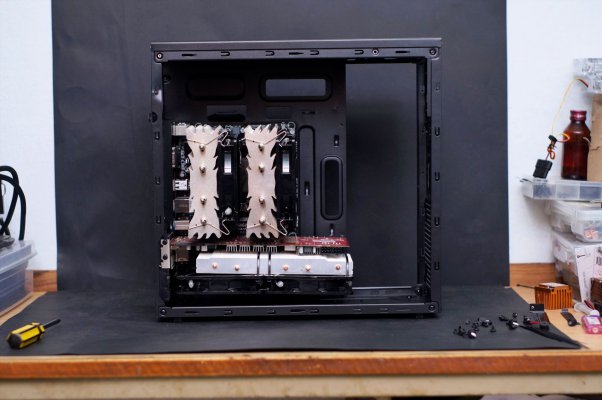
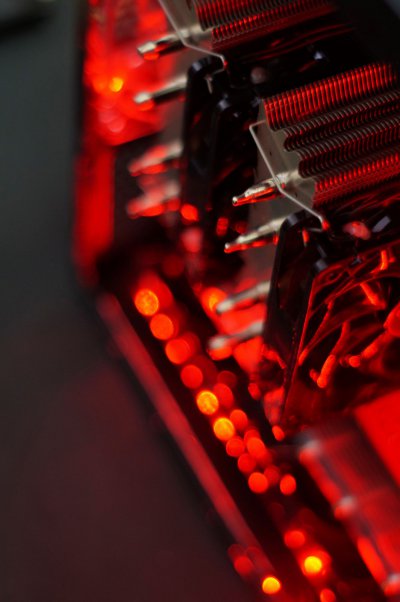
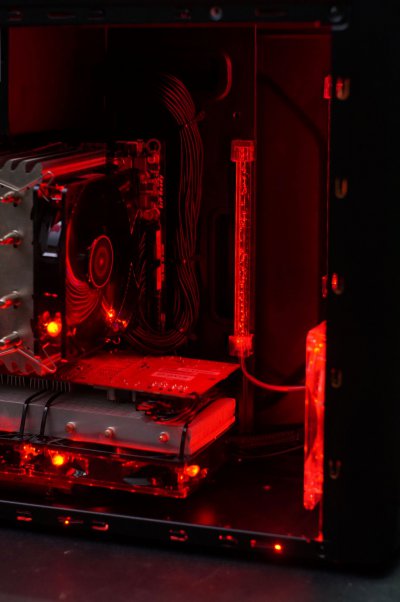
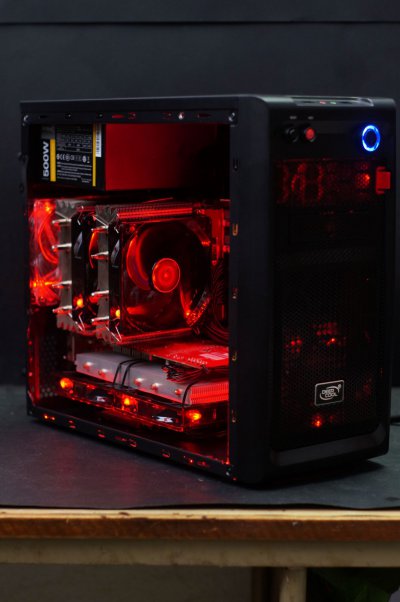
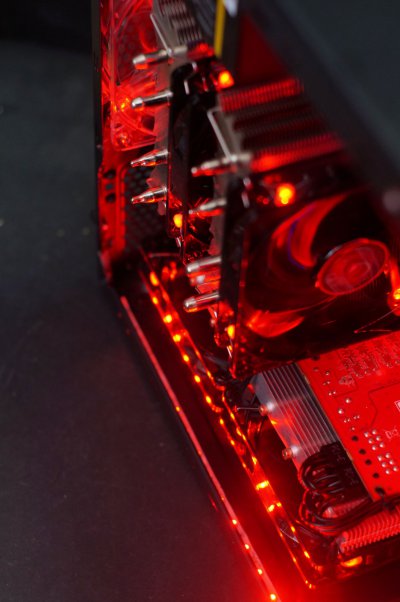
I can finally use this GPU now. The only temperature it knew earlier was 80C+. Used to lockup the system in stress tests because it was going past 87C.
The difference is drastic after modding. I haven't set the fan curve properly yet, but I can keep it below 75C in Furmark and the fans wouldn't be maxed out.
Gotta thank SunnyBoi and TheCoolerPlayer for telling deshrouding ain't a task. The teardown was easier than I thought.
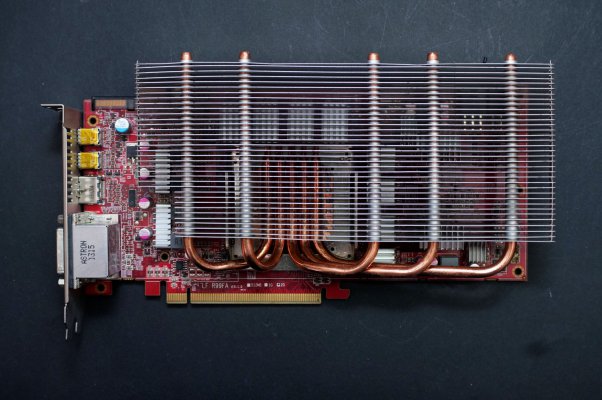
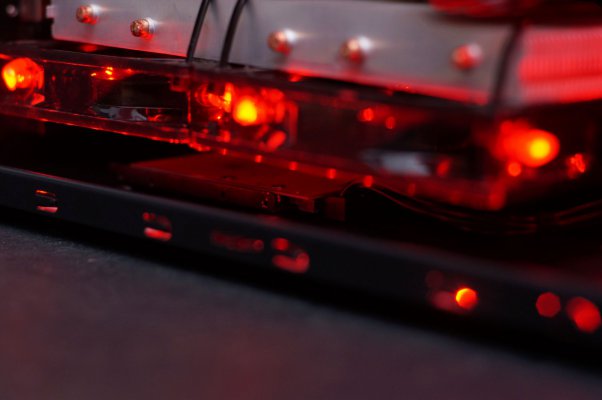
Before:


After:
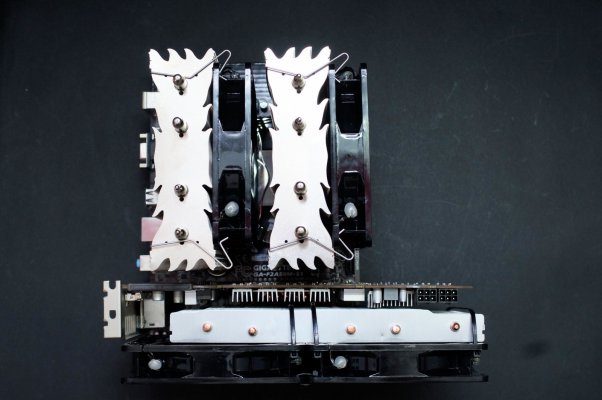
This is not SunnyBoi level of deep cleaning. I didn't want to wait till the HS dried so this was all just brush, cotton swabs, and tissue.

Didn't have IPA but was able to clean the old paste just fine without it. Cotton swabs!
Couldn't do anything about those spots, it was already there and I didn't want to be forceful. The heatsink surface isn't flawless either so it's probably because of that.

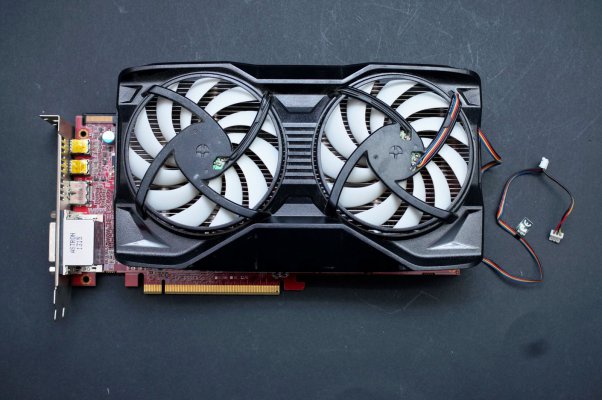
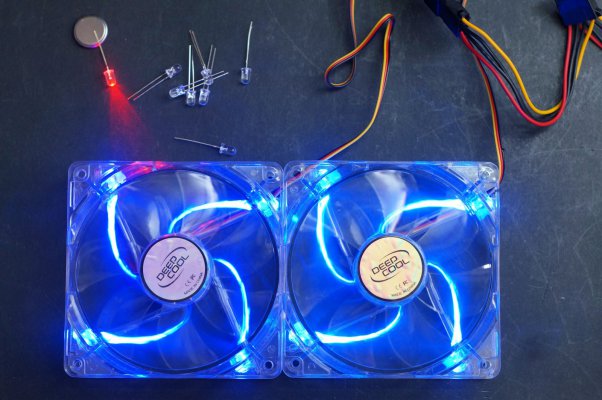
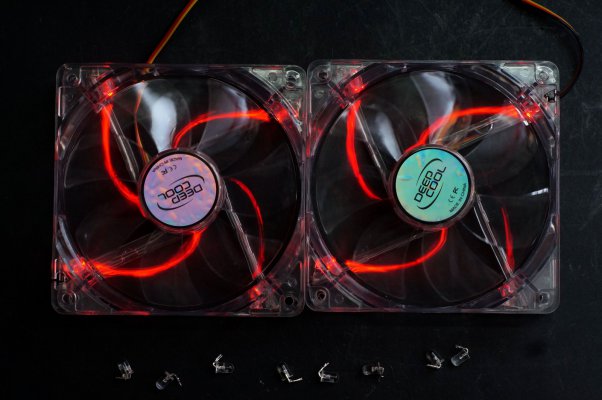
Nitendra will recognize the fans.
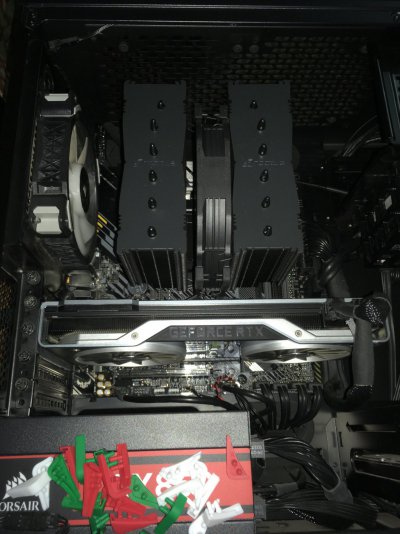
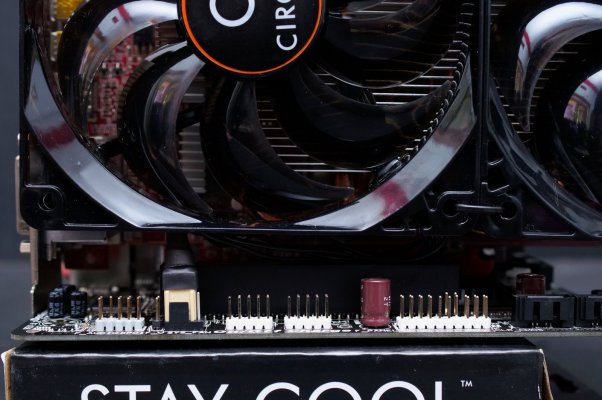
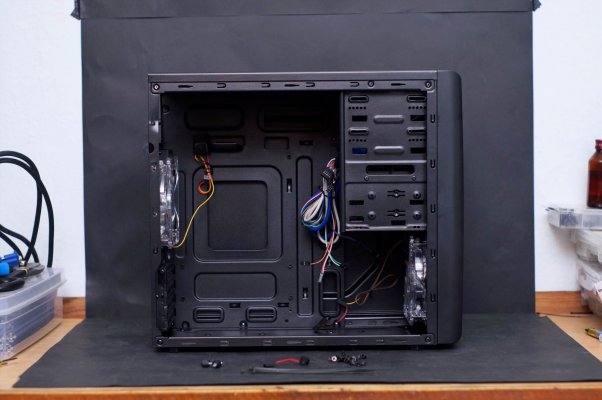
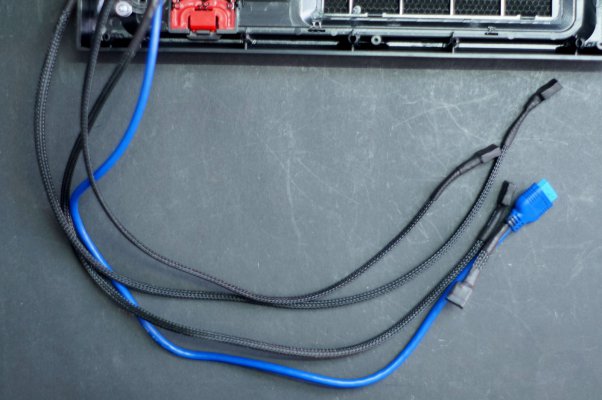
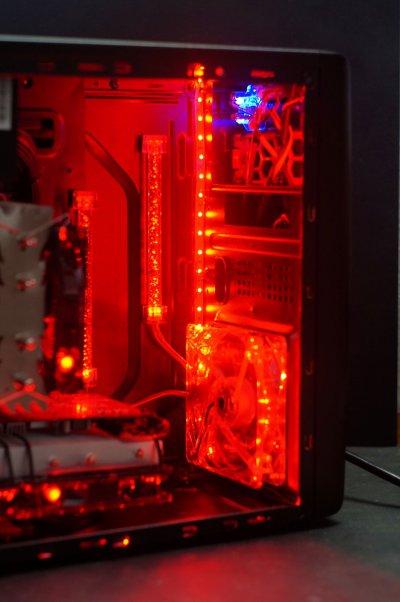
Zip-tied the P12s and tried to keep the cables clean.
I can get the 2nd fan more level but I offset it intentionally to make space for the cables, and also to ensure it would not come in contact with SATA ports/chipset on the board.

Once I get more zipties I'll redo the cables a bit. Not comfortable with the fan wires coming in contact with the HS, don't want stuff melting... not sure if this is a real concern, but just being cautious.

Wanted the cables to be more tighter/cleaner, but toward the end I was more bothered about clearance at the back since I put all the wires/connectors there. After installing I noticed there's enough clearance. Need to figure out a way to ziptie the right extreme as well.
The difference is drastic after modding. I haven't set the fan curve properly yet, but I can keep it below 75C in Furmark and the fans wouldn't be maxed out.
Gotta thank SunnyBoi and TheCoolerPlayer for telling deshrouding ain't a task. The teardown was easier than I thought.
Before:
After:
This is not SunnyBoi level of deep cleaning. I didn't want to wait till the HS dried so this was all just brush, cotton swabs, and tissue.
Didn't have IPA but was able to clean the old paste just fine without it. Cotton swabs!
Couldn't do anything about those spots, it was already there and I didn't want to be forceful. The heatsink surface isn't flawless either so it's probably because of that.
Nitendra will recognize the fans.
Zip-tied the P12s and tried to keep the cables clean.
I can get the 2nd fan more level but I offset it intentionally to make space for the cables, and also to ensure it would not come in contact with SATA ports/chipset on the board.
Once I get more zipties I'll redo the cables a bit. Not comfortable with the fan wires coming in contact with the HS, don't want stuff melting... not sure if this is a real concern, but just being cautious.
Wanted the cables to be more tighter/cleaner, but toward the end I was more bothered about clearance at the back since I put all the wires/connectors there. After installing I noticed there's enough clearance. Need to figure out a way to ziptie the right extreme as well.
Attachments
Last edited:
nitin_g3
Herald
Hey @roofrider, good job there of cleaning and attaching those fans. Btw what are the temps after?
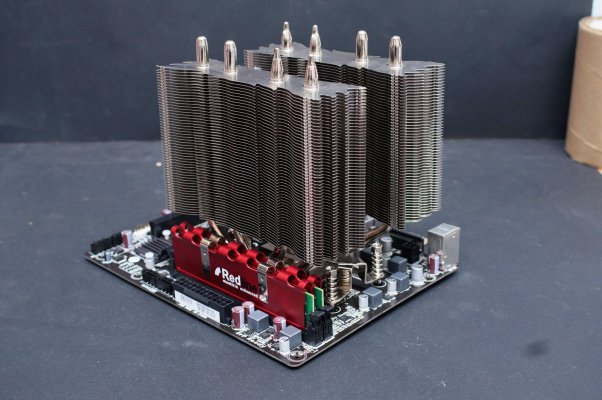
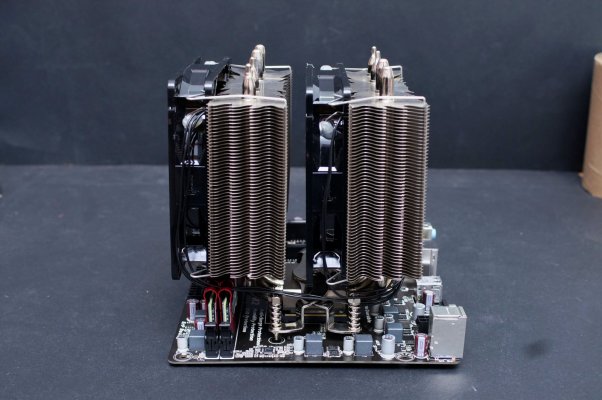
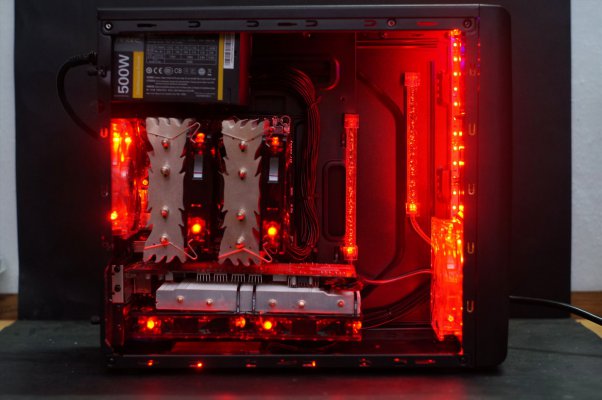
MSI core froze L(from old 3700x) to Noctua nh-D15s(for 5800x). CPU was reaching max 4.1GHz @90c with MSI. Now it’s touching 4.35GHz with stock @90c. Setting voltage curve to -10 is pushing it even further approx. 4.5GHz(https://valid.x86.fr/8dqn79). IMO I would most probably reach 4.7GHz during winters or 4.5GHz on all stock settings.
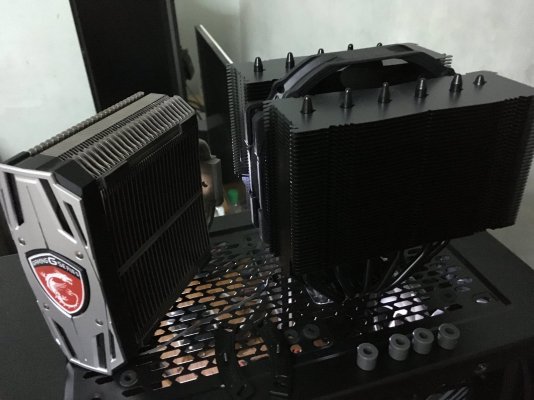
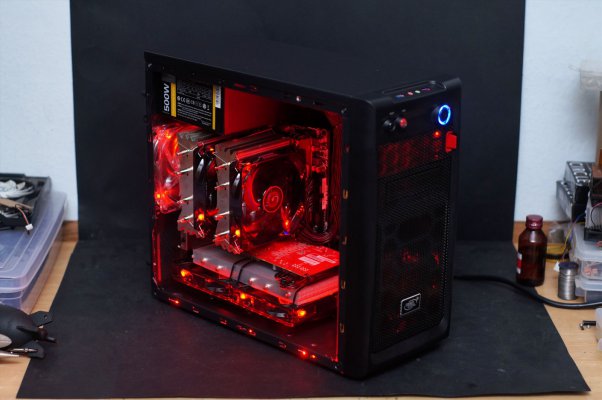
Case: Corsair obsidian 350D with barely 5mm clearance left between the side panel and the cooler.
Case: Corsair obsidian 350D with barely 5mm clearance left between the side panel and the cooler.
Attachments
-
 E05ED7E2-7775-46E0-9912-7C8A247DD3B7.jpeg167.6 KB · Views: 222
 -
 F0659914-C435-4446-B40C-8B0EDEC632BB.jpeg299.3 KB · Views: 216
 -
 07CEB5BA-824E-46F7-9CEA-5C6C3C3885B6.jpeg273.9 KB · Views: 224
 -
 0642810B-298D-43ED-B353-1FDC79A5DF0F.jpeg338.5 KB · Views: 212
 -
 D1B688D1-D7B7-4A12-9FC5-4E8D88396632.jpeg275.8 KB · Views: 216
 -
 67103A7B-1065-40CE-9F85-0CF01695F137.jpeg332.6 KB · Views: 218
Mostly 72C/73C under load, need to test further. If the ambient is 22C/23C it can be 70C or less.Hey @roofrider, good job there of cleaning and attaching those fans. Btw what are the temps after?
Last edited:
MSI core froze L(from old 3700x) to Noctua nh-D15s(for 5800x). CPU was reaching max 4.1GHz @90c with MSI. Now it’s touching 4.35GHz with stock @90c. Setting voltage curve to -10 is pushing it even further approx. 4.5GHz(https://valid.x86.fr/8dqn79). IMO I would most probably reach 4.7GHz during winters or 4.5GHz on all stock settings.
Case: Corsair obsidian 350D with barely 5mm clearance left between the side panel and the cooler.
Nice one. I couldn't find Chromax D15s earlier. How good is iFixit, overpriced or does the quality make it last longer? Also where did you get the Chromax cover from? It's interesting that is fits with the cover on, which increases height by 5mm while Corsair only mentions 160mm clearance. Good it worked out for you!
nitin_g3
Herald
Got the stuff delivered in 50 days from US, many thanks to rahul for providing this service.
HyperX alloy origins core tkl red hyperx switches and hyperx pudding keycaps in white:

Huanuo single monitor mount, large generic gaming mouse pad with world map, kvm switch and 5m led strip.

Will be posting pics of setup after I've installed all these.
HyperX alloy origins core tkl red hyperx switches and hyperx pudding keycaps in white:
Huanuo single monitor mount, large generic gaming mouse pad with world map, kvm switch and 5m led strip.
Will be posting pics of setup after I've installed all these.
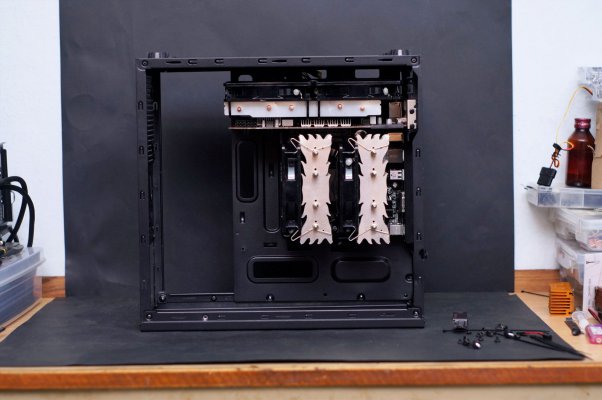
If possible get that 6/8 pin from top of the chassis so that it does not pull the gpu further or from the hole on the top right of the pic. . Good work!Wanted the cables to be more tighter/cleaner, but toward the end I was more bothered about clearance at the back since I put all the wires/connectors there. After installing I noticed there's enough clearance. Need to figure out a way to ziptie the right extreme as well.
Last edited:
I found the cooler on vedantcomputers.com. At first I thought it was an imported cooler. But it has Acro engineering sticker. I couldn’t find the cover in India. So I ordered it via newegg.com directly sold by Noctua Taiwan. Newegg is listed on Noctua.com along with vedant, primeabgb ect. But then it cost me almost double due to ship, tax and import fee. IMO 160mm is the max. safe margin. But fortunately it has approx. 5-8mm more(danger zone) beyond that.Nice one. I couldn't find Chromax D15s earlier. How good is iFixit, overpriced or does the quality make it last longer? Also where did you get the Chromax cover from? It's interesting that is fits with the cover on, which increases height by 5mm while Corsair only mentions 160mm clearance. Good it worked out for you!
 Long L shape screw driver included with the cooler was the best thing I ever. I have not tried any other tool set. But ifixt pro kit is equipped with very useful tools. I’m quite happy with it. My friend from US brought it with him. So i didn’t cost me that much. It was on sale too(pre-covid).
Last edited:
Hope posting this link isn't a punishable offence but too lazy to recreate here...
See https://broadbandforum.co/threads/microscan-aka-vovinet-ftth-fiber.210195/post-1539141
See https://broadbandforum.co/threads/microscan-aka-vovinet-ftth-fiber.210195/post-1539141
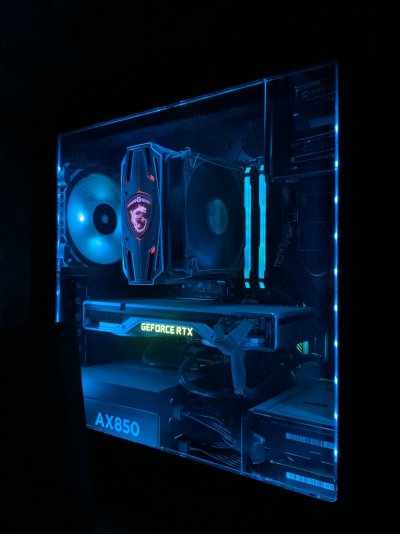
Did some rework.If possible get that 6/8 pin from top of the chassis so that it does not pull the gpu further or from the hole on the top right of the pic. . Good work!
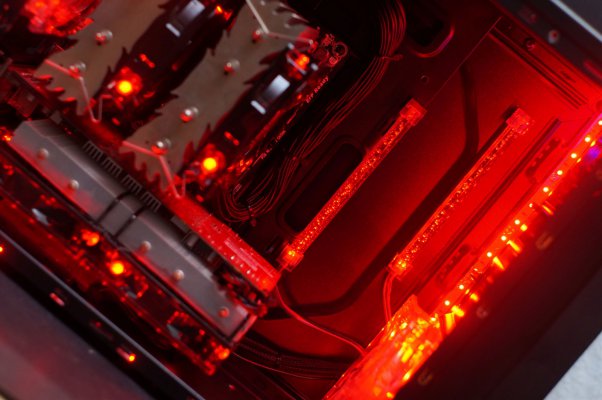
Cleaned up the fan wires with some double sided tape and got it off the HS.
These cables with capacitors in them are a pain to deal with, if anyone wants easy cable management don't get this kind.
After almost going back to PCIE cable at the bottom since I didn't like how it looked, managed to make it half decent.
Hope it's not stressing the connectors. There's not much GPU sag actually, the HS surface isn't completely flat. There is slight bump on the right edge so the 2nd fan is a bit uneven. But having the cable at the top does seem to help a bit!
Oh, and zip-tied the right corner of the fan too, so it's all stable now.
I'm tired of screws being stripped by the normal generic ones, will get a good quality set one day.Long L shape screw driver included with the cooler was the best thing I ever. I have not tried any other tool set. But ifixt pro kit is equipped with very useful tools. I’m quite happy with it. My friend from US brought it with him. So i didn’t cost me that much. It was on sale too(pre-covid).
Last edited:
rsaeon
Innovator
I like how so many of us think alike! For your viewing pleasure, attached is a 40-image excerpt (the forum limit for images allowed in a post) of a 70-image build log from 2015 for a secondary gaming rig:
Attachments
-
 gaming_rig-15.jpg249.4 KB · Views: 205
 -
 gaming_rig-16.jpg213.2 KB · Views: 211
 -
 gaming_rig-17.jpg311.7 KB · Views: 210
 -
 gaming_rig-18.jpg226 KB · Views: 223
 -
 gaming_rig-20.jpg257 KB · Views: 222
 -
 gaming_rig-21.jpg226.1 KB · Views: 199
 -
 gaming_rig-22.jpg295.3 KB · Views: 200
 -
 gaming_rig-23.jpg330.5 KB · Views: 199
 -
 gaming_rig-24.jpg258.1 KB · Views: 206
 -
 gaming_rig-25.jpg191.9 KB · Views: 196
 -
 gaming_rig-26.jpg225.6 KB · Views: 209
 -
 gaming_rig-27.jpg256.5 KB · Views: 201
 -
 gaming_rig-28.jpg246.6 KB · Views: 208
 -
 gaming_rig-29.jpg194.8 KB · Views: 202
 -
 gaming_rig-32.jpg195.1 KB · Views: 216
 -
 gaming_rig-38.jpg205 KB · Views: 195
 -
 gaming_rig-39.jpg206.6 KB · Views: 200
 -
 gaming_rig-40.jpg199.4 KB · Views: 203
 -
 gaming_rig-41.jpg158.3 KB · Views: 191
 -
 gaming_rig-43.jpg227.5 KB · Views: 200
 -
 gaming_rig-44.jpg276.1 KB · Views: 206
 -
 gaming_rig-45.jpg220.8 KB · Views: 194
 -
 gaming_rig-46.jpg302.7 KB · Views: 188
 -
 gaming_rig-47.jpg367.8 KB · Views: 192
 -
 gaming_rig-48.jpg270.2 KB · Views: 202
 -
 gaming_rig-52.jpg169.1 KB · Views: 194
 -
 gaming_rig-53.jpg157.8 KB · Views: 183
 -
 gaming_rig-55.jpg277.1 KB · Views: 196
 -
 gaming_rig-56.jpg143.8 KB · Views: 202
 -
 gaming_rig-57.jpg173.7 KB · Views: 198
 -
 gaming_rig-58.jpg192.9 KB · Views: 199
 -
 gaming_rig-59.jpg196.1 KB · Views: 182
 -
 gaming_rig-60.jpg145 KB · Views: 195
 -
 gaming_rig-61.jpg172.3 KB · Views: 186
 -
 gaming_rig-62.jpg174.3 KB · Views: 174
 -
 gaming_rig-63.jpg178 KB · Views: 191
 -
 gaming_rig-64.jpg120.5 KB · Views: 192
 -
 gaming_rig-65.jpg167.2 KB · Views: 177
 -
 gaming_rig-66.jpg199.5 KB · Views: 193
 -
 gaming_rig-70.jpg197.7 KB · Views: 190
Synth-Pop
Herald
This final setup is amazing. I hope it's cooling as expected. In general GPU stock fans work at higher rpms and these Arctic fans can't go beyond 1800 rpm? So keep a check at heavy loads. Bigger 120mm size may probably compensate for the slow rpm.Did some rework.
Cleaned up the fan wires with some double sided tape and got it off the HS.
View attachment 112174
These cables with capacitors in them are a pain to deal with, if anyone wants easy cable management don't get this kind.
After almost going back to PCIE cable at the bottom since I didn't like how it looked, managed to make it half decent.
View attachment 112175
View attachment 112176
Hope it's not stressing the connectors. There's not much GPU sag actually, the HS surface isn't completely flat. There is slight bump on the right edge so the 2nd fan is a bit uneven. But having the cable at the top does seem to help a bit!
Oh, and zip-tied the right corner of the fan too, so it's all stable now.
I'm tired of screws being stripped by the normal generic ones, will get a good quality set one day.
oof this build deserves a threaad of its own!I like how so many of us think alike! For your viewing pleasure, attached is a 40-image excerpt (the forum limit for images allowed in a post) of a 70-image build log from 2015 for a secondary gaming rig:
Yes! Clear pics. One of the best I have seen!oof this build deserves a threaad of its own!
nitin_g3
Herald
I believe lot of credit goes to photography skill too. Very nice build and very well shot.Yes! Clear pics. One of the best I have seen!
For some reason I thought these were 2000 rpm but yeah, 1800 rpm. And I've not seen it touch 1700 rpm yet. I've also put a minor undervolt on the card now so no issues with temps at all, might even make the fan curve less aggressive once I get the undervolt down. The best part is these fans draw .08A each, while the stock GPU fans are .4A, I can connect 10 of these fans to the GPU fan header and it'll be fine.I hope it's cooling as expected. In general GPU stock fans work at higher rpms and these Arctic fans can't go beyond 1800 rpm? So keep a check at heavy loads. Bigger 120mm size may probably compensate for the slow rpm.
On topic, quite literally every photo @rsaeon posts in this forum is a notch above. Even if it's a random pic to help others or pics in his sale threads. I sometimes wonder if he does this as a profession
