
HSGQ/ ODI SFP GPON STICK
- Thread starter rsaeon
- Start date
You are using an out of date browser. It may not display this or other websites correctly.
You should upgrade or use an alternative browser.
You should upgrade or use an alternative browser.

prince11592
Apprentice
How to Configure an HSGQ ODI / DFP-34X-2C2 GPON ONU SFP Module with Airtel Fiber


Step 4: Search VLAN for your area
1. Telnet to your sfp using cmd or terminal
2. Run this command ''' omcicli mib get 84 '''
3.You will generally get 2 VLAN one is internet other one is for Voice try both and see which one works for you.
4. Airtel uses 100 as vlan all over India[99% area] for internet but those areas having Tejas & ALCL OLTs VLAN changes
5. As seen in screenshot below VLAN is 100 in my case put this VLAN either in sfp itself or in your router .


Someone has posted a video regarding this on Youtube as well
Step 1: Retrieve GPON Serial Number from Airtel Router
- Check the back of your Airtel Fiber Router
- Locate and copy the GPON S/N.
Step 2: Access the SFP Module GUI
- Open a web browser and go to http://192.168.1.1. ( default login credentials are "admin" as the username and "admin" as the password )
- Navigate to Settings.
- In the GPON SN field, enter the GPON serial number you copied from the Airtel router.
- Click Apply Changes.
Step 3: Configure VLAN Settings
- Go to VLAN Settings.
- Select Manual.
- Choose Transparent Mode or you can also set vlan here as well.
- Click Apply Changes.
Step 4: Search VLAN for your area
1. Telnet to your sfp using cmd or terminal
2. Run this command ''' omcicli mib get 84 '''
3.You will generally get 2 VLAN one is internet other one is for Voice try both and see which one works for you.
4. Airtel uses 100 as vlan all over India[99% area] for internet but those areas having Tejas & ALCL OLTs VLAN changes
5. As seen in screenshot below VLAN is 100 in my case put this VLAN either in sfp itself or in your router .
Step 5: Connect the Fiber Patch Cord
- Wait for about 2 minutes to allow the connection to stabilize.
Step 6: Configure Internet Settings on your router [UDM Pro here] to Access Internet
- Open the UDM Pro Portal.
- Navigate to Settings > Internet > Primary (WAN1) > IPv4 Configuration.
- Enter VLAN ID as 100.
- Choose one of the following options based on your Airtel connection type:
- Static IP): Enter the IP Address, Subnet Mask, and Gateway provided by the Airtel team.
- PPPoE : Select PPPoE and enter your username and password provided by Airtel.
Enjoy!!
Your Airtel Fiber connection should now be successfully configured through the GPON ONU SFP module on your UDM Pro. If you face any issues, try rebooting your UDM Pro and SFP module.Someone has posted a video regarding this on Youtube as well
Last edited:
You should create a separate thread in Tutorials section & put it there for better visibility which will help more users. Also, if possible, post similar tutorial for bsnl & excitel which would be also helpful for many users.How to Configure an HSGQ ODI / DFP-34X-2C2 GPON ONU SFP Module with Airtel Fiber
jitender57
Apprentice
How to Configure an HSGQ ODI DFP-34X-2C2 GPON ONU SFP Module with UDM Pro and Access its GUI
Step 1: Connect the SFP Module to UDM Pro
To begin, insert the SFP module into Port 10 of your UDM Pro. Ensure that the module is firmly seated to establish a proper connection.Step 2: Assign a Static IP to the SFP Module Port
To configure the SFP module, assign a static IP address to Port 10 on the UDM Pro Console:- Log in to the UniFi Network Controller.
- Navigate to Settings > Internet > Primary WAN1.
- Scroll down and check for IPv4 Configuration.
- Configure the following static IP settings:
- IP Address: 192.168.1.2
- Subnet Mask: 255.255.255.0
- Gateway: 192.168.1.1
- Apply the settings and wait for the changes to take effect.


Step 3: Configure a Policy-Based Route
To ensure proper communication with the SFP module’s GUI, you need to create a Policy-Based Route:- Navigate to Settings > Traffic Management > Policy-Based Routes.
- Click Create New Rule.
- Configure the rule as follows:
- Name: Access SFP Module GUI
- What to Route?: All Traffic
- Source: Select your device from the list for which you want to route all traffic through WAN1.
- Save the rule and wait for approximately 1 minute for the changes to propagate.


Step 4: Connect Your System to the UDM Pro
To access the SFP module’s GUI:- Plug an Ethernet cable from any available port on the UDM Pro into your system.
- Wait for DHCP to assign an IP address to your system from the default DHCP pool of your network.
Step 5: Access the SFP Module’s GUI
Once the Policy-Based Route is applied:- Open a web browser.
- Enter 192.168.1.1 in the address bar.
- You should now see the SFP Module’s GUI.
- Log in and configure the necessary settings according to your ISP requirements.

jitender57
Apprentice
Bypassing JF Router with VSOL V2802RH ONU
JF provides high-speed internet services but locks users into their proprietary routers. However, by using a VSOL V2802RH ONU (Optical Network Unit), you can bypass the JF router and directly connect your own router. This guide will take you through the step-by-step process.
") to create the GPON Serial Number.
to create the GPON Serial Number.


Press Enter

Press Enter
Step 4: Configure VLAN Settings
Now, configure the VLAN settings on the VSOL ONU:


Step 5: Configure Your Router (Example: UDM Pro)
If you are using a third-party router, such as UDM Pro, follow these steps:


Enjoy your unrestricted internet setup!
JF provides high-speed internet services but locks users into their proprietary routers. However, by using a VSOL V2802RH ONU (Optical Network Unit), you can bypass the JF router and directly connect your own router. This guide will take you through the step-by-step process.
Step 1: Router Brand Name + Obtain the JF-Router’s WAN MAC Address
JF-Router have a 4-character brand name that must be combined with the last 8 characters of your MAC address (excluding colons to create the GPON Serial Number.- Identify the 4-character brand name from the router. (Example: SCOM)
- Note: In 99% of cases, the JF-Router brand name is SERCOMM.
- Extract the last 8 characters of your MAC address (ignoring colons). For example, if your MAC address is 5a:9f:20:5F:21:18, remove the colons and select only the last 8 characters: 205F2118.
- Construct the GPON Serial Number (SN) by appending these values.
- Example GPON SN: SCOM205F2118
- Ensure all letters are capitalized.
Step 2: Login to Your VSOL ONU
To configure the VSOL ONU, follow these steps:Enable Telnet
- Access the ONU web interface by entering 192.168.1.1 in your browser.
- Navigate to Advanced > Other from the left panel.
- Locate the Telnet option and enable it.
Adjust Firewall Settings (If Required)
If you face issues accessing Telnet, ensure the firewall is set to low:- Go to Firewall > ACL in the left panel.
- Change the Firewall Level to Low.
Step 3: Configure GPON Serial Number via Telnet
Once Telnet is enabled, configure the GPON SN using the following method:- Download Putty from putty.org.
- Open Putty and enter your ONU IP (192.168.1.1).
- Login using:
- Username: admin
- Password: (use default or previously set password)
- Execute the following command to set the GPON Serial Number:
flash set GPON_SN SCOM205F2118
Press Enter
- Restart the ONU.
Press Enter
Step 4: Configure VLAN Settings
Now, configure the VLAN settings on the VSOL ONU:
- Go to Setup > WAN in the ONU interface.
- Locate the VLAN section and make the following changes:
- VLAN ID: Set to 1015
- VLAN Cos: Set to 0 (Zero)
- Leave all other settings as default.
- Click Add to save the settings.
Step 5: Configure Your Router (Example: UDM Pro)
If you are using a third-party router, such as UDM Pro, follow these steps:
- Login to your router.
- Navigate to Settings > Internet.
- Select the WAN port you want to use (Primary or Secondary).
- Example: If using WAN 2, click on WAN2.
- Find the MAC Address Clone option and enter the WAN MAC address obtained from the JF-Router.
Enjoy your unrestricted internet setup!
bssunilreddy
Luminary
Can you configure NETLINK GPON ONT 2GE+1POTS+ac WIFI (HG323DAC) with BSNL FTTH for Static IP purpose or Post a tutorial. Thanks.How to Configure an HSGQ ODI / DFP-34X-2C2 GPON ONU SFP Module with Airtel Fiber
Divaksh
Contributor
Will Excitel require the same process to be followed, or will there be any additional steps or requirements that need to be addressed? Currently, I have the stick in hand but do not yet have the SFP router available. I am still waiting for the Hex S 2025 Refresh model to arrive here in India before proceeding further.
As far as I know, it is not possible to configure Excitel router in bridge mode so I seriously doubt this will work.Will Excitel require the same process to be followed, or will there be any additional steps or requirements that need to be addressed? Currently, I have the stick in hand but do not yet have the SFP router available. I am still waiting for the Hex S 2025 Refresh model to arrive here in India before proceeding further.
@d5aqoep
Divaksh
Contributor
GPON.@Divaksh Excitel uses GPON or EPON?
The process is more or less same for GPON. Maybe a combination of both Airtel and Jio methods.
This is not true. It can be done but it involves additional expense of 5 to 10k depending upon your use case.As far as I know, it is not possible to configure Excitel router in bridge mode so I seriously doubt this will work.
@d5aqoep
Can you explain in more details or are you talking about getting some business/non-retail plan?This is not true. It can be done but it involves additional expense of 5 to 10k depending upon your use case.
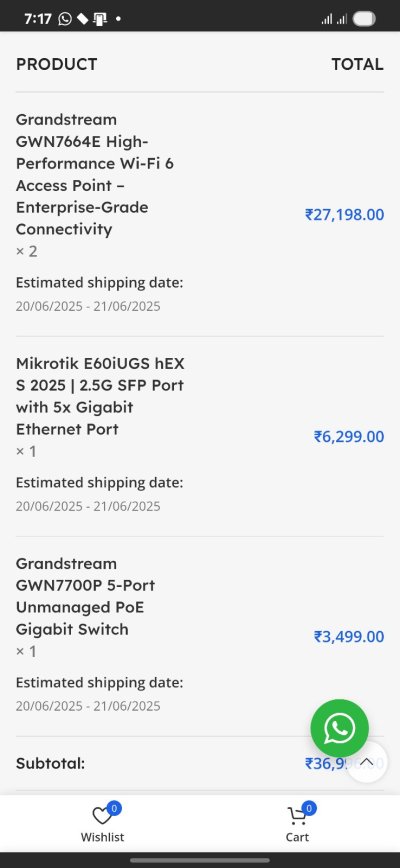
it is now available. https://fgtechstore.com/product/mikrotik-e60iugs/Will Excitel require the same process to be followed, or will there be any additional steps or requirements that need to be addressed? Currently, I have the stick in hand but do not yet have the SFP router available. I am still waiting for the Hex S 2025 Refresh model to arrive here in India before proceeding further.
Divaksh
Contributor
I already ordered it few days back, today it got packed. Will have to sell my few months old Mesh system set of 6 Mercusys Halo H80X AX3000 WIFI once they arrive.
Attachments
Last edited: