Project Evo 3 - CM 840 ATCS/Bulldozer Build Log Updated 6th September

Status
Not open for further replies.
Thanks guys..

@m-jeri, well the whole idea of sleeving is to show the cables, not to hide them. I had done a mod a long time ago of cables which are difficult to see...after that got into sleeving. ANyway that is not the final cable management and it will be a whole lot neater.

@ Rakesh - Thanks man...I might just take you up on that offer you know....;)
 
Well, I started work on the PSU cover yesterday. Got some black acrylic lying around from my previous project. SO did some cutting and heres where we ended up:

tuGAT.jpg


ZFuKu.jpg


The all powerful B&D RTX.....it cuts acrylic at low speeds very very easily...

v23mf.jpg


After some filing and sanding on the sides:

dGCH2.jpg


And installed:

5GU6W.jpg


I may spend some more time to get the edges a bit better...

The whole idea of doing this is to cover up the PSU, but at the same time I want things to be easily accessible as and when required. I am still thinking of some more ideas here...

And just in case I didn't post a pic of the 6 pins before:

sSXHS.jpg


Unluckily I take most of my pics at night, so some of the pics kind of suck...
 
UPDATE TIME:

Got my Lapmtron FC5V2...quite a solid piece of equipment:

IIWi3.jpg


First up, sleeve the power cable:

ihvYX.jpg


mnKM6.jpg


Then I needed to make some 2-1 cables for the fans...well I had some ready, they just looked like crap, so redid the sleeving. AFter redoing I realised that the sleeving is a bit short as the number of wires going to the single plug is 6 and that kind of makes it thick, reducing the length of the sleeve.

VJvAo.jpg


The second one came out better, but I dont have a pic....anyway looks much better than the original. I also cut of the blue wire, as thats for PWM and for some reason would not allow the fan connected to work. Cutting that wire made it all right.

The one on top is the redone one BTW.

And installed:

zwPiM.jpg


Looks nice and the color is perfect.

And some general shots to finish the update:

XlQ3N.jpg


Lots of work left to be done...specially cable management..

And another pic, clearer one of the PSU cover.

nVMOV.jpg
 
Wow the fan controller goes perfectly with the cabinet ...

PS - Where did you get that dremel from? And how much did it cost you?
 
How's viewing angle on that Lamptron? Orange looks so cool.

Scythe's white is boring and viewing angle is so terrible :)
 
Man, just awesome! Sleeving even the fan cables! Extremely good, clean setup. You must write a guide/tutorial afterwards.
 
RD274 said:
Wow the fan controller goes perfectly with the cabinet ...

PS - Where did you get that dremel from? And how much did it cost you?

Thanks man. I got the dremel thru 20north some time ago...cost me about 2.3k or so. I had to get a converter to run it though, as I didnt realise it was 110V.
sajitsm said:
How's viewing angle on that Lamptron? Orange looks so cool.

Scythe's white is boring and viewing angle is so terrible :)

Yup, the viewing angles are great and way better than being stuck with blue or white or something. Choice is always nice.
vivek.krishnan said:
Man, just awesome! Sleeving even the fan cables! Extremely good, clean setup. You must write a guide/tutorial afterwards.

Thanks man...I did put up a sleeving tutorial on the other forum/
 
Got it locally, there is a dealer on the other forum who had one piece I think.

BTW, here is what we have done with the rear. Removed all the ugly silver screws and replaced them with nice matt black 6/32 screws throughout, including the PSU:

tlPLH.jpg


zKjOT.jpg


UTOdY.jpg


SmqwT.jpg


And cleaned up the XSPC screws as well, changed to the same screws as above.

DzdcJ.jpg


The XSPC front panel will be redone and changed in due course.....some cutting and cleaning required once I get a new side panel done.
 
Thanks 6 pack....

Sad news....had an accident today, a bus rammed me from behind as I had to brake quickly to avoid a couple on a motor cycle who in turn had to break suddenly because some idiot without a helmet decided to cut across the road at break neck speed....I seem to have a bit of pain on my neck, but otherwise ok.

My poor car has been damaged on the rear and side because of this idiot. Luckily I was in the city and must have been travelling at around 30-40 km/h when this happened. And luckily the couple on the motor cycle in front did not get hit....

I then had to spend more than an hour at the local police station to get a complaint filed for insurance....just left the car off at the garage...no car for a few days now.

7ZZbG.jpg


Broke the rear tail light, rear bumper is a goner...also the rear bottom panel and rear side panel and door panel have got hit....

AtwJy.jpg
 
No pain anymore...so I can continue with the mod...but a pain on the wallet after hearing the estimate...am still going in the hole after insurance for around 15-17k....well thats how it rolls...

--- Updated Post - Automerged ---

Well, going around another forum and found this....I wonder what happens to some parents when they have to name their kids.....:

HPrsK.jpg


I hope that got your spirits up....anyway some more pics of updated stuff..

First, started to work on managing the cables. This is an older cabby, so none of the rubber mouldings to hide wires for us. SO need to work with P clips..this is the bottom rad fans, chipping in with some extra work.

tjmAt.jpg


Just posting this one up, cause there was a nice smoke effect...from my smoking: (got to quit man...)

txIAA.jpg


gTOzV.jpg


Redid the 24 pin clips, so that it looks a little mroe uniform:

35pxM.jpg


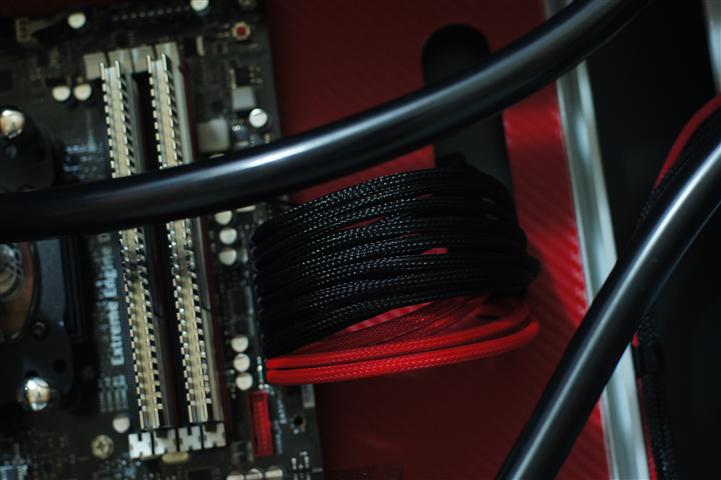
Only wires left to sleeve and a look at the carbon finish:

kgcy3.jpg


General shot:

brU2o.jpg


The fittings will not sit on the water block on the rear side as it fouls with the card...so had to get a small extender. ALso notice, the card edges are now black...

pr89P.jpg


USB cable sleeving:

d9heY.jpg


The screws will be changed to others soon.

Remember the last time I posted a pic of the 6 Pins...removed the writing on the connectors now:

MHnMg.jpg


Another look at the GPU block fittings setup:

xxQdt.jpg


Thats around 34 USD in fittings right there...expensive hobby

My favourite Ram modules...maybe changed to something else soon.

ROrVC.jpg


V7bqw.jpg


On the right side you can see the single 4 Pin molex with the P clips...

CPU Block...I wish EK made a better looking mount for the Supreme, specifically for AMD....

sngmt.jpg


Drain Port and cable management...much cleaner now:

X1FK4.jpg


And is it stands:

RNnOq.jpg


Things to be done....

1. Improve PSU cover plate...maybe a logo, lets see

2. Side panel work...still working on a clean design

3. Front panel, XSPC cover

4. 5 1/4" Bay area cover...need some ideas here. There is a screw holding down the aluminium strut here...am puzzled as to how to cover this area and make it cleaner looking.

5. Waiting on new fans...
 
Status
Not open for further replies.