User Guides Teardown and preparation of Polycab's 16A Wi-Fi Smart Plug for Tasmota

polycab_16A-01.jpg

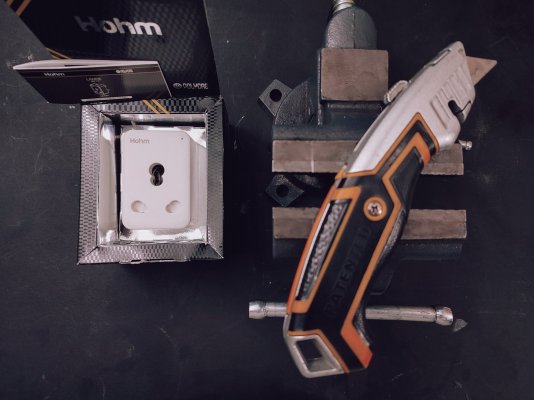
This is a teardown and a guide about preparing a Polycab Hohm Lanre 16A Smart Wi-Fi plug model SLV1910001 for a Tasmota installation.
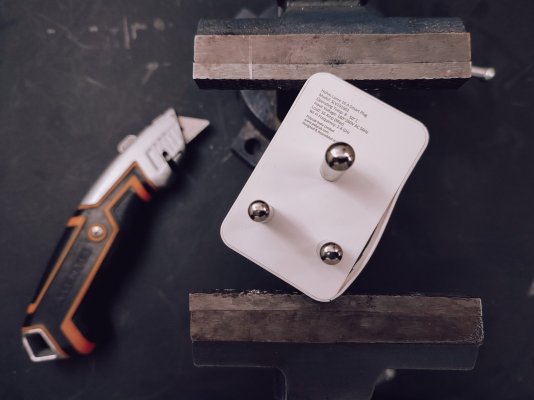
polycab_16A-02.jpg

A heavy vise can be used to clamp down opposing corners, the compression will cause the casing to separate.
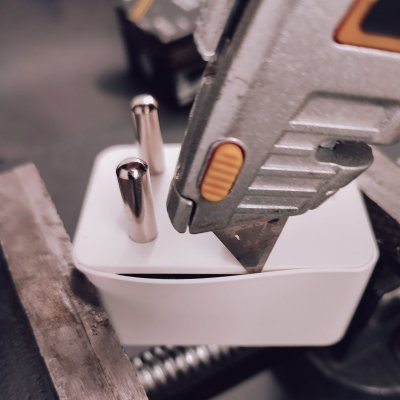
polycab_16A-03.jpg

The tip of a box cutter can then be run around the edges to help separate the casing more.
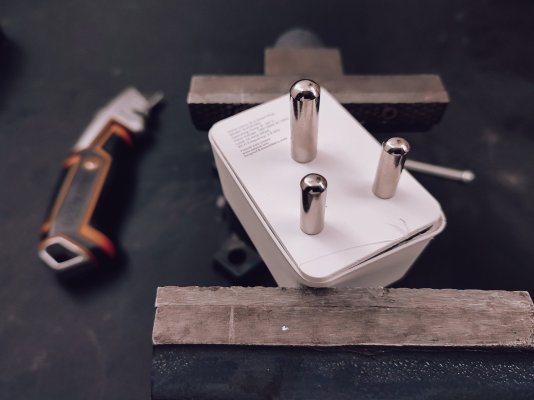
polycab_16A-04.jpg

Further the separation by clamping down the other two opposing corners. Run the box cutter one more time and the bottom of the casing should separate cleanly.
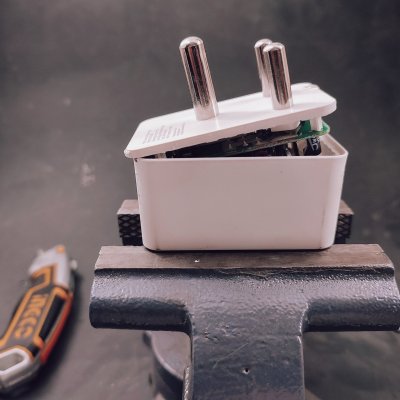
polycab_16A-05.jpg

It takes a considerable amount of force but the bottom edge can be lifted up to separate the casing completely.

This pivoted motion is not advised for the 10A version, that model has an electrolytic capacitor along the bottom edge of the pcb that will almost certainly break away. For that model, pivot along one of longer edges.
polycab_16A-06.jpg

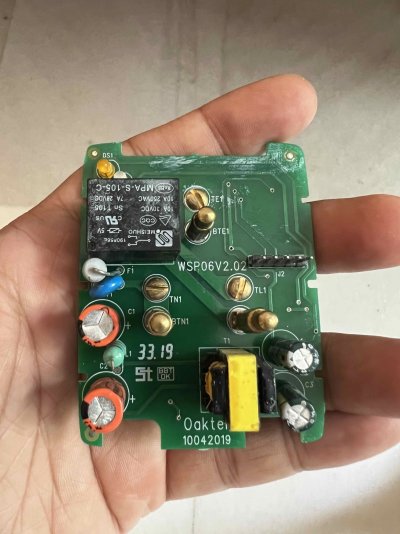
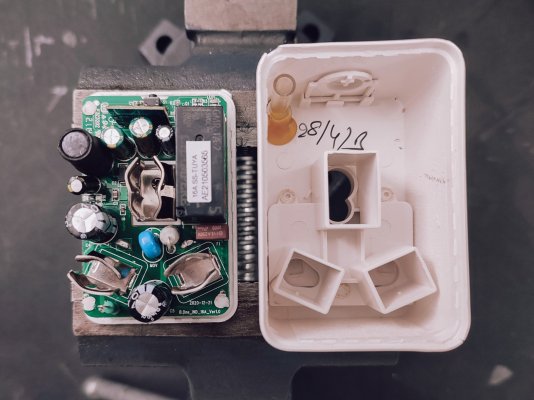
The next sequence of steps is to slice away at the heat-staking and desoldering the two input pins to separate the pcb from the bottom casing.
polycab_16A-07.jpg

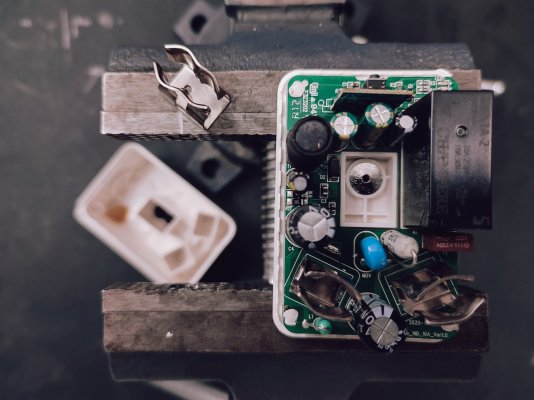
Start with removing the earth pin receptacle which is simply unscrewed. It's very easy to overlook this step when reassembling the plug. Store the screw and receptacle in the larger housing so you remember to reattach it before sealing up the casing.
polycab_16A-08.jpg

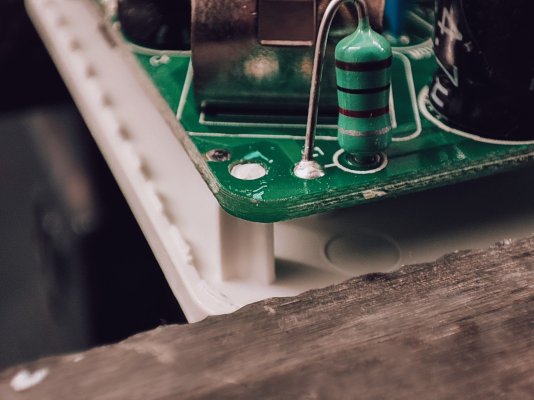
There are four heat-staked supports, each one needs to be cut away cleanly.
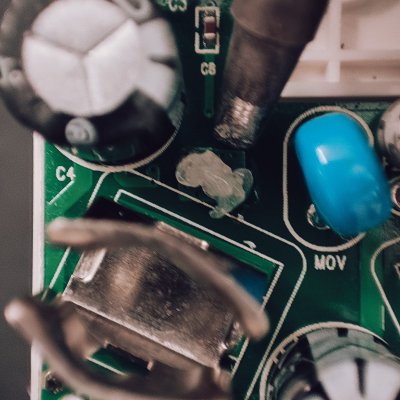
polycab_16A-09.jpg

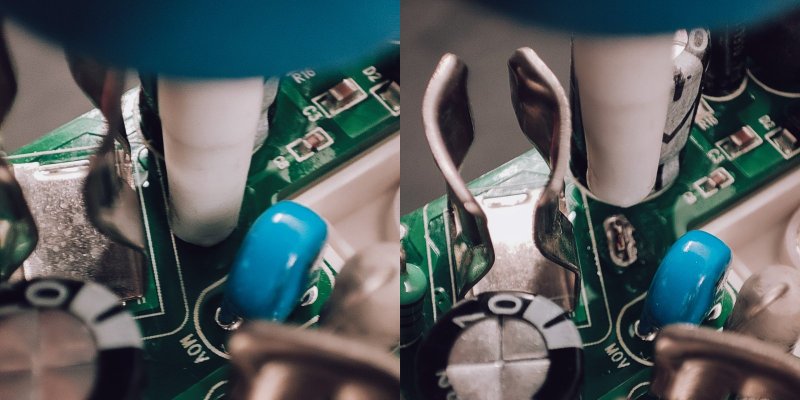
The left pin is the easier one to desolder, so it's a good place to start. A generous blob of flux helps with melting the solder. This is made easier with temperature of the soldering iron set to 350C.
polycab_16A-10.jpg

A desoldering pump (solder sucker) removes most of the solder, you'll need to do a few cycles of melting and pumping.
polycab_16A-11.jpg

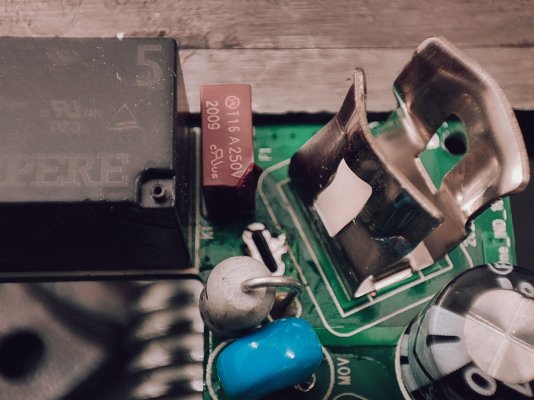
The right pin area is crowded with a few components. Sometimes you can insert the soldering iron straight down, sometimes this ends up melting a nearby component like the fuse here. Bending the pin receptacle gives you a little extra working space.

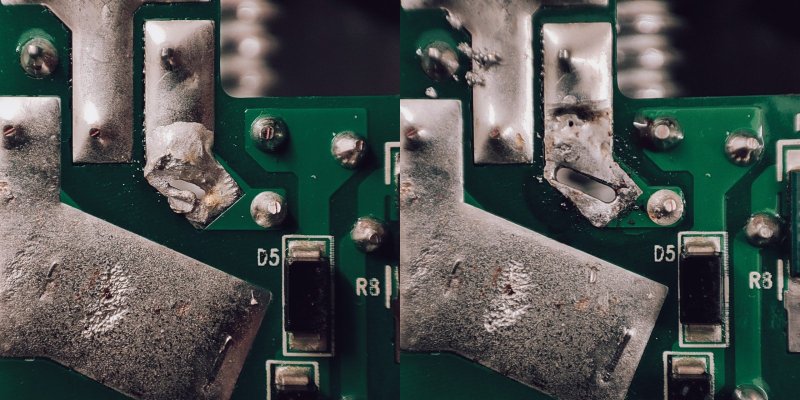
Once the solder is molten, the pcb can be wriggled free. A heavy vise makes for a good third hand in this situation.
polycab_16A-12.jpg

With the pcb free, it's a good time to go in clean up the holes with the desoldering pump to make reassembly easier.
polycab_16A-13.jpg

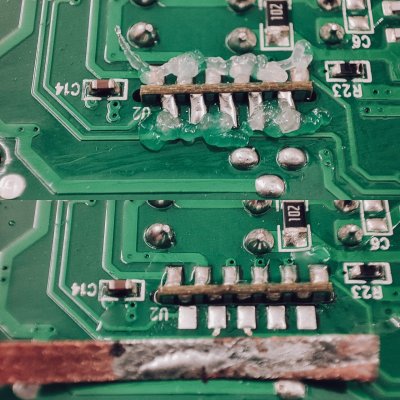
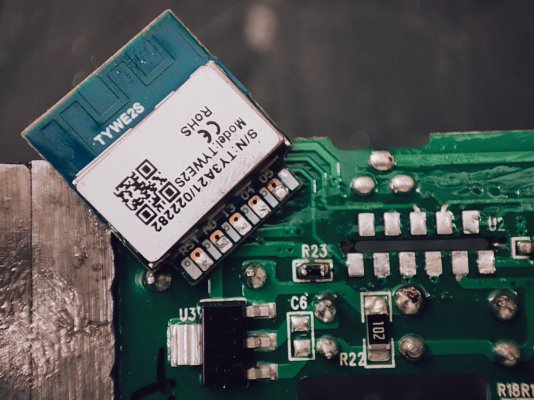
Next up is removing the wifi module. For this, a generous amount of flux and a desoldering wick is essential. Soldering temperature should be lowered to 260C to minimize damage to the pads.
polycab_16A-14.jpg

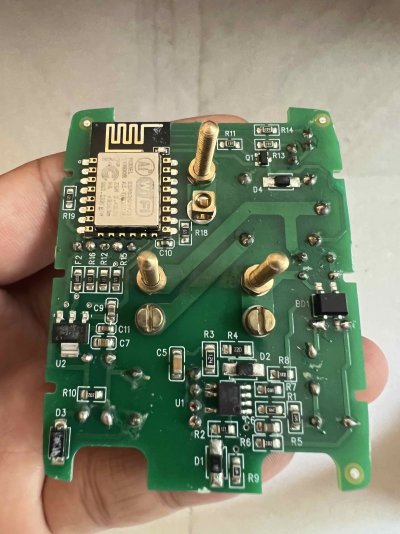
This smart plug uses the Tuya TYWE2S module, which can be directly flashed with Tasmota using an usb serial programmer.
polycab_16A-15.jpg

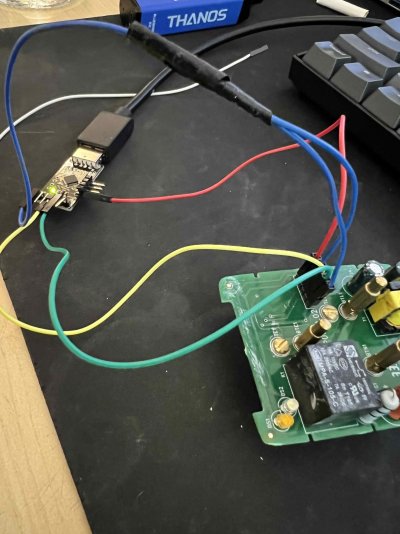
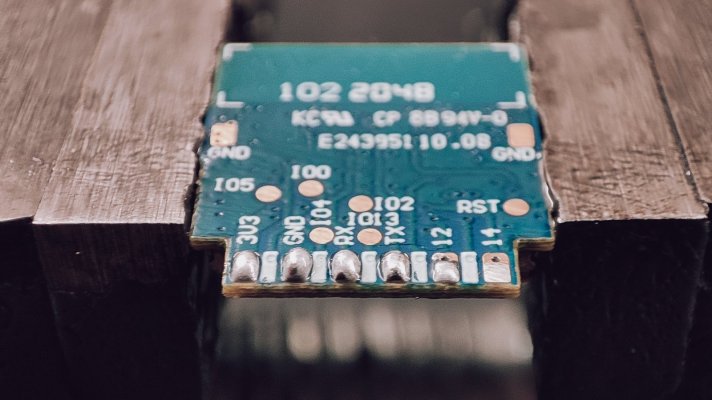
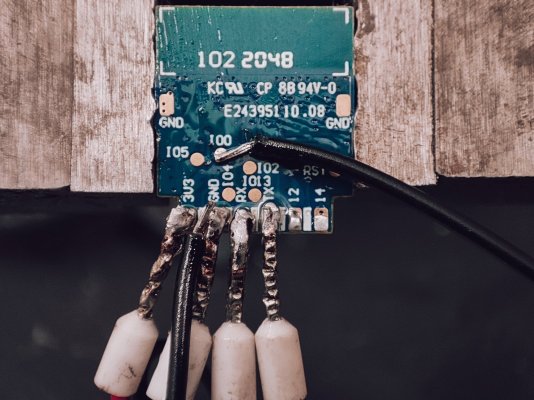
Some kind of programming jig would probably make sense in the longterm but for now we can prep the pads for connecting the programmer with a little excess solder.
polycab_16A-16.jpg

It's not pretty but it works. Flashing is a simple process with Tasmota's web installer. Be sure to erase the device when asked.

Once flashing is complete, disconnect the wire from gpio0 and reconnect the programmer to usb to power up the module. Use a mobile device to connect to the ad-hoc wifi access point created by Tasmota (prefixed with the name tasmota). Your device will then prompt you to sign-in, in actuality you'll be configuring the wifi credentials for the smart plug to connect to your wifi network.
polycab_16A-17.jpg

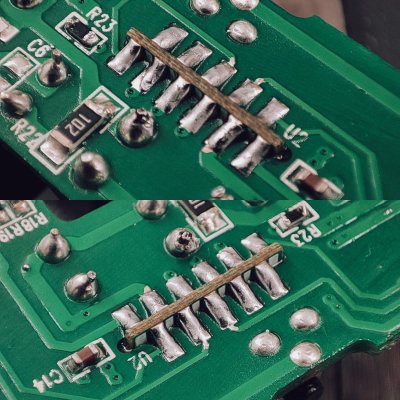
When reinserting and soldering down the module, be certain there are no shorts between adjacent pads. Check for this using a multimeter with its continuity mode.

The plug can be then reassembled for testing without soldering the input pins or sealing the casing. Navigate to the ip address assigned to the plug and paste in the template command from below into the web console and press enter:

template {"NAME":"SLV1910001","GPIO":[0,0,0,32,2720,2656,0,0,2624,576,224,0,0,0],"FLAG":0,"BASE":18}

Navigate to Configuration and then Configure Module and select SLV1910001 (0) which should now be at the top the list and then tap on Save. This should prompt a reboot after which your tasmotized wifi plug is ready to use.

Finish with resoldering the pins, bending back the right pin receptacle, reinstalling the earthing pin receptacle and resealing the casing with your favourite low viscosity adhesive. Flex Kwik works well, allow a few minutes to cure.

The next step now is to calibrate power monitoring.
 
I have a couple of these, and decided not to go this route as I wasn't confident enough to continue using them after the (slightly) destruction procedure. Thanks for showing how it can be done without breaking the case.

Found a couple of smart plugs on tatacliq that are using a WB2S (Beken BK7231) module, can be flashed to OpenBeken (tasmota port for Beken chips, as of now tasmota only supports espressif chips) and are still vulnerable to OTA flash(over the air, without opening them up).

The custom firmware does support the power monitoring chips, and calibration. After calibration, they're within 1% of the Polycab plugs for >10w loads, and slightly more off below 5w. Have been able to forward the data into my influxdb instance with mqtt and home assistant.

Best yet, they cost me 450rs for the 10A ones bought 5 of them, YMMV. https://www.tatacliq.com/zunpulse-1...d-energy-monitoring-white/p-mp000000015863260 .

There's always the chance that they're upgraded to a non vulnerable fw, in that case back to square 1.
 
Great job @rsaeon ! Doesn't look like it was your first time since you managed to keep the outer shell intact. :D Your skills are commendable. Had it been me, the case would have been unusable by the end of the project.

@ze_cook I have been searching the market for hackable smart plugs. I found that both Oakter 6A and 16A can easily be hacked. The only problem with Oakters is the lack of power measuring chip. Otherwise their bodies are screwed on, so they are easy to open and flash. Oakter's product designers even left the serial pins on the boards, so absolutely no need for any kind of soldering or hacking. I have uploaded the working configs here and here.

Even the older Syska WPS001 can be tasmotized using tuya-convert as long as you don't connect them to app first. Syskas are out of stock almost everywhere but Tata Cliq seems to have some stock left.
 
For the uninitiated query , I read about Tasmota but what does it do ? Its like DDWRT of smart plugs
but whats extra achieved out of this ?
There huge list of equipment which can be Tasmotized but you already have Google/Alexa integration so whats the end result here ?
And if some need to buy these plugs which can be Tasmotized which are the preferred models , which doesnt require the OP hard work
 
@rsaeon got skills :sunglasses:

I tried it and screwed it up big time. Then I bought zunpulse plugs(and sonoff stuff) which can be flashed without opening because they are vulnerable.

I didn't have a good soldering iron when I tried this. Later on, I got a iron(with the stand and everything) with a knob for setting temperature. I should try soldering some thing again
 

Attachments

  • image.jpg
    image.jpg
    351.1 KB · Views: 130
Last edited:
Great job @rsaeon ! Doesn't look like it was your first time since you managed to keep the outer shell intact. :D Your skills are commendable. Had it been me, the case would have been unusable by the end of the project.

@ze_cook I have been searching the market for hackable smart plugs. I found that both Oakter 6A and 16A can easily be hacked. The only problem with Oakters is the lack of power measuring chip. Otherwise their bodies are screwed on, so they are easy to open and flash. Oakter's product designers even left the serial pins on the boards, so absolutely no need for any kind of soldering or hacking. I have uploaded the working configs here and here.

Even the older Syska WPS001 can be tasmotized using tuya-convert as long as you don't connect them to app first. Syskas are out of stock almost everywhere but Tata Cliq seems to have some stock left.
Thanks a lot for this. I have 7-8 oakter plugs that I’m struggling to get them to work with HomeKit. Hopefully after flashing Tasmota I’ll be able to get the players to work with homebridge.

I need also need a smart plug with power monitoring chip which is flashable with Tasmota without soldering. Which one do you guys recommend @rahuljawale
@ishanjain28
 
I have a couple of these, and decided not to go this route as I wasn't confident enough to continue using them after the (slightly) destruction procedure. Thanks for showing how it can be done without breaking the case.

Doesn't look like it was your first time since you managed to keep the outer shell intact. :D Your skills are commendable. Had it been me, the case would have been unusable by the end of the project.

It took many, many attempts to get to a point that the casing didn't get mangled during disassembly. I wouldn't have even pursued this but I needed a smart plug that would take the UK plugs and the 10A version of this has that universal socket. Both versions use the same template. I prefer the UK plug for anything with an IEC socket because of the added safety of the built-in fuse.

There huge list of equipment which can be Tasmotized but you already have Google/Alexa integration so whats the end result here ?

For me, the idea is to not rely on any integration or any cloud service — complete control over how and to what the device communicates with.

I tried it and screwed it up big time.

That's how it was in the beginning for me too, I have at least one of these smarts plugs so badly mangled that it needs to run off an external USB charger and can't do any power monitoring. It barely "works" as a wifi on/off switch for a nightlight.
 
And as

If you get something concrete pls post , even i might try out on 1 ZunePulse
how would I go about flashing on the zunpulse 10A? I looked it up but didn't find anything meaningful

tuya-convert seems well documented, I'll try with Syska WP001 first, any tips here @rahuljawale
You need cloudcutter (https://github.com/tuya-cloudcutter/tuya-cloudcutter) and a pc with WiFi running Linux. The entire process is well documented on the repo. Make sure you don't add them to the zunpulse/tuya app, as that can push an OTA.

Again, these devices don't run tasmota, but a tasmota like fw specifically made for the beken series, https://github.com/openshwprojects/OpenBK7231T_App .
 
Last edited:
> You need cloudcutter (https://github.com/tuya-cloudcutter/tuya-cloudcutter) and a pc with WiFi running Linux. The entire process is well documented on the repo. Make sure you don't add them to the zunpulse/tuya app, as that can push an OTA.

Yep, and do this on a VM or on a machine running Ubuntu(with the exact version specified on requirements page). It runs some commands after that and may not work properly if you are not on a supported machine.

Furthermore, During the flashing process It'll ask you for the firmware. It's a BK7231N firmware. Pick the latest version. I don't remember the exact one I used and you may have to try all of them to find the right one. (There are maybe 4-5 firmwares that fit the criteria)

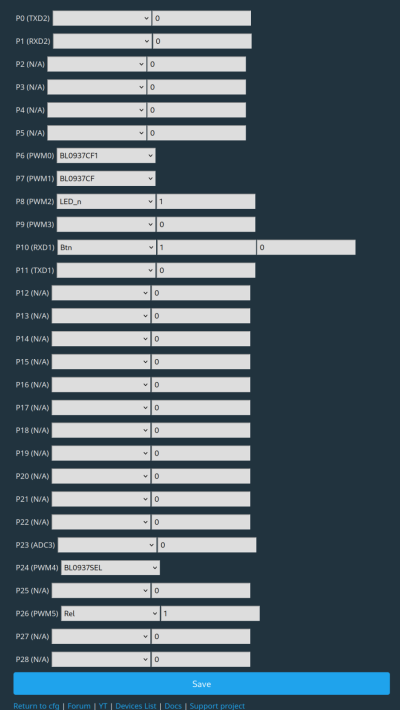
After flashing, You need to setup all the pin configuration. Here is the one I use, I think almost every thing works with this. (The button and the sensors)
 

Attachments

  • zunpulse.10a.openbk.config.png
    zunpulse.10a.openbk.config.png
    122 KB · Views: 123
> You need cloudcutter (https://github.com/tuya-cloudcutter/tuya-cloudcutter) and a pc with WiFi running Linux. The entire process is well documented on the repo. Make sure you don't add them to the zunpulse/tuya app, as that can push an OTA.

Yep, and do this on a VM or on a machine running Ubuntu(with the exact version specified on requirements page). It runs some commands after that and may not work properly if you are not on a supported machine.

Furthermore, During the flashing process It'll ask you for the firmware. It's a BK7231N firmware. Pick the latest version. I don't remember the exact one I used and you may have to try all of them to find the right one. (There are maybe 4-5 firmwares that fit the criteria)

After flashing, You need to setup all the pin configuration. Here is the one I use, I think almost every thing works with this. (The button and the sensors)
Same, I used a ubuntu VM with a USB wifi card passthrough with virtualbox, one of those tp-link wifi adapters, worked fine.
When cloudcutter asks for a device profile, choose generic LSPA7 plug.

You can choose to flash a custom firmware, and cloudcutter already ships with OpenBeken and Esphome. Choose the BK7231N variant of the appropriate firmware.
And for configs, don't need to manually set them one by one, import this cloudcutter template into OpenBeken (after flash, the firmware exposes an app) https://raw.githubusercontent.com/t...r/devices/tuya-generic-lspa9-plug-v1.1.8.json
 
@m0h1t looks like your question was answered by other members. Just that the repo may have an older version of tasmota. Make sure to upgrade to the latest build after flashing with whatever the repo ships with.

@kuduku there are a few reasons to to the Tasmota way. The biggest being, cutting the cords from a Cloud service that can go under any time without a prior notice. The IoT space right now is buzzing with a lot of players, but over the time, most will be out of business leaving the market to select few. At that time you will be left with fully functional yet non-usable hardware. So it is better to cut the cord early and ensure that you have devices don't become obsolete just because the vendor decides to make them obsolete.

Another reason is to be able to control everything through Home Assistant. Most of the smart plug vendors are myopic in their business strategy. They close off their ecosystem in the hopes of keeping their users from moving to competitor's products. With Tasmota I have full control over whatever smart device that I am buying.

Having said that there are a few vendors who like to offer stable integration with third party services. I especially like Philips Wiz series and Shelly. Their devices are well built and they place nice with Home Assistant. I have a few Shellies configured to operate mission critical switches (kitchen, washing machine, dishwasher) and they have been absolute delight to use.
 
I bought a few Sonoff POW320D recently. They all support direct LAN control so I have not tried flashing tasmota on it.
The only down side I see today is, It's voltage reading is off by about ~5V and there is no way to calibrate this on stock firmware.
 
Thanks guys for your feedback.

I’m really liking HomeKit as an IoT aggregator. Voice recognition is pretty decent, and can control directly from my watch. Having an apple TV has the added advantage of controlling everything remotely. Apple shit is expensive but it just works, more often than not. I also love homekit automations, the ability to turn the AC on/off based on room temp; turn on/off the air purifiers based on aqi from the laser egg.

i had to abandon google home because the voice recognition now is so bad that I have to shout everything at least twice for it to understand anything.

I now have 18 smart lights, 2 ACs, a kaiterra PM monitor on HomeKit. Now to get my 6 tplink cameras and 8 oakter plugs onboarded.

——————

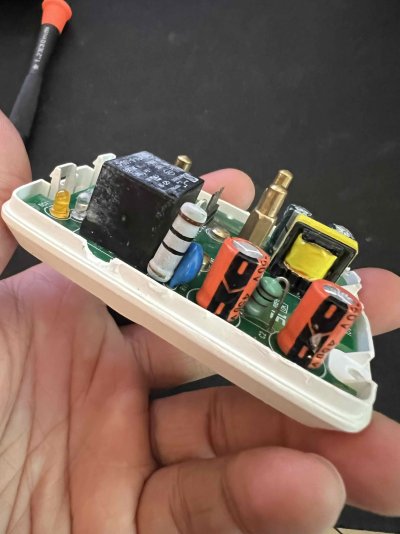
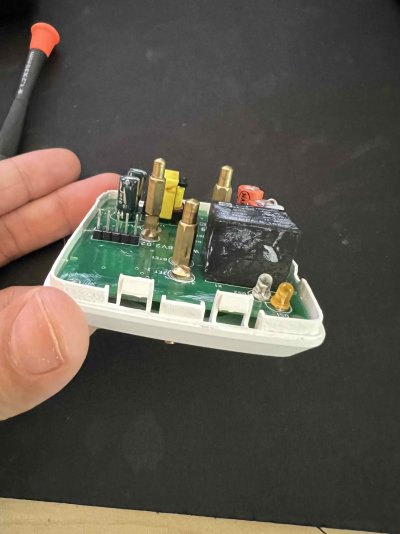
Progress!! Opening the plug was the most difficult part, everything else was a breeze.
 

Attachments

  • IMG_5553.jpeg
    IMG_5553.jpeg
    198.6 KB · Views: 117
  • IMG_5552.jpeg
    IMG_5552.jpeg
    196.3 KB · Views: 108
  • IMG_5551.jpeg
    IMG_5551.jpeg
    245.6 KB · Views: 106
  • IMG_5550.jpeg
    IMG_5550.jpeg
    275.4 KB · Views: 108
  • IMG_5549.jpeg
    IMG_5549.jpeg
    246.3 KB · Views: 100
Last edited:
The LED color status on tasmota oakter config menttioned here is inverted. Use the below for white for Off, Orange for On
{"NAME":"Oakter OakPlug Mini","GPIO":[0,0,0,0,224,0,0,0,544,288,0,0,0,0],"FLAG":0,"BASE":18}

also oakter 10a stock firmware attached, if anyone needs it in future.

dump any esp8266 firmware, follow instructions below
 

Attachments

  • Oakter_10A_OG-FW-Backup.zip
    235.7 KB · Views: 76
Back
Top