Guide Teardown and preparation of Polycab's 16A Wi-Fi Smart Plug for Tasmota

polycab_16A-01.jpg

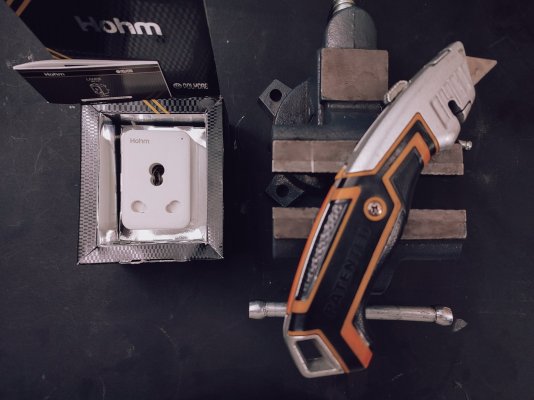
This is a teardown and a guide about preparing a Polycab Hohm Lanre 16A Smart Wi-Fi plug model SLV1910001 for a Tasmota installation.
polycab_16A-02.jpg

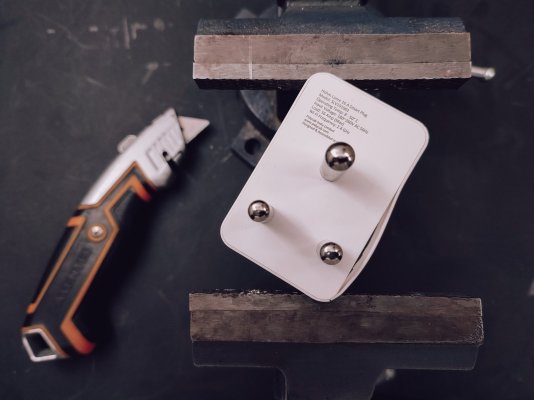
A heavy vise can be used to clamp down opposing corners, the compression will cause the casing to separate.
polycab_16A-03.jpg

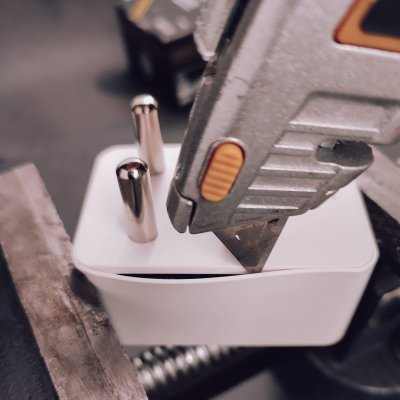
The tip of a box cutter can then be run around the edges to help separate the casing more.
polycab_16A-04.jpg

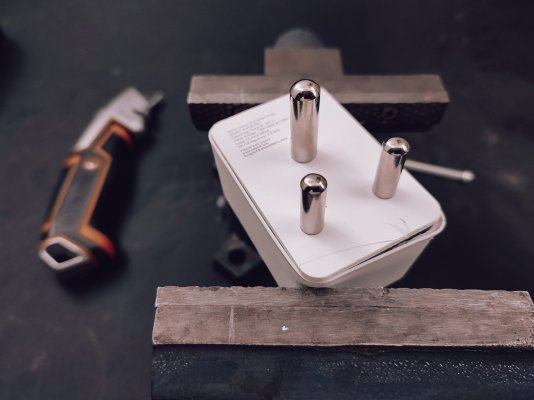
Further the separation by clamping down the other two opposing corners. Run the box cutter one more time and the bottom of the casing should separate cleanly.
polycab_16A-05.jpg

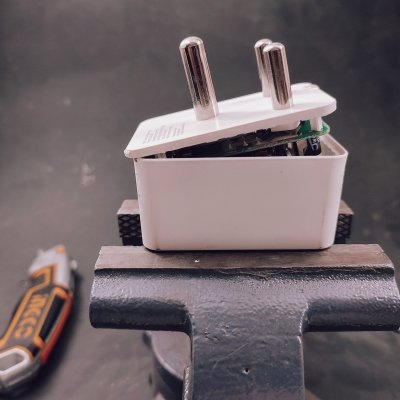
It takes a considerable amount of force but the bottom edge can be lifted up to separate the casing completely.

This pivoted motion is not advised for the 10A version, that model has an electrolytic capacitor along the bottom edge of the pcb that will almost certainly break away. For that model, pivot along one of longer edges.
polycab_16A-06.jpg

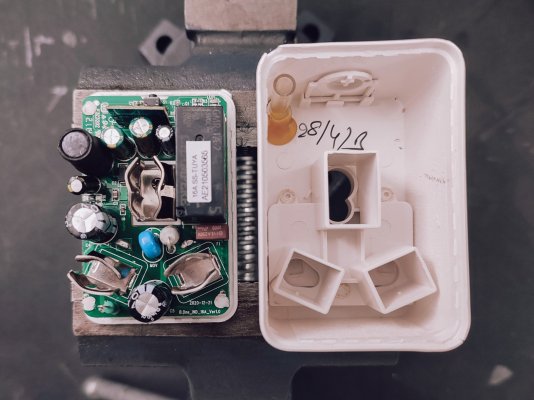
The next sequence of steps is to slice away at the heat-staking and desoldering the two input pins to separate the pcb from the bottom casing.
polycab_16A-07.jpg

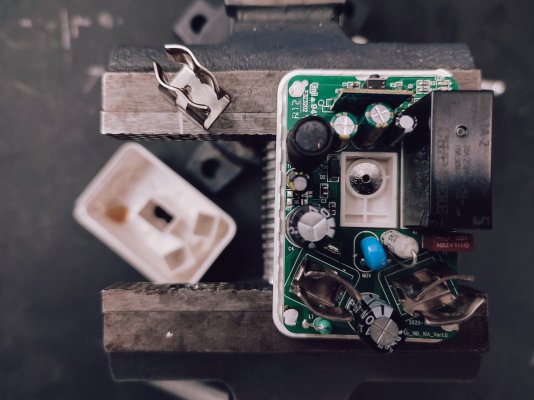
Start with removing the earth pin receptacle which is simply unscrewed. It's very easy to overlook this step when reassembling the plug. Store the screw and receptacle in the larger housing so you remember to reattach it before sealing up the casing.
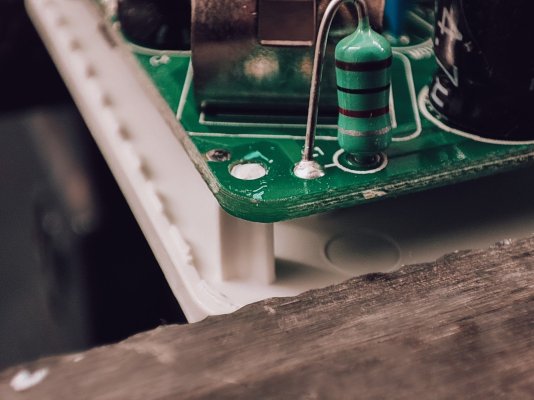
polycab_16A-08.jpg

There are four heat-staked supports, each one needs to be cut away cleanly.
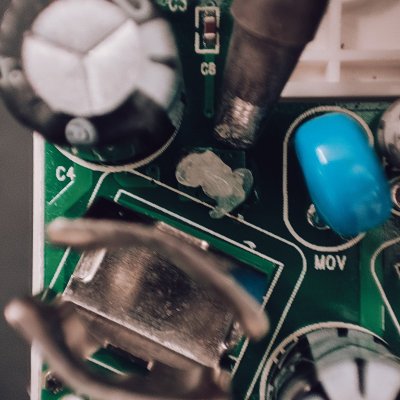
polycab_16A-09.jpg

The left pin is the easier one to desolder, so it's a good place to start. A generous blob of flux helps with melting the solder. This is made easier with temperature of the soldering iron set to 350C.
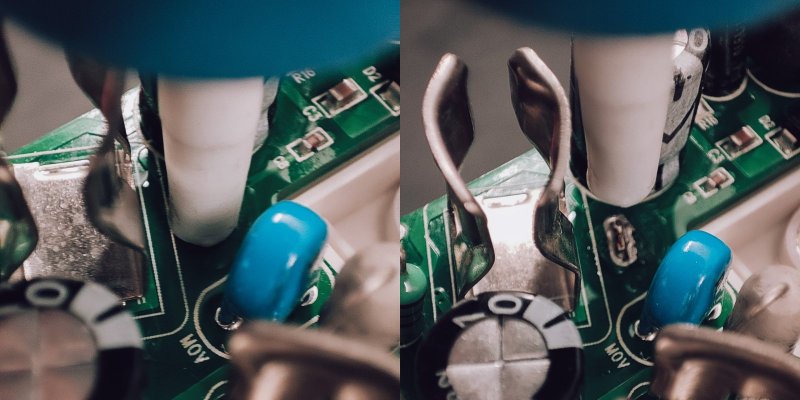
polycab_16A-10.jpg

A desoldering pump (solder sucker) removes most of the solder, you'll need to do a few cycles of melting and pumping.
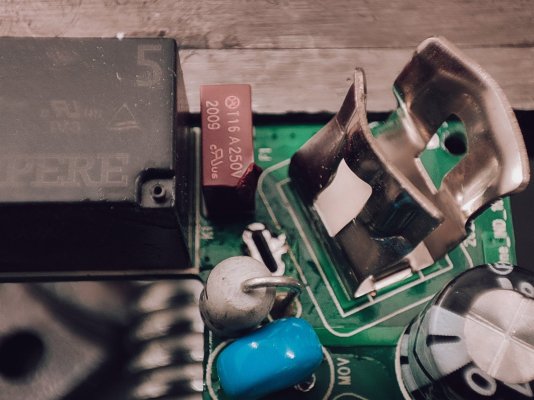
polycab_16A-11.jpg

The right pin area is crowded with a few components. Sometimes you can insert the soldering iron straight down, sometimes this ends up melting a nearby component like the fuse here. Bending the pin receptacle gives you a little extra working space.

Once the solder is molten, the pcb can be wriggled free. A heavy vise makes for a good third hand in this situation.
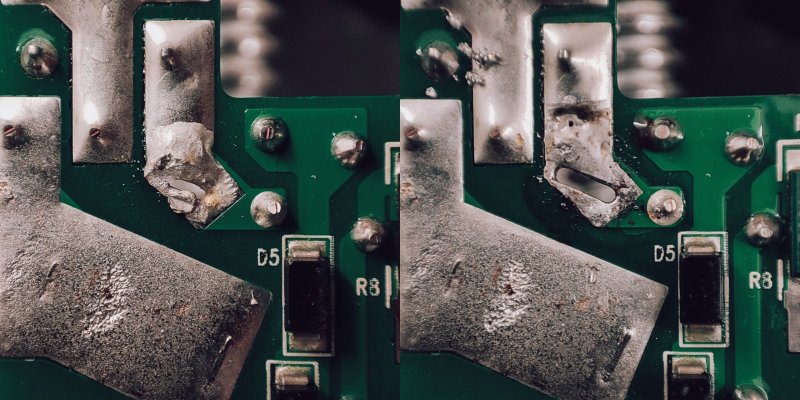
polycab_16A-12.jpg

With the pcb free, it's a good time to go in clean up the holes with the desoldering pump to make reassembly easier.
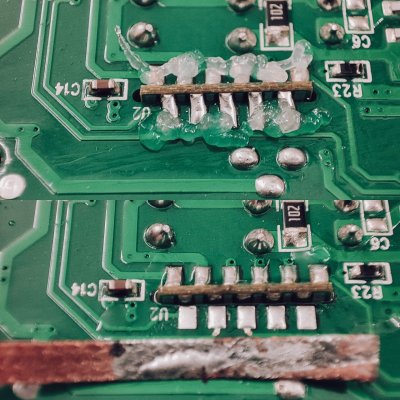
polycab_16A-13.jpg

Next up is removing the wifi module. For this, a generous amount of flux and a desoldering wick is essential. Soldering temperature should be lowered to 260C to minimize damage to the pads.
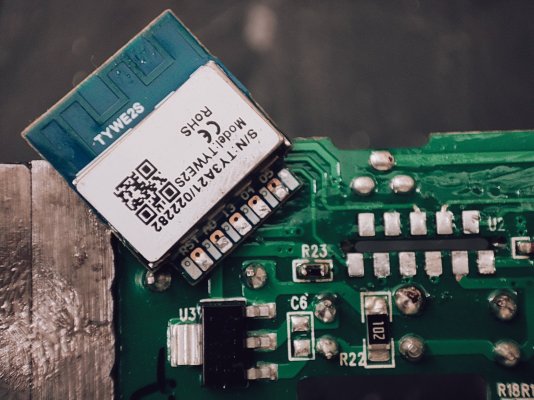
polycab_16A-14.jpg

This smart plug uses the Tuya TYWE2S module, which can be directly flashed with Tasmota using an usb serial programmer.
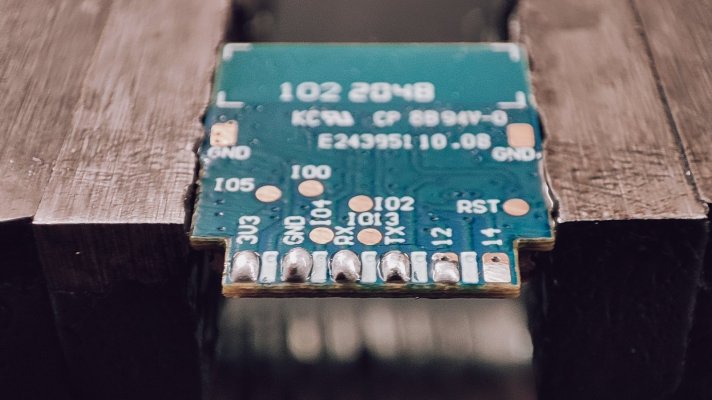
polycab_16A-15.jpg

Some kind of programming jig would probably make sense in the longterm but for now we can prep the pads for connecting the programmer with a little excess solder.
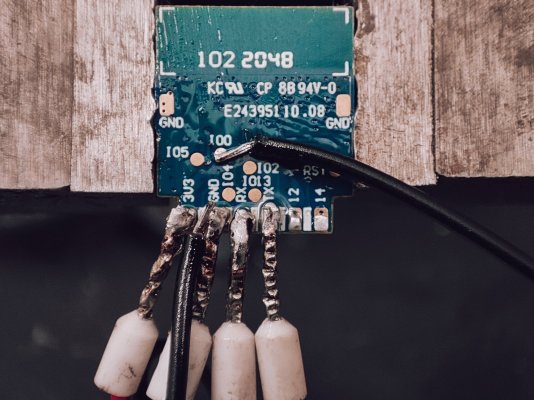
polycab_16A-16.jpg

It's not pretty but it works. Flashing is a simple process with Tasmota's web installer. Be sure to erase the device when asked.

Once flashing is complete, disconnect the wire from gpio0 and reconnect the programmer to usb to power up the module. Use a mobile device to connect to the ad-hoc wifi access point created by Tasmota (prefixed with the name tasmota). Your device will then prompt you to sign-in, in actuality you'll be configuring the wifi credentials for the smart plug to connect to your wifi network.
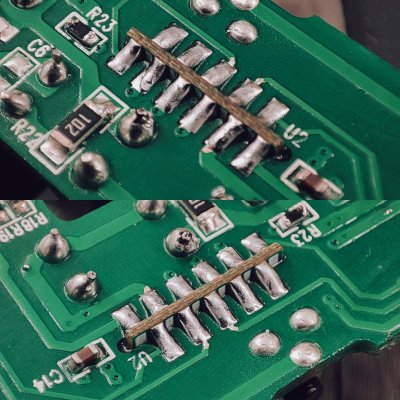
polycab_16A-17.jpg

When reinserting and soldering down the module, be certain there are no shorts between adjacent pads. Check for this using a multimeter with its continuity mode.

The plug can be then reassembled for testing without soldering the input pins or sealing the casing. Navigate to the ip address assigned to the plug and paste in the template command from below into the web console and press enter:

template {"NAME":"SLV1910001","GPIO":[0,0,0,32,2720,2656,0,0,2624,576,224,0,0,0],"FLAG":0,"BASE":18}

Navigate to Configuration and then Configure Module and select SLV1910001 (0) which should now be at the top the list and then tap on Save. This should prompt a reboot after which your tasmotized wifi plug is ready to use.

Finish with resoldering the pins, bending back the right pin receptacle, reinstalling the earthing pin receptacle and resealing the casing with your favourite low viscosity adhesive. Flex Kwik works well, allow a few minutes to cure.

The next step now is to calibrate power monitoring.
 
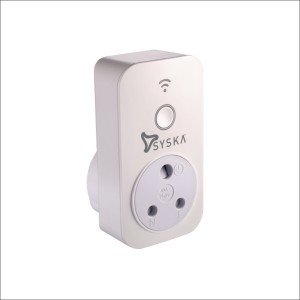
Even the older Syska WPS001 can be tasmotized using tuya-convert as long as you don't connect them to app first. Syskas are out of stock almost everywhere but Tata Cliq seems to have some stock left.

Hey do you know how to flash syska wp001? not able to flash it successfully with tuya-convert
 
Last edited:
Same, I used a ubuntu VM with a USB wifi card passthrough with virtualbox, one of those tp-link wifi adapters, worked fine.
When cloudcutter asks for a device profile, choose generic LSPA7 plug.

You can choose to flash a custom firmware, and cloudcutter already ships with OpenBeken and Esphome. Choose the BK7231N variant of the appropriate firmware.
And for configs, don't need to manually set them one by one, import this cloudcutter template into OpenBeken (after flash, the firmware exposes an app) https://raw.githubusercontent.com/t...r/devices/tuya-generic-lspa9-plug-v1.1.8.json
Thanks dude! syska WP001 didn't work but zunpulse worked perfectly without a hiccup.
 
Hello All,

My requirement is to have a smart plug with an energy monitoring solution for my Octoprint setup. I wanted a way to calculate the exact print cost and control the printer using Tasmota plugin.

So, as my first step, tried to open and flash Wipro 16 A plug listed "https://templates.blakadder.com/wipro_DS11160.html". But I failed to flash. It appears to have tuya chip 'CB2S/BK7231N' and not 'TYWE2S' as there is no visible 'GPIO00' or the '100' pad and all it has "CSN/RST" pin. I still tried to flash it but didn't work. Finally gave up (after many trials and errors), and managed to resemble them all in one piece and made it work back to stock (since it was never flashed!).

Planning to use tuya-convert solution and looks like 'Homemate 16A plug' can be tasmotised based on 'https://templates.blakadder.com/homemate_HMLPG16.html'. Will this work? anyone has tried it before?

In this post I read @rahuljawale has recommended 'Syska WPS001' via tuya-convert - has it worked for anyone? if so, what is the template to be used after flashing Tasmota? Please help.

Similarly, @zunpulse, @ze_cook, @m0h1t would 'zunpulse 10A Smart Plug Pro' is an easier way to try first?

Thanks in advance for your replies.
 
@esr@pradeep yup zunpulse 10a is quite easy to flash. Recommended. I wasn’t able to flash Syska WP001, ended up trashing it.

Also which 3d printer are you using? I’ve got a CR10v3 but it’s gathering dust mostly, I print small things like GPU stand, RJ45 clips once every few months.

2nd also, do you work for ESR?
 
Last edited:
@esr@pradeep yup zunpulse 10a is quite easy to flash. Recommended. I wasn’t able to flash Syska WP001, ended up trashing it.

Also which 3d printer are you using? I’ve got a CR10v3 but it’s gathering dust mostly, I print small things like GPU stand, RJ45 clips once every few months.

2nd also, do you work for ESR?
Thanks for the quick reply.
Impressive and glad to know of similar interests. I have a moded Creality Ender 3v2 with the recent addition of a Direct Drive Sprite extruder. I use an enclosure (normal Creality cover) and mainly use it for prototyping my in-house electronic projects, and some random stuff that I find exciting. I don't work for ESR, but are my initials.
 
Last edited:
Thanks for the quick reply.
Impressive and glad to know of similar interests. I have a moded Creality Ender 3v2 with the recent addition of a Direct Drive Sprite extruder. I use an enclosure (normal Creality cover) and mainly use it for prototyping my in-house electronic projects, and some random stuff that I find exciting. I don't work for ESR, but are my initials.
I hear abs printing can only happen reliably with an enclosure, any other use case for the enclosure?
 
I hear abs printing can only happen reliably with an enclosure, any other use case for the enclosure?
Yes, the enclosure avoids print wrapping and maintains temperature (I haven't actually calculated and compared the power consumption for the frequent PWM switching on to maintain the set temperature). It is beneficial and safe if you have kids at home. Also, it benefits me to use my ceiling room fan (at full speed - especially in summer) while print is going without the need to worry if it affects the bed temperature during a print. Avoids dust accumulation when the printer is not in use (Lubricant/grease attracts dust). The downside, it limits access to the printers when you want to service it. But it has a zipper so removing the enclosure is easy, but not for lazy :-). Yeah, but an enclosure like this looks cheap compared to costly acrylic enclosures (but who cares, it solves my problem).
 
@esr@pradeep yup zunpulse 10a is quite easy to flash. Recommended. I wasn’t able to flash Syska WP001, ended up trashing it.

Also which 3d printer are you using? I’ve got a CR10v3 but it’s gathering dust mostly, I print small things like GPU stand, RJ45 clips once every few months.

2nd also, do you work for ESR?
I tried using 'tuya_cloudcutter' and flashed 'esphome' i.e. 'kickstart-bk7231n' instead of 'OpenBeken'. Any idea how to flash it with proper firmware? Now I have access to the smart switch via AP and can see a box to 'upload OTA firmware' file. Thanks.
 
Great job @rsaeon ! Doesn't look like it was your first time since you managed to keep the outer shell intact. :D Your skills are commendable. Had it been me, the case would have been unusable by the end of the project.

@ze_cook I have been searching the market for hackable smart plugs. I found that both Oakter 6A and 16A can easily be hacked. The only problem with Oakters is the lack of power measuring chip. Otherwise their bodies are screwed on, so they are easy to open and flash. Oakter's product designers even left the serial pins on the boards, so absolutely no need for any kind of soldering or hacking. I have uploaded the working configs here and here.

Even the older Syska WPS001 can be tasmotized using tuya-convert as long as you don't connect them to app first. Syskas are out of stock almost everywhere but Tata Cliq seems to have some stock left.
hey thanks for the details on smart plugs

so currently which plugs are we able to flash Tamosta ?
 
wipro 16A plugs are compatible with homebridge for use in IOS. what is the additional advantage using tasmota?

Wipro devices are based on Tuya cloud which is from China and many have concerns on the same.. hence we prefer Tasmota or Esphome which is completely local lan control
 
Wipro devices are based on Tuya cloud which is from China and many have concerns on the same.. hence we prefer Tasmota or Esphome which is completely local lan control
can you specify what concerns are those?. is it like hacking or its privacy?. any articles published about it?

if its completely lan control, how do we access from outside home?. doesnt that defeat some benefit of the smart devices?
 
can you specify what concerns are those?. is it like hacking or its privacy?. any articles published about it?

if its completely lan control, how do we access from outside home?. doesnt that defeat some benefit of the smart devices?
when I say "Lan control" it doesnt mean u cant control remotely... just integrate this custom firmware flashed Tasmota/ESPhome devices with Home Assistant or HomeBridge and u can access it from anywhere... you can even add these devices to Apple Homekit if u are a iOS user for remote access.

read this link for Tuya concerns
Tuya security concerns in the news - Third party integrations - Home Assistant Community (home-assistant.io)
 
Back
Top