Guide Teardown and preparation of Polycab's 16A Wi-Fi Smart Plug for Tasmota

polycab_16A-01.jpg

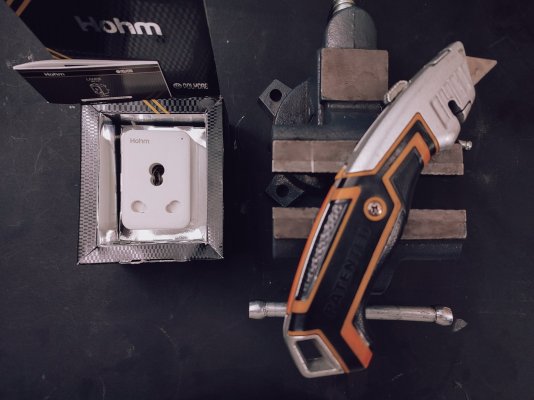
This is a teardown and a guide about preparing a Polycab Hohm Lanre 16A Smart Wi-Fi plug model SLV1910001 for a Tasmota installation.
polycab_16A-02.jpg

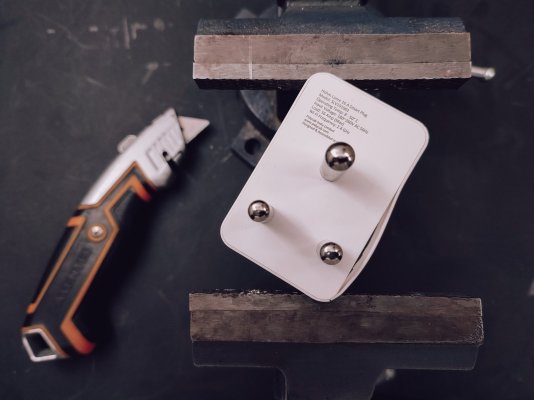
A heavy vise can be used to clamp down opposing corners, the compression will cause the casing to separate.
polycab_16A-03.jpg

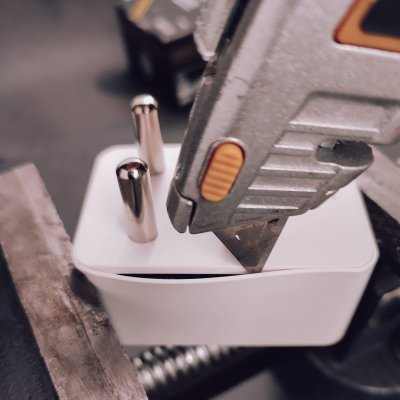
The tip of a box cutter can then be run around the edges to help separate the casing more.
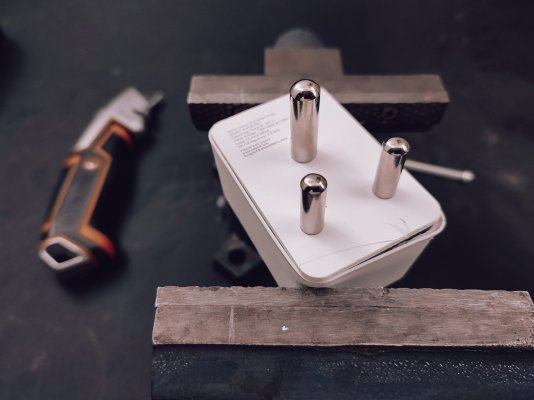
polycab_16A-04.jpg

Further the separation by clamping down the other two opposing corners. Run the box cutter one more time and the bottom of the casing should separate cleanly.
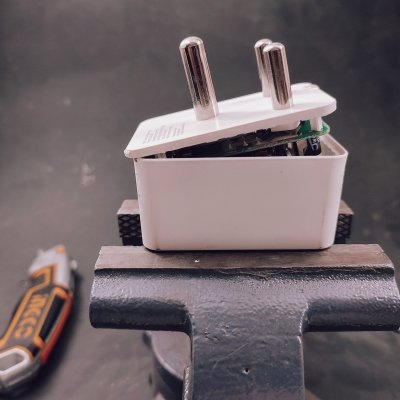
polycab_16A-05.jpg

It takes a considerable amount of force but the bottom edge can be lifted up to separate the casing completely.

This pivoted motion is not advised for the 10A version, that model has an electrolytic capacitor along the bottom edge of the pcb that will almost certainly break away. For that model, pivot along one of longer edges.
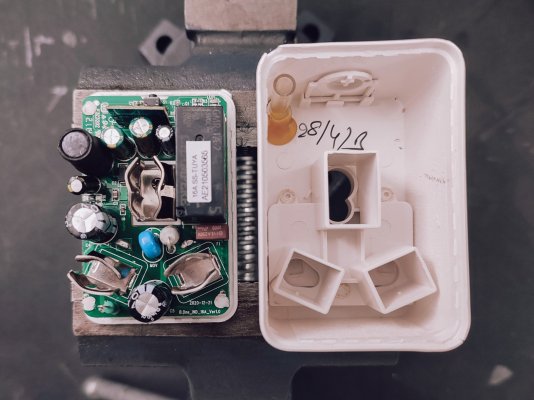
polycab_16A-06.jpg

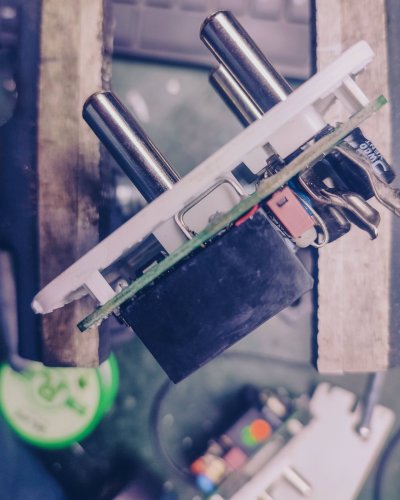
The next sequence of steps is to slice away at the heat-staking and desoldering the two input pins to separate the pcb from the bottom casing.
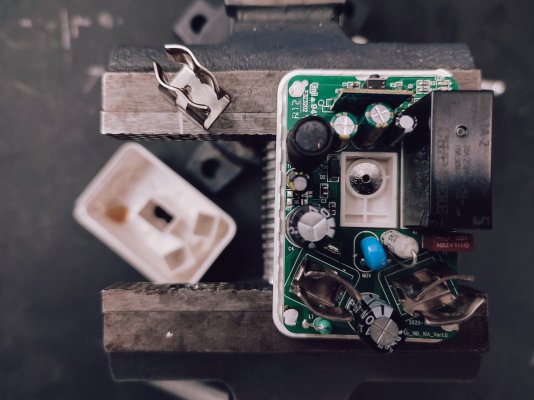
polycab_16A-07.jpg

Start with removing the earth pin receptacle which is simply unscrewed. It's very easy to overlook this step when reassembling the plug. Store the screw and receptacle in the larger housing so you remember to reattach it before sealing up the casing.
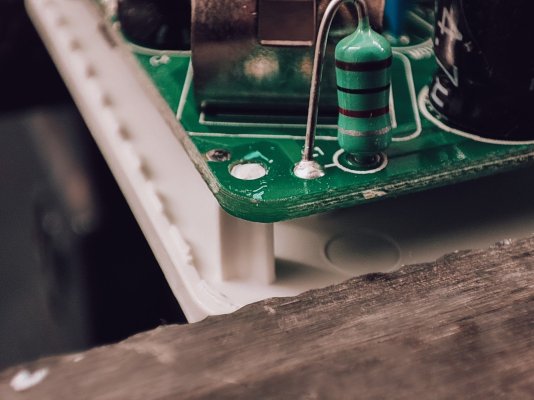
polycab_16A-08.jpg

There are four heat-staked supports, each one needs to be cut away cleanly.
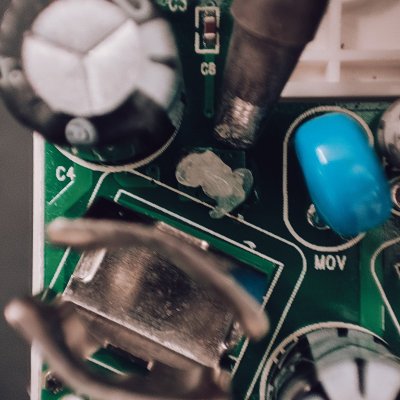
polycab_16A-09.jpg

The left pin is the easier one to desolder, so it's a good place to start. A generous blob of flux helps with melting the solder. This is made easier with temperature of the soldering iron set to 350C.
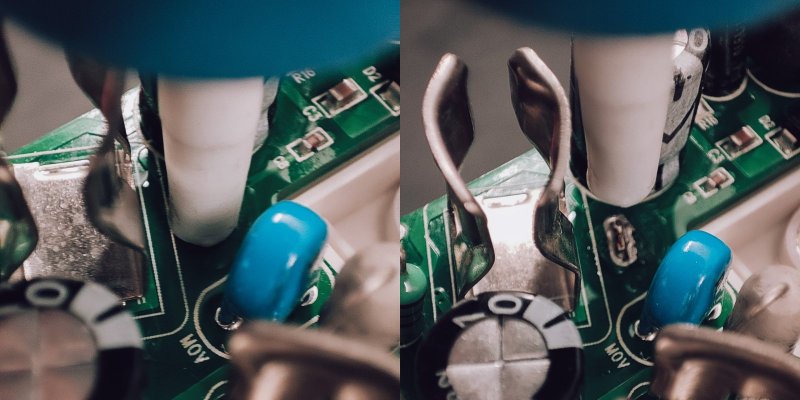
polycab_16A-10.jpg

A desoldering pump (solder sucker) removes most of the solder, you'll need to do a few cycles of melting and pumping.
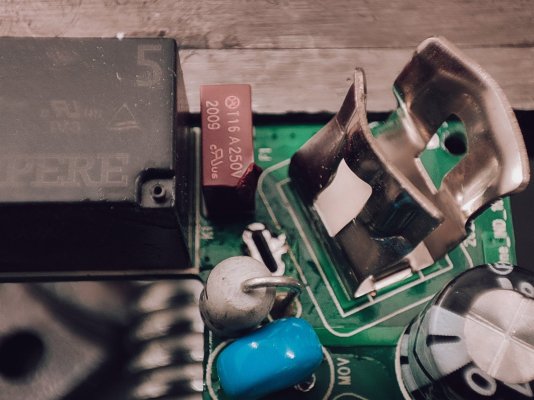
polycab_16A-11.jpg

The right pin area is crowded with a few components. Sometimes you can insert the soldering iron straight down, sometimes this ends up melting a nearby component like the fuse here. Bending the pin receptacle gives you a little extra working space.

Once the solder is molten, the pcb can be wriggled free. A heavy vise makes for a good third hand in this situation.
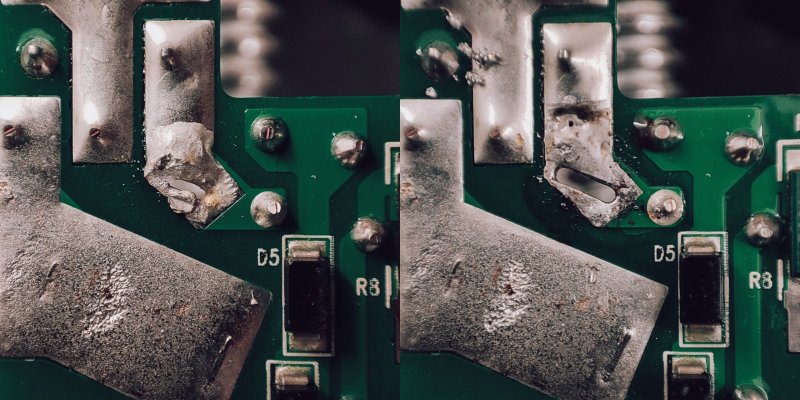
polycab_16A-12.jpg

With the pcb free, it's a good time to go in clean up the holes with the desoldering pump to make reassembly easier.
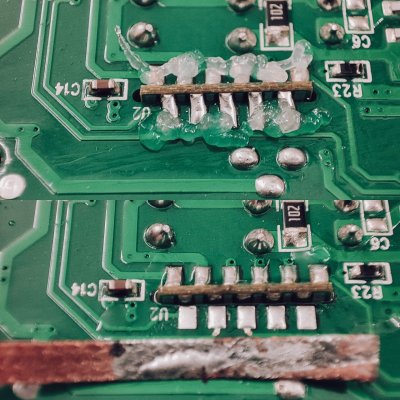
polycab_16A-13.jpg

Next up is removing the wifi module. For this, a generous amount of flux and a desoldering wick is essential. Soldering temperature should be lowered to 260C to minimize damage to the pads.
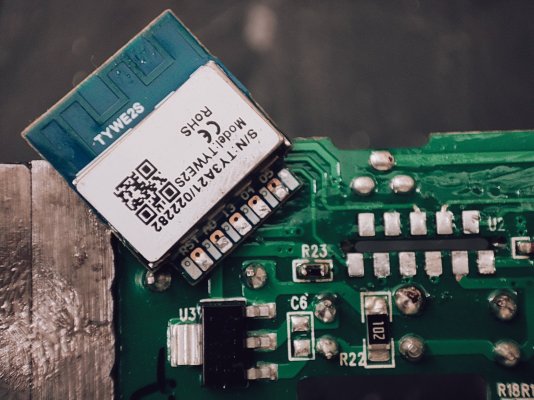
polycab_16A-14.jpg

This smart plug uses the Tuya TYWE2S module, which can be directly flashed with Tasmota using an usb serial programmer.
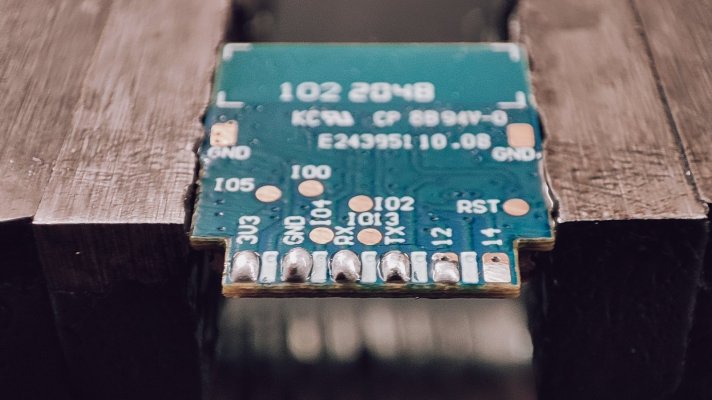
polycab_16A-15.jpg

Some kind of programming jig would probably make sense in the longterm but for now we can prep the pads for connecting the programmer with a little excess solder.
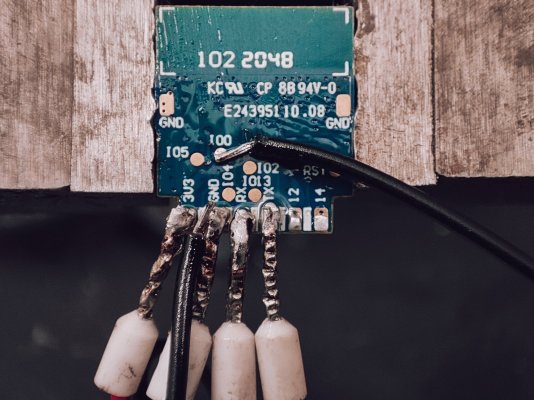
polycab_16A-16.jpg

It's not pretty but it works. Flashing is a simple process with Tasmota's web installer. Be sure to erase the device when asked.

Once flashing is complete, disconnect the wire from gpio0 and reconnect the programmer to usb to power up the module. Use a mobile device to connect to the ad-hoc wifi access point created by Tasmota (prefixed with the name tasmota). Your device will then prompt you to sign-in, in actuality you'll be configuring the wifi credentials for the smart plug to connect to your wifi network.
polycab_16A-17.jpg

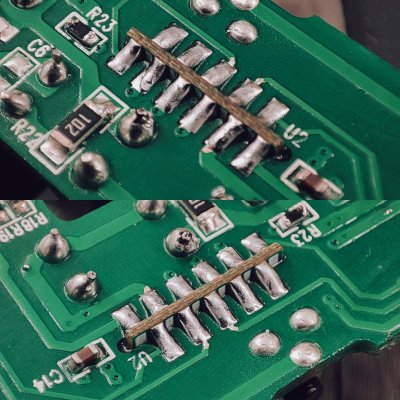
When reinserting and soldering down the module, be certain there are no shorts between adjacent pads. Check for this using a multimeter with its continuity mode.

The plug can be then reassembled for testing without soldering the input pins or sealing the casing. Navigate to the ip address assigned to the plug and paste in the template command from below into the web console and press enter:

template {"NAME":"SLV1910001","GPIO":[0,0,0,32,2720,2656,0,0,2624,576,224,0,0,0],"FLAG":0,"BASE":18}

Navigate to Configuration and then Configure Module and select SLV1910001 (0) which should now be at the top the list and then tap on Save. This should prompt a reboot after which your tasmotized wifi plug is ready to use.

Finish with resoldering the pins, bending back the right pin receptacle, reinstalling the earthing pin receptacle and resealing the casing with your favourite low viscosity adhesive. Flex Kwik works well, allow a few minutes to cure.

The next step now is to calibrate power monitoring.
 
Good news. Anyone interested to buy the Wipro 16A Smart Plug, please do from Wipro's own website. The shipment will be done by their supplier and you receive mostly a new piece of plug rather than some one used and returned plugs by the famous e-Tailer. You also will save Rs.150 per plug, The price mentioned as on today is 849/- which inclusive of Delivery. The link is here.
 
Good news. Anyone interested to buy the Wipro 16A Smart Plug, please do from Wipro's own website. The shipment will be done by their supplier and you receive mostly a new piece of plug rather than some one used and returned plugs by the famous e-Tailer. You also will save Rs.150 per plug, The price mentioned as on today is 849/- which inclusive of Delivery. The link is here.
this supports Tuya Cloud cutter ? and have u flashed ESPHome or Openbeken ?
 
I want techenclave users opinion.
How about polycab vs wipro energy report comparision? Before and after open source firmware?

Tasmota comparable devices in the market is decreasing. Libretiny compatible devices are increasing in the market, which getting better in features. How would you see this?
 
Does Open-Beken/LibreTiny/Tuya-cut and everything else require you to open and physically access the IC?

I was hoping for something like Tuya-convert OTA. An OTA update makes it really useful.

If I have to open up devices, I'm not sure I'll be able to put them back up satisfactorily.
 
Does Open-Beken/LibreTiny/Tuya-cut and everything else require you to open and physically access the IC?

I was hoping for something like Tuya-convert OTA. An OTA update makes it really useful.

If I have to open up devices, I'm not sure I'll be able to put them back up satisfactorily.
nope, Open-Beken/LibreTiny/Tuya-cloudcutter does need you to open any devices... its very similar process like the old Tuya convert

I have 8 different devices (Switches, Bulbs, Plugs) which are all flashed with either Openbeken or Esphome, I did not have to open even single device for the cloud cut process.
I want techenclave users opinion.
How about polycab vs wipro energy report comparision? Before and after open source firmware?

Tasmota comparable devices in the market is decreasing. Libretiny compatible devices are increasing in the market, which getting better in features. How would you see this?
all depends on your requirement, for the energy consumption report there is no difference, with local control you will likely have more accurate results I guess,

there are still few tasmota switches on amazon
 
Last edited:
nope, Open-Beken/LibreTiny/Tuya-cloudcutter does  not need you to open any devices... its very similar process like the old Tuya convert
Thank you kind sir. Can you list the 10 A/16A plugs/sockets you own and use?
there are still few tasmota switches on amazon
Could you point these out?

The Wipro sockets posted earlier, I believe, do not have ESP chips.
 
Last edited:
Slight OT,
Does anyone have any idea about the realme AC smart plug? It is advertised as it can control the connected AC through the app. Does it have an IR blaster like the tata power plug?
 
I use wipro smart plugs to manage my few appliances and also monitor power, but i usually get a fixed usage for a day. Is there any other smart plugs or if we do a flash on any other smart plugs with like tuya do these give like a line graph to check wattage for a particular day.
 
A long-overdue update with a modification:

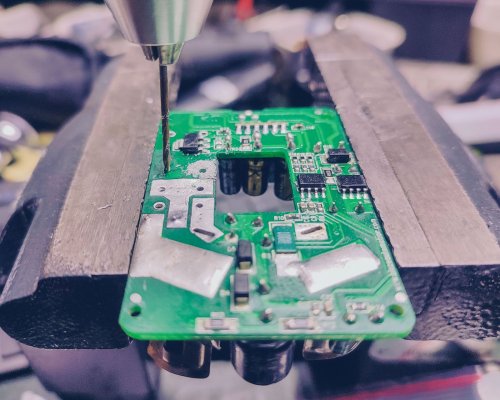
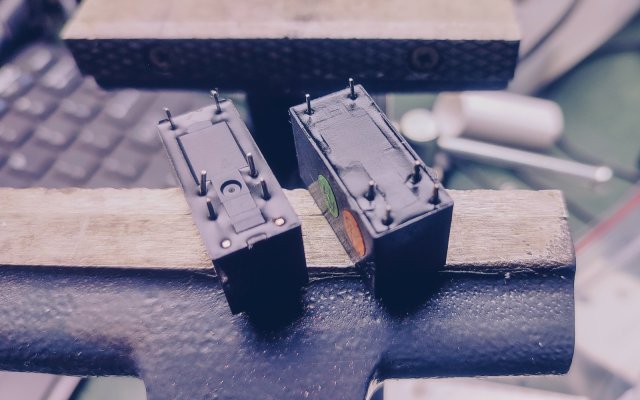
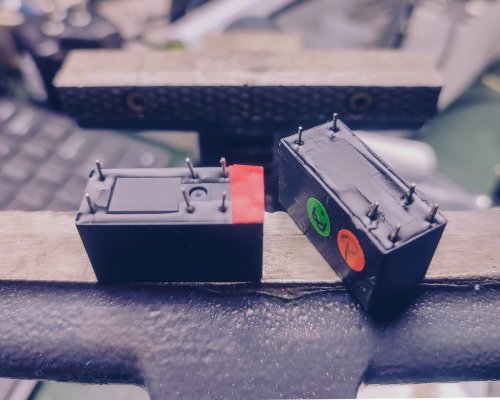
These plugs tend to warm up with a 1000W continuous load, I assumed it was because of heat build-up from the relay being constantly energized, so I went ahead with swapping out the Form A normally-open relay with a Form C change-over relay (being used as a normally-closed relay). I couldn't find any Form B relays in a 29mm × 12.7mm package.

The main reason though is that Tasmota's Fast Power Cycle Device Recovery is often triggered by unstable mains power, thereby reseting the device to a blank state. I do have automatic restore from a webserver set up but as a precaution for the time period until it restores from a backup, or if the backup fails entirely, this modification ensures the load remains powered on after such a reset.

Two holes need to be drilled to allow for the normally-closed contacts:

polycab_16A-18.jpeg

The normally open contacts are then removed from the relay:

polycab_16A-19.jpeg

And insulated with a few layers of electrical tape:

polycab_16A-20.jpeg

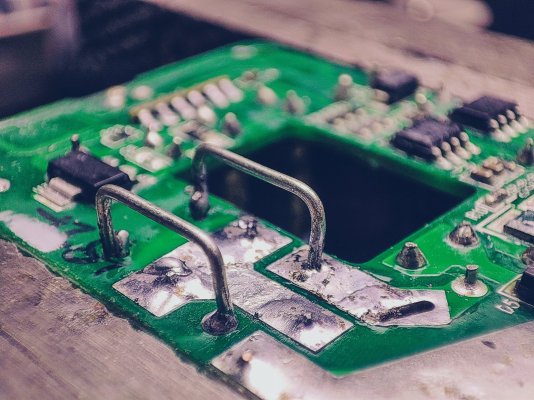
The contacts are then bridged with the PCB traces:

polycab_16A-21.jpeg

And this modification is now complete with adequate clearance:

polycab_16A-22.jpeg

The new tasmota template command:

template {"NAME":"SLV1910001-NC","GPIO":[0,0,0,32,2720,2656,0,0,2624,576,256,0,0,0],"FLAG":0,"BASE":18}

The wi-fi plugs continue to build-up heat over time, which suggests that these devices are not designed for continuous operation.

The next logical step would be to design my own, ha.
 
Last edited:
Back
Top