Guide Teardown and preparation of Polycab's 16A Wi-Fi Smart Plug for Tasmota

polycab_16A-01.jpg

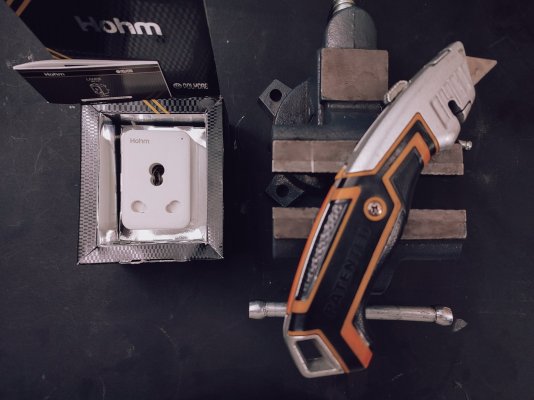
This is a teardown and a guide about preparing a Polycab Hohm Lanre 16A Smart Wi-Fi plug model SLV1910001 for a Tasmota installation.
polycab_16A-02.jpg

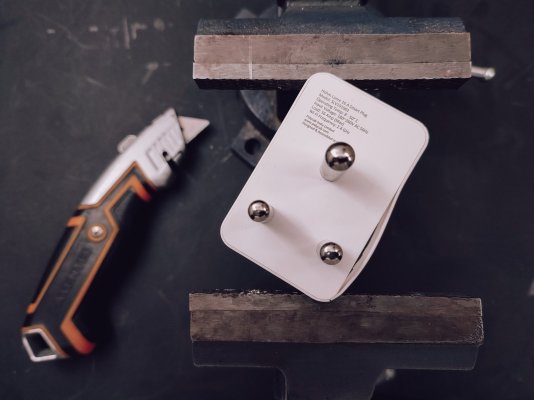
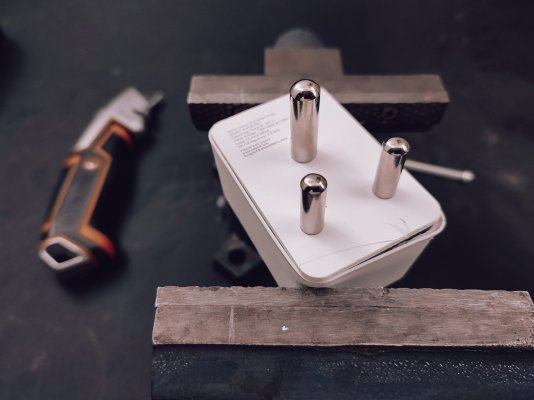
A heavy vise can be used to clamp down opposing corners, the compression will cause the casing to separate.
polycab_16A-03.jpg

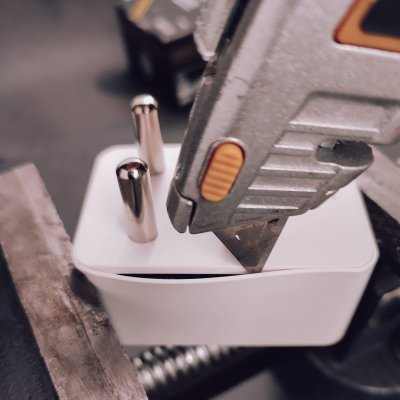
The tip of a box cutter can then be run around the edges to help separate the casing more.
polycab_16A-04.jpg

Further the separation by clamping down the other two opposing corners. Run the box cutter one more time and the bottom of the casing should separate cleanly.
polycab_16A-05.jpg

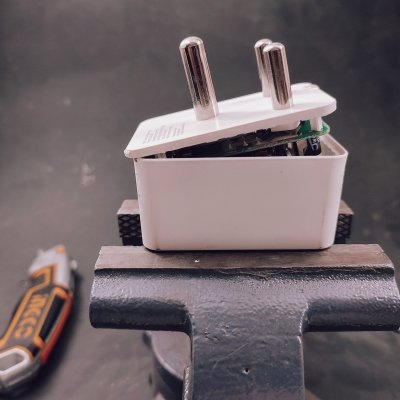
It takes a considerable amount of force but the bottom edge can be lifted up to separate the casing completely.

This pivoted motion is not advised for the 10A version, that model has an electrolytic capacitor along the bottom edge of the pcb that will almost certainly break away. For that model, pivot along one of longer edges.
polycab_16A-06.jpg

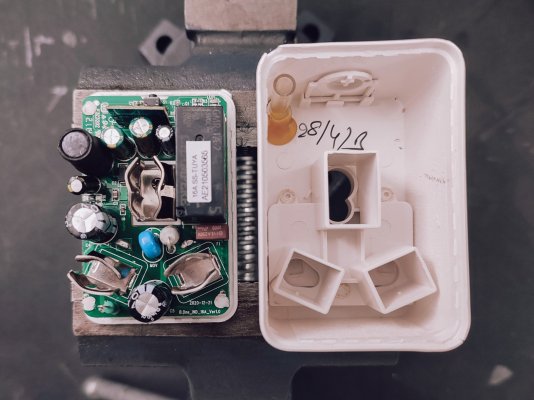
The next sequence of steps is to slice away at the heat-staking and desoldering the two input pins to separate the pcb from the bottom casing.
polycab_16A-07.jpg

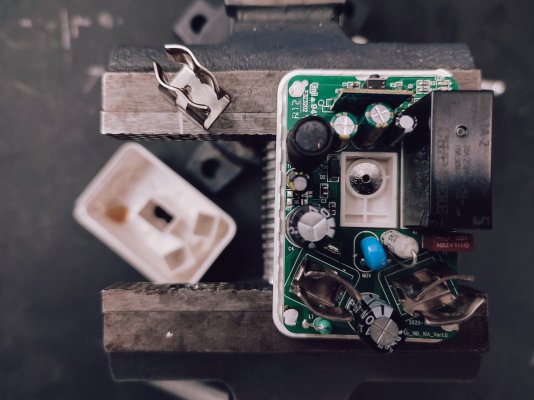
Start with removing the earth pin receptacle which is simply unscrewed. It's very easy to overlook this step when reassembling the plug. Store the screw and receptacle in the larger housing so you remember to reattach it before sealing up the casing.
polycab_16A-08.jpg

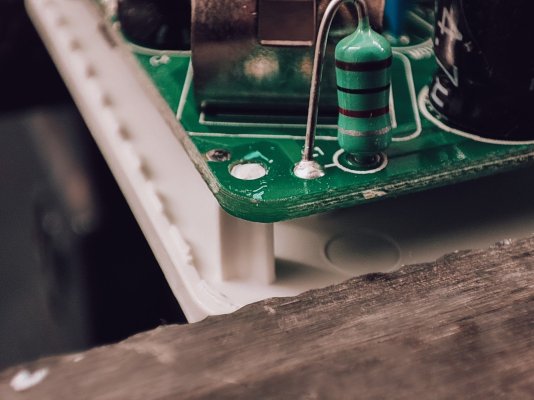
There are four heat-staked supports, each one needs to be cut away cleanly.
polycab_16A-09.jpg

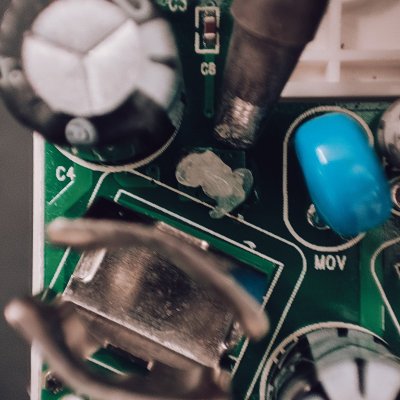
The left pin is the easier one to desolder, so it's a good place to start. A generous blob of flux helps with melting the solder. This is made easier with temperature of the soldering iron set to 350C.
polycab_16A-10.jpg

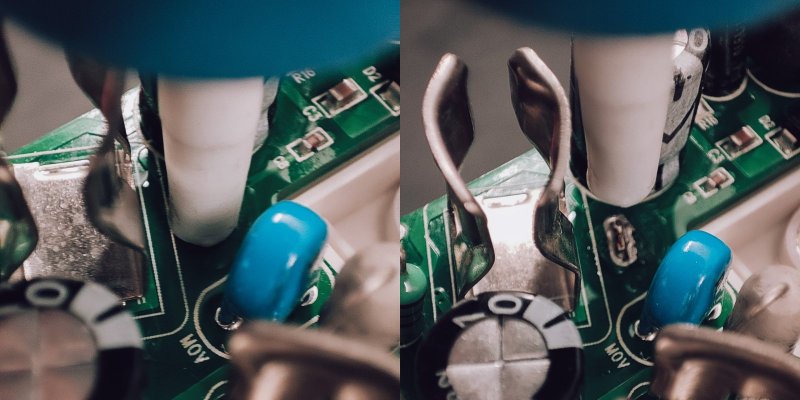
A desoldering pump (solder sucker) removes most of the solder, you'll need to do a few cycles of melting and pumping.
polycab_16A-11.jpg

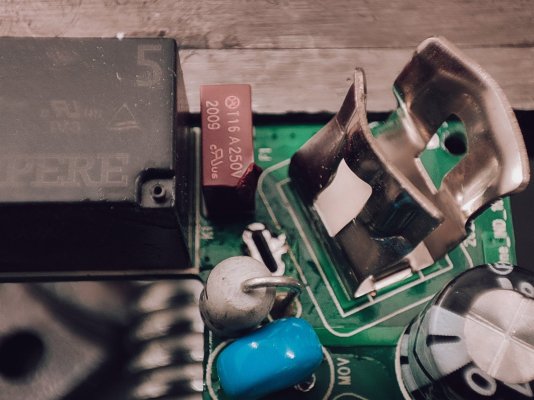
The right pin area is crowded with a few components. Sometimes you can insert the soldering iron straight down, sometimes this ends up melting a nearby component like the fuse here. Bending the pin receptacle gives you a little extra working space.

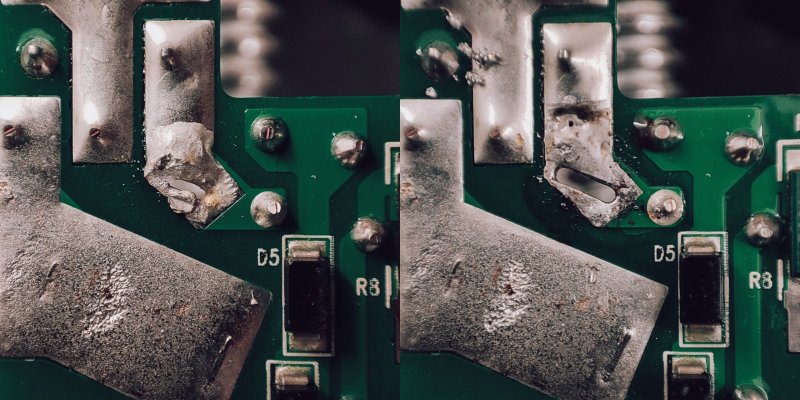
Once the solder is molten, the pcb can be wriggled free. A heavy vise makes for a good third hand in this situation.
polycab_16A-12.jpg

With the pcb free, it's a good time to go in clean up the holes with the desoldering pump to make reassembly easier.
polycab_16A-13.jpg

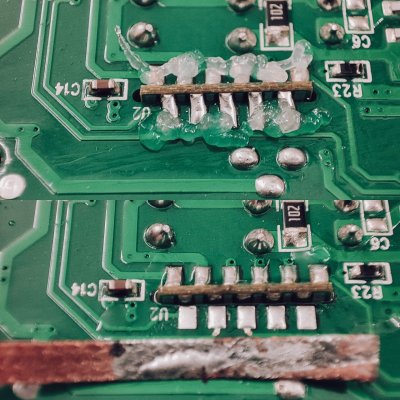
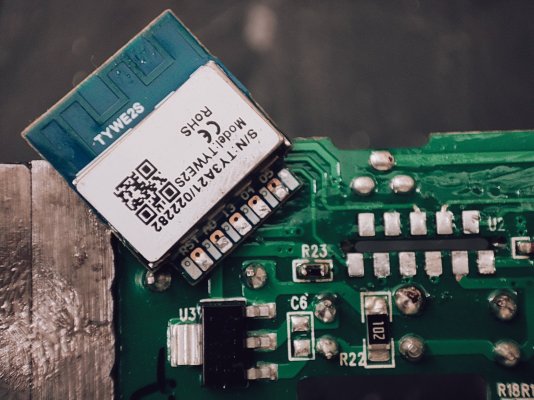
Next up is removing the wifi module. For this, a generous amount of flux and a desoldering wick is essential. Soldering temperature should be lowered to 260C to minimize damage to the pads.
polycab_16A-14.jpg

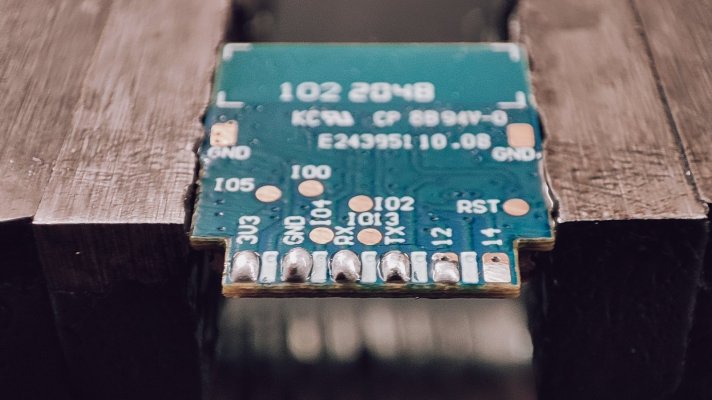
This smart plug uses the Tuya TYWE2S module, which can be directly flashed with Tasmota using an usb serial programmer.
polycab_16A-15.jpg

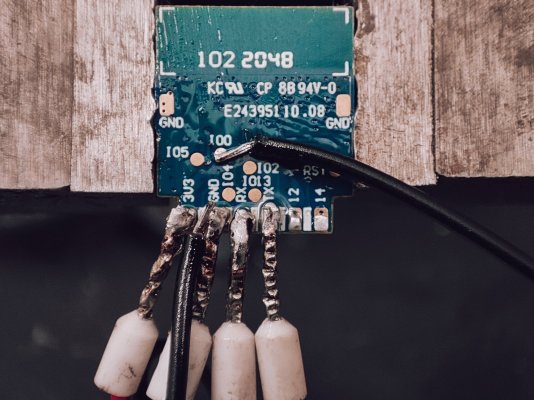
Some kind of programming jig would probably make sense in the longterm but for now we can prep the pads for connecting the programmer with a little excess solder.
polycab_16A-16.jpg

It's not pretty but it works. Flashing is a simple process with Tasmota's web installer. Be sure to erase the device when asked.

Once flashing is complete, disconnect the wire from gpio0 and reconnect the programmer to usb to power up the module. Use a mobile device to connect to the ad-hoc wifi access point created by Tasmota (prefixed with the name tasmota). Your device will then prompt you to sign-in, in actuality you'll be configuring the wifi credentials for the smart plug to connect to your wifi network.
polycab_16A-17.jpg

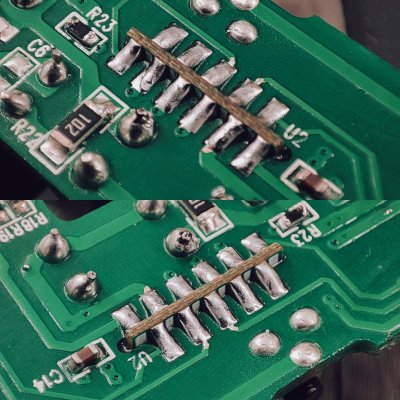
When reinserting and soldering down the module, be certain there are no shorts between adjacent pads. Check for this using a multimeter with its continuity mode.

The plug can be then reassembled for testing without soldering the input pins or sealing the casing. Navigate to the ip address assigned to the plug and paste in the template command from below into the web console and press enter:

template {"NAME":"SLV1910001","GPIO":[0,0,0,32,2720,2656,0,0,2624,576,224,0,0,0],"FLAG":0,"BASE":18}

Navigate to Configuration and then Configure Module and select SLV1910001 (0) which should now be at the top the list and then tap on Save. This should prompt a reboot after which your tasmotized wifi plug is ready to use.

Finish with resoldering the pins, bending back the right pin receptacle, reinstalling the earthing pin receptacle and resealing the casing with your favourite low viscosity adhesive. Flex Kwik works well, allow a few minutes to cure.

The next step now is to calibrate power monitoring.
 
zunpulse 10A plugs are available again for 650 on flipkart if anyone is interested. picked up two.
Syska 16amp smart plug for 299rs.

 
I wasn't successful in converting the syska WP001 plug, this one seems different though. Has anyone converterd this specific model successfully?
 
is it not ESP? or Beken ?
It was quite a while ago I tried with the syskaplug, I think it was supposed to be tuya but it wasn't responding to the converter and I ended it bricking it somehow, so just tossed it and got zunpulse.
 
It was quite a while ago I tried with the syskaplug, I think it was supposed to be tuya but it wasn't responding to the converter and I ended it bricking it somehow, so just tossed it and got zunpulse.
do you know if their LED downlights are also tuya / home assistant compatible?
 
do you know if their LED downlights are also tuya / home assistant compatible?
no sorry

zunpulse 10A plugs are available again for 650 on flipkart if anyone is interested. picked up two.
I can confirm these are still working great with OpenBeken or ESPHome via tuya cloudcutter.

this time I was facing some issue flashing openbeken directly for some strange reason so I went ESPHome first and then openbeken from there. This is the OTA file for flashing OpenBeken from ESPHome webui - https://github.com/BenJamesAndo/OpenBeken_uf2_firmware

I've finally migrated everything to home assistant. Its so good! I love the history and charting option!!
 
Last edited:
no sorry


I can confirm these are still working great with OpenBeken or ESPHome via tuya cloudcutter.

this time I was facing some issue flashing openbeken directly for some strange reason so I went ESPHome first and then openbeken from there. This is the OTA file for flashing OpenBeken from ESPHome webui - https://github.com/BenJamesAndo/OpenBeken_uf2_firmware

I've finally migrated everything to home assistant. Its so good! I love the history and charting option!!
And it can still be used with Google assistant or Alexa? Is this same can be done on wipro switches?
 
Thank you, maybe ill check it and post here.

Could you also post your esphome config for the 10a plugs? @m0h1t
not using esphome for these 10a plugs, openbeken has a lot more features. Using it with home assistant via MQTT. If you want to use ESPhome you can try to generate the config from here - https://github.com/tuya-cloudcutter...-party-firmware-how-can-i-configure-my-device

And it can still be used with Google assistant or Alexa? Is this same can be done on wipro switches?
Once you use tuya cloud cutter, then natively you can’t use with any voice assistant. You can pair with home assistant and use in google home/homekit or with alexa.
 
  • Like
Reactions: cyberwarfare
Hi All,

This is my first post. I have bought wipro 16 amps power plug. How to run the cloud cutter in a windows pc? In the app it asks me to turn on bluetooth instead of wifi. I cannot find any AP access point when the plug is in pairing mode.
 
  • Like
Reactions: rsaeon
Hi All,

This is my first post. I have bought wipro 16 amps power plug. How to run the cloud cutter in a windows pc? In the app it asks me to turn on bluetooth instead of wifi. I cannot find any AP access point when the plug is in pairing mode.
Now I was able to flash. I am able to read the device status via tinytuya. But I am not able to switch the plug on. I see a json with "1":"True". But d.turn_on() is not working
 
  • Like
Reactions: rsaeon
Got the 16 A Zunpulse plug.

I'm honestly confused now and my google/reddit searches don't lead me anywhere useful or confuse me further. If y'all can confirm this, I'd be happy.

Homekit (Apple only)/HomeAssistant - these are the apps on your phone that you use to control the switches (similar to Smart Life, but without the cloud connection)

Tuya cloud-cutter/Libretiny/Openbeken are the applications/ programs you use to cut the cloud connection.


What does ESPHome/Tasmota do?

All the other names mentioned here, which of these 3 categories do they fall in?

And finally which of these should I use for my plug?

Any of them?
Are there advantages to one vs the other?

Also what's the deal with pin numbers?

I'm sorry, but YT and Reddit only seem to offer so much help and parts of all the repos go above my head.

Thanks guys..!!


Also, you might want to check your orders from Zunpulse official website. Got a 10A plug that was old and extremely dirty and used. They agreed to process a replacement immediately, but it doesn't appear to be the case that plugs directly from the manufacturers are unused and new and those on Amazon/Flipkart might be used. It seems to be a mixed bag.

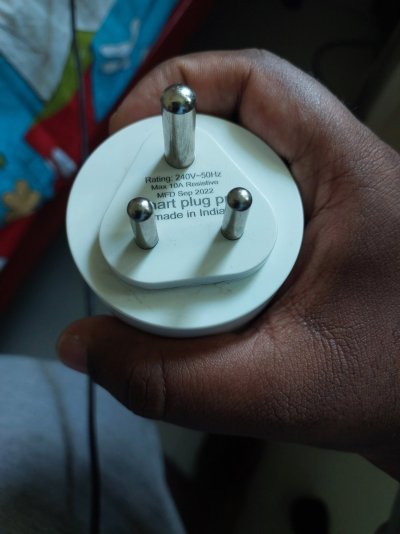
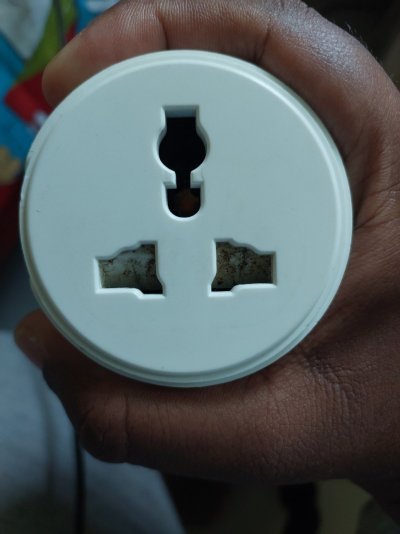
20240710_130745.jpg 20240710_130732.jpg
 
  • Like
Reactions: rsaeon
I'm honestly confused now and my google/reddit searches don't lead me anywhere useful or confuse me further. If y'all can confirm this, I'd be happy.

Yeah, that was me in the beginning. I had no idea what anything was and there was no simplified guide anywhere. There really needs to be a 'Tasmota for Dummies' type guide.

What does ESPHome/Tasmota do?

I'm not familiar with ESPHome, so I'll summarize about Tasmota.

Tasmota allows control through a browser window that's on the same network.

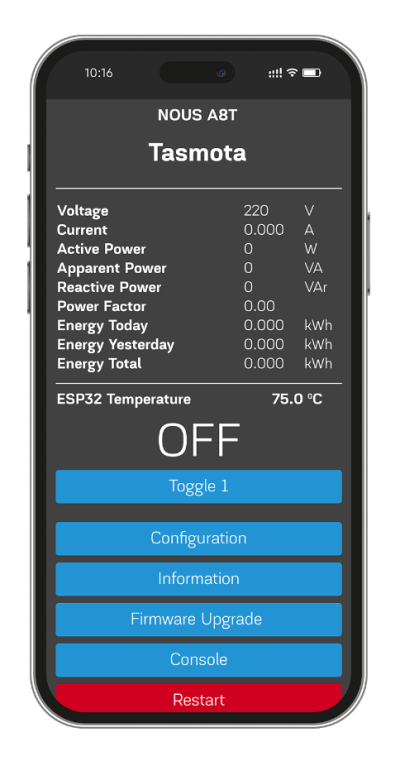
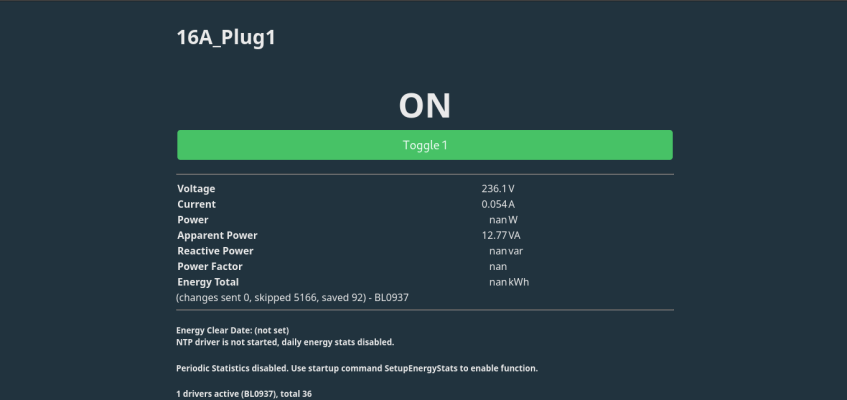
Here's the web interface of a Tasmota smart plug with power monitoring capabilities:

Screen Shot 2024-07-11 at 3.22.25 AM.png

You can save the ip address of the Tasmota device as a shortcut or bookmark and tap on it whenever you want to turn it on/off, it'll load this page and then you'd tap on the TOGGLE button.

A little more advanced, you can even save a direct url that'll trigger the toggle when opened without having to wait until the webpage loads. Apple allows this through the Shortcuts app and the 'Get Headers of URL' function. So it becomes an icon on your home screen that you tap on to turn on/off devices/lights/fans. No other setup/account or configuration is needed for this. The url you would need to save for this is http://<ip>/cm?cmnd=Power%20TOGGLE

Tasmota on it's own like this has some basic automation like timers and triggers/control from/to other Tasmota devices on the same network. These use Tasmota's built-in Rules and Rulesets. For example, on a Tasmota device connected to a light, you could set a rule/ruleset to basically say 'when turned on, also turn on the power for the coffee maker', where the coffee maker is connected to a different Tasmota plug but on the same wi-fi network. On a Tasmota device with a sensor, say a door open sensor, then a ruleset like 'when the door is opened, turn on the light' would be pretty cool.

You can then expand on this, and connect Tasmota to a self-hosted home automation server. This will give you central control of all your Tasmota devices from a single dashboard type web page. This is what Home Assistant does, I've never used it, but it's pretty cool.

Imagine walking around with an iPad and tapping on this web dashboard to turn on/off lights and fans all over your house.

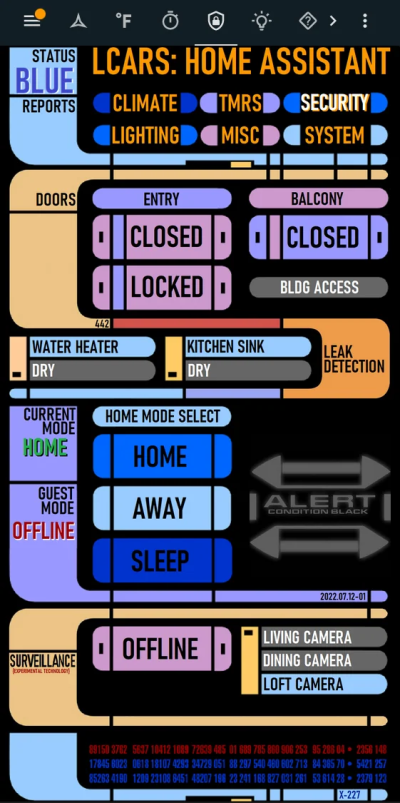
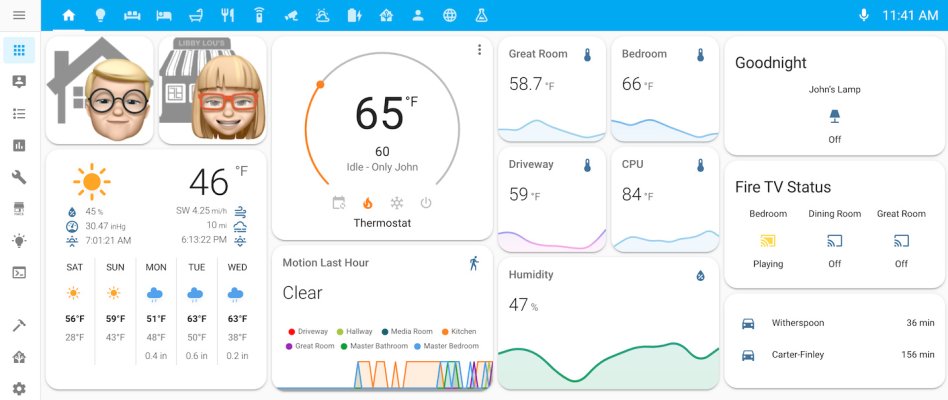
Here's one that's themed to look like Star Trek's LCARS interface:

ya1b5iltqlc91.png

Another based on Windows Metro Interface:

a36f964a17c4f1c1ac9dad1c7015b44b390a627a.png


And something closer to the default theme:

0d477e591ff5b96074f6a1566edb1e96f63d618f.jpeg

There are other automations, like turning on/off devices through Telegram, getting notifications on Discord if someone turned on the water heater, etc. Control/monitoring of all your Tasmota devices can be done through MQTT server (self-hosted messaging server for devices). Automations can then tap into what the MQTT server sees and get updates or send out commands using flow based control like Node-RED. I have these set up seperately but they can also be set up as part of your Home Assistant install.

Important: What you lose with Tasmota (and other alternative firmwares), is control of your devices when you're not on the same Wi-Fi network — for this you'll need a VPN back to your home network like WireGuard/Tailscale (the preferred way to do this), or expose some part of your home automation to the internet with port forwarding (definitely not recommended).

Be sure to self-document EVERYTHING at every stage/change/update, so that some months later you won't be frustrated when you've forgotten some password or configuration.

The starting point now is to either

(1) get rid of the proprietary firmware that's on your device and replace it with Tasmota/ESPHome/other

or

(2) see if your device can integrate with HomeAssistant/HomeKit/other directly

Hopefully other members can explain more about the other stuff you've mentioned — my experience has been limited to just Tasmota and MQTT/Node-RED — and Apple's Shortcuts app.
 
Last edited:
I just wanted to say thanks for a great guide! I just started my tasmota journey with a oakter smart plug, which luckily had male header pins already soldered when I opened it, so it was a breeze. This looks MUCH more complicated lol
 
  • Like
Reactions: rsaeon
@rsaeon Thank you. Your post inspired some confidence and I was able to successfully flash a few Zunpulse 10A plugs.


I'm looking for help on the Zunpulse 16A plug pin configuration. I was able to flash OpenBeken successfully (v1.1.8 was the firmware), but Pin configuration for any of the existing templates don't seem to be working.
I'm not too confident about whether I can find the configuration successfully.
 
  • Like
Reactions: rsaeon
I'm looking for help on the Zunpulse 16A plug pin configuration. I was able to flash OpenBeken successfully (v1.1.8 was the firmware), but Pin configuration for any of the existing templates don't seem to be working.

Answering my own doubt -

Pin 6 - BL0937CF1
Pin 7 - Relay set to Channel 1
Pin 9 - BL0937CF
Pin 11 - LED_n (Inverted LED) set to Channel 1
Pin 24 - Button set to Channel 1
Pin 26 - BL0937SEL

After this, you need to calibrate voltage, current and power values via the GUI.

HOWEVER, I AM FACING A PROBLEM HERE and would like some help.


My current and voltage values are correct, but I am getting nothing on the power value, all I get is NaN W. However reactive power (V*A) works. I tried calibrating power with different values but nothing worked. (See the attached screenshot)

Please help..!
 

Attachments

  • Screenshot from 2024-07-23 00-03-11.png
    Screenshot from 2024-07-23 00-03-11.png
    60.6 KB · Views: 49
  • Like
Reactions: rsaeon